

Font Book
Introduction
With the Font Book option, you can easily add your Google Fonts loaded from your local hosting, not Google server, or upload your custom fonts. The first feature was created mostly for the EU webmasters and the European Economic Area (EEA). The General Data Protection Regulation (GDPR) law enforces the avoidance of services such as Google Fonts, whose resources are loaded directly from Google's (US) servers. So the safe way is to download the font files and upload them to your local server through our SPPB Font Book, making it GDPR compliant. If you are not an EU webmaster and your website is not for the EU area you don't have to use that feature. Anytime you use Google Fonts in a classic way, for example, set them in general from Template Options for Body, Navigation, and selected H1-H6 headers.

How to Integrate Google Fonts?
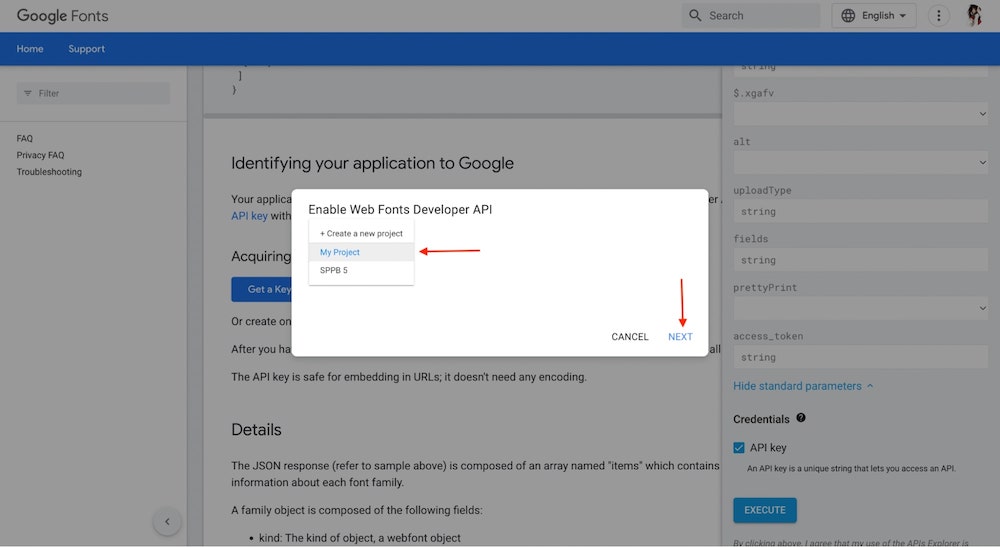
To upload your Google Fonts go to https://developers.google.com/fonts/docs/developer_api and scroll down to locate the “Get a Key” section. Click on the “Get a Key” button and choose your project.
Click on the Next button to proceed and your API key will be generated now.
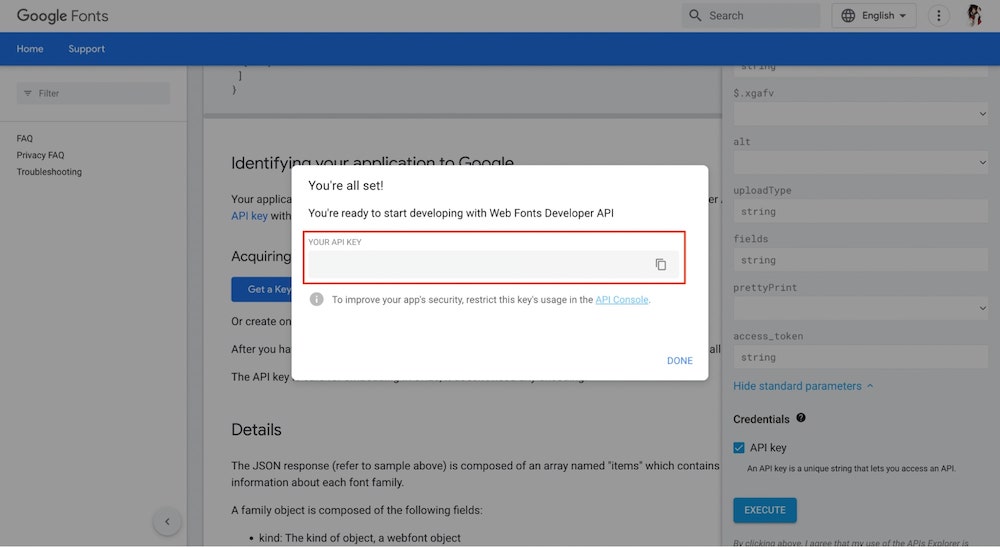
Copy the API Key and hit Done.
Now go back to the SP Page Builder 5 dashboard and navigate to Settings > Advanced. Locate the Google Fonts API Key field and enter the copied API Key. Save the changes and go back to the Font Book option. You should be able to see your Google Fonts loaded at this point.
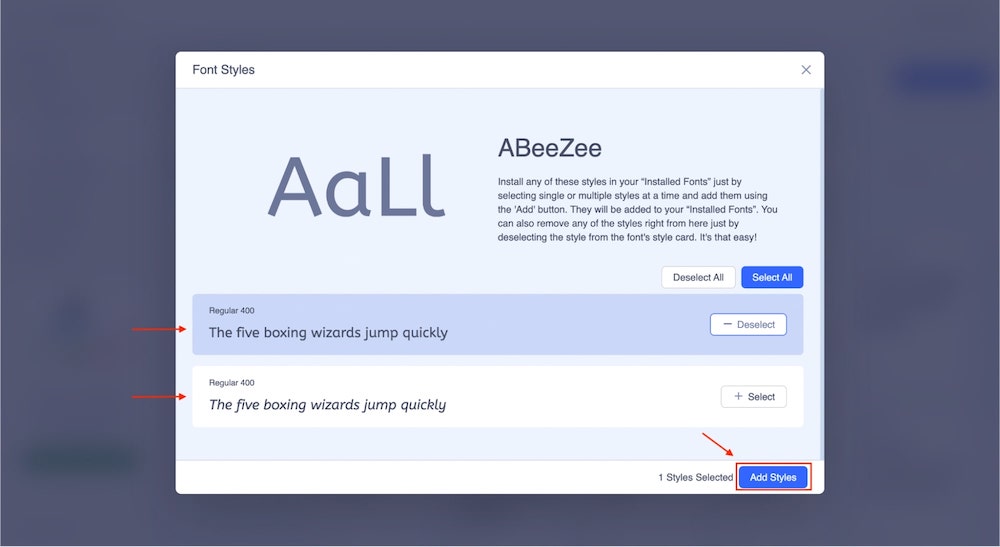
Now search for your desired Google Font and click on the add button that shows up upon hovering. Select your font style and hit Add Styles.
You can view your added fonts from the Installed Fonts option.
How to Install Custom Fonts?
SP Page Builder 5 also lets you upload your custom fonts. It can be Fonts downloaded from Free Resources or Google Fonts website as well, becuase they allows that.
- To install your custom fonts, download or save the font in .TTF or .OTF format.
- Then go to the Font Squirrel Webfont Generator.
- Click the Upload Fonts button to select your .TTF or .OTF file. Remember to upload only ONE font file per package.
- Select the output of the files (we recommend using the Basic or Optimal settings unless you are comfortable with the Expert Settings.)
- Tick the agreement section.
- Click Download your kit
- Once it is finished downloading, you will be left with a Webfont kit zip file.
- Then from the Font Book option click on the Upload Font button (you can find it in Google Fonts and Installed Fonts).
- Upload your font zip file, then should be displayed on the list of fonts.
Video guide: https://www.youtube.com/watch?v=k0jw03dLBEg
Remember! You can upload only one font file per zip package. Yes, you can upload more fonts by repeating the steps.
To maintain website speed performance, we do not recommend using more than 3 different fonts. This is because each additional font must be loaded before the actual content, which will likely lower your Google speed rating..
Notice! If you have a problem with file upload, check if the PHP setting for memory_limit - value must be above 128M, do not use unlimited value (-1).
How to Remove Any Installed Fonts?
To remove any of the installed fonts go to the Installed Fonts option and simply click on the Remove button that shows up upon hovering.