Create a new position
By using layout builder user will be able to crate unlimited module positions. Creating a new position is now very simple. Just follow the instruction given bellow:
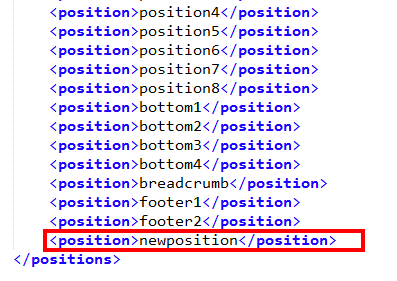
Step 1: For create a new position at first go to templateDetails.xml file. You will found this file in this path: templates\shaper_helix_ii. Here you found positions field, which contains 27 default position name like logo, menu, search etc (line no. 35 to 63).

Now add your desire position name here. Like here we add a new position, name newposition.
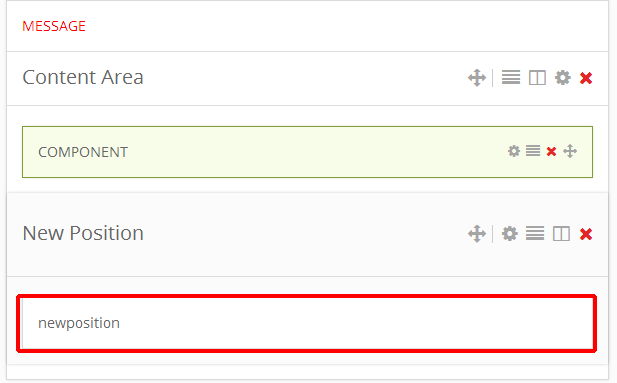
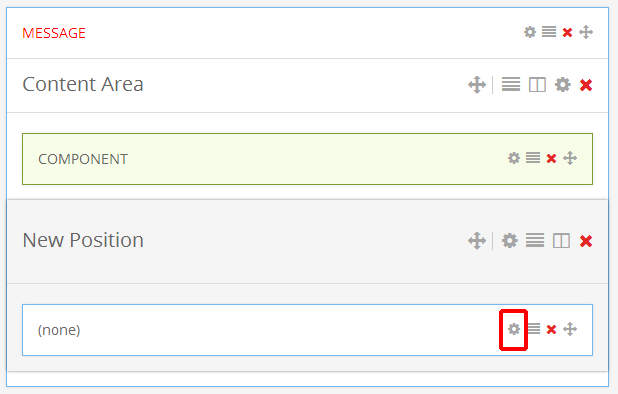
Step 2: Now open Layout from template manager. Here we published our new position under the COMPONENT position. For doing that add a new row by using Add a new row option.
Now give it a name. We named it as New Position by using row settings.
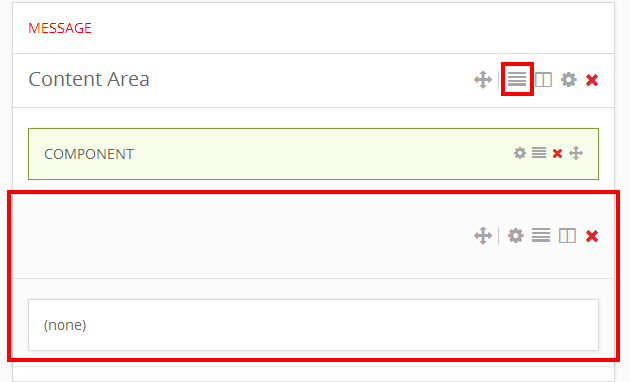
Then click on the Row settings icon of the none box field.
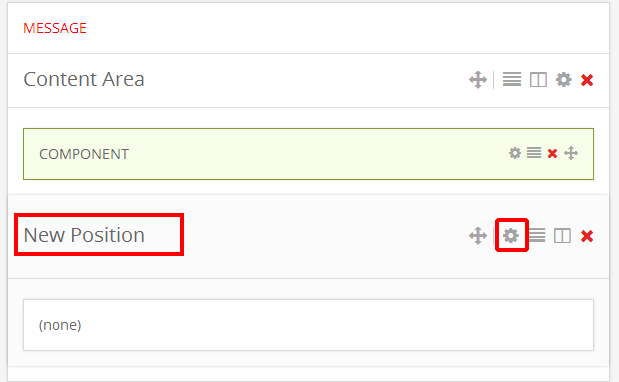
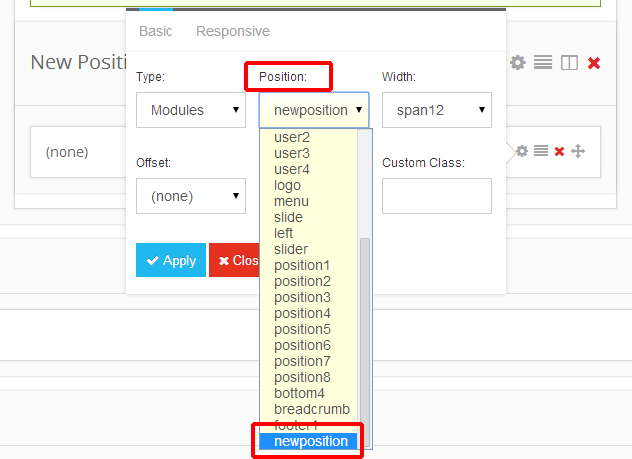
After clicking on this icon you will found option for select the position name. Here we select our new created position named newposition. Then click on Apply.
Then save this by clicking on the save button on top left. Now your new position added on the layout builder. You can use this position on this template now.