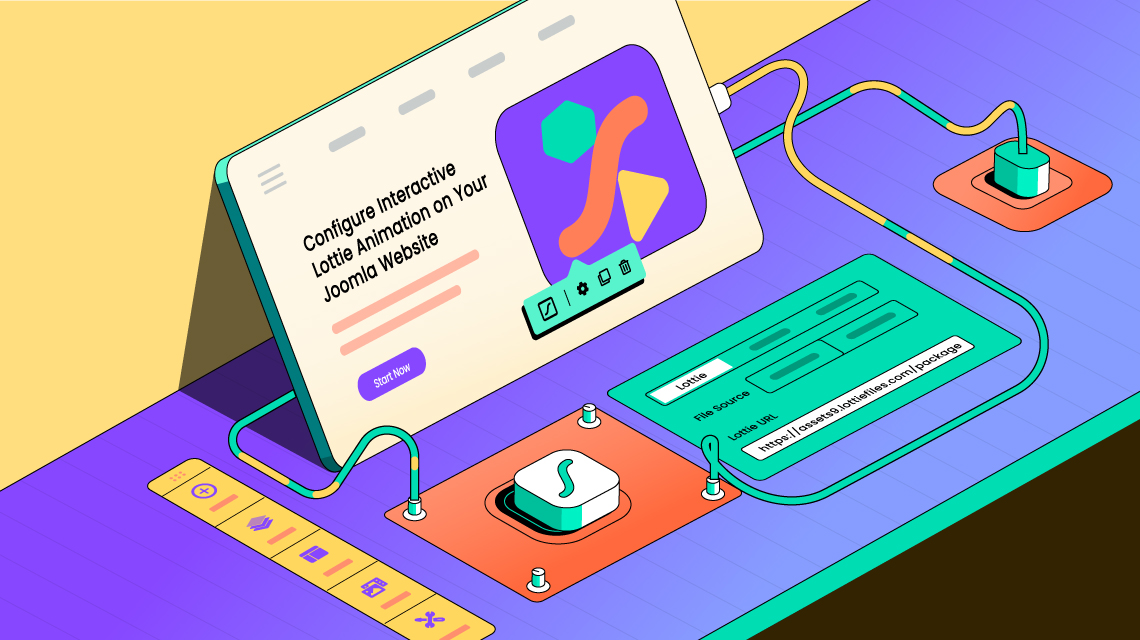
How to Configure Interactive Lottie Animation on Your Joomla Website

Motion captures attention!
The moving elements always draw our attention, even to our subconscious mind. The United States National Library of Medicine published a journal about the alliance between visual motion and attentional capture. According to their research, motion always guides our attention effectively.
If you want to get more attention on your webpage, add some moving objects there. Thus the customers are more likely to get hooked to your webpage. But here comes the actual question; how can you capture visitors’ attention?
Simple, use Lottie animation!
Lottie's are far more effective in terms of capturing visitors' attention than the static assets of your website. That’s why we’re going to inform you of the overall process of adding interactive Lottie animation to your Joomla website.
What Are Lottie Animations
Lottie is basically a file format for vector graphics animations. It was named after a German pioneer of silhouette animation, Charlotte Lotte Reiniger.
A Lottie is basically a JSON-based animation file that helps web designers to display animation files on every screen. These small animation files suit any screen without pixelation. But, if we wanna talk about development, Bodymovin is the first thing we must discuss here.
The development of Lottie files became possible finally because of Bodymovin. It is an Adobe After Effect plugin that was developed by Hernan Torrisi. This plugin can export Adobe After Effects animations into JSON formats. When the web designer implements those JSON files on their website, they get those beautiful Lotties vibing on their screen!
Where Can You Find Interactive Lottie Animations for Free
There are lots of online and offline tools to design your own Lottie animation. The most popular ones are Adobe After Effects, Adobe XD, Figma, etc. However, you can design an effective Lottie animation only if you have enough time and design knowledge for that.
Despite how complex Lottie animations may seem to create, they are pretty simple to implement. Because there are plenty of free and readymade Lottie animations available online. Search for your preferred Lottie animations there, get the JSON file, and use that on your website.
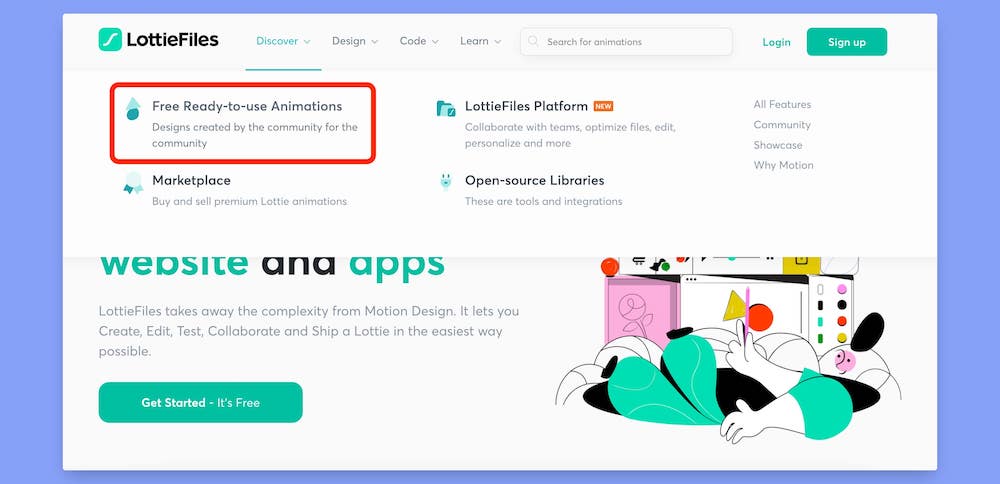
However, you may collect your Lotties from Lottiefiles. It’s a great open-source platform where you can download a number of interactive Lotties for free. Let me explain the steps of finding free Lottie animations from Lottiefiles.
- Browse Lottiefiles.com
- Hover your mouse on the Discover menu
- Click on the Free Ready-to-use Animations from the dropdown menu
You will find plenty of Lottie animation on that page. If you want a specific animation, you may use the search box on the navbar. Once you find your preferred Lottie animation, click on that and download it in whichever format you want. Lottiefiles allows users to download these animations in multiple formats such as JSON, dotLottie, ZIP, MP4, Gif, etc.
How to Add & Configure Interactive Lottie Animation
Designing a Joomla website isn’t a big deal. The real struggle begins when you want to design a professional and eye-catchy website. Well, today we are going to help you design a better website by adding and configuring interactive Lottie animations. Let’s get the list of prerequisites first.
Prerequisites
You’ll need only two things to design your Joomla webpage uniquely.
- SP Page Builder Pro
- Admin access to a website
Got everything?
Great! Now, let’s focus on the step-by-step process of adding some interactive Lottie animation to your website.
Step 1: Create a New Page or Article
You can add Lottie animation on both your web pages and articles. So, create a new page or article first. In this blog, we will add a Lottie in a new article. So, log in to your Joomla admin panel dashboard first. Then navigate to Content > Articles. On the article page, click the + New button on the topbar in order to create a new article.
Here, write your article title, alias, and other required settings. Then click on the Save button and select the SP Page Builder option in the article section. Now, click on the Edit with SP Page Builder button, and the SP Page Builder editor will open in a new tab.
Note: You must save the article first in order to edit the article with SP Page Builder.
Step 2: Choose the Placement Area
Now, you have to choose where you want to place your Lottie. Try to place it in such a place that it can attract the most visitors. To choose the placement area, click on the Add New Row button and choose your preferred column layout.

As you can see, there are already 10 pre-defined column layouts there. Choose the one that suits the best with your article structure. However, you can also generate your custom column layouts by using the custom columns box. We choose the 4+4+4 layout in our article.
Step 3: Use Lottie Addon
Now it’s time to use the Lottie addon. After setting up the column layout:
- Choose your preferred column area where you want to show the Lottie
- Click the '+' icon from there, and it will open the addons of SP Page Builder
- Search for the Lottie addon and drag that to your preferred column area
After setting up the column layout, choose the place where you want to show the Lottie. Then click the ‘+’ icon from there and it will open the addons of SP Page Builder. Search for the Lottie addon and drag that to your preferred column area.

After dragging the addon on there, you’ll get a bicycle image on there. It’s just a demo Lottie animation that comes with the SP Page Builder. You can change the Lottie URL in order to use your own. We’ll discuss the process in the following step.
Step 4: Get the Lottie Animation URL
SP Page Builder supports multiple methods of integrating Lottie animations on your Joomla website. You may either upload the Lottie GIF file directly into the media library or use an external URL of the JSON file of your preferred Lottie file. In this blog, we will use a Lottie of an Aerobatic Plane which is hosted on Lottiefiles.
As we’ve mentioned earlier, Lottiefiles has thousand of free Lottie animations to choose from. Just choose a good Lottie and click on that. You’ll get the Lottie animation URL just under the animation.

Go to Lottiefiles.com and copy the JSON link of your preferred Lottie animation. We’ll need that URL to configure the Lottie animation. Make sure that you have copied the full URL correctly. Otherwise, SP Page Builder cannot fetch your preferred Lottie file from the source. By the way, you must log in to get that JSON URL.
Now, click on the Lottie section, and it’ll display the Lottie Setting bar. Click on the Lottie addon icon from here. It will open the Lottie Settings modal popup. Select the External URL option from there as the file source and paste your URL in the Lottie URL box.

That’s it!
If you followed the previous steps properly, you might get a preview of your chosen Lottie animation by now.
Step 5: Configuring Lottie's Settings
Well, you might be a little bit confused right now. Because even though you’ve done everything correctly, the animation file isn’t moving! It looks like a static image, right?
Don’t worry! Everything is just fine. In this step, we have to tweak some settings to control the behavior of your selected animation file.
To do that, open the Lottie Settings modal popup again. Then enable the Autoplay and Loop option. As the name suggests, enabling these options will make the animations move continuously.

Besides the highlighted options, you’ll also get a few other customization options here. These are:
- Mode - It indicates when the animation will start moving.
- Play Speed - It determines the speed of animation. The default speed is 1.
- Start Point - The start point indicates the time at which moment the animation will start.
- End Point - Just like the start point, it indicates the ending moment of your Lottie animation.
- Direction - You can control whether you want to play the animation in a forward or backward direction from here.
These are the additional configuration options of SP Page Builder. However, if you need to adjust the dimension of your Lottie animation, you can do it from the Size tab. You can set the proper height and width of your Lotties.
Note: Users can embed Lotties in an iFrame too. In that case, they have to use the RAW HTML addon instead of the Lottie addon. Then, they have to copy and paste the whole iFrame code on the Raw HTML addon.
Step 6: Preview the Final Version
That’s the end of our journey of adding and configuring an interactive Lottie animation on a Joomla website. So, let’s have a look at the GIF file below to understand the configuration of Lottie animations.

That’s the process of adding and configuring an interactive Lottie animation file on your Joomla website.
Bonus Tips on Adding Lottie Animation
Lottie animations beautify your website for sure; no doubt about that. But, that doesn’t mean you’ll add unlimited Lotties wherever on your Joomla website.
Here are some important things that you must take into consideration while adding the Lottie animations.
Don’t Use Too Many Lotties
Lottie animation is an eye-catchy web element. It has a positive impact on visitor sessions, bounce rate, user engagement, etc. So, most webmasters can’t resist the temptation of overusing those animations. But you must avoid using too many Lottie animations in order to reduce the loading speed, page weight, etc.
Maintain Brand Color Consistency
You must maintain color consistency throughout the whole website. It is a crucial part of your brand identity. However, it doesn't mean that you can’t use animations of different colors. Nowadays, most of the Lottie animation provider has a feature to apply a different color palette to that animation. Simply apply your brand color palette and increase your brand awareness.
Pay Attention to Lottie Placement
The ultimate purpose of using Lottie animations is to increase the visitors’ attention. That’s why you have to pay close attention to the placement of those animations. Here are some locations where you might use Lottie animations in order to get the most positive feedback.
- Above the fold area
- Image galleries
- Product feature section
- Contact form
- Purchase confirmation page
- 404 pages, etc.
These are the most common pages from where the Lottie animation suits the best. Though this placement thing totally depends on your business and website design, just make sure that you didn’t misplace it.
Ensure Pixel Perfect Layout of Lotties
While placing an animation in an existing article, make sure that it remains consistent with the existing column layout. Otherwise, it not only breaks the design pattern but also the design of the whole webpage will become inconsistent. Overall, it will affect the user experience negatively.
Wrapping Up
Lottie animations not only improve the visitor's user experience but also make your website looks unique and more attractive than others. By the way, don’t overuse these animations in the right. Otherwise, it may backfire on your website’s performance.
However, we hope our guideline of adding and configuring interactive Lottie animation will help you to implement some eye-catchy Lotties on your own website. If you face any issue throughout the whole configuration process, shoot that in the comment box below.
Happy animating!