

How to Install Joomla on CyberPanel (Complete Step-by-Step Tutorial)

Back in the early days when I was a newbie in the web world, I used to build websites mostly with cPanel. It’s a fantastic web panel that takes all the hassles on behalf of the person launching a new website. The majority of the shared or managed hosting service providers offer a convenient web control panel for their customers. This saves a lot of time in kicking off a website. CyberPanel is one of the popular website control panels these days. And today we’ll see how to create a Joomla website on CyberPanel.
Why CyberPanel?
An obvious question, and I was literally expecting this query from you ;)
Somebody might ask, “Why use CyberPanel when there is a more established counterpart like cPanel?” Well, let me explain.
You get cPanel preinstalled in many shared or managed hosting plans. But, what if you use a VPS or dedicated hosting service? In such cases, you usually need to setup the server on your own.
If you want to use cPanel on your unmanaged (self-managed) server, you need to purchase a license at a minimum $15/month rate. cPanel has many simple to complex features that you might never need. Considering the cost and all of these stuff, CyberPanel can be your ideal web hosting control panel. I also found it easier to use in some cases compared to cPanel.
CyberPanel Features at a Glance
- Free of cost (pro version available)
- Uses fast & scalable OpenLiteSpeed server
- Built-in SSL manager
- User friendly FTP Server
- Pre-installed phpMyAdmin
- DNS server
- Email server support
- File manager
- PHP management
- Firewall
- Easy backup and restore
How to Install Joomla on CyberPanel
So, you got enough reasons to use CyberPanel at this point. Now let’s see how can we use it to launch a Joomla site.
Step 1: Get a Server
To run a website or web app, we need some online space. Regarding our tutorial, we need a hosting server to install CyberPanel at first. Then we can install Joomla on the panel. You can get a server from any hosting platform like DigitalOcean, Vultr, Linode etc. There are many pricing options like $2.5/month, $5 per month and so on. Purchase per your requirements. Once this is done, you’re ready to proceed on.
Step 2: Install CyberPanel on the Server
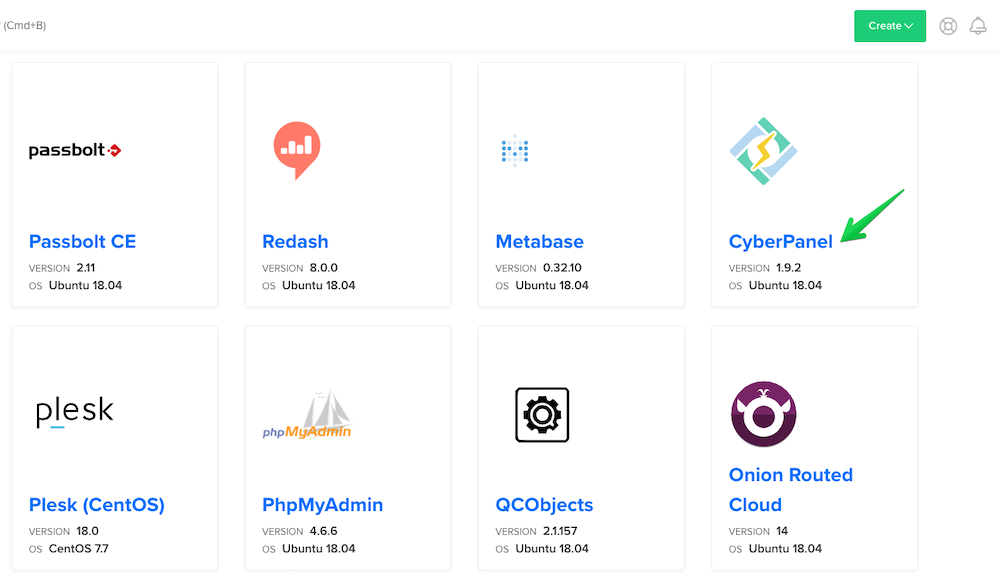
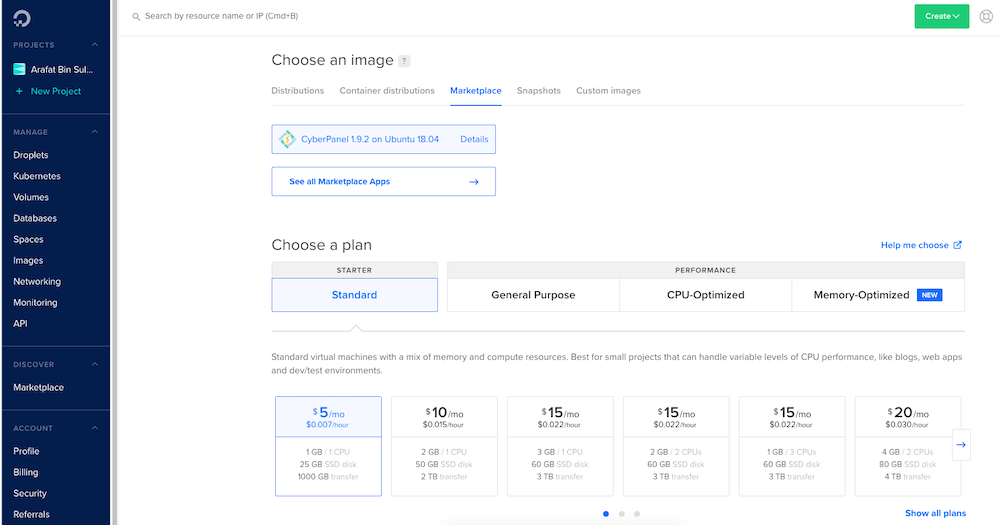
Cloud or VPS hosting companies like DigitalOcean and Vultr offer one-click apps to deploy web stacks in minutes. There you may find one-click CyberPanel installer apps to get started right away. If there’s no ready one-click CyberPanel installer app, you can deploy a server instance and install CyberPanel via the command line interface.
The One-click Method
As I’ve mentioned earlier, many hosting service providers offer one-click apps to deploy CyberPanel quickly. You just need to choose a subscription plan, server configuration, region, and finally run the installation. It’s the easiest and most hassle-free way. You can find more relevant information on this page. Once the installation is complete, you can get the CyberPanel admin password by entering the following command in your server’s command line interface: sudo cat .litespeed_password
Note: To login to your server via SSH, you need to know the server instance’s username and password. Generally the service provider sends these credentials via email after deploying the server.
The Command Line Method
In case you cannot find any one-click CyberPanel installer app or just prefer the manual command line installation method, here’s the solution. Follow the below steps.
- Deploy a CentOS 7.x (recommended) or Ubuntu server on your cloud hosting account.
- Login to the server through the command line.
- Run this command:
sh <(curl https://cyberpanel.net/install.sh || wget -O - https://cyberpanel.net/install.sh) - Follow on-screen instructions to complete the installation.
- You can get the CyberPanel admin password with the following command:
sudo cat .litespeed_password - Visit
yourdomain.om:8090to get your CyberPanel dashboard login screen.
Step 3: Login to Your CyberPanel
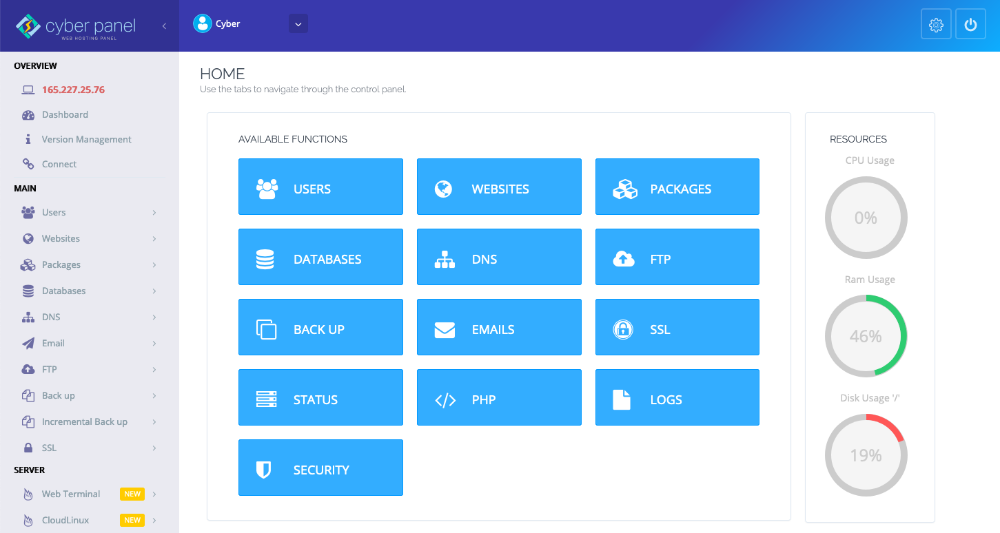
Visit yourdomain.om:8090 to get your CyberPanel login screen. It will look like the following screenshot.

Enter your credentials and login. This is how the CyberPanel welcome screen looks like.
Note: Make sure to add your server IP and/or Name Server details to your domain’s DNS settings. Otherwise you couldn’t be able to access the server via your domain name (e.g. yourdomain.com). Contact your domain registrar to get help regarding this.
Step 4: Install Joomla in CyberPanel
Once you’re logged-in to your CyberPanel, you’re just a few clicks away from installing Joomla on it.
Adding a Site to CyberPanel: In order to install any CMS or launch a webpage, at first you need to add a website to CyberPanel. On your CyberPanel dashboard, go to Websites > Create Website. Fill the form and click Create Website button.
Installing Joomla: After adding the site entry, now we are ready to install Joomla on that particular site. On your CyberPanel dashboard, navigate to Websites > List Websites. Click the Manage link besides the particular website. Choose Joomla from the Application Installer section (bottom). Provide a few basic information, and start the installation.
It should take a few minutes to complete the initial CMS installation. And finally, visit your website URL and complete Joomla installation.
Alternatively, you can download Joomla from the official Joomla site, and upload to the public_html directory of your site via CyberPanel.
In this case, you need to create a database using CyberPanel’s built-in tools. Navigate to CyberPanel dashboard, and you will find the database management tool on the left sidebar. After extracting the compressed folder in public_html, you can simply visit your site URL and initiate the installation manually.
Now that, you've launched your fresh Joomla website using a convenient web hosting panel. It's time to give your site the look and functionality you want. JoomShaper has 115+ high quality Joomla templates and 40+ rich Joomla extensions to provide you the style and functionalities you need. Two of the most popular Joomla site building tools, SP Page Builder and Helix framework are made by JoomShaper. So you get the best Joomla tools here. Explore our site to find the full offering for you!
I believe you’ve found it really easy to install Joomla in CyberPanel. Have you tried it before? What do you think about CyberPanel? Please share your thoughts in the comments.


Is there also joomscan, fast cgi, php fpm and google pagespeed available to set up in cpanel? Or do wen need to set it up on the linux host?
amazing, what you show everything for us. Thanks!