

Joomla 4 tutorial: Simplified installation on localhost

Joomla 4 is on the run to be live as soon as possible. The alpha version of Joomla 4 is live now with lots of amazing features and new technologies. So, you must be in ‘can’t wait’ mode to check out the new features that are going to be launched with Joomla 4. To introduce you to a more exciting and smoother journey with Joomla 4, we are going to publish a series of first hand Joomla 4 tutorials. Today we will go through a simplified Joomla 4 installation process. Gradually, we will introduce more tutorials on various Joomla 4 features.
Step one: Download Joomla 4
Open the Joomla 4 GitHub link (pre-release version for now, because the stable version is yet to be arrived). You will find Joomla 4 installation packages. Click to download a file in you preferred format.
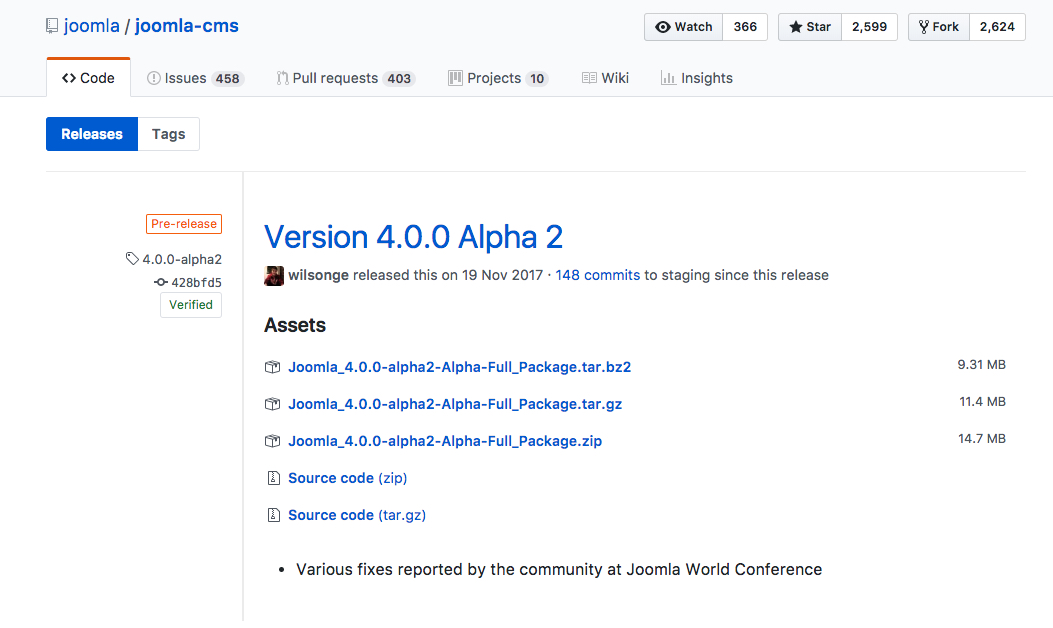
Figure: GitHub page for downloading Joomla 4 pre-release versions.
Step two: Install a web server
For localhost installation, you have to install a local web server. You can use a server environment like XAMPP, MAMP, WAMP, JAMP or any other you prefer. Download the software and install it. Now put the installation zip file of Joomla 4 into the document root folder, if you are using XAMPP or MAMP, it is the ‘htdocs’ folder. Unzip the Joomla 4 installation zip file into the htdocs folder. You are now ready to start the CMS installation.
Step three: Run the installation wizard
Type the URL of your Joomla 4 localhost site in the browser address bar. Example: http://localhost/joomla-4.0.0-alpha2/. The installation screen will pop up. Now follow the below steps to install it on your localhost.
Step four: Enter the language and site name
On the first screen, enter the language of your Joomla site in the first field. Use the drop down menu to choose a language. In the second field, you have to add the site name. Example: example.com.
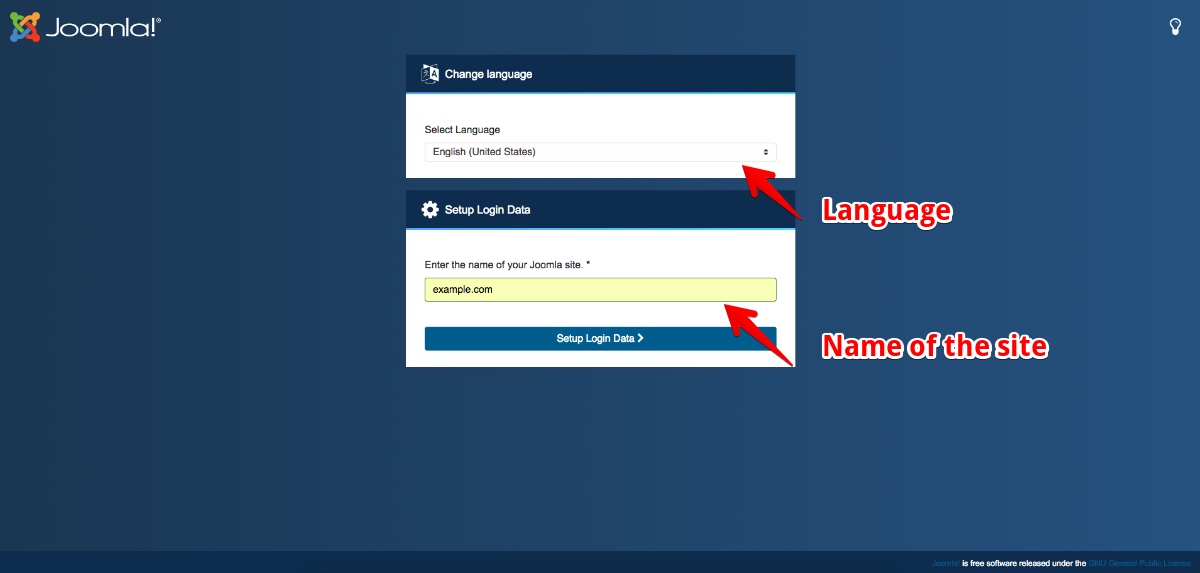
Figure: Site language and site name selection stage.
Step five: Setup user data
After clicking the button “Enter Login Data”, a new page will open. Here you have to enter your login details. In the first field, you have to add the super admin username. In the second field, you have to add the email address of your superuser. In the last field, add a password for your superuser.
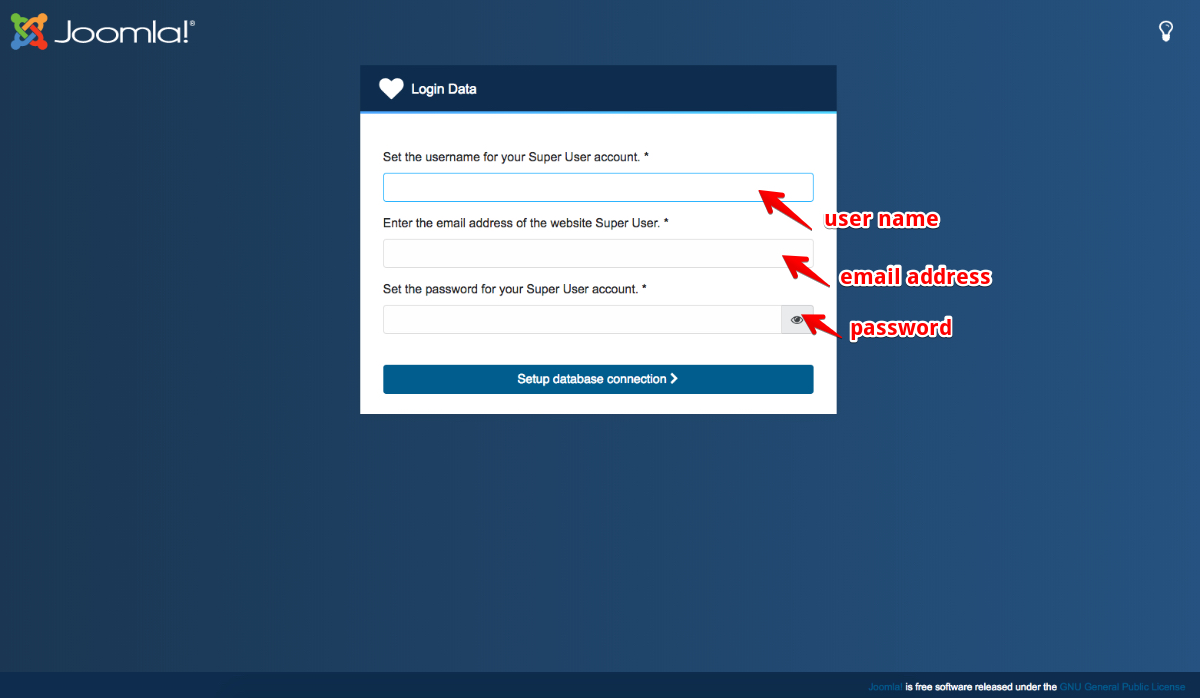
Figure: Setting up user data.
Step six: Database configuration
Now you have to configure the database for your Joomla website. Select the database type of your site in the first input field. In the second field, you need to specify the host name. For localhost, add the host name as “localhost”. In the third field, add the database username. For localhost installation, add ‘root’ as username. In the fourth field, add the password for the database. For localhost installation, it is better to add "root" as the password. In the fifth input field, insert the database table name. It is a very crucial field. It is better to use the site prefix to distinguish the table for later customizations. Now at the last input field, add a table prefix or you can use the randomly generated one.
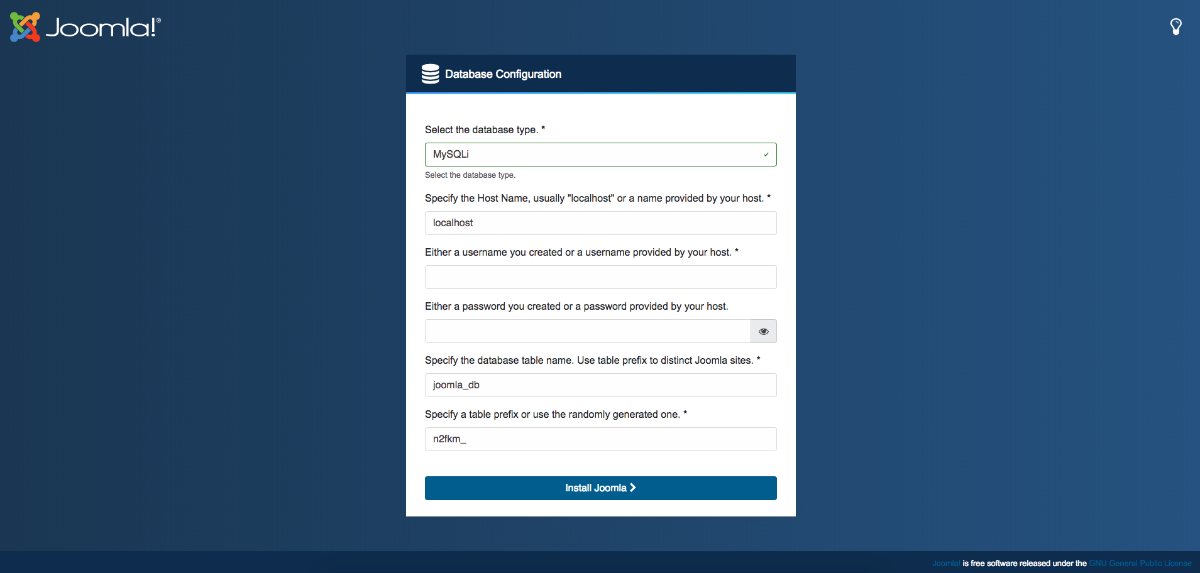
Figure: Configuring the database.
Step seven: Install Joomla 4
After clicking the "Install Joomla" button, Joomla 4 will be installed. And then the completion page will open. From two options, you can use any. You can open the site or go to the admin backend. If you choose the Open Admin option, it will take you to the administrator login page.
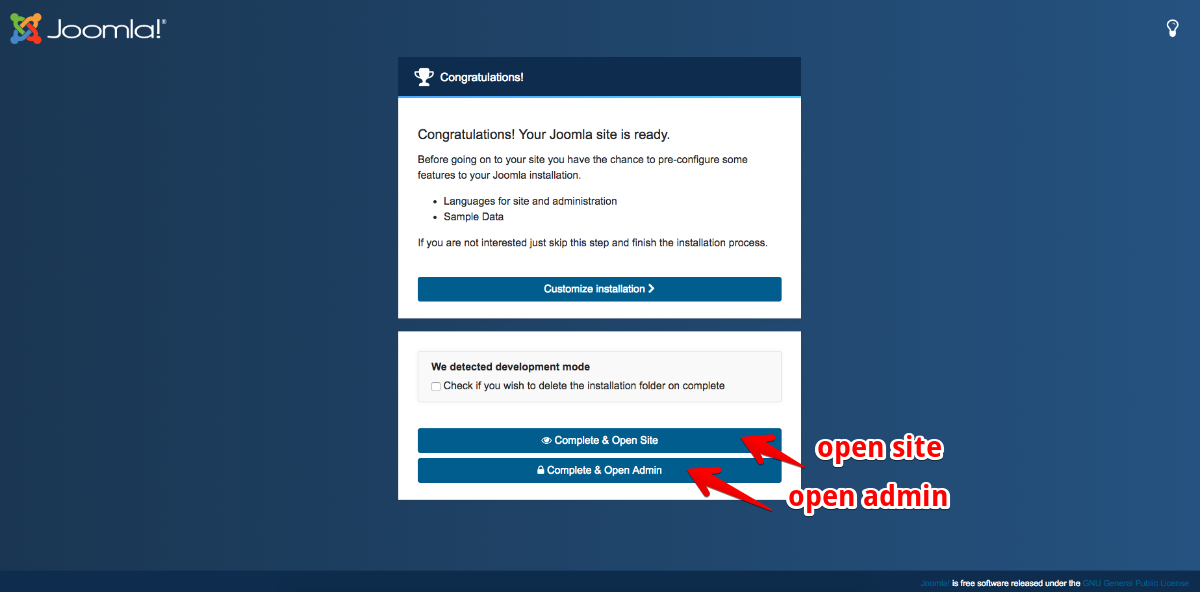
Figure: Joomla 4 installation complete.
If you choose the "Open Site" option, it will open your site’s frontend.
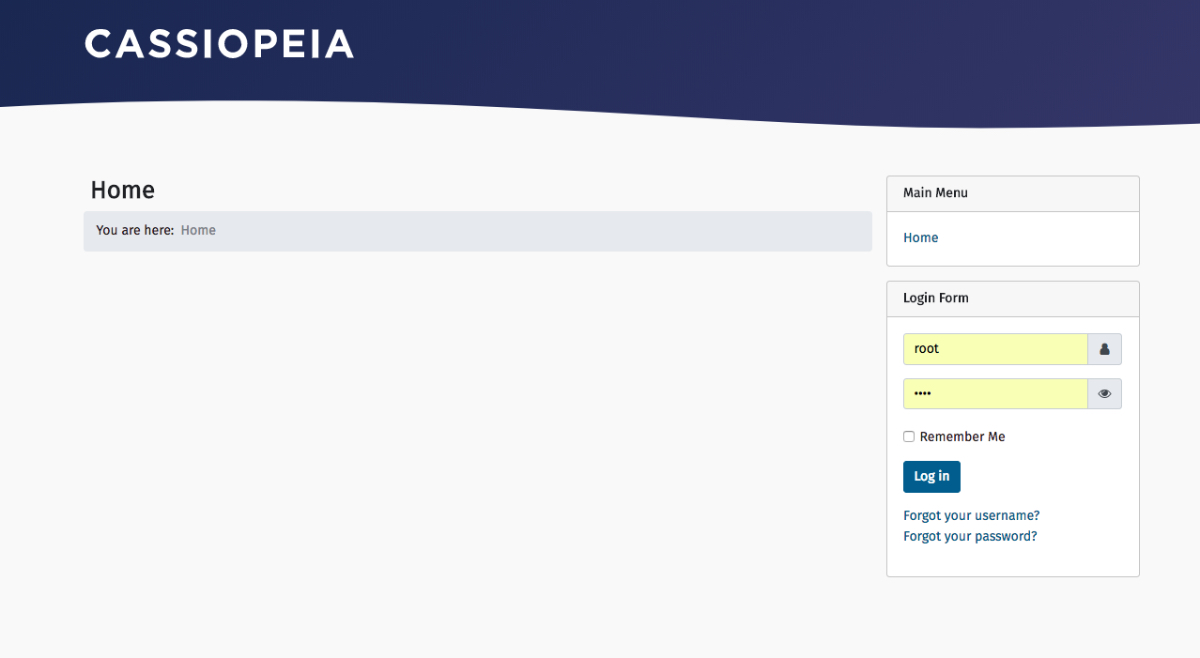
Figure: Joomla 4 frontend.
So, this is another cool thing achieved with Joomla 4, the simplified installation. We will publish more tutorials regarding Joomla 4 in future. Please stay with us, and meanwhile, if you have any thoughts and suggestions please use our comment section below.


Have you tested to migrate a joomla3 to j4 ?
if yes, what should be the process ?
Is SP Page builder 3 already compatible with J$ RC latest version?
And Helix Ultimate?
Thanks