

How to Backup and Restore Your Joomla Site (Complete Tutorial)

It’s very important to take website backups. A site may face many problems that require restoring it from previous backups. What if you don’t have any? This is not pleasant at all. You may avoid such unexpected situations by taking regular backups. You can do it in several ways including manually archiving files and downloading them to your computer. But creating a backup is very easy with Akeeba.
Well, Akeeba Backup is a component that you can use to create full backups of your Joomla site and restore them. Let’s see how to do it.
Download and Install Akeeba Backup
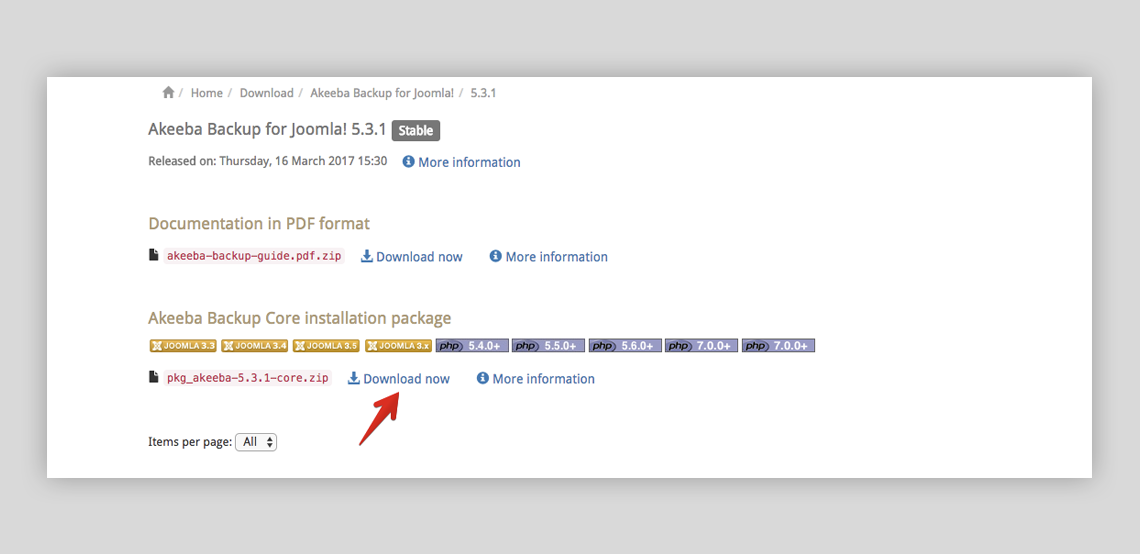
Download the component from its official site. You will get several versions of Akeeba on its website. Installing the latest version can be the best option for an updated Joomla setup.
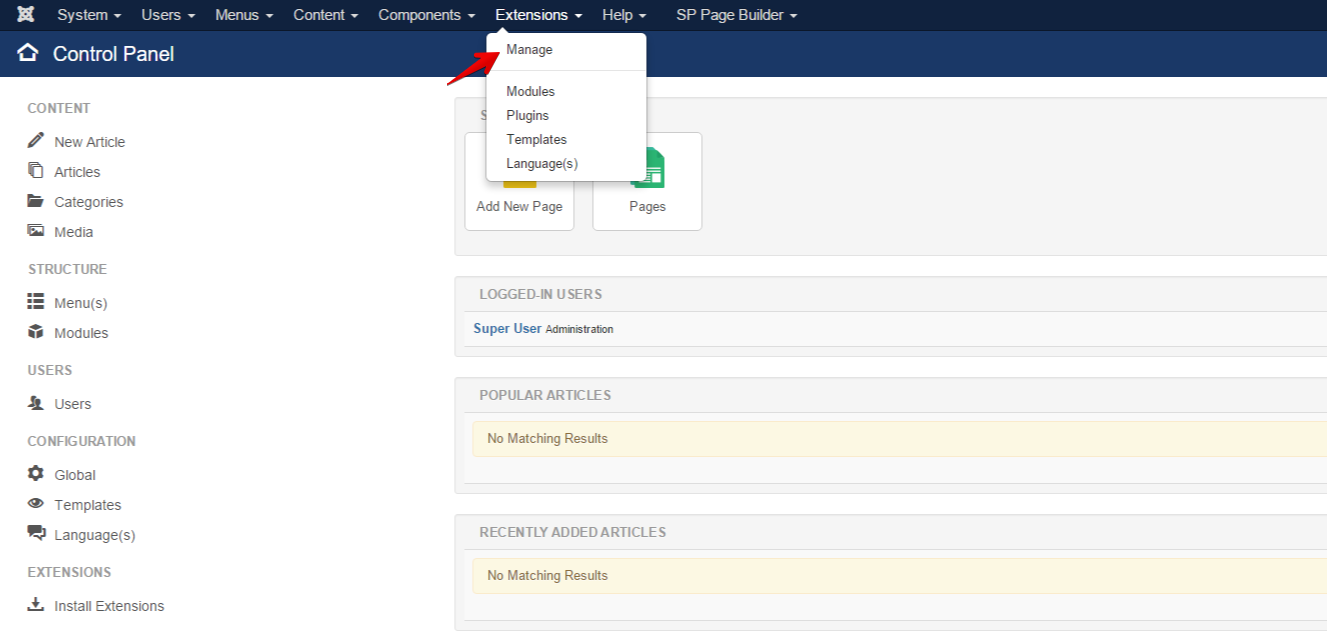
Now login to your Joomla site’s administration panel. Go to Extensions > Manage.
Locate the Akeeba Backup package from your computer, press “Upload & Install”.
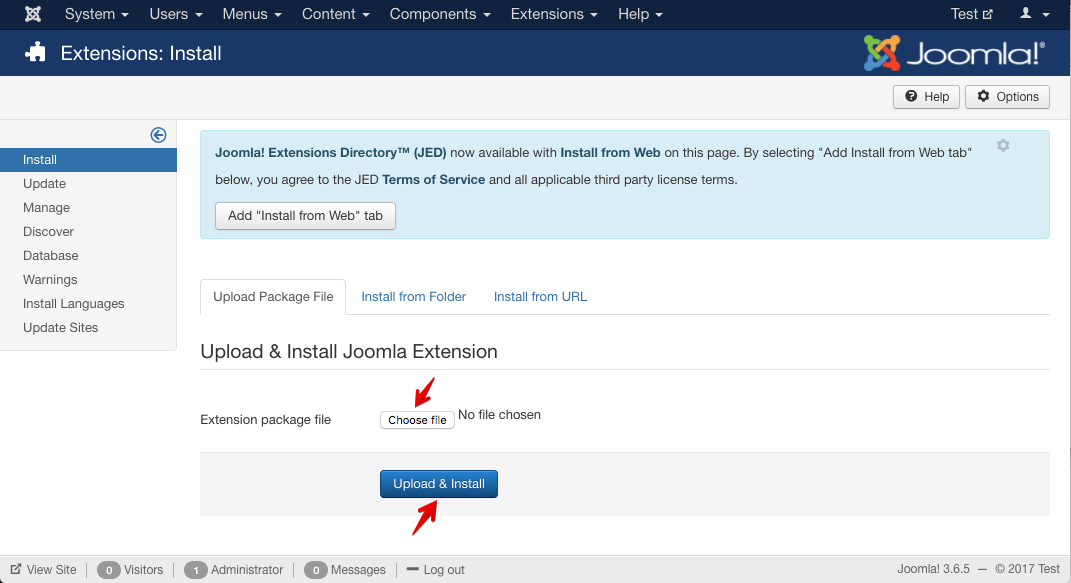
Remember, you can install an extension by locating it from a folder that is already uploaded to your server. Also, there is an option for installing extensions via their URLs. In this method, you don’t need to download the package locally, rather enter the package link into the specified field and click the Upload & Install button. You can use the "Install from Web" feature to get extensions from Joomla extension directory as well.
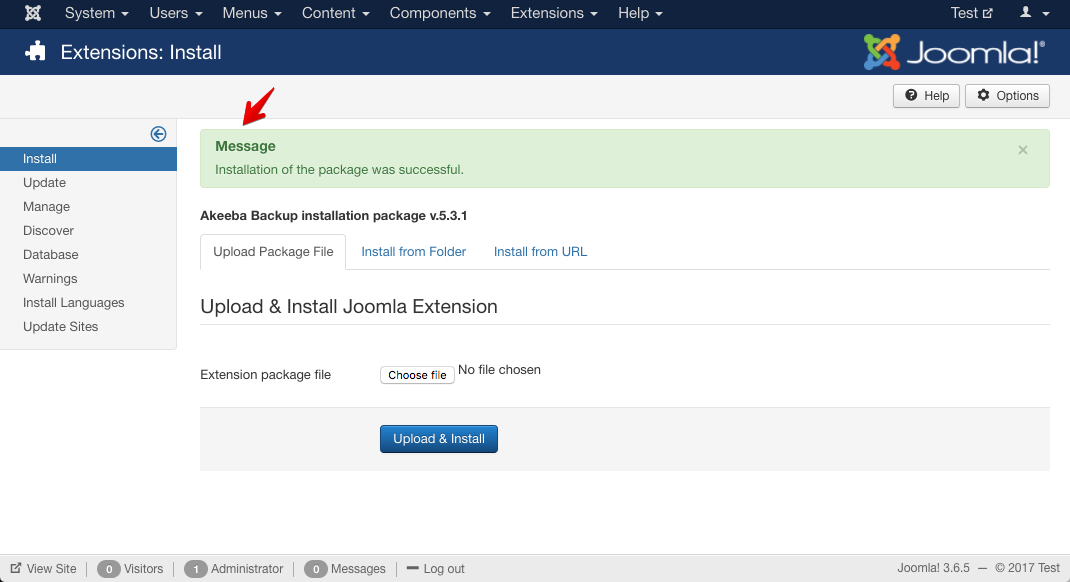
The system will notify you soon about the installation.
After installing Akeeba, navigate to Components > Akeeba Backup.
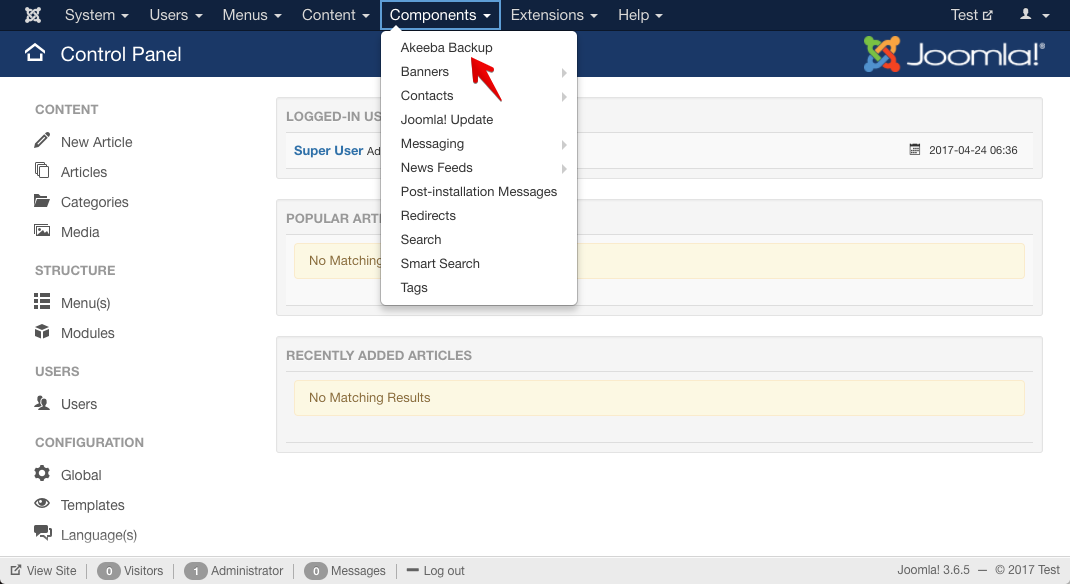
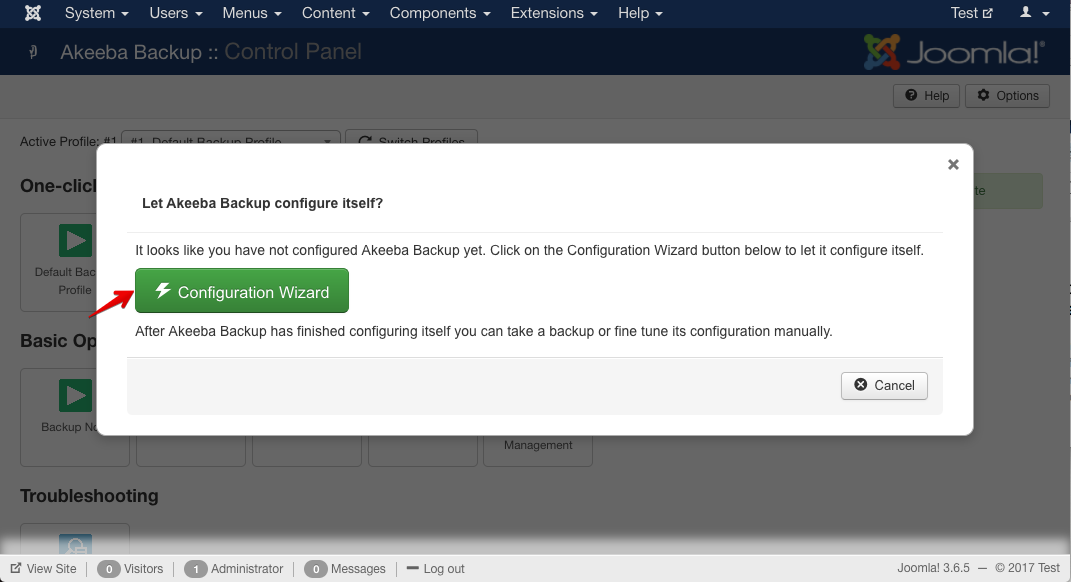
The component will show an auto configuration button. Run the Configuration Wizard.
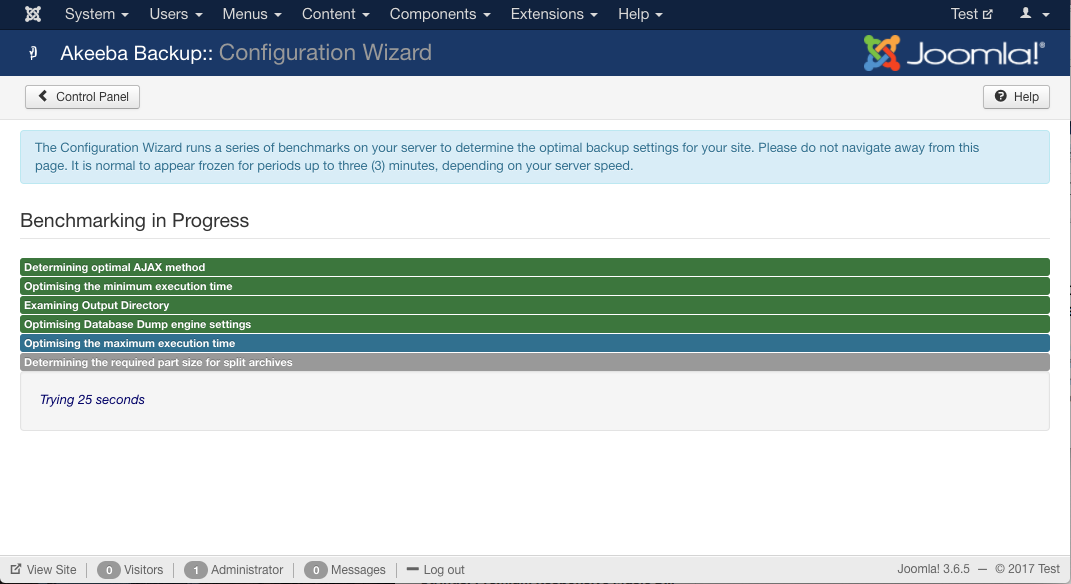
The configuration progress will be displayed on the screen.
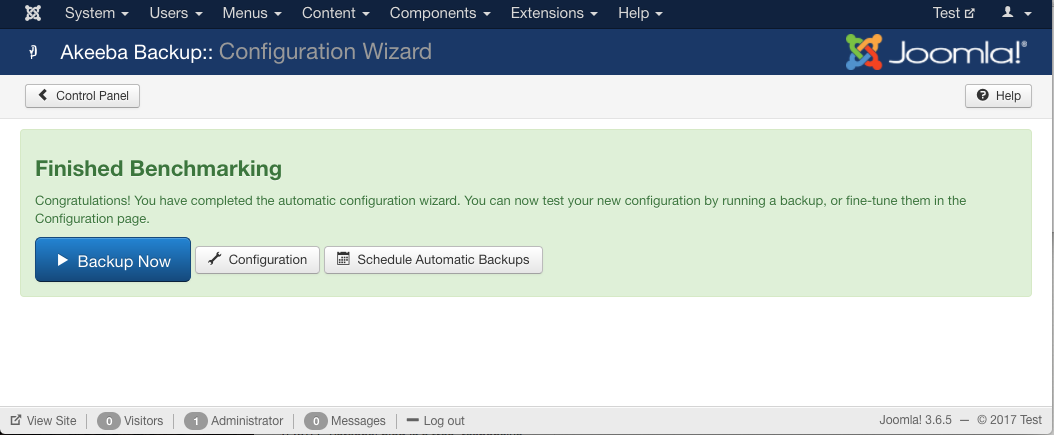
After the component performs the automated configuration tasks, you will get an option to create new backups and re-configure the tool.
Create a Backup
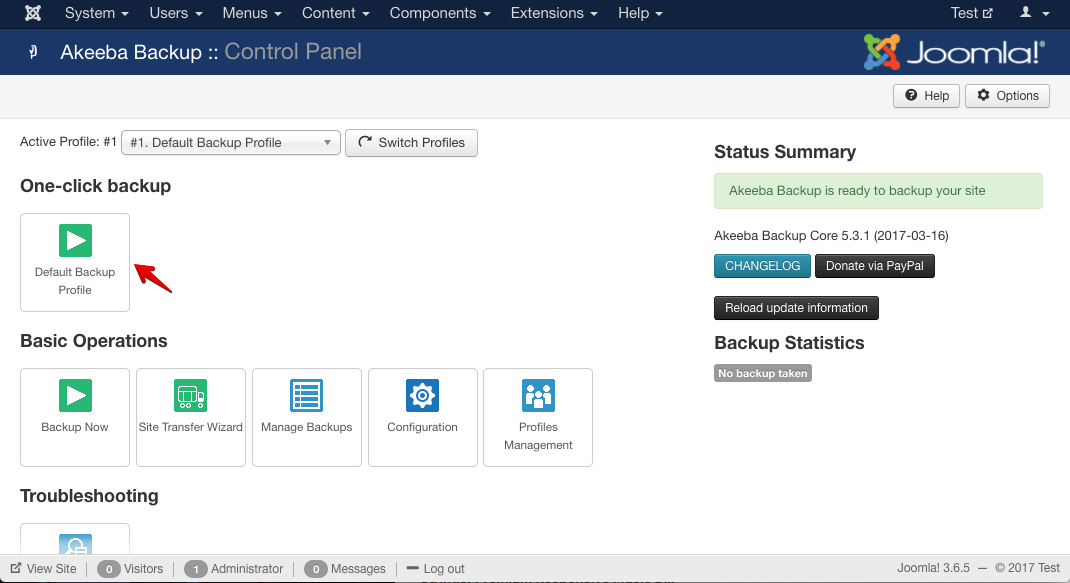
To start creating a new backup, go to Components > Akeeba Backup. There you will see the component options. You can create a new backup using the default configuration by clicking the default one-click backup button. (Other basic operations are also can be done from here.)
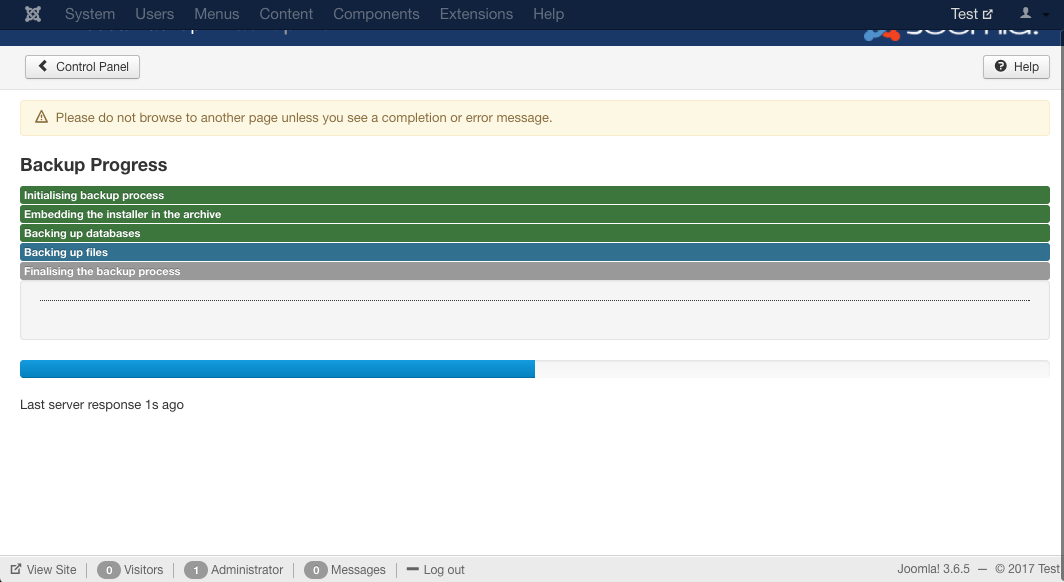
The system will show the backup progress.
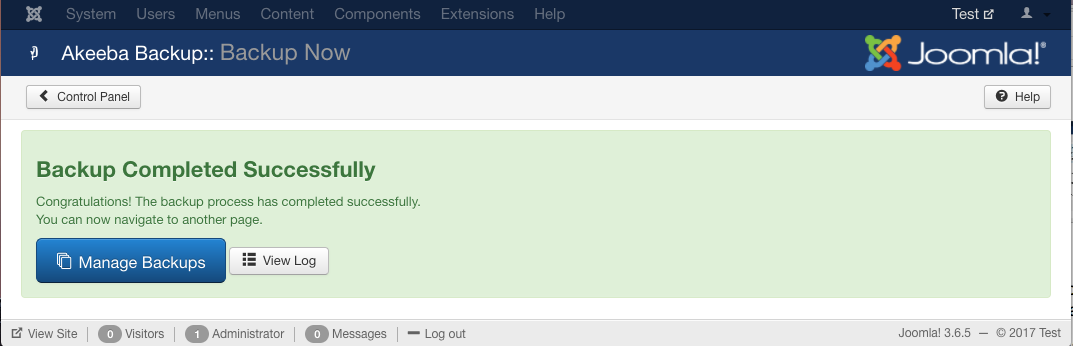
You will be notified once the backup is completed.
Download the Backup
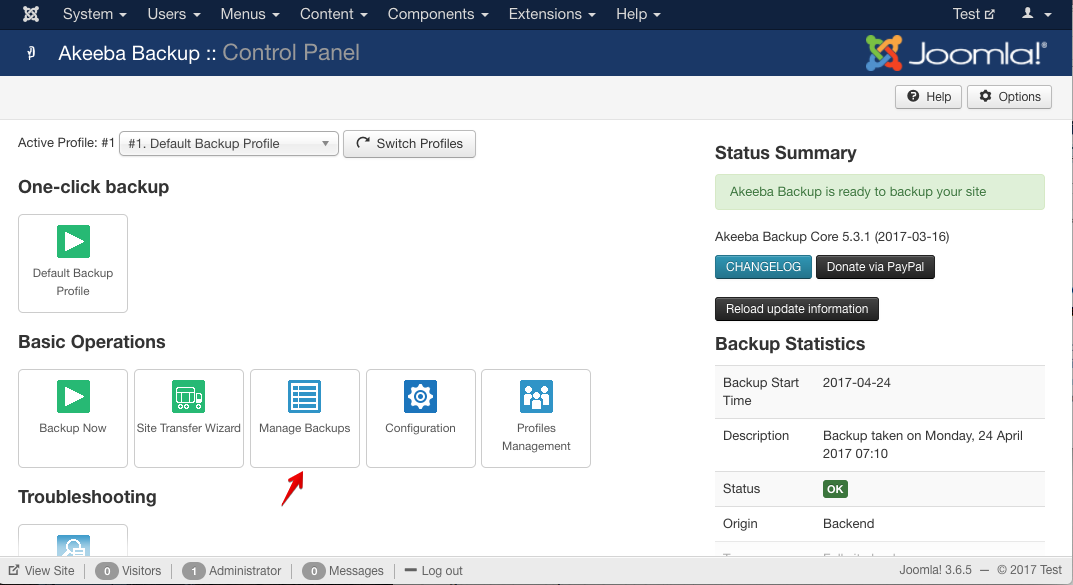
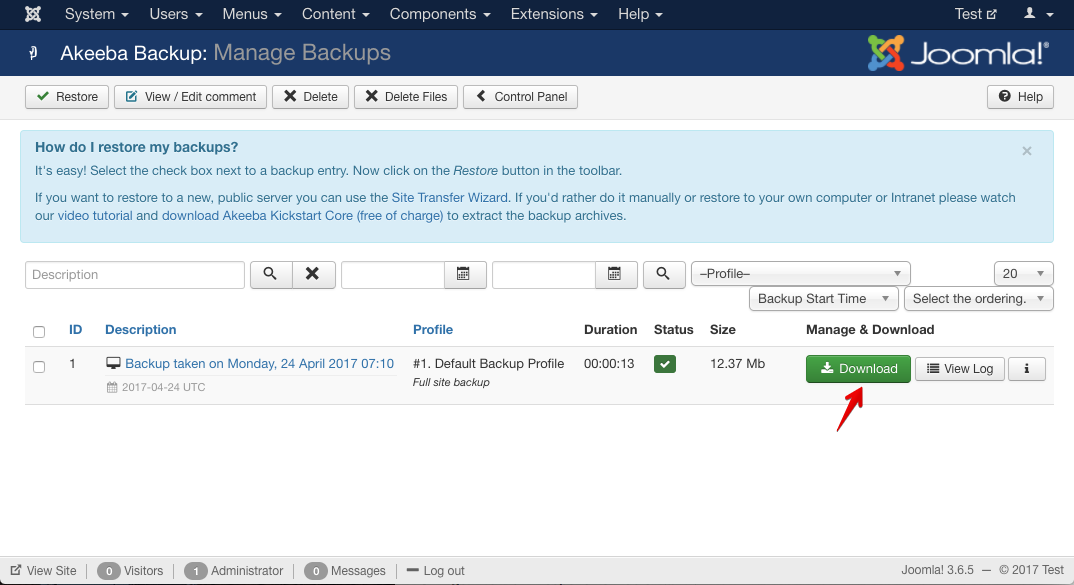
When the backup is created, you can download it to your local computer. Click the “Manage Backups” button on the Akeeba Backup dashboard to view all of your available backups.
You can download a backup file from the upcoming page.
How to Restore a Backup?
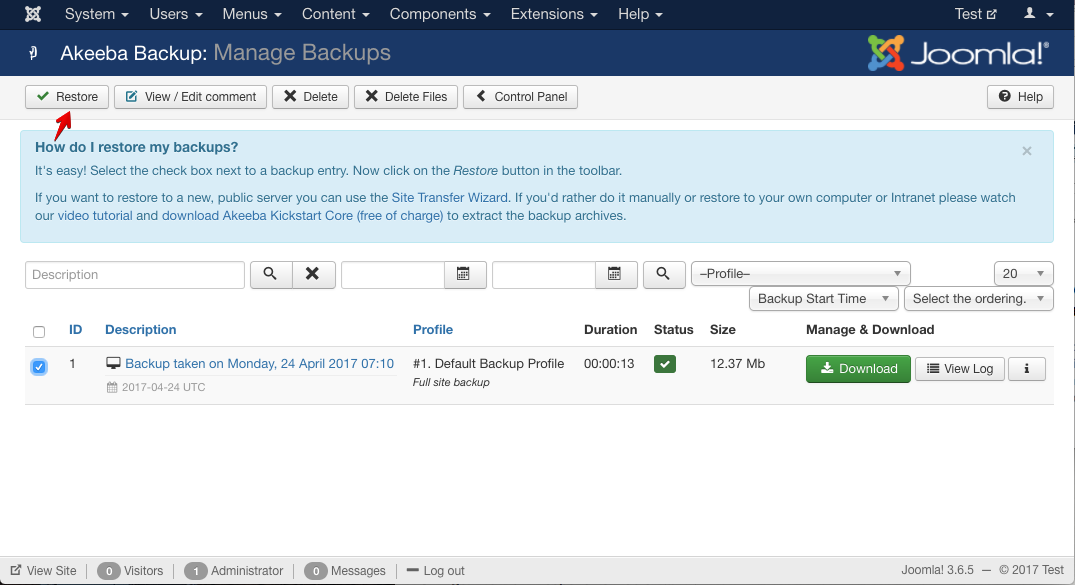
You can restore a backup that was created with Akeeba anytime. It has several steps to follow. At first go to the Akeeba Backup component dashboard via your site’s admin panel. Visit the Manage Backups section. Select the target backup by checking the checkbox. Click the Restore button
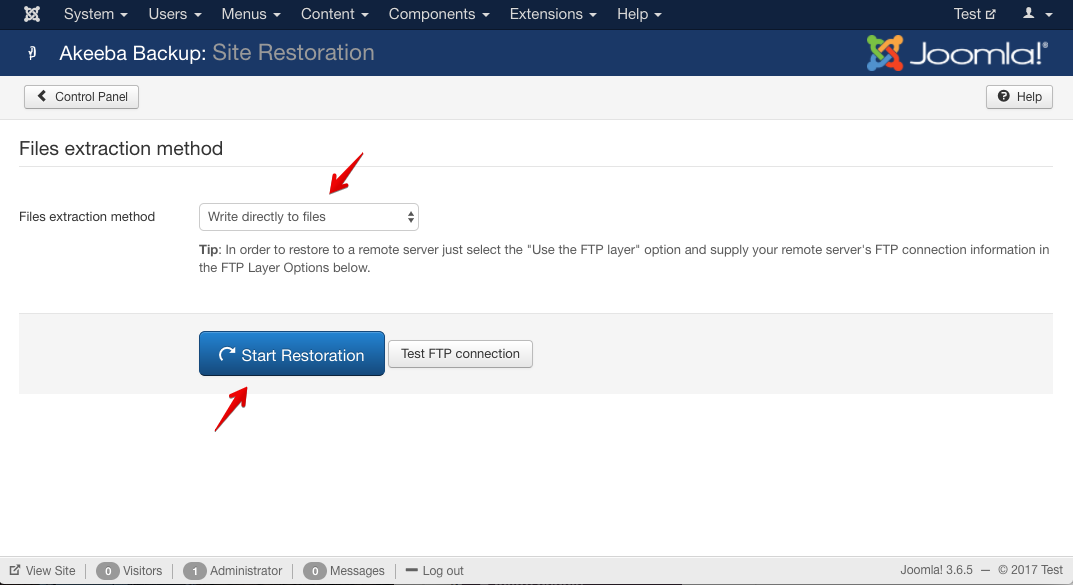
On the next page, the system will gather some more configuration information from you. If you're restoring the site in the same server using an on-site backup, leave all these options as default. Then click the Start Restoration button. The progress will be shown on the screen.
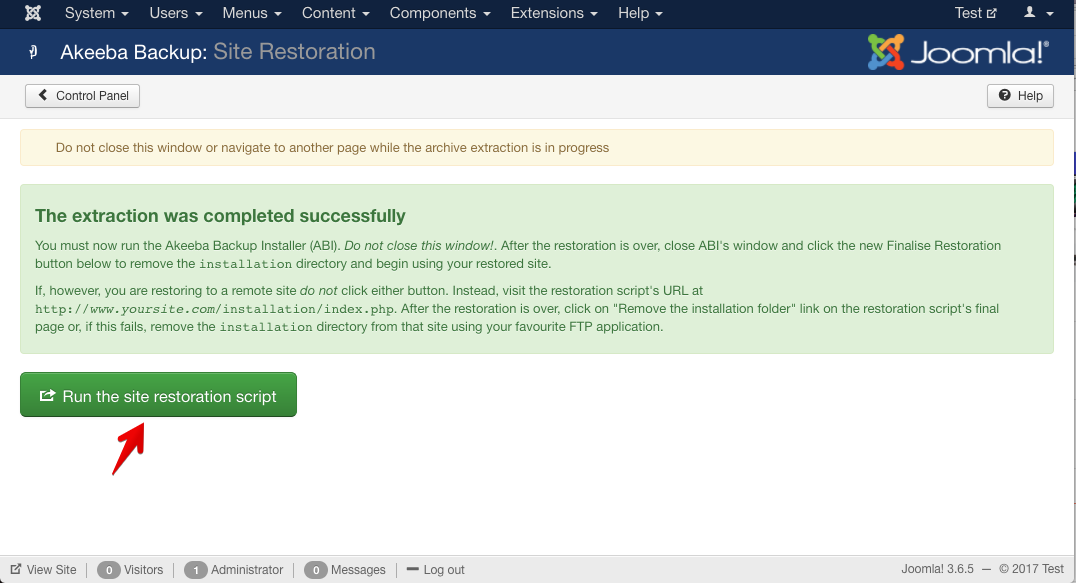
After the package extraction is complete, the following screen will arrive. Click 'Run the site restoration script' button.
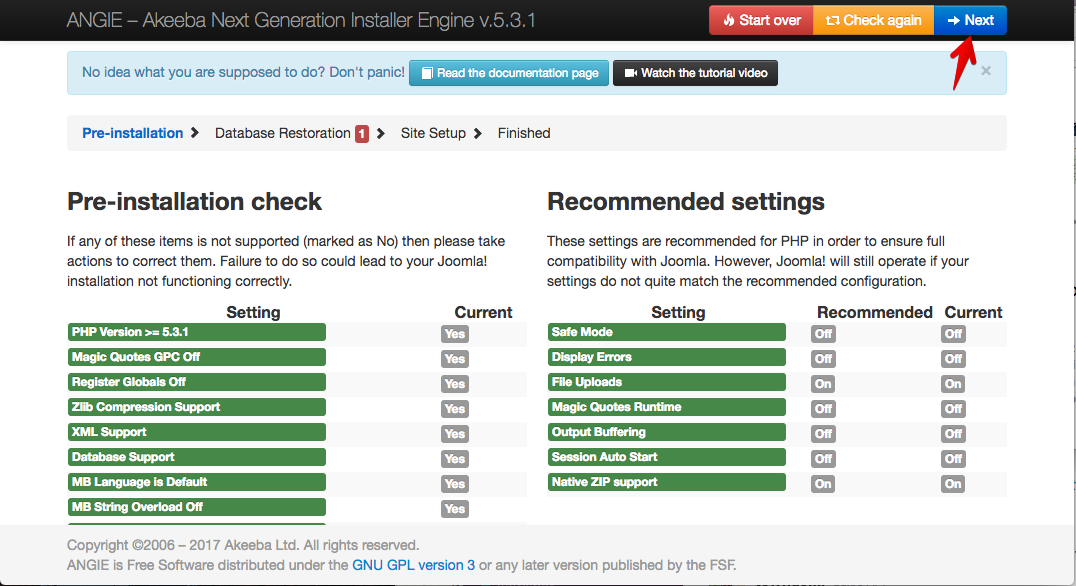
Akeeba will load the restoration interface. It will check whether your site is ready to be restored. Click the Next button.
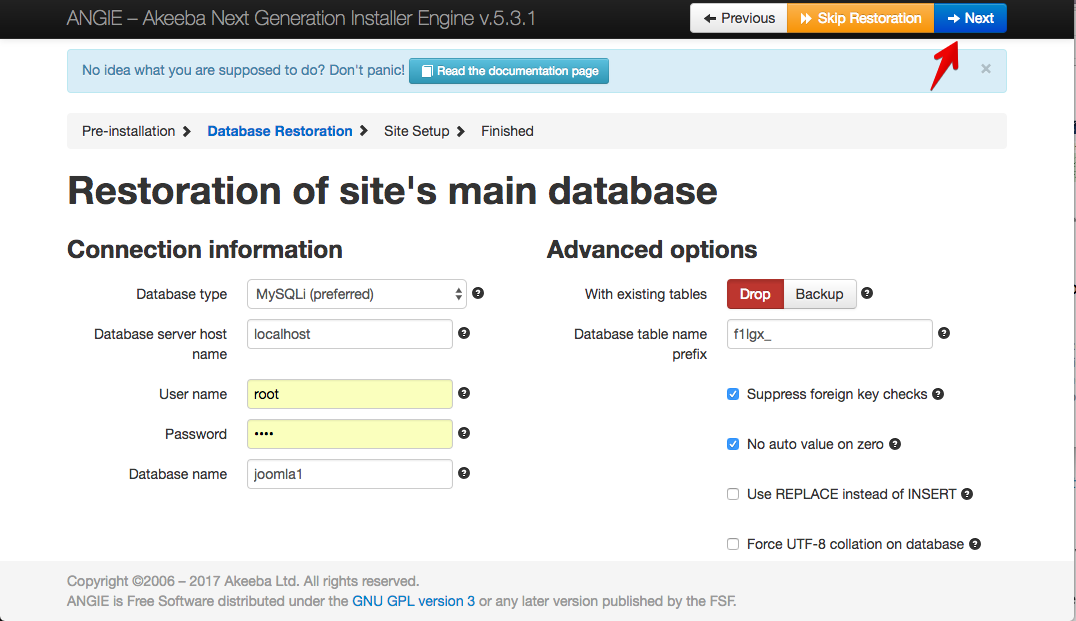
The upcoming screen will show the database restoration phase. Review all information and click the Next button.
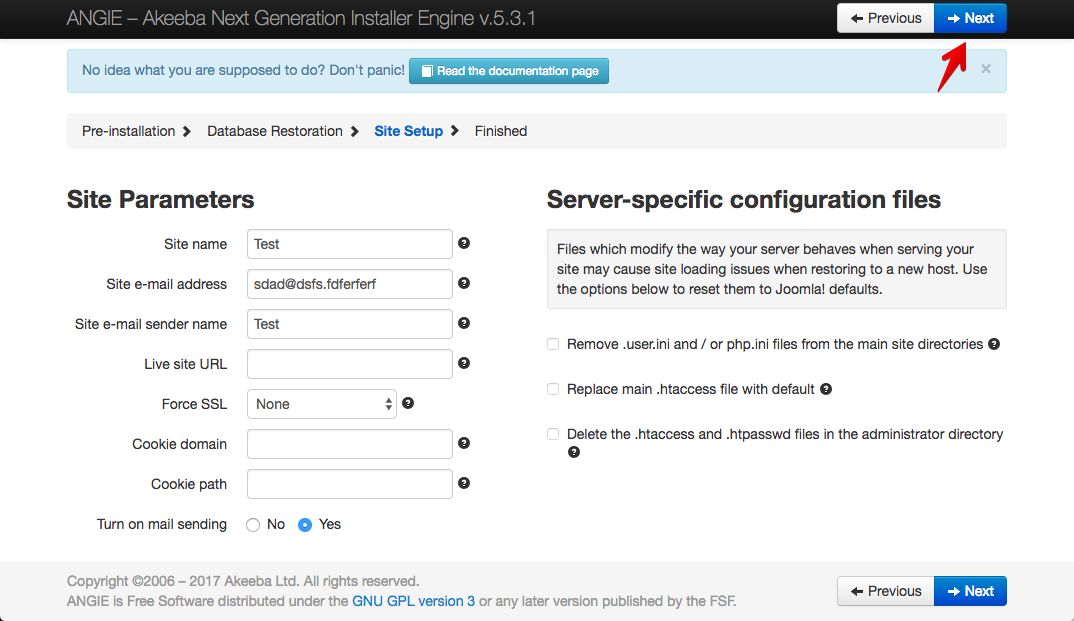
You will get the Site Setup phase. It's very close to completion. Check the site setup information and click the Next button.
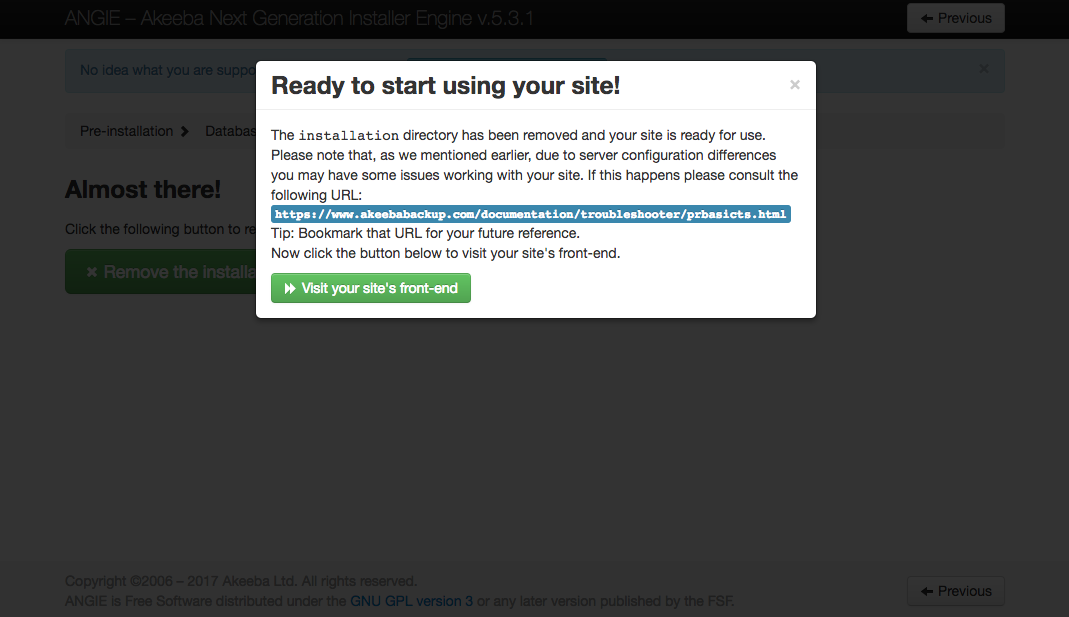
Almost finished. Now remove the installation directory by clicking the provided button.
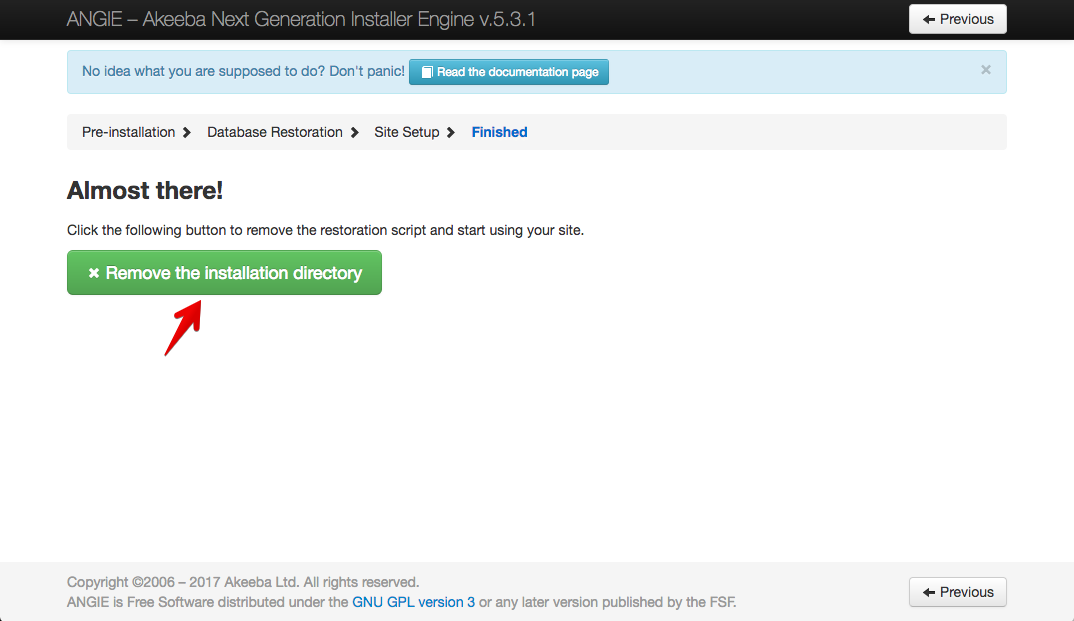
And your mission is complete. Now you can visit your site and it should be back as it was in the backup date.
That was all for now. Which backup-restore method do you use? Please share your experience with us via comments.
Note: This article was updated with the new Akeeba v5.3.1 to reflect the changes in the component.


Thanks.
Does it offer a complete backup and restore functionality of a Joomla website?