

How to Create a Custom Addon for SP Page Builder

TL;DR: This article is a step by step guideline for the advance users of SP Page Builder (the most popular Joomla Page Building tool).
If you’re using SP Page Builder for a while and the thought of creating your own addon popped up in your mind. You had probably put a “period” on that thought thinking since you are not a professional developer, you cannot do it. Well, this is where you’re wrong. You can both create your own addon and make money out of it by selling.
As it turns out, you don’t have to be a professional developer or the creator of SP Page Builder to have your own addon. If you know a thing or two about programming and can write functions to execute your desired task. You can create a custom addon for SP Page Builder any day you want.
Steps for creating a custom addon
The source code is attached at the end of this article but to understand the process better, we’ll see a step by step guide for creating a custom addon from scratch.
Note: We will be using “Sample Addon” as the name of our new addon.
Step 1: Creating the plugin
Before we begin, we need to first understand that there would be a plugin using which our custom addon(s) will be installed. So first, we need to create a plugin. Creating a plugin is pretty simple, you just create a folder, then put necessary files inside and create a zip file out of it. That zip file is the installable plugin. Here's what would be inside the plugin folder:
- The PHP file that would be used as installer
- The supporting XML file for the plugin
- The folder that will store the addon(s)
We'll follow the standard naming practice and it is important that we strictly follow the naming convention since it's case sensitive. We would create a folder named plg_sppagebuilder_demo here demo is the plugin name.
Step 2: Creating plugin-specific files
We'll start by creating the plugin PHP file. To do that, open your text/code editor, create a new file, and this is important, name the file according to the plugin name. Here, the plugin name is Demo, hence the name of the file would be demo.php then paste the following code snippet.
<?php
/**
* @package SP Page Builder
* @author JoomShaper http://www.joomshaper.com
* @copyright Copyright (c) 2010 - 2019 JoomShaper
* @license http://www.gnu.org/licenses/gpl-2.0.html GNU/GPLv2 or later
*/

//no direct accees
defined('_JEXEC') or die('Restricted Aceess');

class PlgSppagebuilderDemo extends JPlugin {
	protected $autoloadLanguage = true;
}
You should rename the PlgSppagebuilderDemo class to your preferred one, Demo is the name of the plugin, thus it's the word you’ll be replacing.
Once we did that, we'll create a new XML file for our plugin. The process is similar, create a new file on your code editor, name it demo.xml and paste the following code snippet.
<?xml version="1.0" encoding="utf-8"?>
<extension version="3.8" type="plugin" group="sppagebuilder" method="upgrade">
	<name>Demo Addon Plugin - SP Page Builder</name>
	<author>JoomShaper</author>
	<creationDate>22 Nov 2019</creationDate>
	<authorEmail>support(at)joomshaper.com</authorEmail>
	<authorUrl>https://www.joomshaper.com</authorUrl>
	<copyright>Copyright (C) 2010 - 2019 JoomShaper. All rights reserved.</copyright>
	<license>GNU/GPL V2 or Later</license>
	<description>Demo addon plugin for SP Page Builder</description>
	<version>1.0</version>

	<files>
		<filename plugin="demo">demo.php</filename>
		<folder>addons</folder>
	</files>

</extension>
You should replace three words in this code. Firstly, in the <name> tag put the name of your addon. Secondly, and this is the important part, in the <filename> tag replace the file name demo.php with your plugin PHP file. In the <folder> tag set the folder name "addons" in this case (relate to step 3).
Note: All characters must be in lowercase and use underscore instead of space.
Step 3: Creating the addon folder
Once we have created both plugin-specific files PHP and XML, we’ll create a folder in which we will put all the addons. Yes, a plugin can be used for installing multiple addons. The addons we will be creating would be stored in the folder "addons". Create separate folders for each addons (if you wish to create more than one). Therefore, inside the “addons” folder, we’ll create a folder with the name of our custom addon. We have named our first addon as Sample Addon, hence the folder name is “sample_addon”.
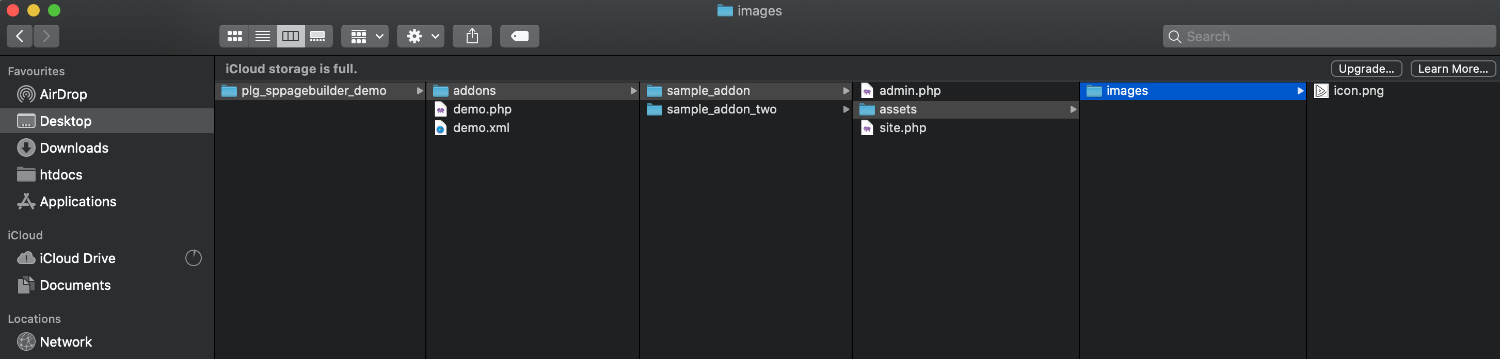
Figure: File structure for creating your custom addon.
Our addon folder will host two files and a folder. The admin.php file is responsible for creating the addon fields (aka the functionalities of the addon), the site.php file is used for visualizing the addon. There would also be a folder in which we will store all the assets for the addon, hence we name it "assets". In the next step, we'll be writing the functionalities for the addon.
Step 4: Writing functions for the addon
So, when we are done laying the basics, we’ll start writing code to add fields (features) in our addon. Let’s create a new PHP file and name it admin.php then paste the following code snippet.
<?php
/**
* @package SP Page Builder
* @author JoomShaper http://www.joomshaper.com
* @copyright Copyright (c) 2010 - 2019 JoomShaper
* @license http://www.gnu.org/licenses/gpl-2.0.html GNU/GPLv2 or later
*/

//no direct accees
defined('_JEXEC') or die('Restricted Aceess');

SpAddonsConfig::addonConfig(
	array(
		'type'=>'content',
		'addon_name'=>'sample_addon',
		'title'=> 'Sample Addon',
		'desc'=> 'Sample addon for SP Page Builder (Now you can edit or modify this)',
		'icon'=>JURI::root() . 'plugins/sppagebuilder/demo/addons/sample_addon/assets/images/icon.png',
		'category'=>'MyAddons',
		'attr'=>array(
			'general' => array(
				'admin_label'=>array(
					'type'=>'text',
					'title'=>JText::_('COM_SPPAGEBUILDER_ADDON_ADMIN_LABEL'),
					'desc'=>JText::_('COM_SPPAGEBUILDER_ADDON_ADMIN_LABEL_DESC'),
					'std'=> ''
				),
				// Title
				'title'=>array(
					'type'=>'textarea',
					'title'=>JText::_('COM_SPPAGEBUILDER_ADDON_TITLE'),
					'desc'=>JText::_('COM_SPPAGEBUILDER_ADDON_TITLE_DESC'),
					'std'=>  'This is sample title'
				),
				'addon_icon'=>array(
					'type'=>'icon',
					'title'=>'Icon',
					'depends'=>array(array('title', '!=', '')),
				),
				'addon_link'=>array(
					'type'=>'media',
					'format'=>'attachment',
					'title'=>'Link',
					'placeholder'=>'http://',
					'std'=>'',
					'hide_preview'=>true,
				),
				'addon_font_family'=>array(
					'type'=>'fonts',
					'title'=>'Font Family',
					'depends'=>array(array('title', '!=', '')),
					'selector'=> array(
						'type'=>'font',
						'font'=>'{{ VALUE }}',
						'css'=>'.sppb-addon-title { font-family: {{ VALUE }}; }'
					)
				),
				'addon_fontsize'=>array(
					'type'=>'slider',
					'title'=>'Font Size',
					'std'=>'',
					'max'=>400,
					'responsive'=>true
				),
				'addon_lineheight'=>array(
					'type'=>'slider',
					'title'=>'Line Height',
					'std'=>'',
					'max'=>400,
					'responsive'=>true
				),

				'addon_font_style'=>array(
					'type'=>'fontstyle',
					'title'=>'Font Style',
					'depends'=>array(array('title', '!=', '')),
				),
				'addon_margin'=>array(
					'type'=>'margin',
					'title'=>'Margin',
					'std' => '0px 0px 30px 0px',
					'responsive'=>true
				),
				'addon_padding'=>array(
					'type'=>'padding',
					'title'=>'Padding',
					'std' => '0px 0px 0px 0px',
					'responsive'=>true
				),

				// Content
				'content'=>array(
					'type'=>'editor',
					'title'=>JText::_('COM_SPPAGEBUILDER_GLOBAL_CONTENT'),
					'std'=>'Lorem ipsum dolor sit amet, consectetur adipiscing elit. Integer adipiscing erat eget risus sollicitudin pellentesque et non erat. Maecenas nibh dolor, malesuada et bibendum a, sagittis accumsan ipsum. Pellentesque ultrices ultrices sapien, nec tincidunt nunc posuere ut. Lorem ipsum dolor sit amet, consectetur adipiscing elit. Nam scelerisque tristique dolor vitae tincidunt. Aenean quis massa uada mi elementum elementum. Nec sapien convallis vulputate rhoncus vel dui.'
				),

				'class'=>array(
					'type'=>'text',
					'title'=>JText::_('COM_SPPAGEBUILDER_ADDON_CLASS'),
					'desc'=>JText::_('COM_SPPAGEBUILDER_ADDON_CLASS_DESC'),
					'std'=>''
				),

			),
		),
	)
);
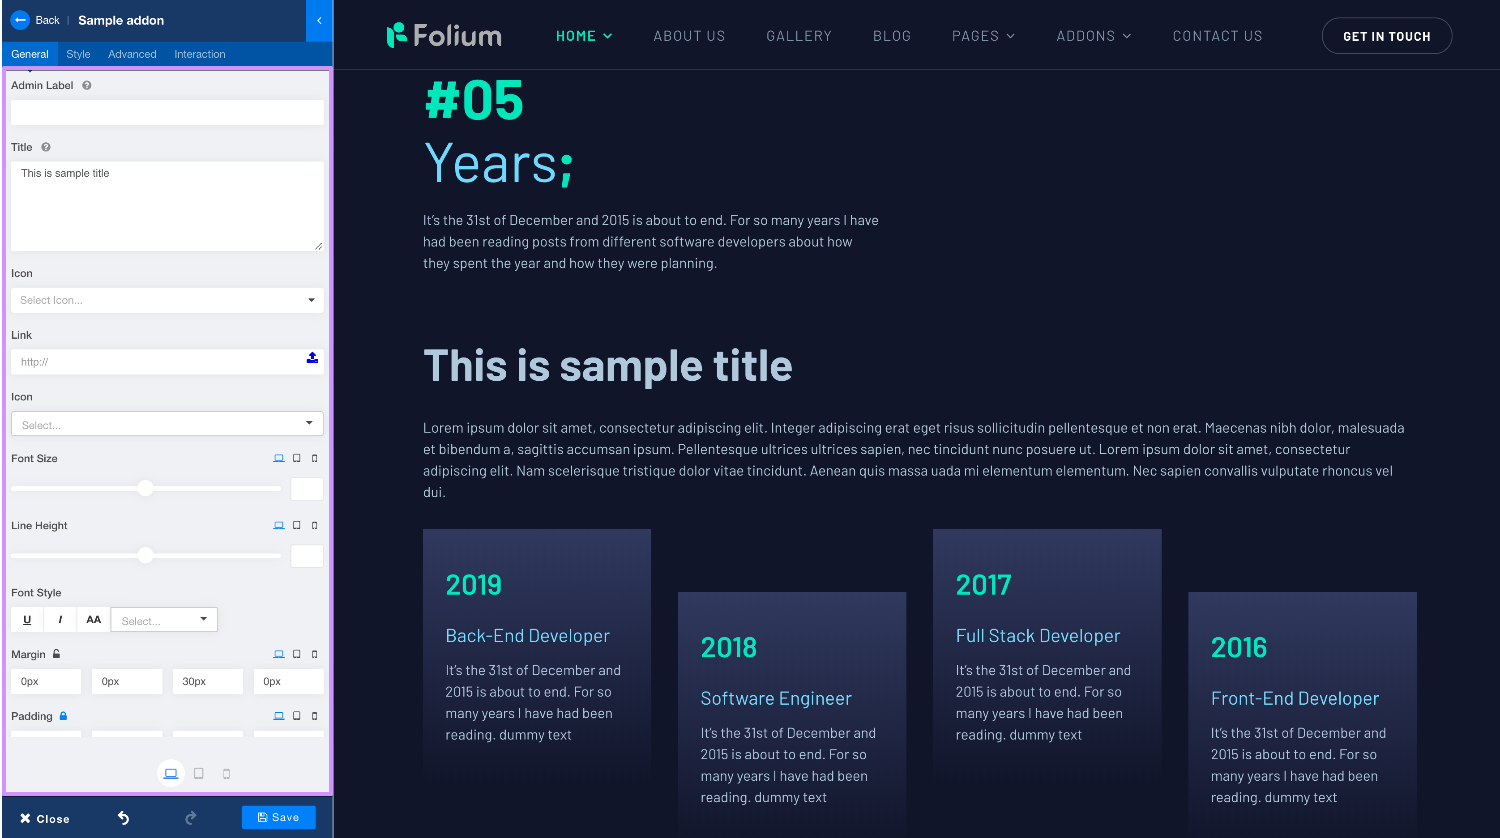
This is the file where you’d be writing feature-specific code for your addon. Define the value for 'addon_name' - this must be same as the addon folder, 'title' - is the name of the addon, 'desc' - is the text shown in the tooltip, 'icon' - is the link for the icon, 'category' - to create a separate category for our addon(s), and then start writing features for the addon. The 'general' array is where you write the fields (aka functions) for the addon.
The following fields are coming from the admin.php file.
Once we have done that, we need to visualise our addon, and that's the whole point. For that purpose, we need to create a new file then paste the following code snippet into that file, name it site.php.
<?php
/**
* @package SP Page Builder
* @author JoomShaper http://www.joomshaper.com
* @copyright Copyright (c) 2010 - 2019 JoomShaper
* @license http://www.gnu.org/licenses/gpl-2.0.html GNU/GPLv2 or later
*/

//no direct accees
defined('_JEXEC') or die('Restricted Aceess');

class SppagebuilderAddonSample_addon extends SppagebuilderAddons {

    public function render() {
        $class      = (isset($this->addon->settings->class) && $this->addon->settings->class) ? ' ' . $this->addon->settings->class : '';
        $title      = (isset($this->addon->settings->title) && $this->addon->settings->title) ? $this->addon->settings->title : '';
        $addon_link = (isset($this->addon->settings->addon_link) && $this->addon->settings->addon_link) ? $this->addon->settings->addon_link : '';
        $addon_icon = (isset($this->addon->settings->addon_icon) && $this->addon->settings->addon_icon) ? $this->addon->settings->addon_icon : '';
        $content    = (isset($this->addon->settings->content) && $this->addon->settings->content) ? $this->addon->settings->content : '';

        $output = '';
        $output .= '<div class="sppb-addon sppb-addon-sample' . $class . '">';
            if($title) {
                $output .= '<h1 class="sppb-addon-title">';
                    $output .= (!empty($addon_link)) ? '<a href="' . $addon_link . '">' : '';
                    $output .= (!empty($addon_icon)) ? '<i class="fa ' . $addon_icon . '"></i> ' : '';
                    $output .= (!empty($title)) ? $title : '';
                    $output .= (!empty($addon_link)) ? '</a>' : '';
                $output .= '</h1>';
            }

            if($content) {
                $output .= '<div class="sppb-addon-content">';
                    $output .= $content;
                $output .= '</div>';
            }
        $output .= '</div>';

        return $output;
    }

    public function css() {
        $addon_id = '#sppb-addon-' . $this->addon->id;

        $style = '';
        $style_sm = '';
        $style_xs = '';

        $style .= (isset($this->addon->settings->addon_margin) && $this->addon->settings->addon_margin) ?  SppagebuilderHelperSite::getPaddingMargin($this->addon->settings->addon_margin, 'margin') : '';
        $style_sm .= (isset($this->addon->settings->addon_margin_sm) && $this->addon->settings->addon_margin_sm) ?  SppagebuilderHelperSite::getPaddingMargin($this->addon->settings->addon_margin_sm, 'margin') : '';
        $style_xs .= (isset($this->addon->settings->addon_margin_xs) && $this->addon->settings->addon_margin_xs) ?  SppagebuilderHelperSite::getPaddingMargin($this->addon->settings->addon_margin_xs, 'margin') : '';

        $style .= (isset($this->addon->settings->addon_padding) && $this->addon->settings->addon_padding) ? SppagebuilderHelperSite::getPaddingMargin($this->addon->settings->addon_padding, 'padding') : '';
        $style_sm .= (isset($this->addon->settings->addon_padding_sm) && $this->addon->settings->addon_padding_sm) ? SppagebuilderHelperSite::getPaddingMargin($this->addon->settings->addon_padding_sm, 'padding') : '';
        $style_xs .= (isset($this->addon->settings->addon_padding_xs) && $this->addon->settings->addon_padding_xs) ? SppagebuilderHelperSite::getPaddingMargin($this->addon->settings->addon_padding_xs, 'padding') : '';

        $style .= (isset($this->addon->settings->addon_fontsize) && $this->addon->settings->addon_fontsize) ? 'font-size: ' . $this->addon->settings->addon_fontsize  . 'px; ' : '';
        $style_sm .= (isset($this->addon->settings->addon_fontsize_sm) && $this->addon->settings->addon_fontsize_sm) ? 'font-size: ' . $this->addon->settings->addon_fontsize_sm  . 'px; ' : '';
        $style_xs .= (isset($this->addon->settings->addon_fontsize_xs) && $this->addon->settings->addon_fontsize_xs) ? 'font-size: ' . $this->addon->settings->addon_fontsize_xs  . 'px; ' : '';

        $style .= (isset($this->addon->settings->addon_lineheight) && $this->addon->settings->addon_lineheight) ? 'line-height: ' . $this->addon->settings->addon_lineheight  . 'px; ' : '';
        $style_sm .= (isset($this->addon->settings->addon_lineheight_sm) && $this->addon->settings->addon_lineheight_sm) ? 'line-height: ' . $this->addon->settings->addon_lineheight_sm  . 'px; ' : '';
        $style_xs .= (isset($this->addon->settings->addon_lineheight_xs) && $this->addon->settings->addon_lineheight_xs) ? 'line-height: ' . $this->addon->settings->addon_lineheight_xs  . 'px; ' : '';

        // Font Style
        if(isset($addon->settings->addon_font_style->underline) && $addon->settings->addon_font_style->underline) {
            $style .= 'text-decoration: underline;';
        }

        if(isset($addon->settings->addon_font_style->italic) && $addon->settings->addon_font_style->italic) {
            $style .= 'font-style: italic;';
        }

        if(isset($addon->settings->addon_font_style->uppercase) && $addon->settings->addon_font_style->uppercase) {
            $style .= 'text-transform: uppercase;';
        }

        if(isset($addon->settings->addon_font_style->weight) && $addon->settings->addon_font_style->weight) {
            $style .= 'font-weight: ' . $addon->settings->addon_font_style->weight . ';';
        }

        $css = '';
        if ($style) {
            $css .= $addon_id . ' .sppb-addon-title {' . $style . '}';
        }

        if ($style_sm) {
            $css .= '@media (min-width: 768px) and (max-width: 991px) {';
                $css .= $addon_id . ' .sppb-addon-title {' . $style_sm . '}';
            $css .= '}';
        }

        if ($style_xs) {
            $css .= '@media (max-width: 767px) {';
                $css .= $addon_id . ' .sppb-addon-title {' . $style_xs . '}';
            $css .= '}';
        }

        return $css;
    }

    public static function getTemplate() {
        $output = '
        <#
            var margin = window.getMarginPadding(data.addon_margin, "margin");
            var padding = window.getMarginPadding(data.addon_padding, "padding");
        #>
        <style type="text/css">
            #sppb-addon-{{ data.id }} .sppb-addon-title{
                <# if(_.isObject(data.addon_fontsize)){ #>
                    font-size: {{ data.addon_fontsize.md }}px;
                <# } #>

                <# if(_.isObject(data.addon_lineheight)){ #>
                    line-height: {{ data.addon_lineheight.md }}px;
                <# } #>

                <# if(_.isObject(data.addon_font_style) && data.addon_font_style.underline) { #>
                    text-decoration: underline;
                <# } #>

                <# if(_.isObject(data.addon_font_style) && data.addon_font_style.italic) { #>
                    font-style: italic;
                <# } #>

                <# if(_.isObject(data.addon_font_style) && data.addon_font_style.uppercase) { #>
                    text-transform: uppercase;
                <# } #>

                <# if(_.isObject(data.addon_font_style) && data.addon_font_style.weight) { #>
                    font-weight: {{ data.addon_font_style.weight }};
                <# } #>

                <# if(_.isObject(margin)){ #>
                    {{{ padding.md }}}
                    {{{ margin.md }}}
                <# } #>
            }

            @media (min-width: 768px) and (max-width: 991px) {
                #sppb-addon-{{ data.id }} .sppb-addon-title{
                    <# if(_.isObject(margin)){ #>
                        {{{ padding.sm }}}
                        {{{ margin.sm }}}
                    <# } #>
                }
            }
            @media (max-width: 767px) {
                #sppb-addon-{{ data.id }} .sppb-addon-title{
                    <# if(_.isObject(margin)){ #>
                        {{{ padding.xs }}}
                        {{{ margin.xs }}}
                    <# } #>
                }
            }
        </style>
        <div class="sppb-addon sppb-addon-hello-world {{ data.class }}">
            <h1 class="sppb-addon-title">
                <# if(!_.isEmpty(data.addon_link)){ #>
                    <a href="/{{ data.addon_link }}">
                <# } #>
                <# if(!_.isEmpty(data.addon_icon)){ #>
                    <i class="fa {{ data.addon_icon }}"></i>
                <# } #>
                {{{ data.title }}}
                <# if(!_.isEmpty(data.addon_link)){ #>
                    </a>
                <# } #>
            </h1>
            <# if(!_.isEmpty(data.content)){ #>
                <div id="addon-sample-{{data.id}}" class="sppb-addon-content sp-editable-content" data-id={{data.id}} data-fieldName="content">{{{ data.content }}}</div>
            <# } #>
        </div>
        ';

        return $output;
    }
}
The important thing to do here is to change the class name from “SppagebuilderAddonSample_addon” to “SampleBuilderAddonYour_addon” and whenever you are going to name a div, use this format “sppb-addon-sample-addon”.
The following output is coming from the site.php file.
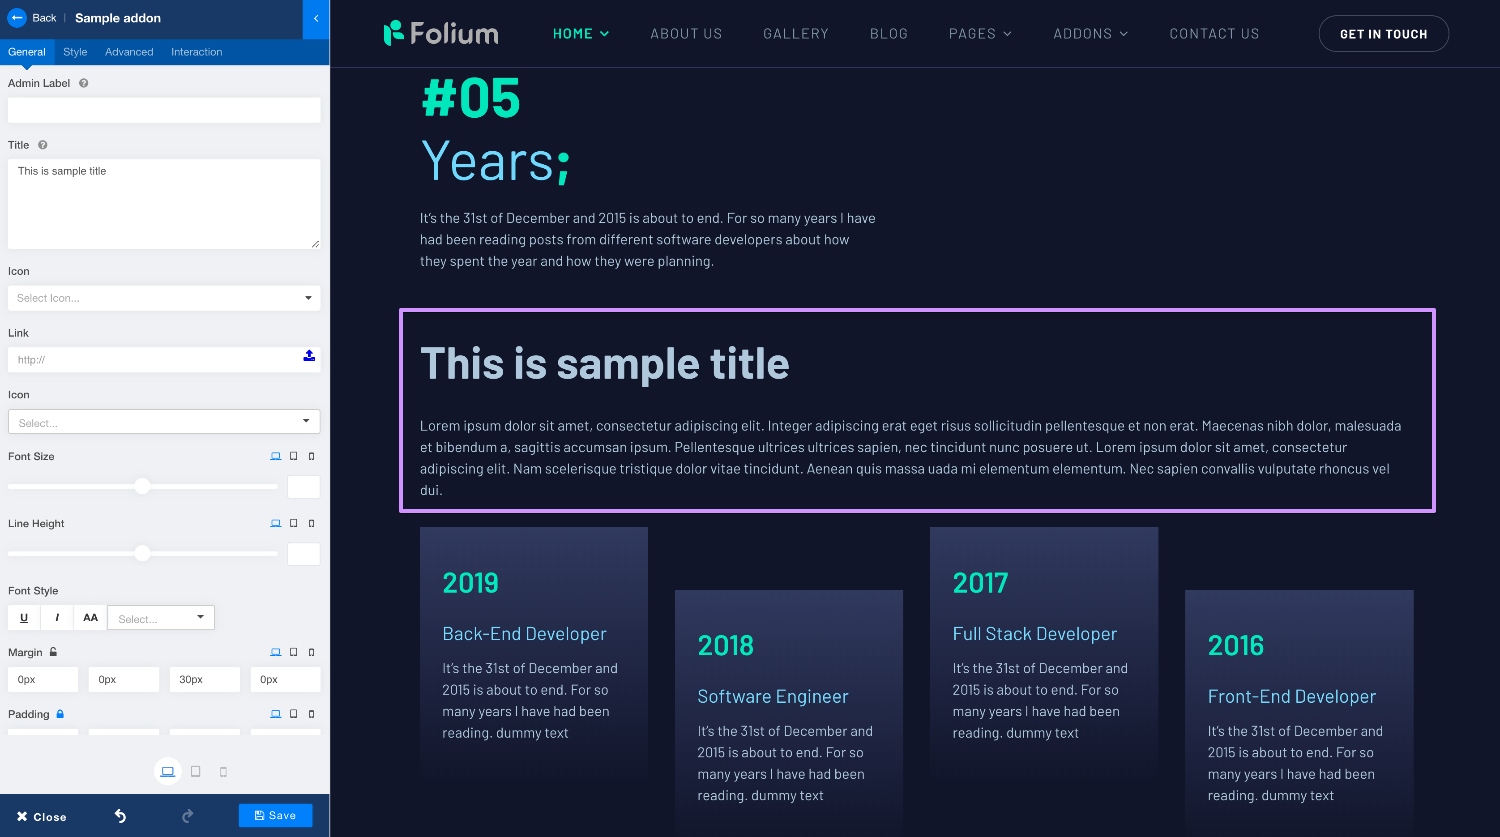
To explain the code of the site.php file: the render() function shows the end result, the css() controls the style of the end result, and finally, the getTemplate() function is used for providing front-end editing support. If you don't want to include live editing (aka frontend editing) for your addon, you can replace the getTemplate() function with the following code.
public static function getTemplate() {
        return false;
    }
Finally, as for the assets folder, this is where we store the addon icon. It's an image file, so we create an "images" folder and put the icon there. The size of the icon is 76*76 px and the name is icon.png. If you want to change the icon just replace the icon image. For your reference, the path is sample_addon > assets > images > icon.
Step 5: Creating the installable (zip) file.
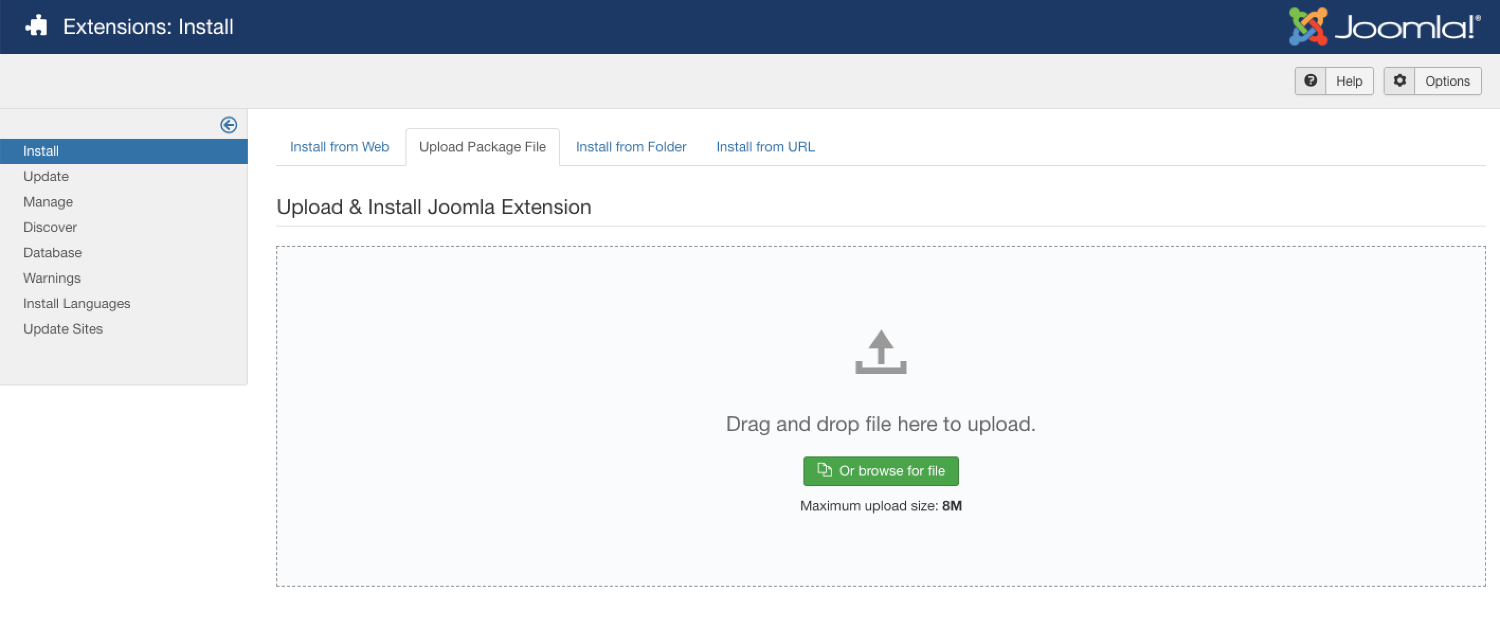
When you are done with all the above steps, you need to create a zip file. Just simply compress the plg_sppagebuilder_demo folder and you're done. The plugin can be installed on your website like any other Joomla Plugins by going to Joomla backend > Extensions > Manage > Install > Upload Package File.
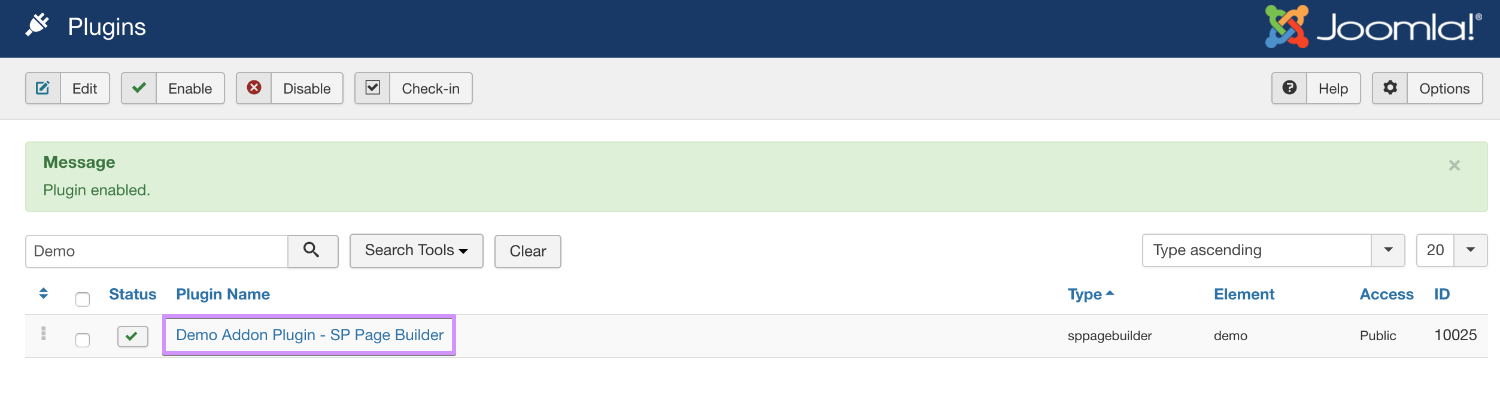
Finally, after installation, you need to activate (publish) the plugin, by going to Extensions > Plugins > find your plugin and publish.
Repeat the process to create multiple addons and install them using only one plugin.
If you think it's too much of a work, you can just download the following source code. Then start making changes stated in the above steps. And of course, if you find any difficulties following these instructions or need assistance in creating your own. Feel free to reach us in the comments below, we are always here to help.


You have deleted my comment who preferred to have a single add-on form with all inclusive (contact, gdpr ...)
I do not find it very nice :-(
Regards
If you create two plugins, sp page builder will CHOOSE the latest plugin to use, old plugin will be removed.
Example:
plugin_demo_1 => installed
plugin_demo_2 => installed (later)
SP Page Builder will pick the plugin_demo_2 to use and all add-ons from plugin_demo_1 will be removed.
Screenshot: https://imgur.com/kk8OQVc
The biggest problem is:
Free SP Page builder version is limited the real time editing function(of course its your business model),
and with custom add-ons (that implement render template feature) sometime the apply button didn't work like it should be, you need to reload or save then reload to see the content update.
If you remove the render template code and set it too false, apply button working fine, is it correct ??
Video example: https://imgur.com/yUQtm2t
I hope SP dev team can fix and improved this case.
Thank you
https://prnt.sc/qcvumz
I believe, one of the following two things is causing the issue:
1. The plugin names are same
2. The addon names are same
That's the reason why you are facing this issue.
Solution: [b]you don't need to keep installing new plugins[/b]
You should create the new addon folder in along with all the other custom addon folders like in this image (use a different name)
[url="https://imgur.com/byfmJjM"]Solution Image[/url]
Thanks for your suggestion.
I tested PB add-ons today (FULL DAY) and found something interesting.
My working environment: Php 7.3, Joomla latest 3.9.14
[b]Issue1:[/b]
First: Install clean Joomla 3.9.4 and Free SP Page Builder 3.6.5 lite
Next, install your demo add-ons => create demo page => adding your custom add-on (Sample addon) and add some content (because we are working with free pb version so we need to click APPLY button, its working and content appear if you update/delete).
Next, install the PRO SP Page builder version: Go back to the page that created before and you can see the real time editing feature of Sample add-on, still great :)
Now, REinstall free sp page builder version and back to the page => the sample add-on NOT working with APPLY button.
Changing some content and click APPLY button (remember that we revert back to free version so we can not use real time editing, we need to click apply button first), the content is not update, however, if you click save and reload the page, you will see the content update, lol. Funny, on the same page, if you add new same add-on(sample addon), you are able to change the content and see the result appear with APPLY button. Caching ? I dont think so.
[b]Issue 2:[/b] If you install the PRO version first, the custom add-on not working with real time editing, you will see the apply button appear, what's wrong ?
However, If you install the free version then install the custom add-on then update free sp page builder to pro, you will see the custom add-on (sample add-on) not showing apply button, so that mean the realtime editing feature working.
[b]Issue 3:[/b]
With large add-ons, example 100, it takes [b]12ms[/b] to open the add-ons dashboard ? Same if you are working in front-end mode, click back button and it takes 12ms to back to the editor panel ? Its a BIG problem.
About the issue with multiple addon plugin: Well, I test and create two plugins because some developers create different plugins so it will caused the issue like that :), working with pb since 2.x and I know how to create my plugins add-on bro :D
Here the short video for issue, I will create the video for orther issue if you need to take a look :)
https://www.dropbox.com/s/7xsys8z4dxmmga4/pagebuilder.mov?dl=0
For the first and second issue. You should not downgrade PB pro to lite. Once you upgraded use that version don't install lite version in pro version it will effect.
For the third issue we need check to check this issue.
Do you have any news about the Slow add-ons opening ? Example with over 100 add-ons the time opening is REALY SLOW (12s) for add-ons opening and same for back button.
If i remove my custom add-ons, the speed is faster 2.x (with pure sp pagebuilder lite, just 2s to open add-ons dashboard, with pro version, it takes 3 or 4s. What's the main issue ? How do I fix it?
Here the video about add-ons dashboard slow loading with many add-ons.
https://www.dropbox.com/s/9db7o9tizmhpm5t/sppagebuilder-pro.mov?dl=0
Fresh Joomla 3.9.15, Latest SP Pagebuilder pro 3.6.10
Core Sp page builder pro add-ons ONLY.
Steps: I duplicated accordion add-ons (50 accordion add-ons) and rename the add-ons by adding a unique number so SP Pagebuilder understand that they are different add-ons. Now we have total 106 add-ons. Its okay right? because the 3rd dev create many add-ons by themselves so I think the number of add-ons are acceptable.
The default core (56 add-ons) loading good when opening add-ons dashboard, however, with many add-ons, it takes 8->12s to open the add-ons, same when you working via font-end (drag add-on or click back button).
If you check the video above, you can see that it takes time when opening add-ons dashboard via back-end and when you drag or click back-button via front-end editing.
Another issue: With page builder lite 3.6.7, if you save the page (back-end), it opens a popup asking for leave the page.
Thank you
in particular when creating xml file