

How to create an Ajax contact form in Joomla?

Ajax contact form is a great contact channel for any website. This opens up the door for your site visitors to get in touch with you or your site administrator. We always look for and in need of a good contact form plugin or extension to create a quick and well functional Ajax contact form. If you are looking for a simple contact form in Joomla, you can use Joomla’s default contact form component. But if you're looking for a smarter and faster option, you can use SP Page Builder’s Ajax Contact Form addon to create a quick contact form in Joomla. You can do all the styling and add necessary contact form fields with the addon.
So, without further delay, let's head straight to the procedures of creating a contact form with SP Page Builder Ajax Contact Form addon.
Step: 1
First of all, you need to install SP Page Builder. After that, go to Components >> SP Page Builder to open the SP Page Builder dashboard. Now, select and open the page you want to add the contact form.

Figure: SP Page Builder backend dashboard
Step: 2
On the target page, click “Add new row“ to add a new row. The row will be added at the bottom of the page. You can use drag and drop system to adjust the row position in the page.
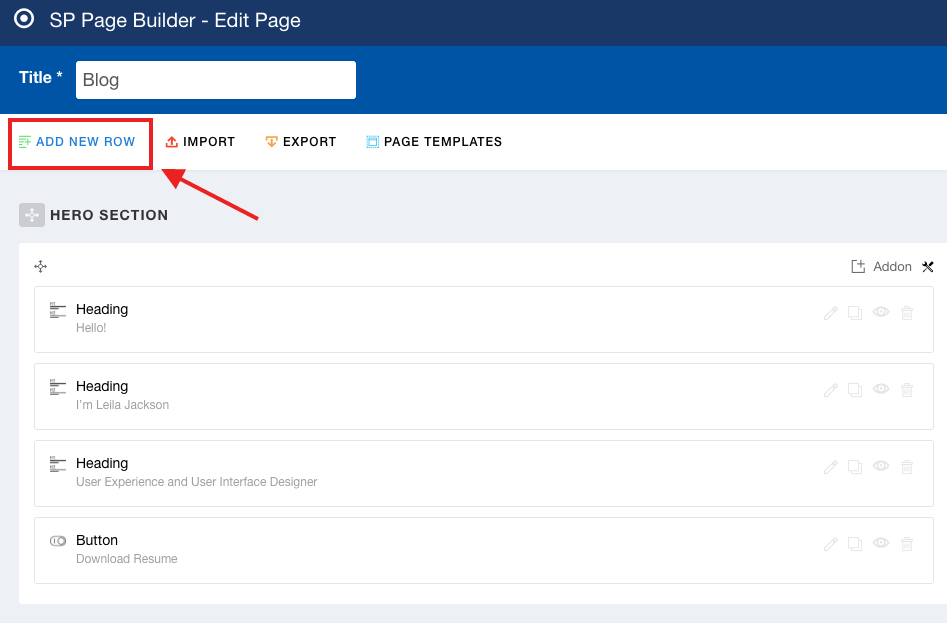
Figure: Adding a new row with SP Page Builder backend editor
Step: 3
Now it is time to add the creative contact form addon of SP Page Builder. Click on the plus sign in the middle of the empty row.

Figure: Adding the Contact Form addon to the row
Upon clicking, the list of SP Page Builder addons will open. Now select Contact Form addon from the list.

Figure: Adding the Contact Form addon to the row
It is now added to your row. You can use custom column structure of SP Page Builder to determine the position of your added addon. Here in my case, I wanted to add my contact form in the center of my page. So I defined the column structure of my page to 4+4+4. And at the center column, I added the contact from addon.

Figure: Creating a custom column structure
Step: 4
Now it is time to modify the addon. Click on the edit addon button on the right side of the addon.
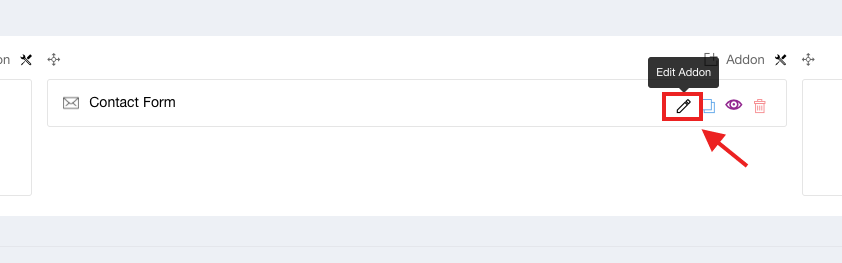
Figure: Starting Contact Form addon modifications
There are several options that need to be customized to get the final result.
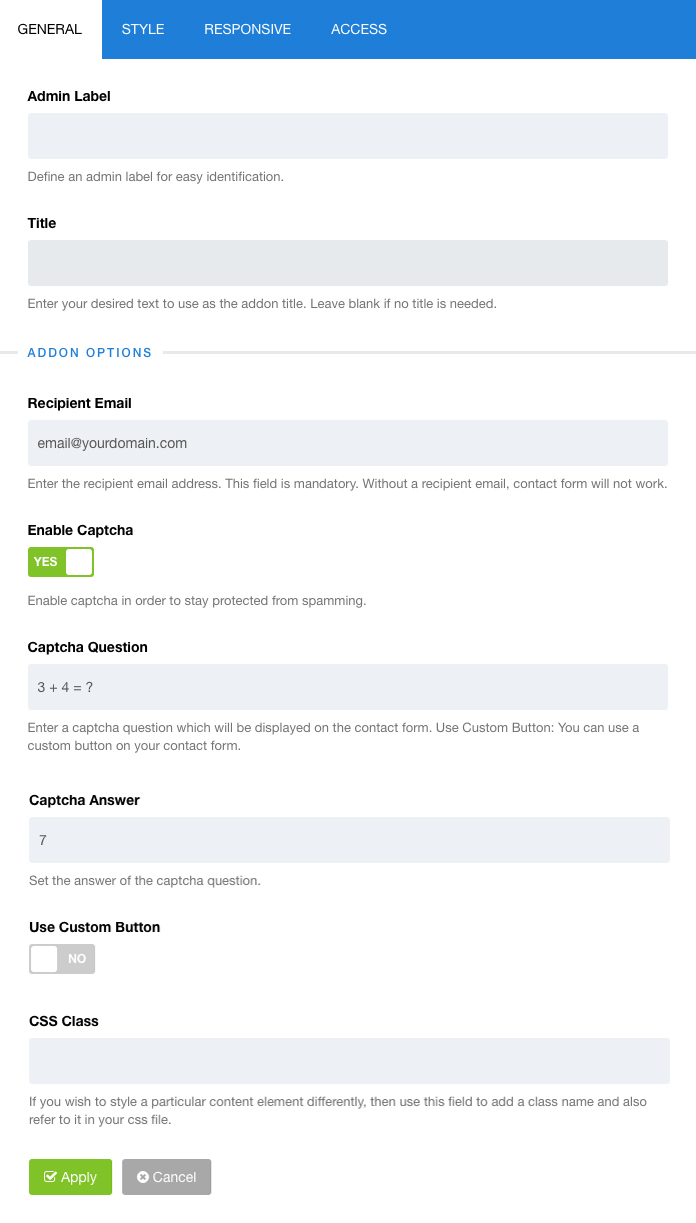
Figure: Editing the Contact Form addon options
Title
Enter the title of the contact form here. There are lots of styling options that come with title. You can modify title font size, color, HTML element, font style, line height, letter spacing etc.
Recipient Email
You have to add the recipient's email address here. This field is mandatory. Without a recipient email address, contact form will not work. All the contact details including the message (sent by the visitors) will be delivered to that email address.
From Name
This field works as an anti-spam tool. Add the person or company name who will receive the contact form details.
From Email
Add the email address ‘from where’ the contact messages will be sent to the site admin once a visitor contacts.
Enable Captcha
Enable captcha in order to stay protected from spamming.
Captcha Type
Select the type of captcha which you want to use. There are two types of captchas, ‘default captcha’, and ‘Google reCaptcha’.
Use Custom Button
If you want to add a custom button, enable the custom button option. Add the the button text and do all the stylings as per your requirements.
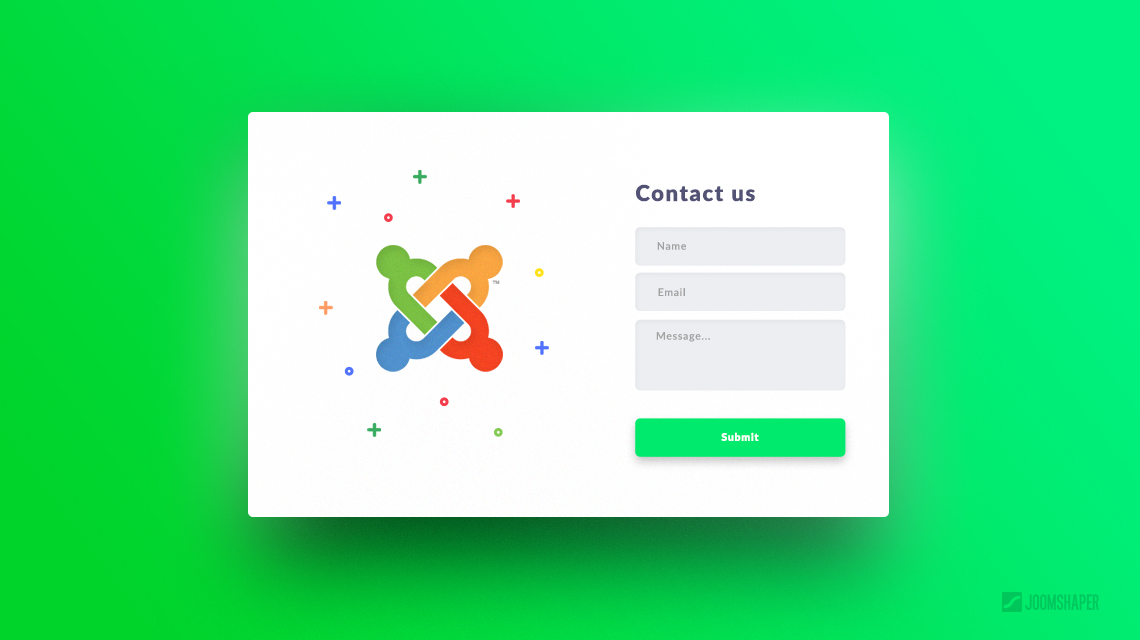
Final result
So, we’ve created the contact form. This is the final outcome after few modifications in the addon. We’ve set a background color in the row options. The title and subtitle of the contact form also added with the row option of the row.
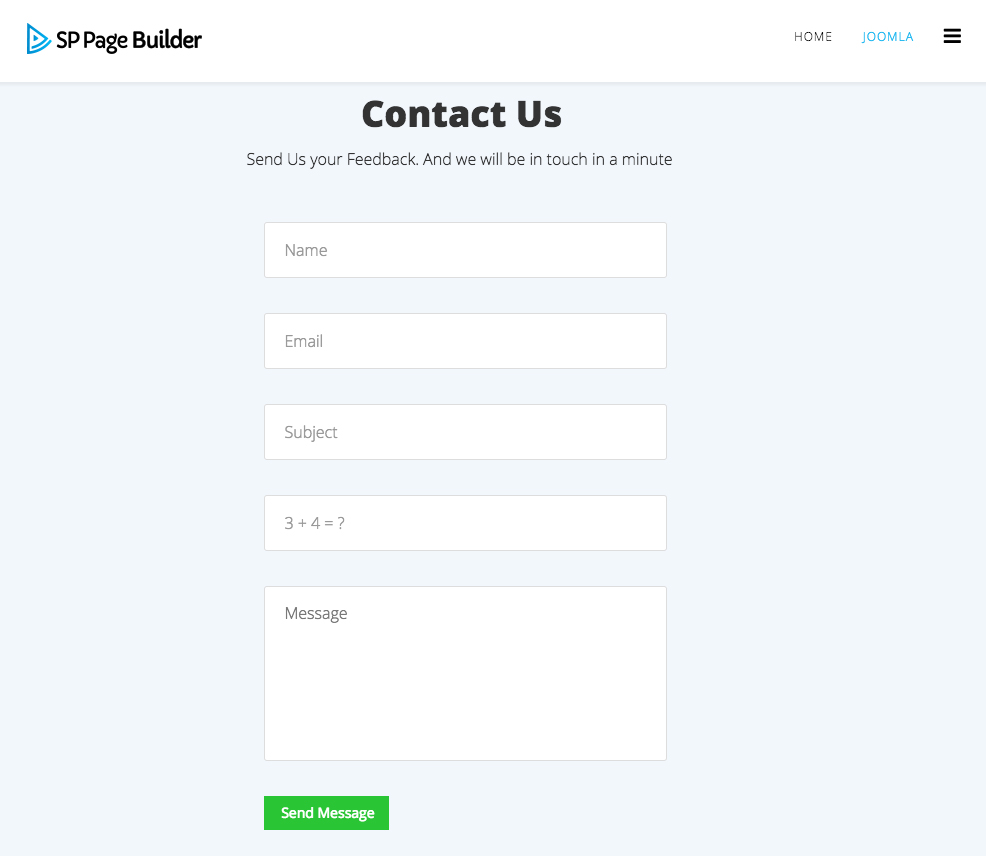
Figure: Final rendering of the contact form built with SP Page Builder Contact Form addon
Some CSS
After adding the Contact Form addon, a generalized contact form will be added. For my desired look, I did some CSS.
.sppb-addon-ajax-contact .sppb-ajax-contact-content .sppb-ajaxt-contact-form {
padding-right: 52px;
}
.sppb-addon-ajax-contact .sppb-ajax-contact-content .sppb-ajaxt-contact-form .sppb-form-group {
margin-bottom: 35px;
}
.sppb-addon-ajax-contact .sppb-ajax-contact-content .sppb-ajaxt-contact-form .sppb-form-group input {
background: #FFFFFF;
border: 1px solid #DDDDDD;
border-radius: 3px;
width: 100%;
color: #666666;
height: 56px !important;
box-shadow: none;
padding: 0 0 0 20px;
font-size: 16px;
}
.sppb-addon-ajax-contact .sppb-ajax-contact-content .sppb-ajaxt-contact-form .sppb-form-group textarea {
background: #FFFFFF;
border: 1px solid #DDDDDD;
border-radius: 3px;
width: 100%;
color: rgba(102, 102, 102, 0.3);
height: 175px !important;
box-shadow: none;
padding: 15px 0 0 20px;
font-size: 16px;
resize: none;
}
Note: To add the custom CSS, you have to open the "Options" in the top right corner of the page dashboard. After that, click "CSS", and in the text field add the custom CSS.


; Ajax Contact
COM_SPPAGEBUILDER_ADDON_AJAX_CONTACT_NAME="Name"
COM_SPPAGEBUILDER_ADDON_AJAX_CONTACT_EMAIL="Email"
COM_SPPAGEBUILDER_ADDON_AJAX_CONTACT_SUBJECT="Subject"
COM_SPPAGEBUILDER_ADDON_AJAX_CONTACT_MESSAGE="Message"
We are also planning to give field adding options in the addon in the coming days. So stay with us.
Thanks :)
One questions is how you work with rtl (right to left) Titles for text block with SP Pagebuilder? If you have rtl langauges in Joomla and how that work for SP Pagebuilder/Helix.
As you have JCE editor you can change and write with rtl text but how about rtl with titles?
You just copy/past for example arabic in the text title or how do you do?
Thank you
For SP Page Builder you can take a look at this:
https://www.joomshaper.com/documentation/sp-page-builder/sp-page-builder-2-x#how-to-use-nesting-rows
https://www.joomshaper.com/documentation/sp-page-builder/sp-page-builder-2-x#how-to-use-nesting-columns
For the Helix3 we have the option only create row and column. We will introduce complex layout, nested row, and column option in Helix4.
- Thanks
Cheers! :)
Really Thanks for the information. We will check it out and fix it.
- Thanks