

How to create an attractive slider in a Joomla website
7 min read

Sliders are widely used and they can dramatically enhance the beauty of your website. A good slider can make your visitors fall in love at the first sight. Plus, if you can make the sliders interactive, this will incredibly increase the conversion potential. But the question is, how do you do that?
We will create the Joomla slider with the Slideshow addon of SP Page Builder. The process is pretty straight forward. Here are the prerequisites.
- Get SP Page Builder Pro from this link
- Install SP Page Builder Pro on your Joomla site
- Visit or create a page where you want to add the slider
- In the frontend editing mode, add a row and start building the slider
Step 1: Prepare the row
At first, we will open the Row Options and make it Fluid Row from the General section.
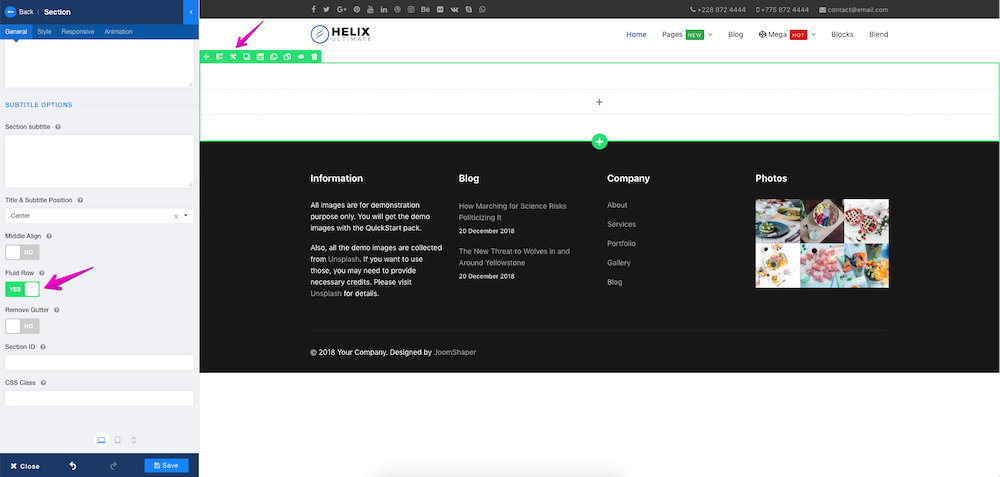
You’ll notice there are still some empty space remaining at both the top and bottom of the addon area. If you want to make it go away, browse to Style tab and set the padding to 0px.
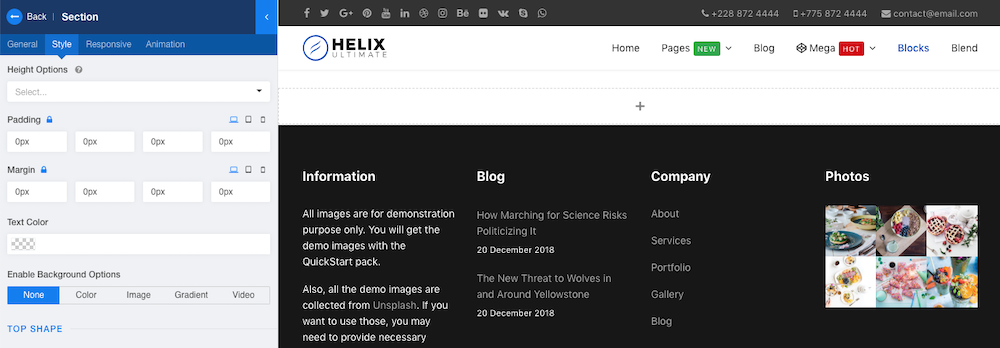
Also, choose Custom for the “Select Content Container” option at the top left of the editing panel (General tab).
Step 2: Add the addon to your desired position
Now that we have the row in our target place. Let's add the Slideshow addon to the row.
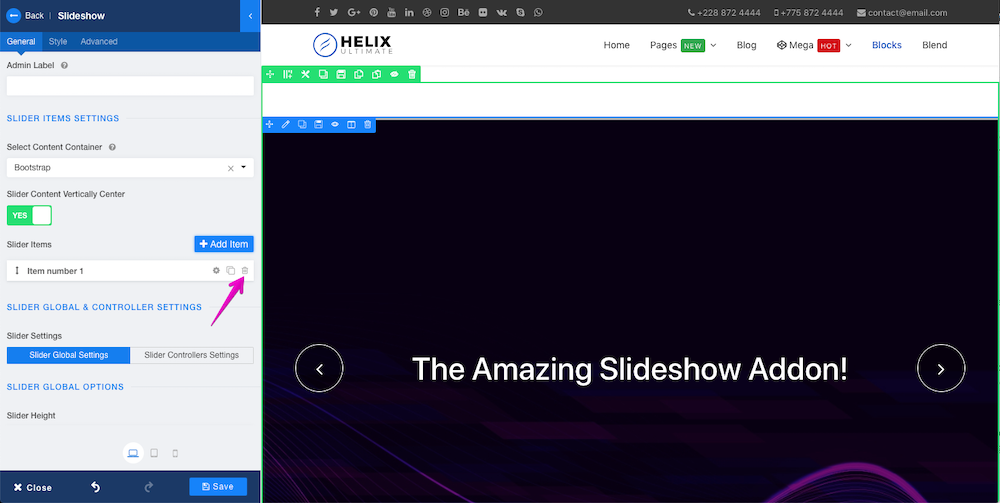
Step 2.1: Prepare the addon to have a fresh start
Upon placing the addon on the row, a demo slider frame will appear. We will delete that demo slider frame and then create our own ones.
Currently, a timer progress bar is turned on by default, which you can stop from the Slider Global Settings. Also, we will turn off the bullet and arrow controller from the Bullet/Line Controllers Settings and Slider Controller Settings tab respectively to have a fresh start.
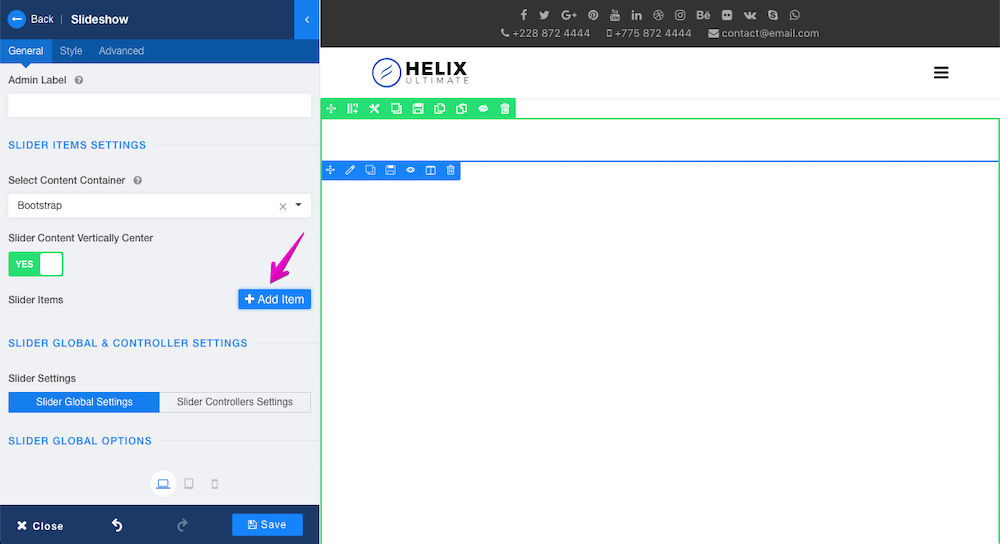
Now our canvas is ready to create a new slider. Click the Add Item button to add your first slider frame.
Step 3: Start building the slider
Upon clicking the Add Item button, the following panel will appear.
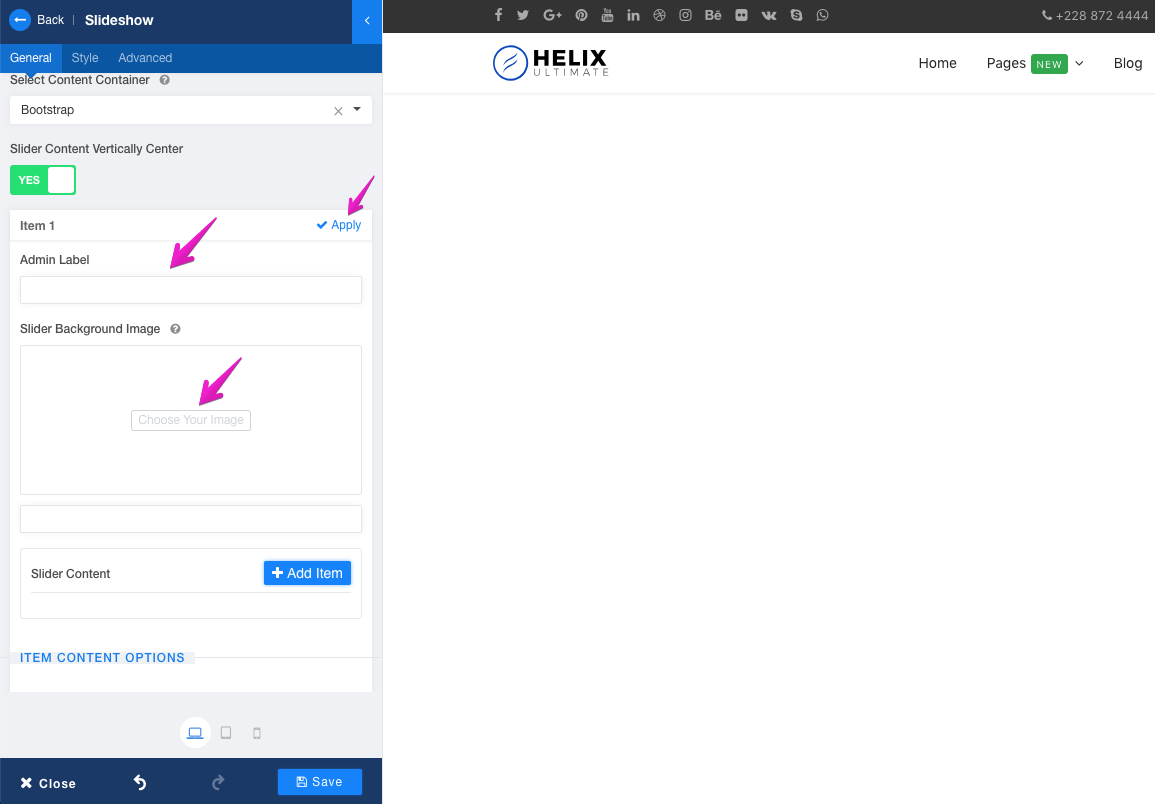
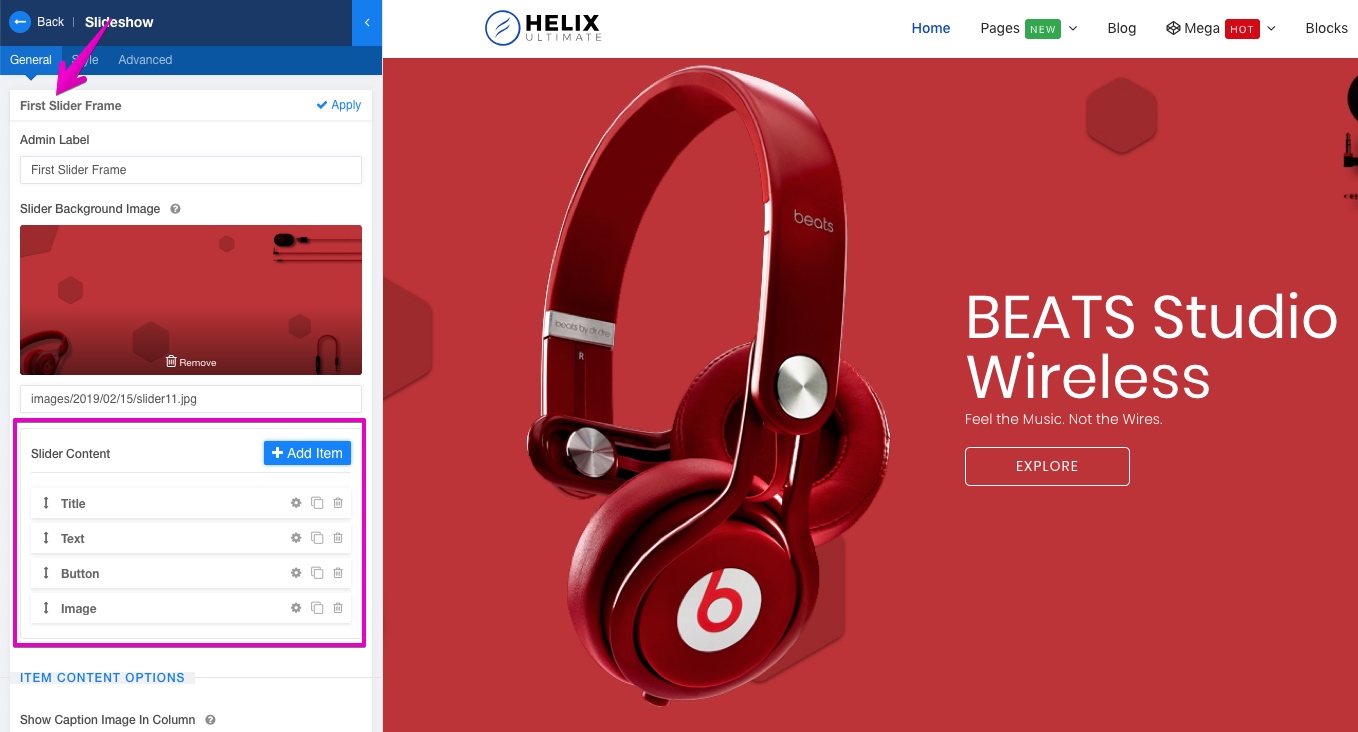
Step 3.1: Set a background for the slider frame
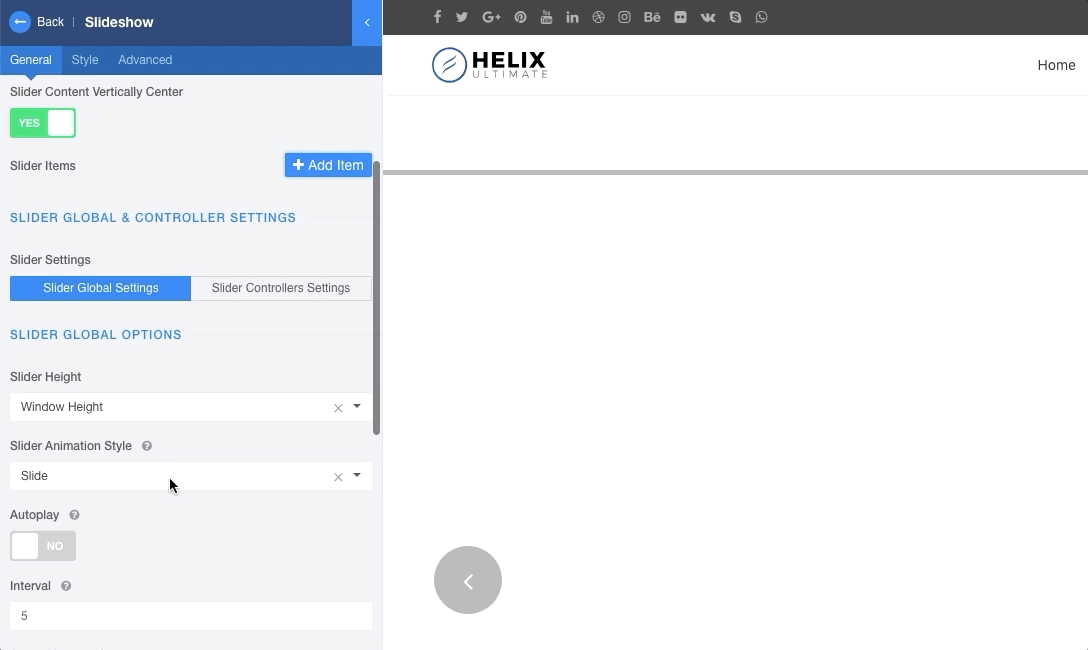
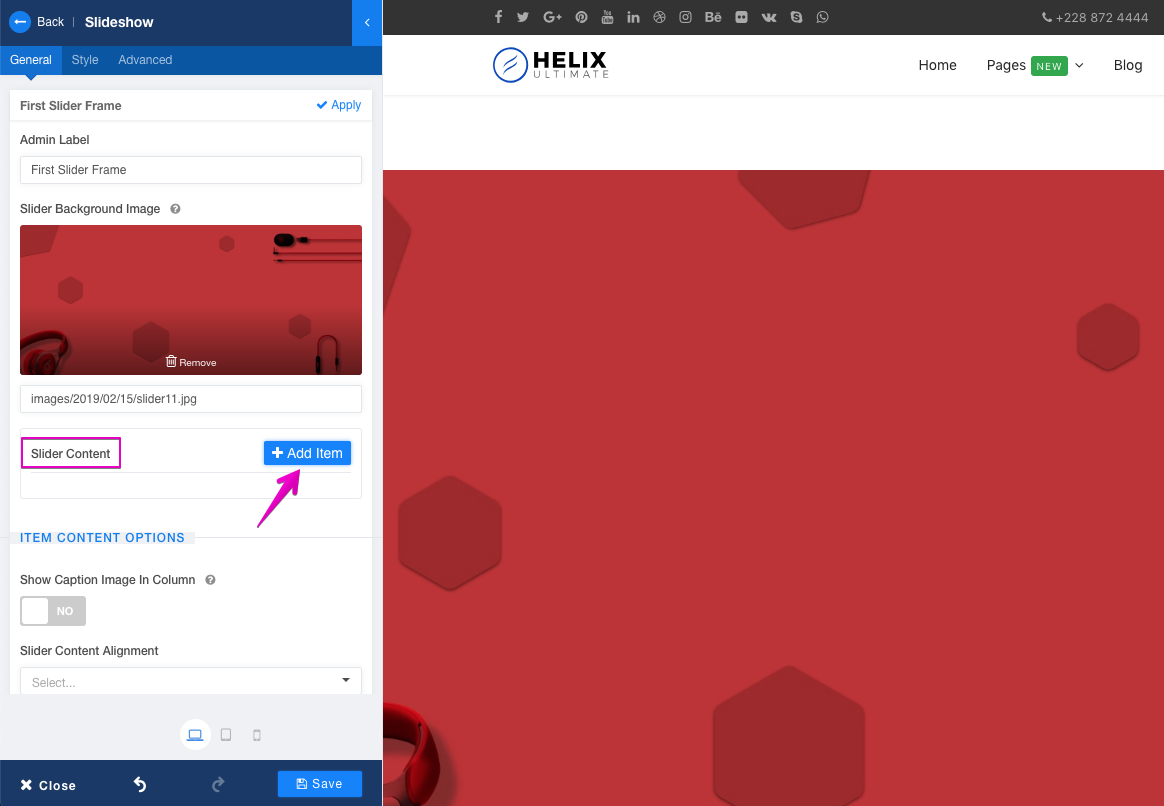
Give the slider frame an admin label, set a background image (see the above screenshot). Click the Apply button. Now our first slider frame just got a background. Scroll down in the left options panel. In slider Global Settings, choose Slider Height as Custom, and set the “Slider Animation Style” to Bubble.
Step 4: Add slider contents
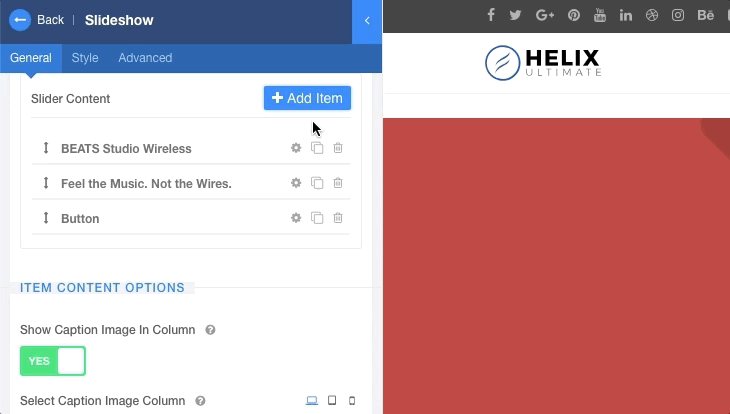
It’s time to start adding some contents inside our slider frame. Click the small gear symbol to open the first slider frame in editing mode.

Then click on the “Add Item” button right beside the Slider Content section.
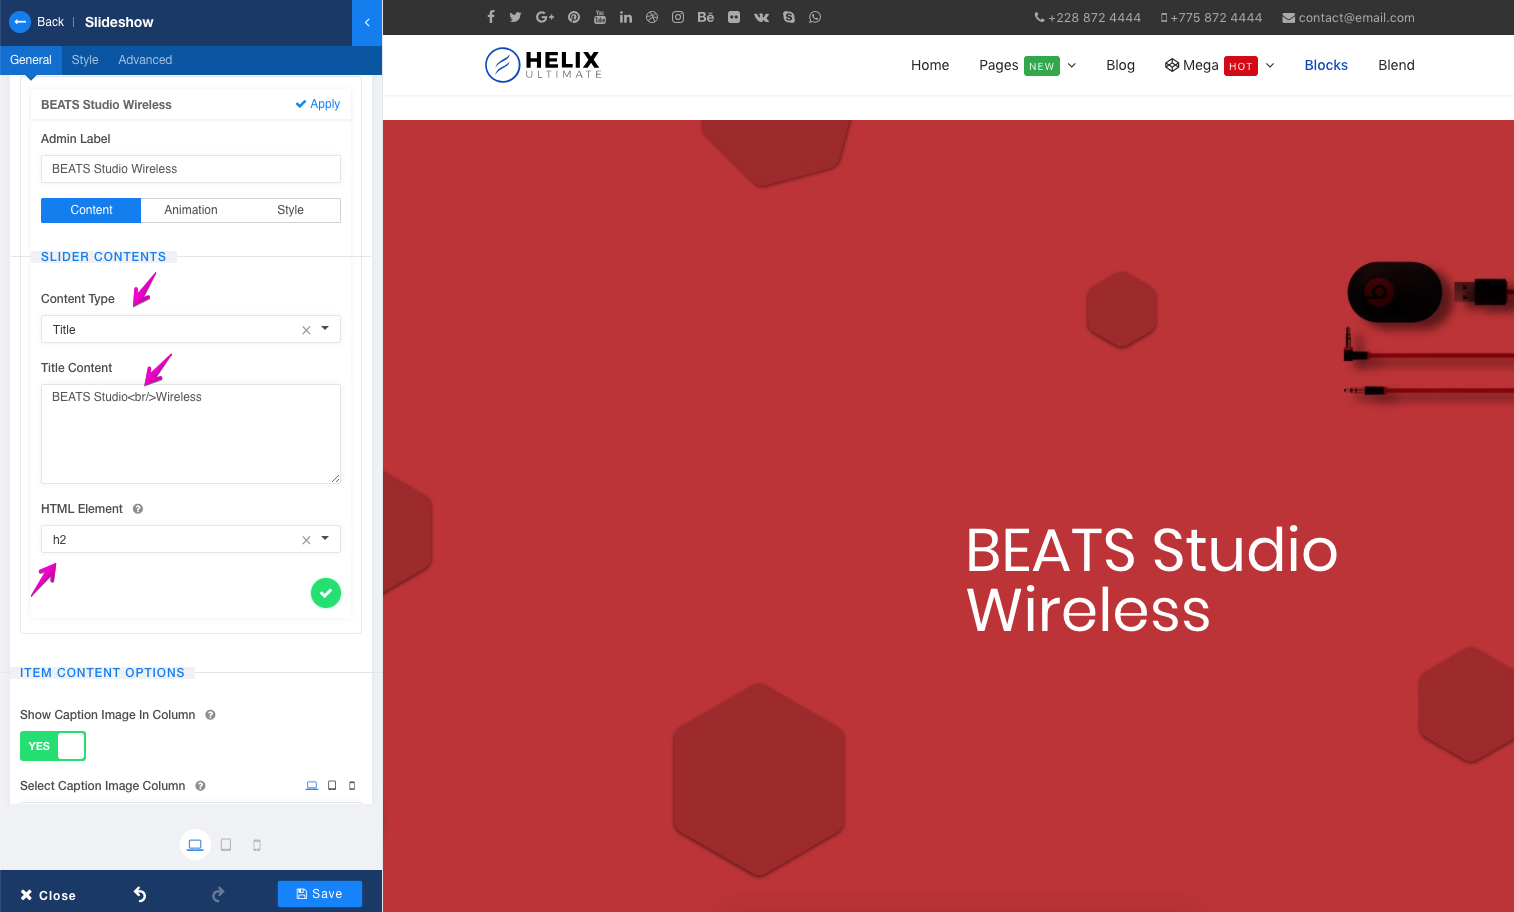
This will allow you to choose a content type.
Adding a slider content title: Let's select Title from the drop-down list, put the title content (use a <br/> tag if you want a line break) in the box and define its type (h2) from the HTML Element list.
Scrolling down, we will turn on the “Show Caption Image In Column” and “Reverse Caption Image Column” options for a better look of our slider. Make “Slider Image Alignment” Center, and “Slider Content Alignment” Left.
Also, let’s beautify the title by selecting the following properties from the Styles tab.
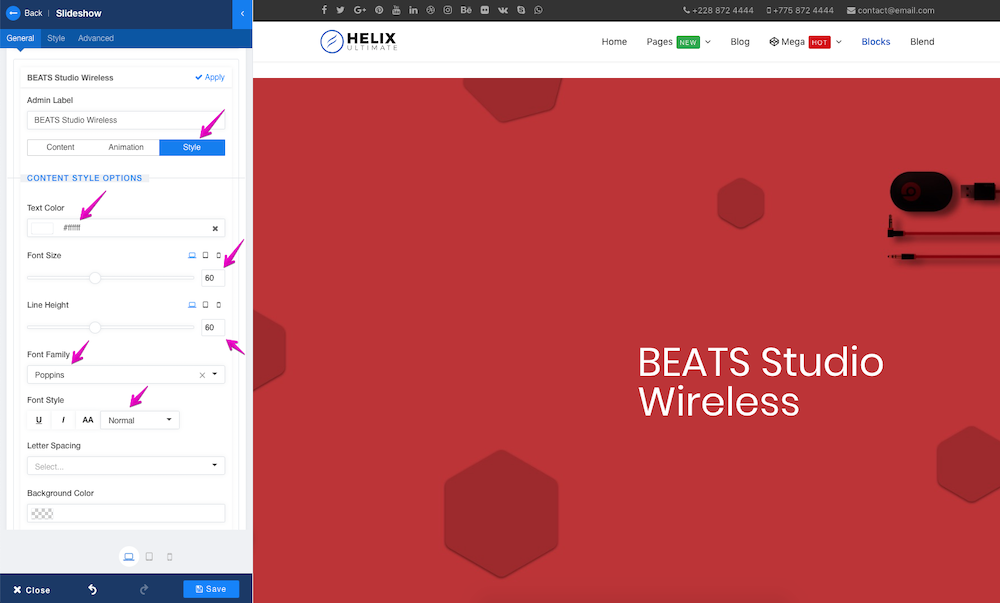
- Text color: #ffffff
- Font size: 60
- Line height: 60
- Font family: Poppins
- Font style: Normal
Now, from the Animation tab, we will add an animation effect to this title. Let’s do the following changes.
- Animation Type: Slide
- Animation Direction: Left
- Animation Duration: 800
- Animation Delay: 900
- Animation Slide From: 100
- Animation Timing Function: Ease
Check the screenshot below for a better understanding.
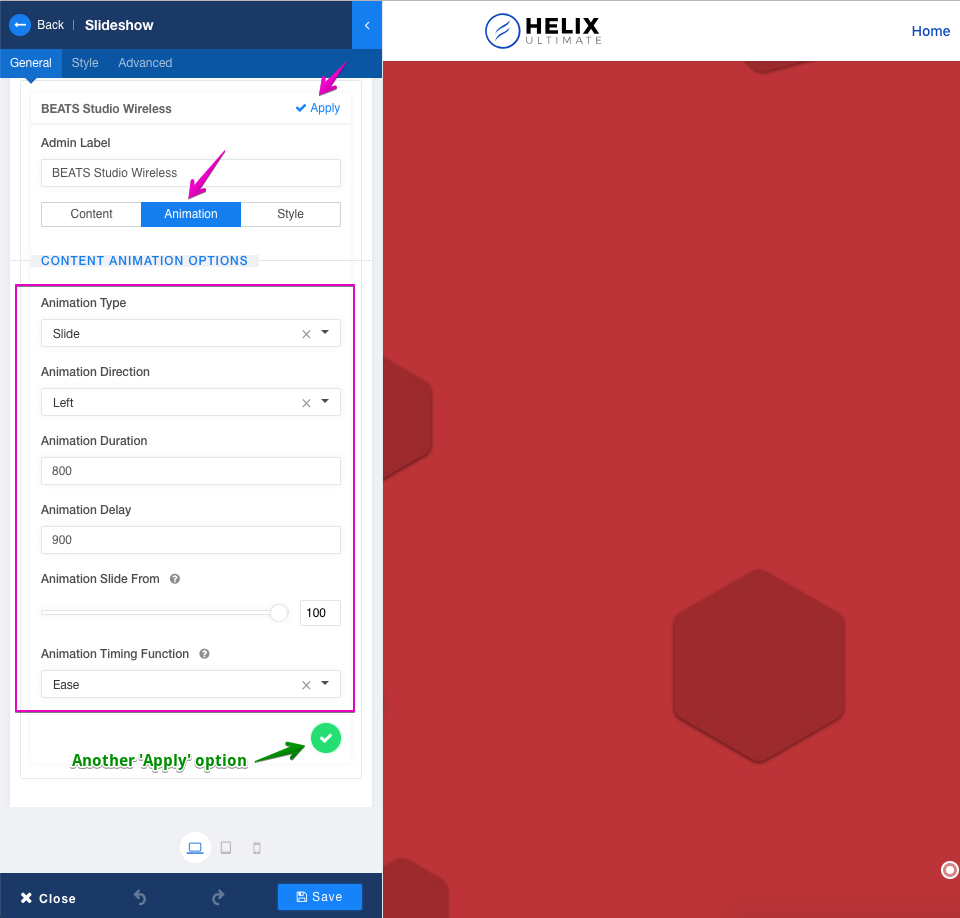
Click Apply.
Adding a text description following the title: We’ve added our first content. If we want to keep adding more contents then the procedure is the same. Click on “Add Item” and choose the content type- this time we’ll be adding some text about our product, so let’s choose the Text content type from the list and put our content in its respective field.
Let’s beautify the text by selecting the following properties from the Styles tab.
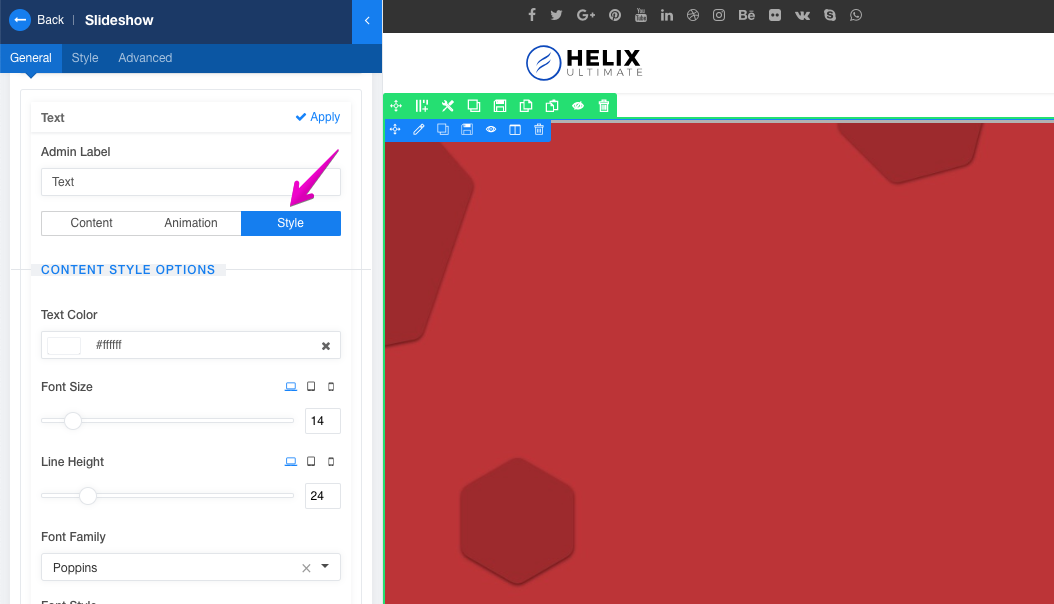
- Text Color: #ffffff
- Font Size: 14
- Line Height: 24
- Font Family: Poppins
- Font Style: Light
- Text Shadow: #fff
Next, from the Animation tab, we will add an animation effect to this text. Let’s do the following changes.
- Animation Type: Slide
- Animation Direction: Left
- Animation Duration: 800
- Animation Delay: 1000
- Animation Slide From: 100
- Animation Timing Function: Ease
Adding a button following the text: Now it’s time to add a button to help our users explore around. Like the above step, at first, click the Add Item button. Then choose Button from the content type dropdown.
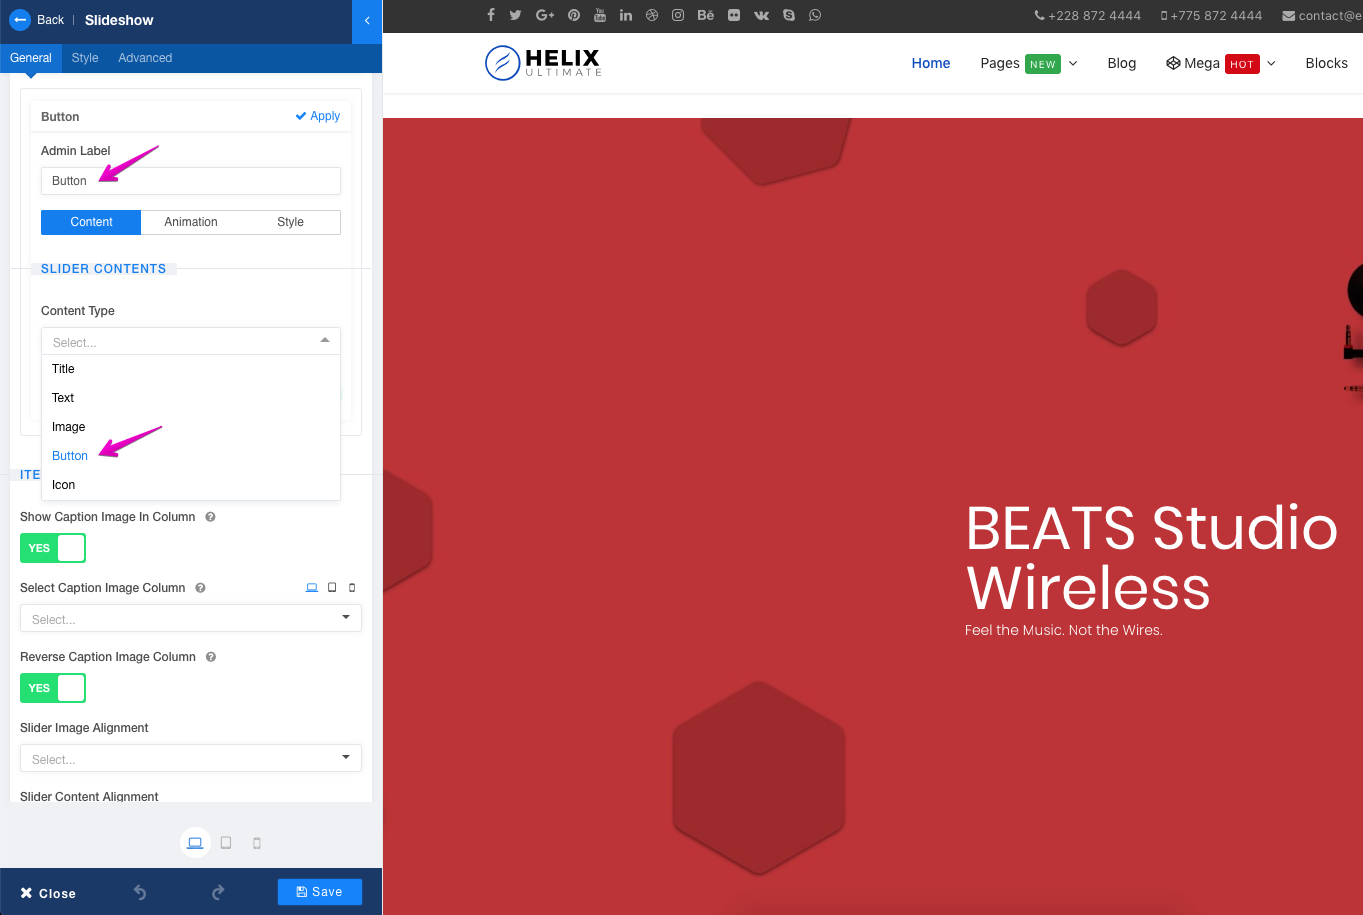
We’ll be presenting with a lot more functions as the button needs to be polished. Let’s fill them up quickly since the fields are pretty self-explanatory.
From the Content tab, make the following changes.
- Content Type: Button
- Button Content: Explore (anything you want)
- Button Link: # (any link you want)
From the Animation tab, make the following changes.
- Animation Type: Slide
- Animation Direction: Left
- Animation Duration: 800
- Animation Delay: 1000
- Animation Slide From: 100
- Animation Timing Function: Ease
From the Style tab, make the following changes for the button.
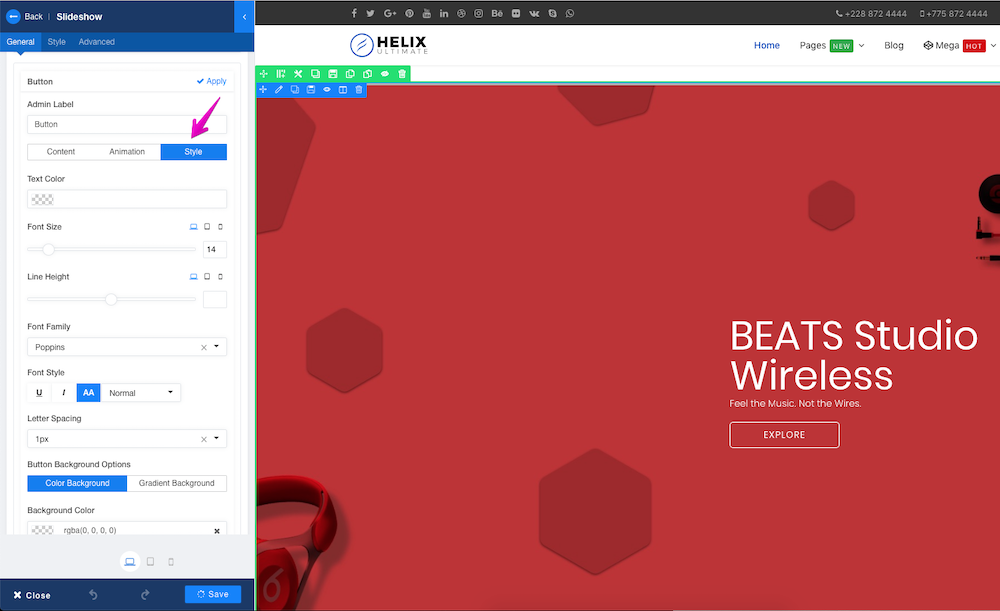
- Font Size: 14
- Font Family: Poppins
- Font Style: AA Normal
- Letter Spacing: 1px
- Background Color: rgba(0, 0, 0, 0)
- Border Width: 1px 1px 1px 1px
- Border Color: #ffffff
- Border Radius: 5
- Padding: 8px 50px 8px 50px
- Text Shadow: #fff
- Box Shadow: #fff
- Button Hover Color: #BE3233
- Hover Background Color: #ffffff
Adding an image inside the slider frame: Now the only thing left to do is add our product image. Let’s follow the similar path like the above to add the new content, but this time we’ll be choosing Image as the content type from the dropdown. This will enable us to upload and select an image in our slider. Let's do that.
Remember to hit “Apply” every time you add a new content.
After adding the image, we need to set its animation and style.
From the Animation tab, make the following changes.
- Animation Type: Slide
- Animation Direction: Top
- Animation Duration: 800
- Animation Delay: 1000
- Animation Slide From: 100
- Animation Timing Function: Ease
Now, from the Style tab, make the following changes for the image.
- Image Width: According to your image (366 in this example)
- Image Height: According to your image (645 in this example)
Adding contents is done for the first slider frame.
We will add a second slider frame following the same method.
Step 5: Working with the slider controller and slide timer
Our slider is almost ready. You can add more slider frames if you want. But for this tutorial I would keep it limited to 2 slider frames, because there are more things to do. Now we will customize the slider controller and the timer.
Customizing the slider controller: Slider controllers let the visitors click and jump into any slide easily. Controllers also display the position of a frame in a slideshow.
Make the following changes in the Slider Controllers section
- Show Bullet/Line Controllers: Yes
- Controllers Style: Line
- Controllers Position: Bottom Center
- Controllers Gap From Bottom: 50
To get a linear controller interface, we will customize the “BULLET/LINE CONTROLLER NORMAL STYLE” section as follows.
- Height: 5
- Width: 15
- Border Radius: 18
Go to the Bullet/Line Active Style tab, and make the following changes
- Bullet/Line Active Height: 5
- Bullet/Line Active Width: 30
Setting the slider timer: You can show/hide the slider timer bar from the addon’s General settings tab.
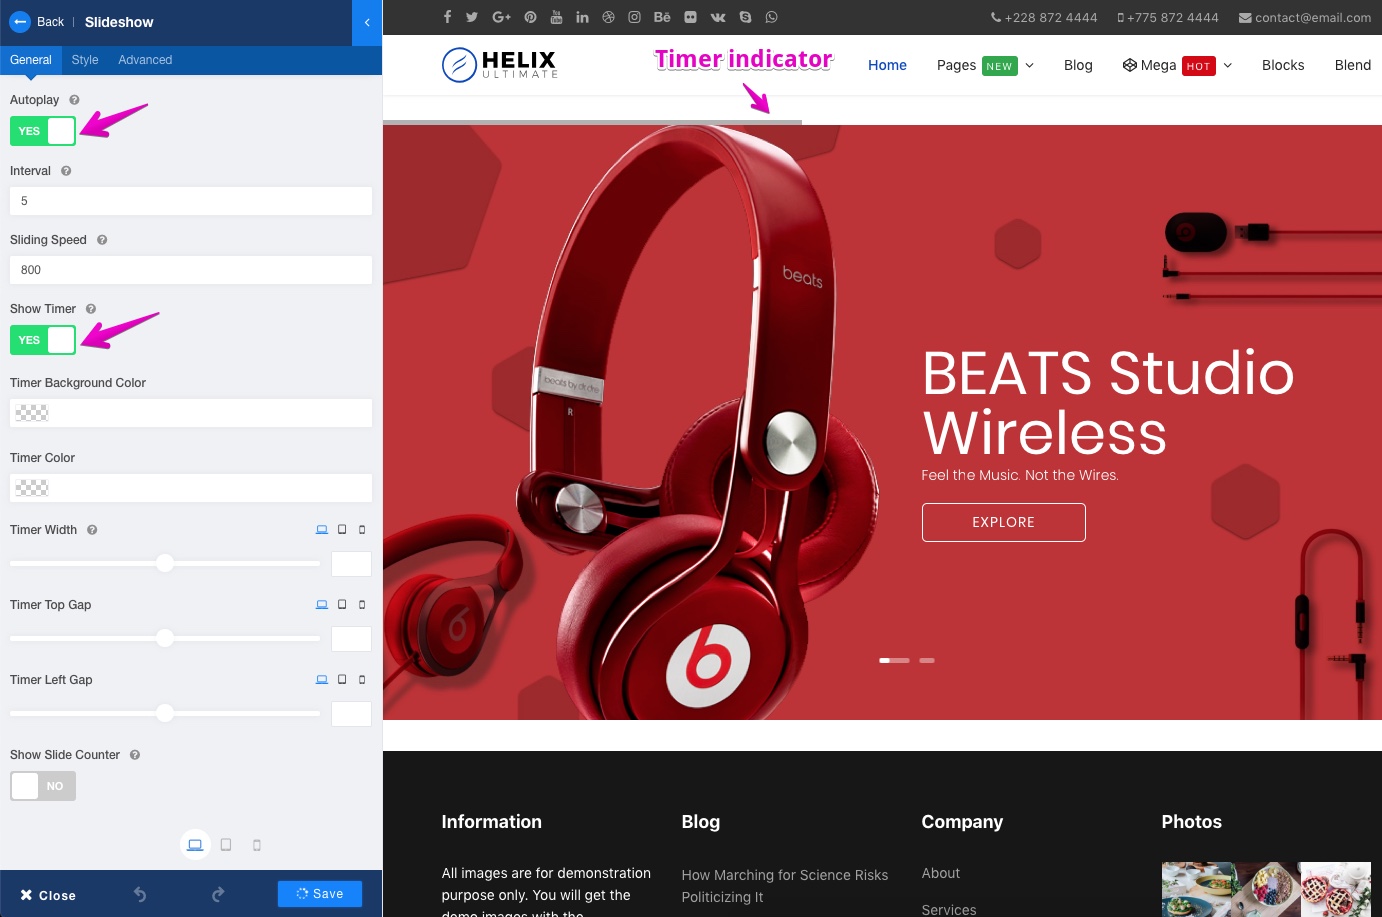
Also, there you can activate the autoplay along with other options.
Don't forget to save the changes by clicking the Save button at the bottom.
Done!
And... Our slider is now ready. Now let’s take a look at the output.

The Slideshow addon is a huge tool to build UNLIMITED slider styles with amazing effects. In this tutorial, I’ve shown a standard slider example. You can unleash your creativity to get your unique slider design and behavior. We’ve also released 16 readymade slider blocks with the announcement of the Slideshow addon. You can use them as well.
I believe this tutorial will be helpful in using the SP Page Builder’s Pro Slideshow addon to create a slider on your Joomla site. Have you already created a slider using the addon? Please share your thoughts and experiences with the community via comments.
Try SP Page Builder for FREE! Get SP Page Builder Pro Rate on JED


This is handy for making stunning slides using page builder.
ts great to have this turorial bcs slider is one of the most important feature for websites. :p
There is some to catch up with Wordpress for Joomla like https://revolution.themepunch.com/ and I also use this Createiv Joomla slider in my projects http://creativeslider.demo.offlajn.com/ ;)
Cheers!