

Joomla is an open-source content management system with a rock-solid infrastructure. Approximately 2 million active websites run on Joomla, and chances are you landed on this tutorial because you want to build one too. But a website needs to be hosted somewhere.
Hosting is like a “Home” to your website, where its files are stored and made accessible anytime, from anywhere. To host your website on the internet, you need to own a domain. But if you’re just in the development phase, hosting your site to the local web server is a great option to develop and test your site.
It only takes a couple of minutes to install clean Joomla or our QuickStarts on your localhost. It can also be tricky and problematic if you are attempting to do it for the first time. Whether you are a Mac, Windows, or Linux user, in today’s guide, we got you covered. Follow along with this tutorial and find out how simply you can get it done in just 4 steps.
Step 1: Setting Up a Local Web Server
You can set up a local web server on all platforms- Windows, Mac, and Linux. We will discuss them all in this article.
Windows and Mac
To install a local web server in Windows or Mac, you can choose a local server software such as XAMPP, WAMP, MAMP, or JAMP. In this tutorial, we will choose MAMP for its ease of use. But if you have a preference, go ahead and use the one you are most comfortable with.
What is MAMP?
MAMP is a web server solution package that stands for "My Apache - MySQL - PHP.” MAMP has both a Windows version and a Mac version. In this tutorial, we will be using MAMP. The package comes with the most recent installments of Apache, MySQL, and PHP which makes it convenient to host any web content.
Download and Installation
Go to the download page of MAMP, it’s available for free and paid. Download the installer file and open it to launch the installer. The installation process is just like a general app installation on Windows and Mac.
Installation prompts are pretty straightforward. You can maintain the default values and click on “Next”. Once the installation is complete, click on “Start Servers” and you should see your Apache and MYSQL servers running like the image below.
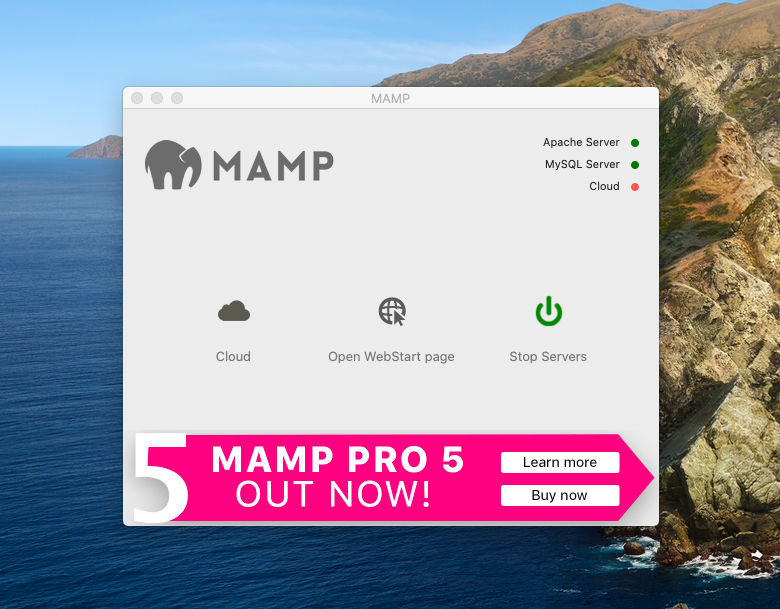
Great! Your MAMP is ready to work.
Quick Tips:
- If you get an error message saying the port is already taken, click the “MAMP” tab on the top then head over to Preferences > Ports > Set Mamp ports to default, and you should be good to go.
- Similarly, If you face any issue with the PHP version click on the MAMP tab then Preferences > PHP, and you can select your standard PHP version.
Linux
To install a local web server in Linux, you can choose any stack between XAMPP, LAMP, or BitNami Joomla! Stack. This section will guide through the process of installing XAMPP on Linux.
XAMPP Download and Installation for Linux
- Go to the download page of XAMPP for Linux and download the latest version to your Home folder.
- Open the Linux terminal and enter: sudo tar xvfz xampp-linux-7.2.30.tar.gz -C/opt Replace xampp-linux-7.2.30.tar.gz with your downloaded version of XAMPP. This step will also install Apache, MySQL, PHP, and FTP server.
- To start the server enter: sudo /opt/lampp/lampp start
You can also see this XAMPP documentation for more details.
Step 2: Download Joomla
Windows and Mac: Go to the download page of Joomla. You will see an option to get the latest version. Download the full package in ZIP format.
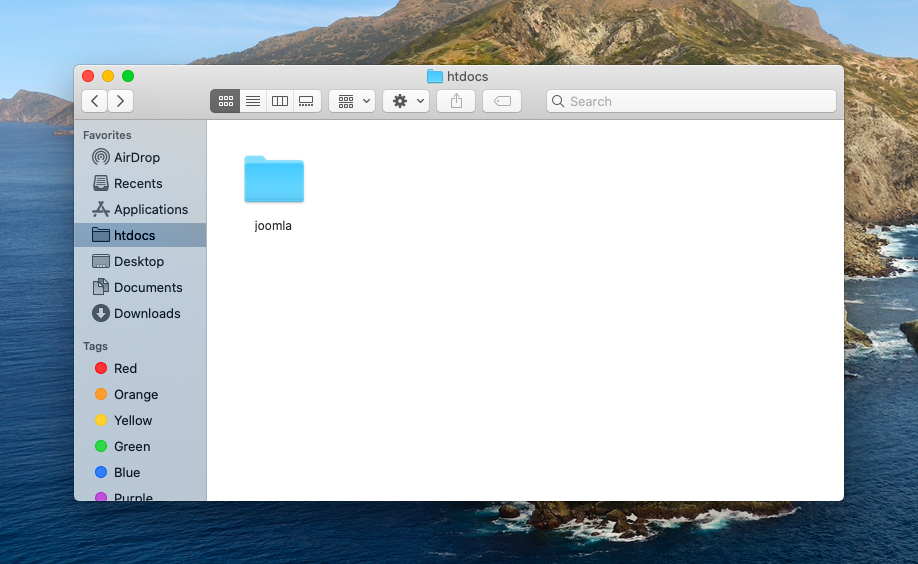
Once it’s downloaded, extract the .zip file and copy the folder to the htdocs directory of your MAMP installation drive.
Rename the folder to anything you want, for this tutorial we will name our folder “joomla”.
Quick Tips:
- It’s always a good idea to know the technical requirements before you download any software. Visit the Technical Requirements page of Joomla to check the requirements of supported software.
- You can also visit here to see a list of browsers supported by Joomla.
Linux:
- Go to the download page of Joomla. You will see an option to get the latest version. Download the full package in ZIP format for Linux.
- Unzip the folder to your hard drive.
- Connect to localhost with an FTP client Default, and create a folder for your Joomla on the localhost server (for ease of understanding we will call this folder “newfolder”).
- FTP the unpacked Joomla installation files to the newly created Joomla folder.
Configure Joomla
From your browser, go to http://localhost/newfolder. You might face an error in the Joomla installation screen, here’s a quick guide to fix them:
- Go to the terminal and type: sudo gedit /opt/lampp/etc/php.ini
- In the php.ini file, search for error_reporting =
- Change the value to error_reporting = E_ALL & ~E_NOTICE & ~E_DEPRECATED
- Again, in the php.ini file, look for display_errors = On
- Change the value to display_errors = Off
Restart XAMPP for the changes to take effect.
You can also see this page for more details.
Step 3: Create a Database
From here, the installation process is the same for Windows, Mac, and Linux.
To install Joomla you need a database to store data and access them. Ideally, MAMP connects Joomla to your database on a MySQL server. So, you don’t need to worry about getting a MySQL software, MAMP took care of it during the installation process. All you need to do now is create a database for your site.
Go to http://localhost/phpMyAdmin from your browser. Click on the “Databases” tab and you will see an option to create a database.
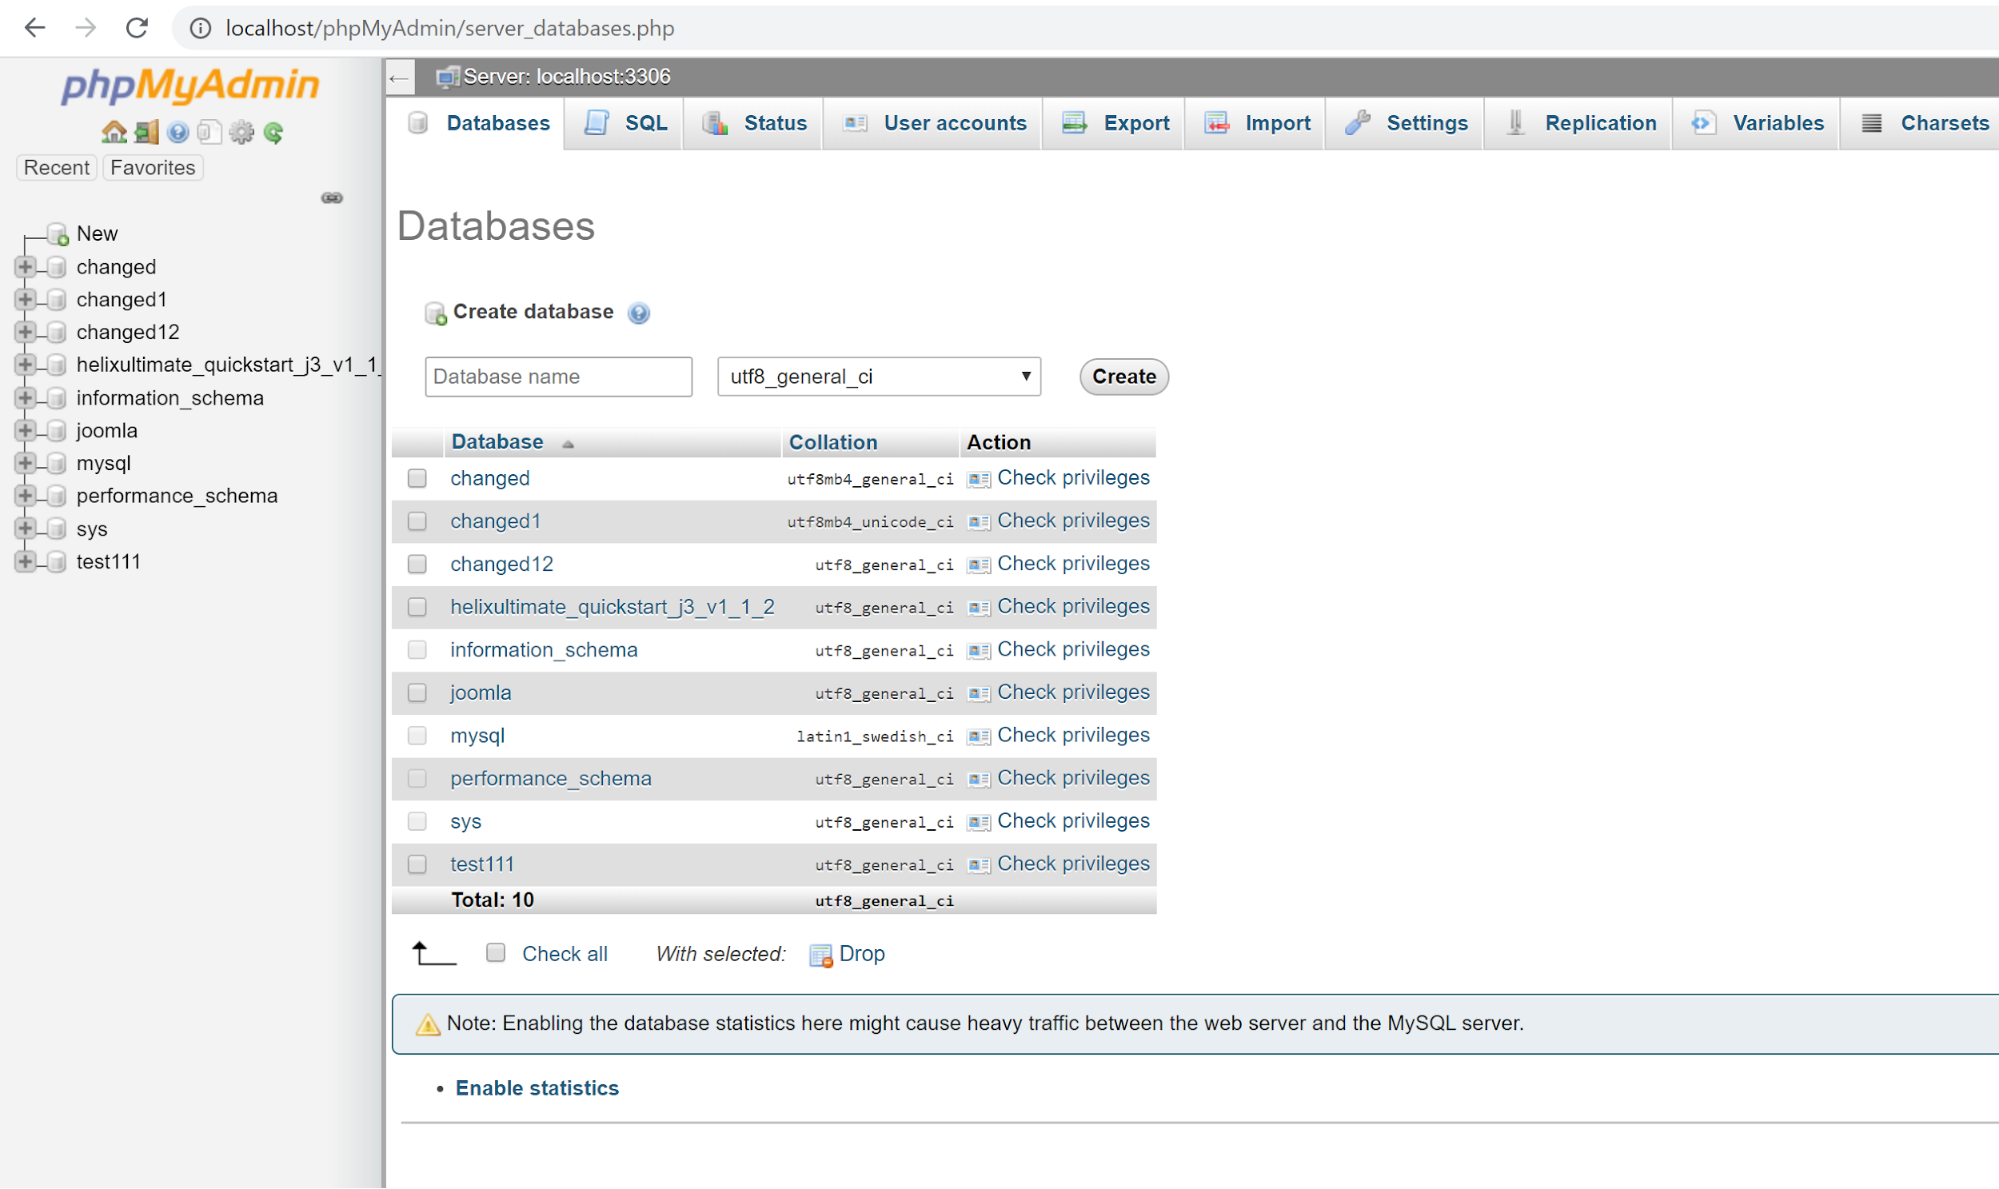
Give a proper name to your database and make sure to remember the name for our next step which is Joomla Installation.
Step 4: Joomla Installation
Now, comes the final step. From your browser, go to http://localhost/joomla. Here, “joomla” is the name of the folder where we have kept the Joomla files in the htdocs folder in Step 2. If you are following the Linux guide, go to http://localhost/newfolder. You will be presented with a screen like below.
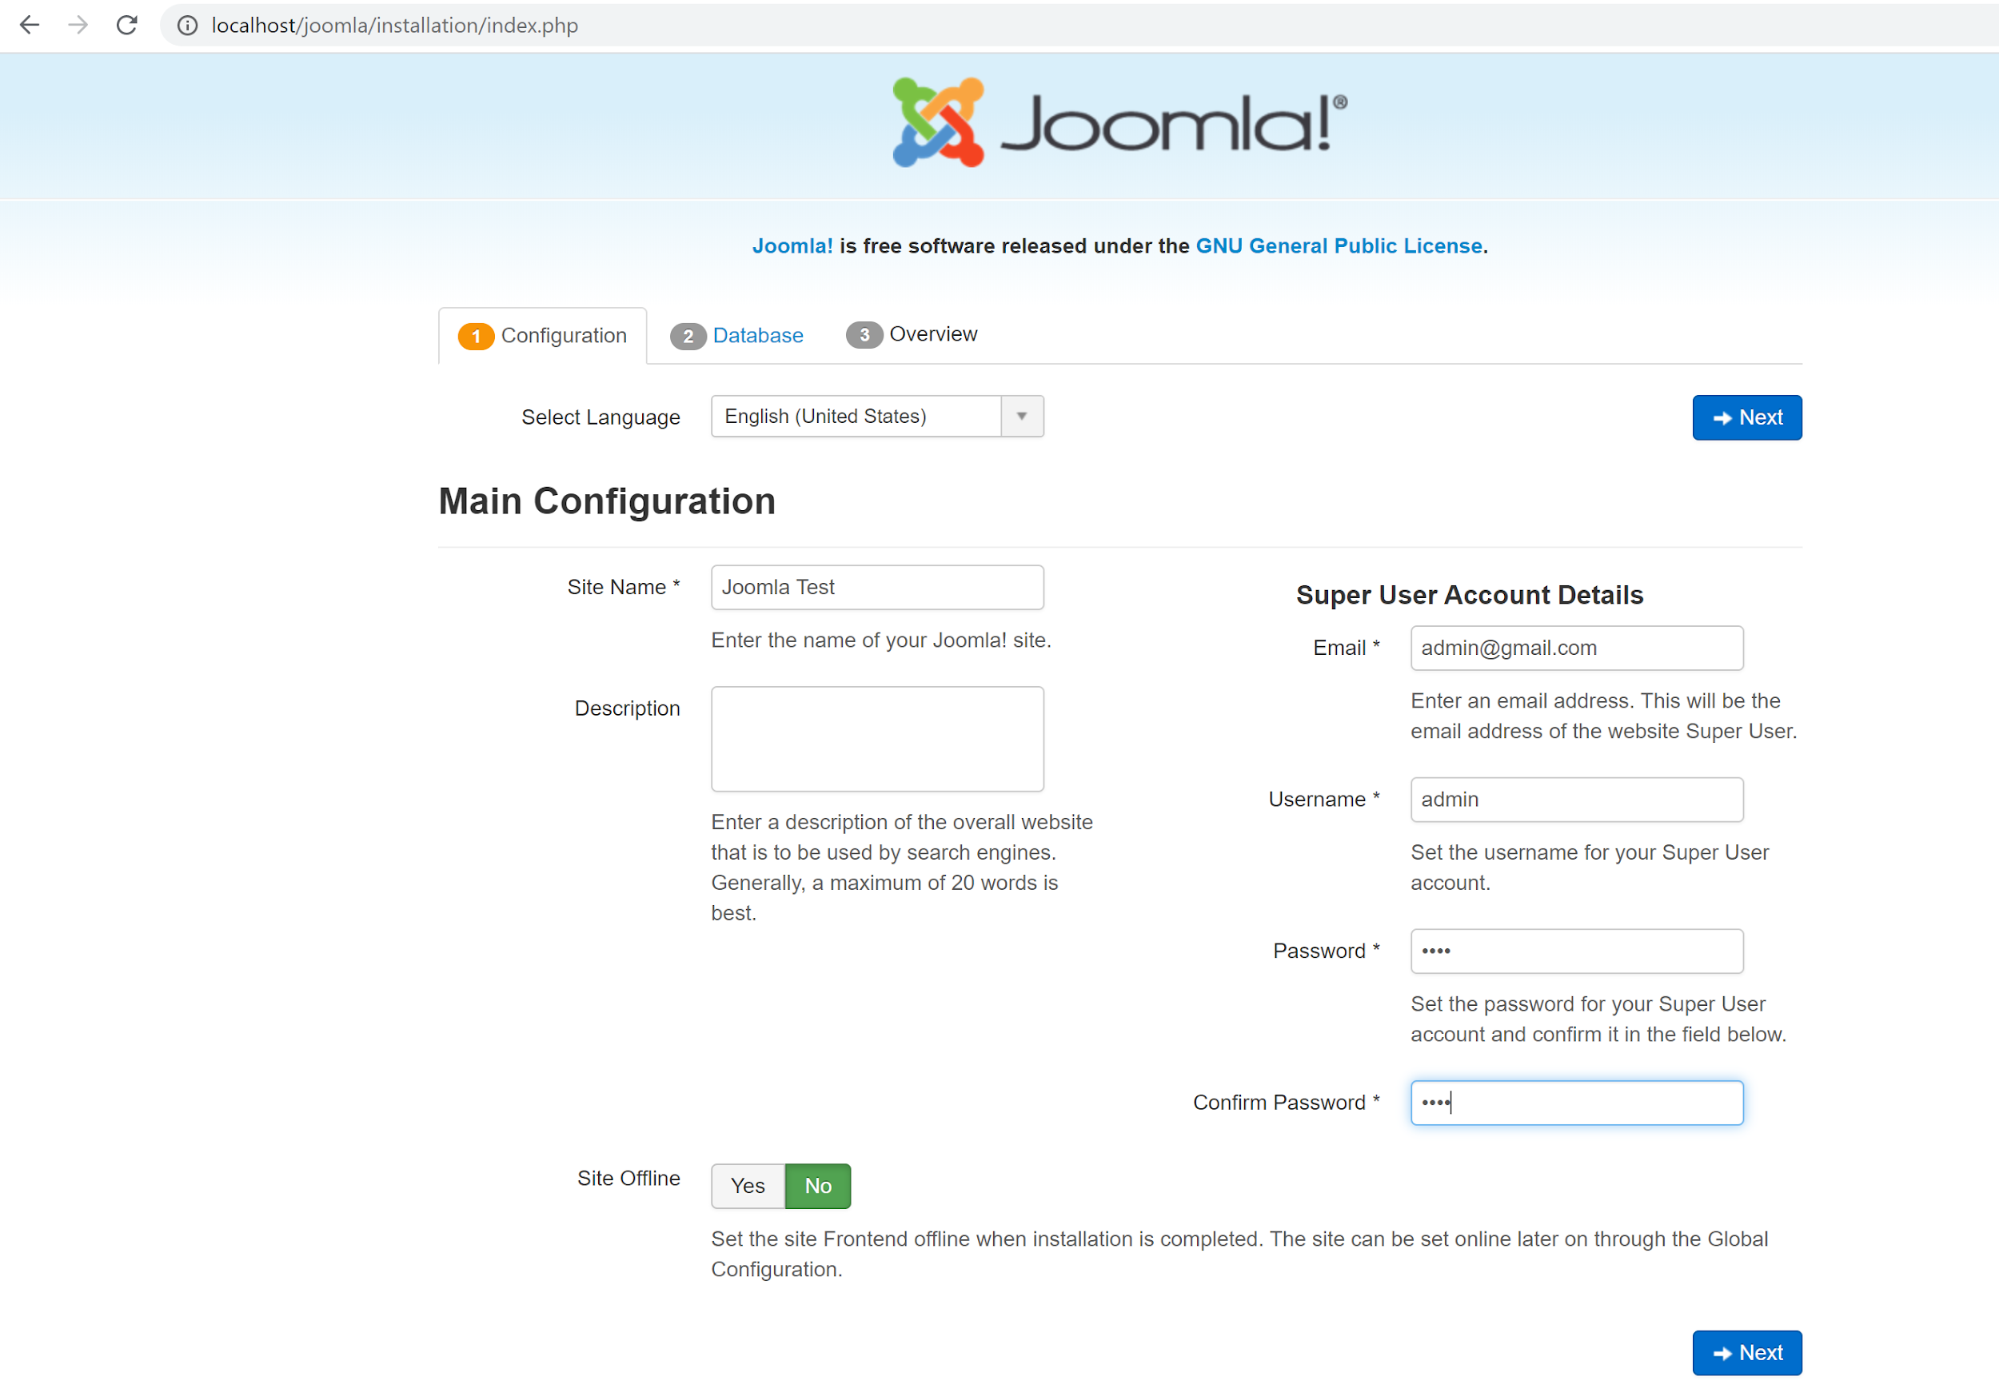
Fill up the required fields. Give your Joomla site a name, we named it Joomla Test. Set up the Super User account by providing your email, a username, and a password. Then, click on Next.
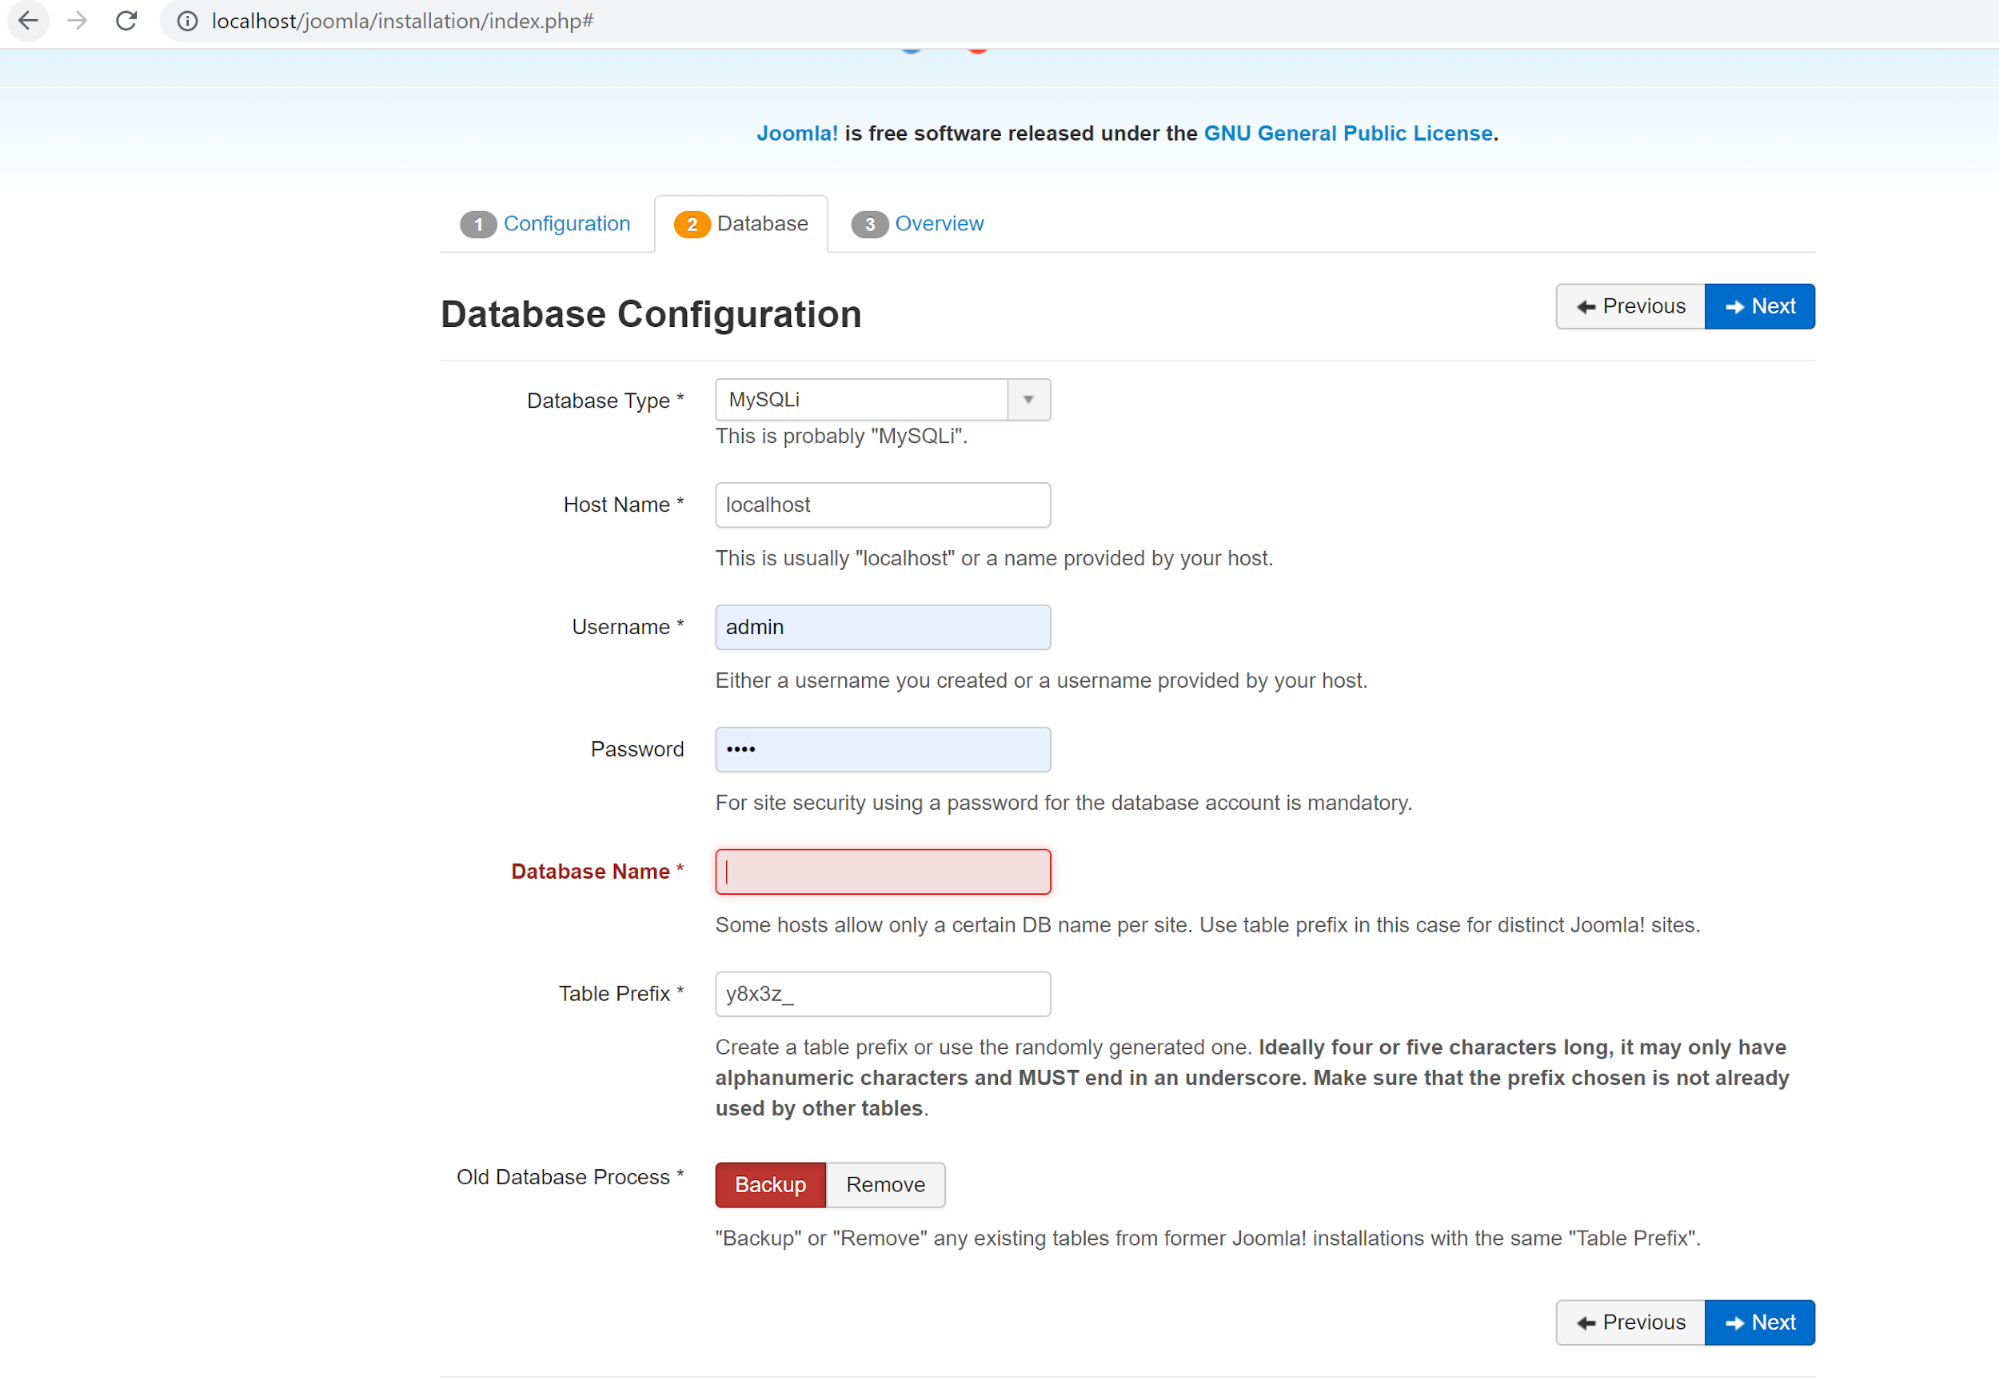
“Database Type” will be MySQLi by default. Let’s keep it that way. Since we are using a local web server, our “Host Name” will be localhost. In the “Username” and “Password” fields give the database username and password. By default, MAMP sets the database username and password as “root” and “root” which you can change later. However, the default database username and password policy in MAMP can be changed over time by its developer. So if you need assistance with this, please see MAMP documentations.
Remember the name of the database you have created in step 3? Yes? Good. Here, in the “Database Name” field enter the name of the database and hit next.
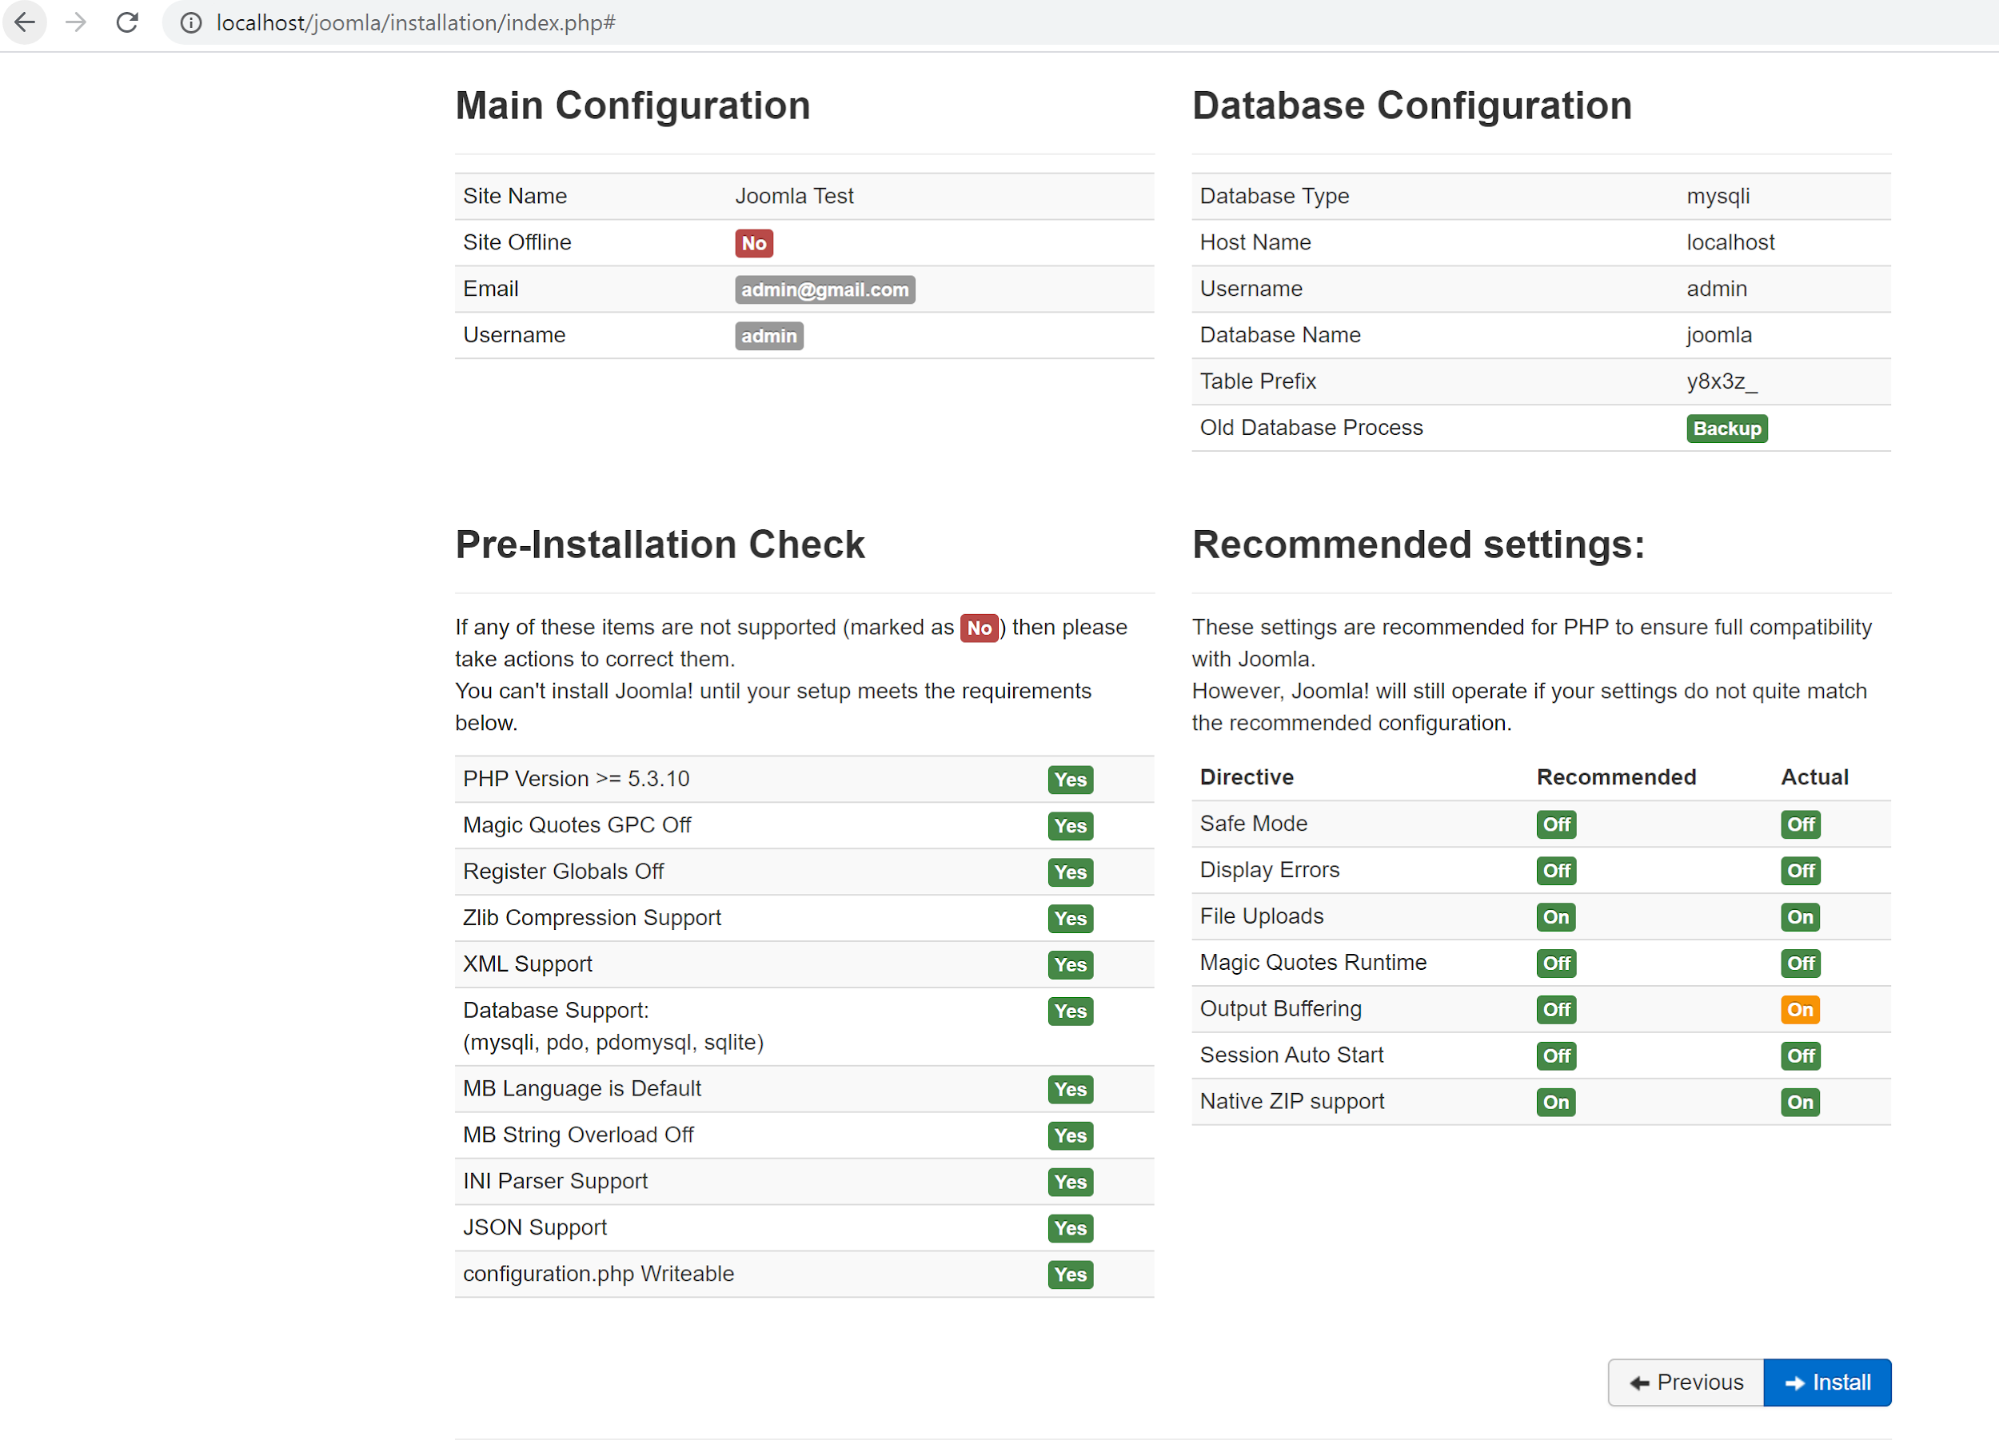
In the final step, Make sure all the items are marked as yes in the Pre-Installation Check section. If not, take the necessary steps to correct them. If everything is looking good so far, proceed on to install.
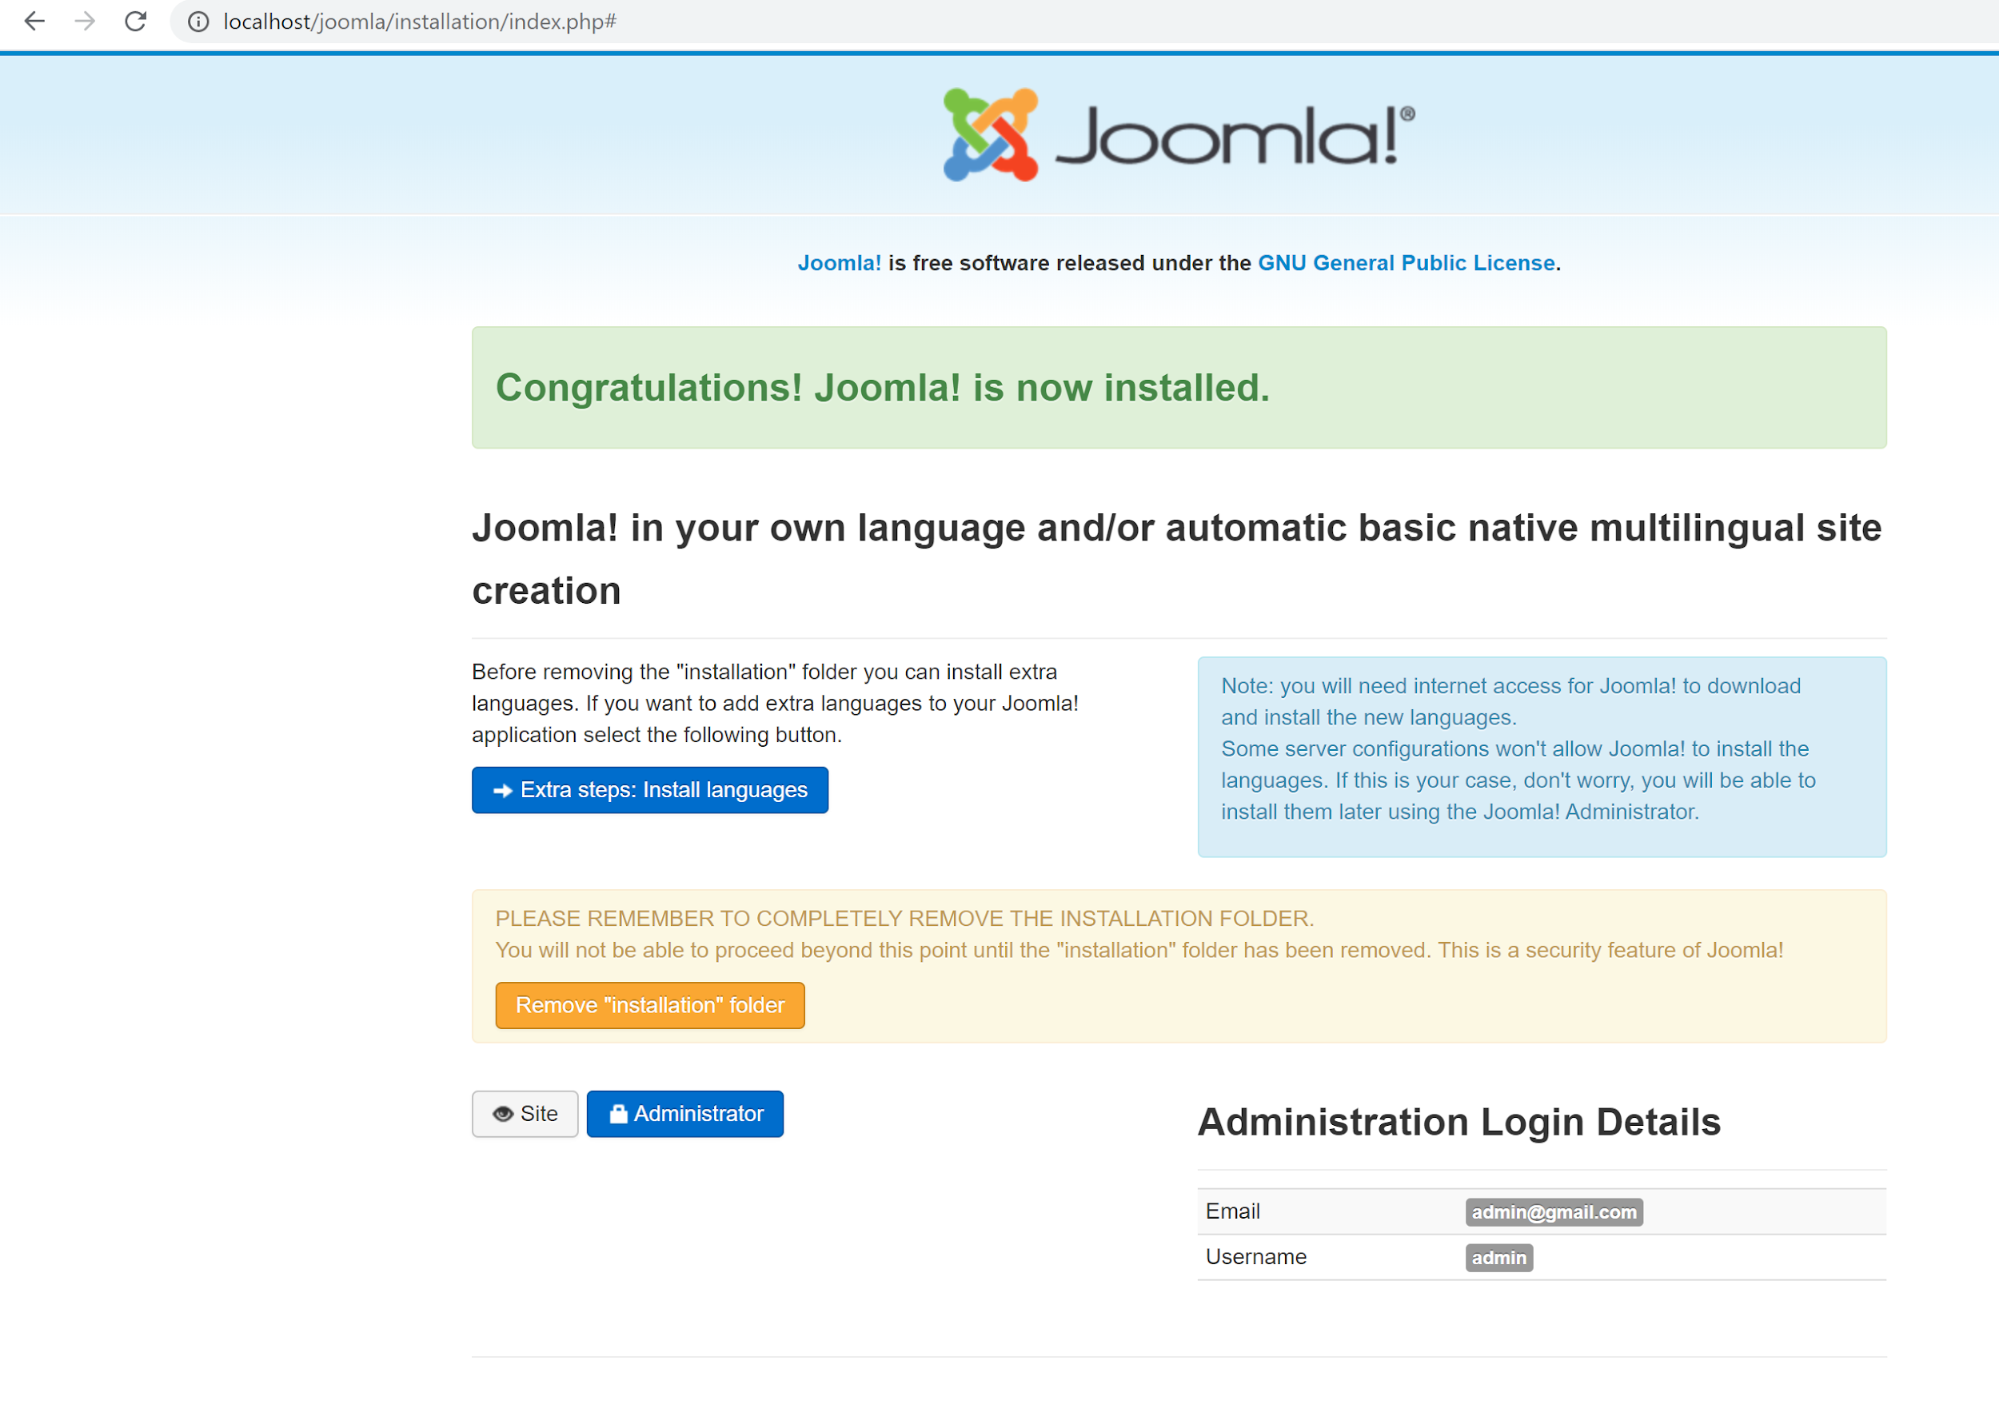
After some time, you will see a page that says “Congratulations! Joomla! is now installed”. To proceed further, you have to remove the installation folder. Once it’s removed, click on the “Administrator” button and log in using the username and password you have used to create the Super User. This is also called the backend of your website. You can view the frontend by clicking on the “Site” button.
Start Creating Content
Now that you have Joomla installed on your localhost, it is time to play around with it and build amazing sites. If you are a beginner or a non-coder, you can still build a site with advanced functionality with your favorite templates and a couple of needed extensions, for example, SP Page Builder Pro. Whether you are building a personal website or a one for your business, there are hundreds of Joomla templates that can make the development phase a piece of cake.
Feeling a little lost here? Give this a read for more in-depth knowledge on how to get started with QuickStarts. Do not forget to keep an eye on our blog for regular updates, new releases, and more tutorials.
That’s it. Give yourself a pat on the back if you have successfully come this far. We hope this tutorial was helpful and feel free to ask us questions if you got stuck anywhere. Go ahead, explore, and experience the endless possibilities Joomla has to offer to build your site. Good Luck!


At localhost there is no need to create the database before installation, because by filling in the database field as shown in step 4, the database is created automatically.
this is the small difference between localhost and the web server.
Thank you
Best Regards
Thanks.