- TemplatesTemplates
- Page BuilderPage Builder
- OverviewOverview
- FeaturesFeatures
- Dynamic ContentDynamic Content
- Popup BuilderPopup Builder
- InteractionsInteractions
- Layout BundlesLayout Bundles
- Pre-made BlocksPre-made Blocks
- DocumentationDocumentation
- EasyStoreEasyStore
- ResourcesResources
- DocumentationDocumentation
- ForumsForums
- Live ChatLive Chat
- Ask a QuestionAsk a QuestionGet fast & extensive assistance from our expert support engineers. Ask a question on our Forums, and we will get back to you.
- BlogBlog
- PricingPricing
How to Install Quickstart Package in Joomla 4
If you have ever tried to install a Joomla Quickstart manually then you might have noticed it comes with a lot of settings and options that need to be configured for you to use it smoothly. To help ease the struggle Quickstart packs are there that come together with the sample data and all the necessary items and ingredients that are required. And all these together will help you let your site get going in no time.
In this tutorial, you will get a closer look at how you can get your Joomla Quickstart pack downloaded and installed in Joomla 4.
What is a Joomla Quickstart Package?
A Joomla Quickstart pack is actually a copy of a template's demo website consisting of all the related necessary components like all demo site extensions, installed and configured templates, sample data containing the configured extensions, custom contents, etc. In short, Quickstart.zip is the exact demo site of a particular template.
As the package is loaded with quite a few elements it is about 30 MB in size and not 2MB like the template only pack.
Downloading the Quickstart Package
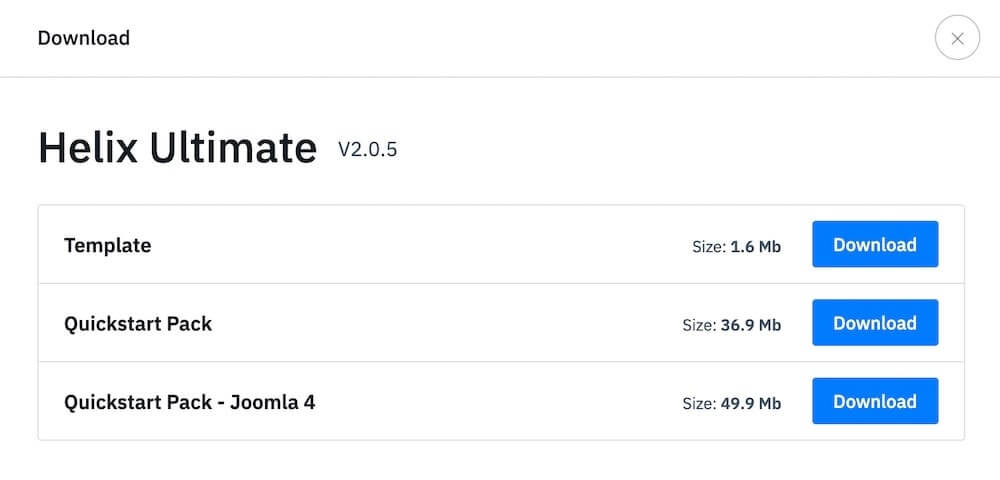
If you are looking to get attractive and responsive Quickstart packages to give the desired look for your website grab yours from the JoomShaper website. After logging in to our website navigate to the Products tab and choose Templates from the dropdown menu. Choose your desired template that you wish to install and choose the Quickstart Pack - Joomla 4 button. Click Download.
Methods of Installing Quickstart Package
You can install the Quickstart package both on the localhost and the web server. In this tutorial, we are going to see the Quickstart installation methods both on the server and the localhost.
So, let's get started.
Install Quickstart on a Localhost
If you are locally developing your website and looking to install the Joomla Quickstart pack then you need to have it installed on your localhost. Follow along with these simple steps and your Quickstart package will get ready to go in no time.
Copying and Unzipping Quickstart Pack to the Localhost
To set up your Quickstart pack on your localhost you can use local server software like MAMP, WAMP, XAMPP. Assuming you already have set up your local web server environment, copy the Quickstart zip file that you have just downloaded to the htdocs folder of the local server that you installed. Extract the Quickstart zip file there.
In case you haven’t installed any local web server and need relevant help you can check out the tutorial here.
Visiting Localhost Address to Start the Installation
Now open your browser and type “localhost” in the URL panel.
Click on the unzipped folder from the Index page which will land you on your Quickstart’s installation page. You should be able to see the screen given below:

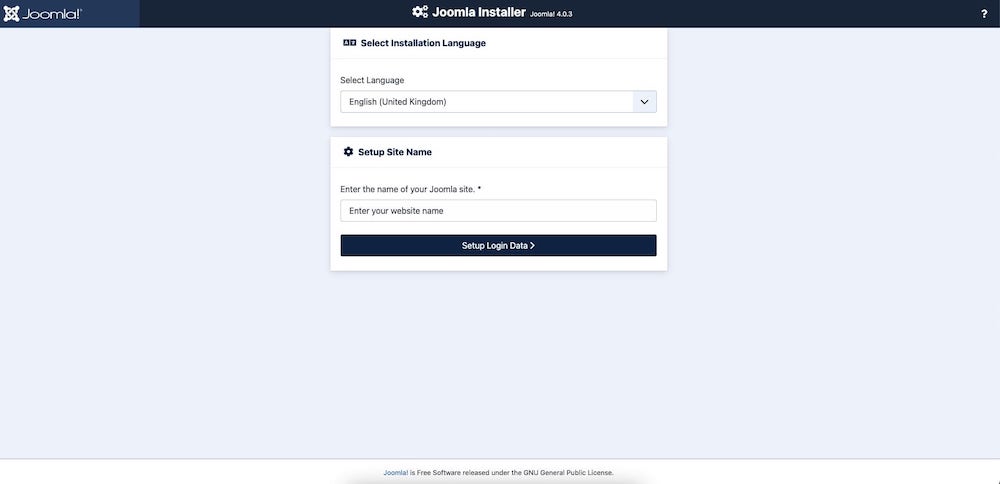
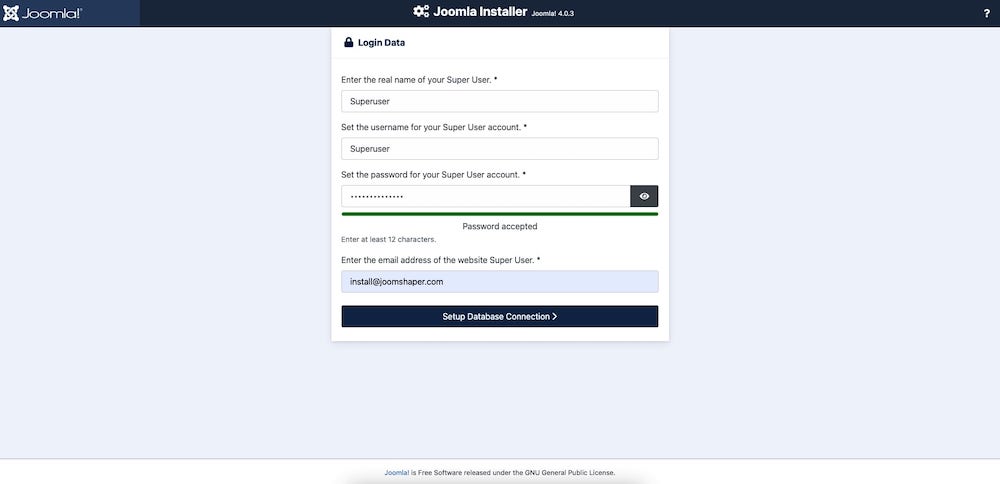
Enter your website name and go to the next page. Fill out the login data using your site name, username, and password.

Hit Setup Database Connection once you are done. This will land you on the database configuration page where you carefully need to fill out the form.
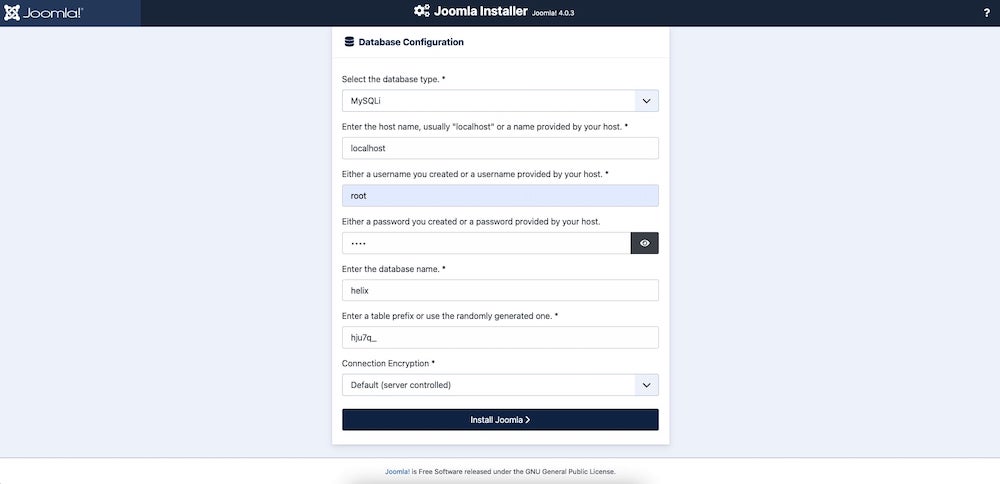
Enter the username and password of the database as “root”. (Default for localhost software like MAMP. Please check for your localhost software). Now set a database name and click next.
Installation Completed!
Once you have successfully completed the installation the following page will appear.
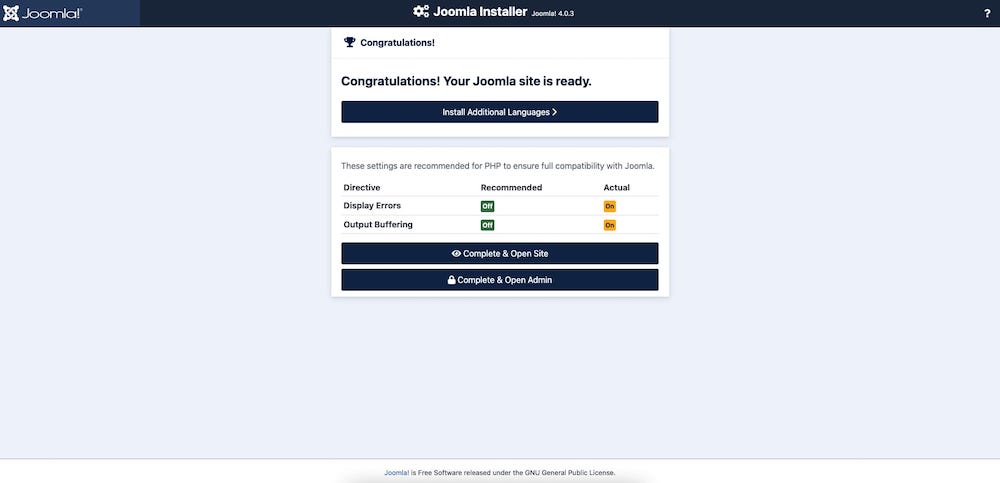
Now hit Complete and Open Admin to access your Joomla backend administrator.
Install Quickstart on a Web Server (Cpanel)
Now, we will take a look at how to install a Quickstart pack to your web server. There are two ways to upload the Quickstart file to your server.
- cPanel
- FTP client
In our case, we will be using the cPanel as our web hosting control panel. Assuming your host uses cPanel, your host should provide you with a direct link to access cPanel. Once you visit that address, you’ll be prompted to log in with your cPanel username and password.

If you haven’t received your username and password please contact your hosting provider for support and help.
Upload the Quickstart Pack to the Server
After logging in to your cPanel using your username and password, go to File Manager from your cPanel dashboard.
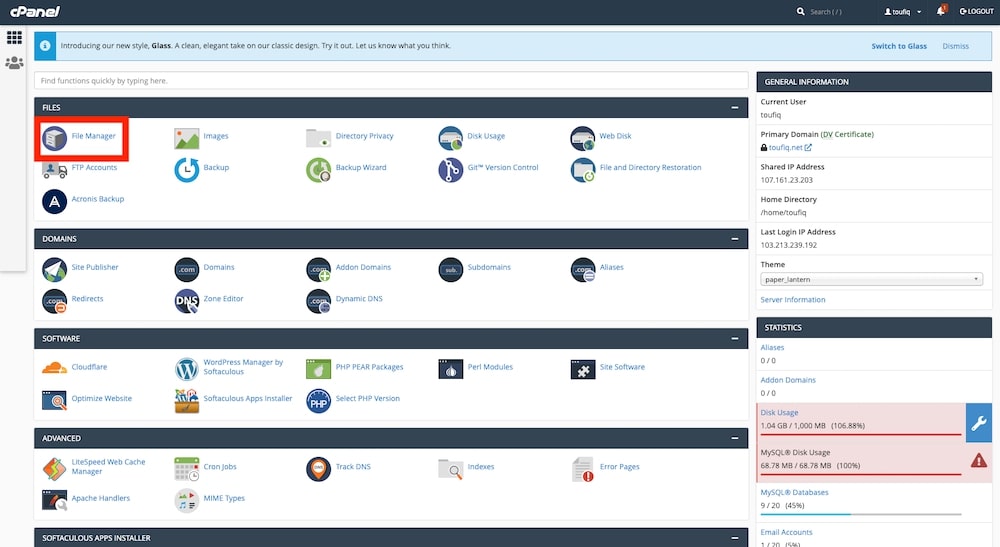
Now on cPanel’s file manager, there are two ways for you to upload your files.
First of all copy the folder that you got after extracting your Quickstart zip pack. Now you can start off by clicking on the file manager on your cPanel and then navigating to the public_html folder. Then simply paste your extracted folders there.
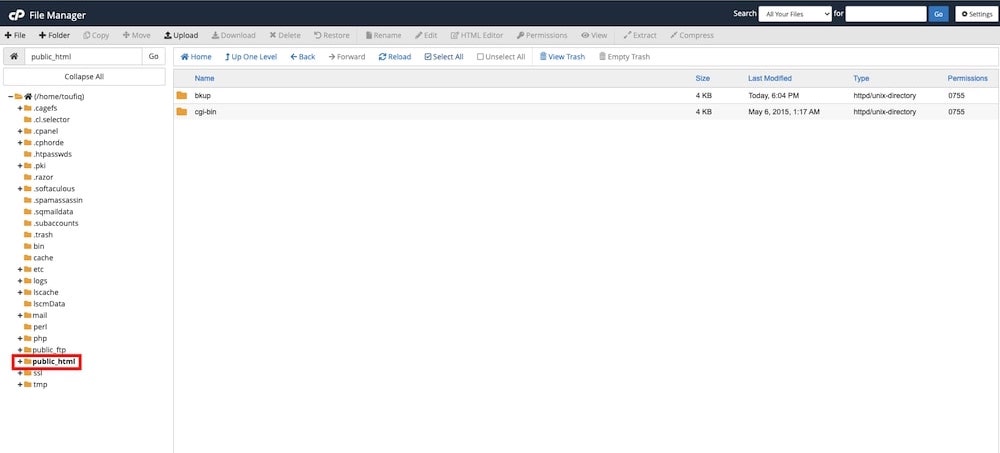
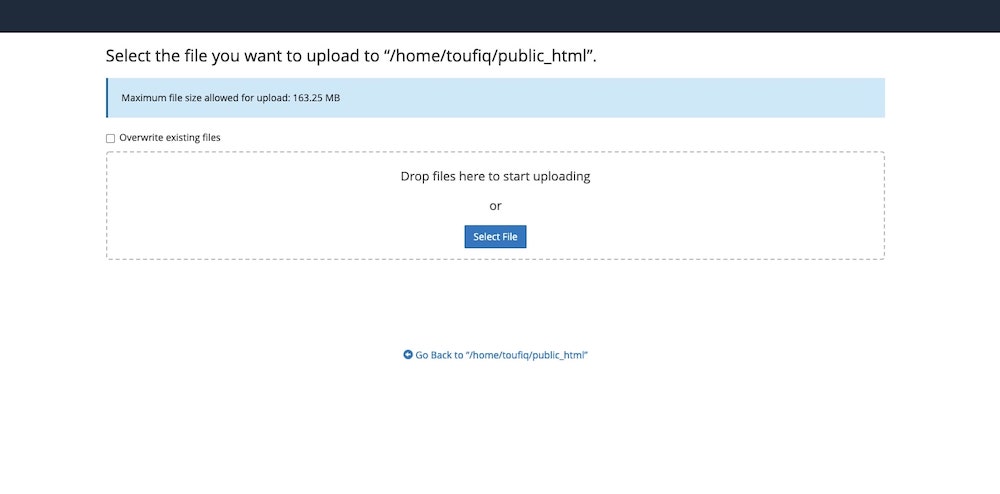
Or you can also upload your downloaded Quickstart zip file to public_html in your File Manager.
Create a New Database and a Database User
While installing the Quickstart pack on your server you will come across a ‘Database Configuration’ page that will require valid information. For that, we need to create a MySQL database user and a database on your web server first. Let’s take a look at how we can create a database.
On your cPanel visit the MySQL Database Wizard on the cPanel and create a database first.
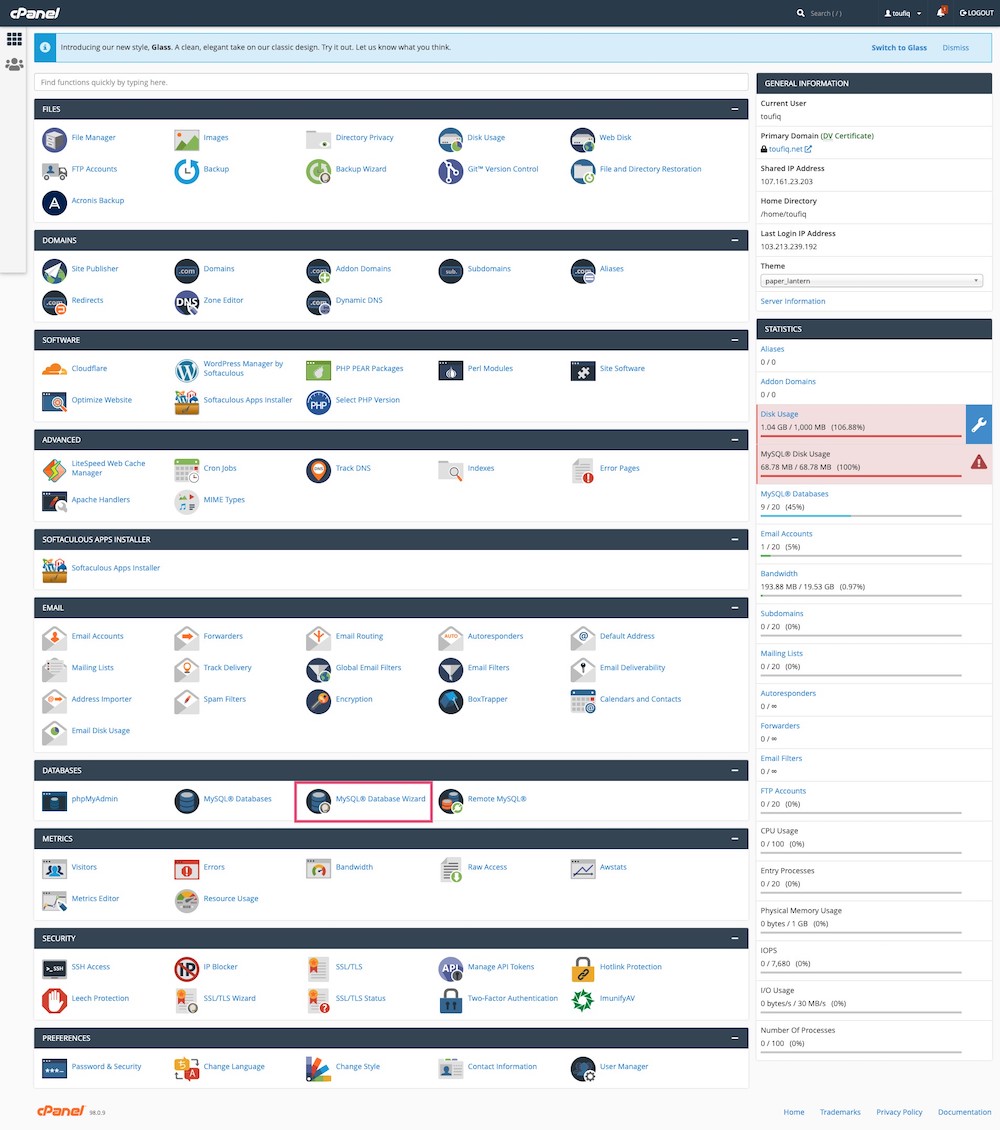
Give a name to your database and hit Next Step

Now create a database user by filling out the username and confirming your password on the same environment of the cPanel MySQL Database Wizard.
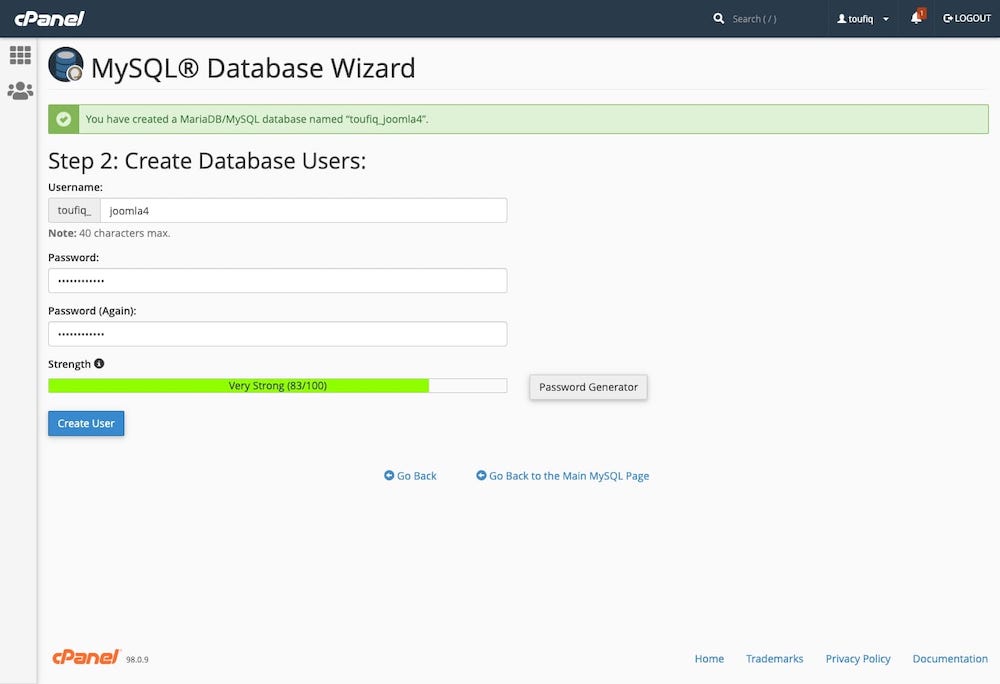
Now that you have a database and a database user, it is time to assign all the privileges to the MySQL user. Choose all privileges in the ‘ Add user to the database ’ page and hit Next Step.
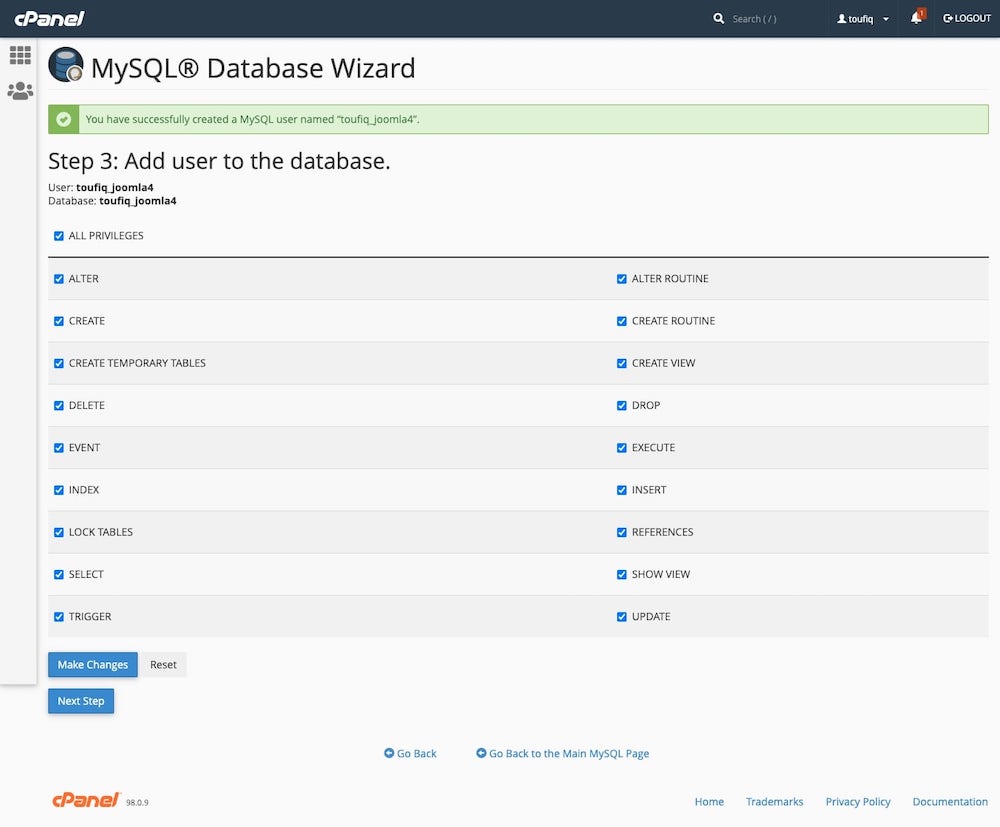
You have successfully created a new database and a database user!
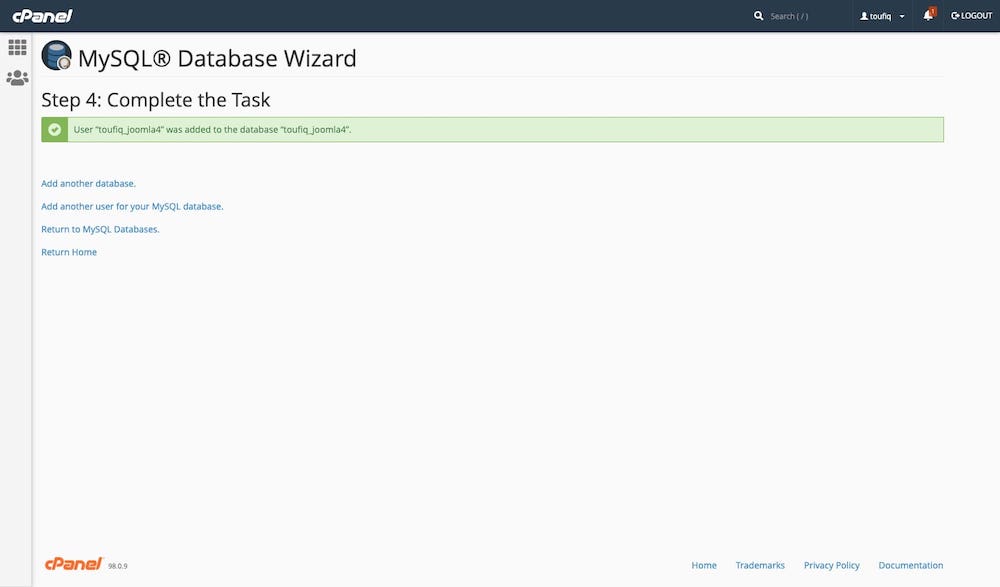
Start Installation by Visiting Your IP/Website Address
To start your installation, open your browser and navigate to the URL panel and type in your appropriate domain name. You should be able to see the initial installation page at this point. Follow through the installation process as you have done for your localhost.
In the database configuration page use the database username and password of the user you have just created along with the newly created database name. Hit the install button.
Once the installation is complete, a success message will show up.
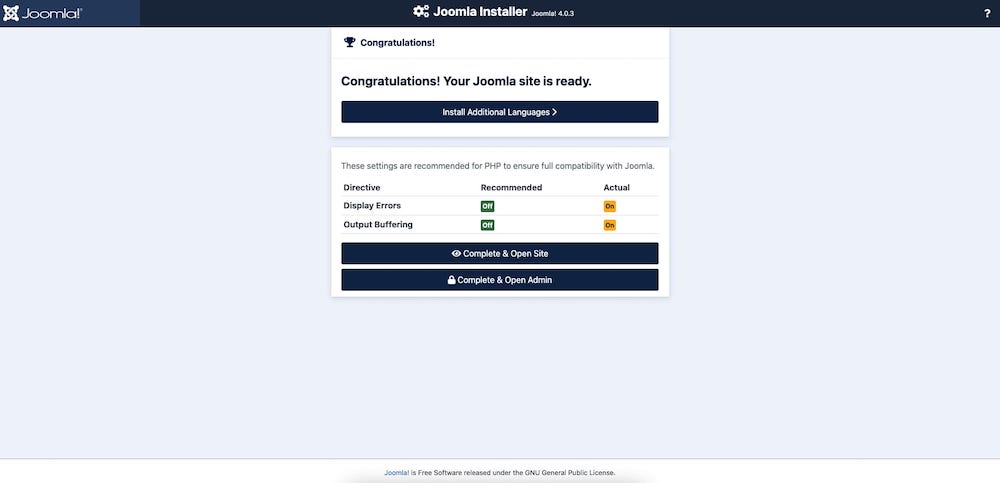
Installation Completed!
That’s it! You’ve successfully installed your Quickstart package in Joomla 4 on your web. Click Complete & Open Admin to view and edit your newly installed Quickstart pack.
Summing Up
So far in this guide, you have learned two different ways of setting up the Quickstart package. Hope you could find your way through to your preferred Quickstart pack using this tutorial. Do not forget to keep an eye on our blogs for regular updates, new releases, and more tutorials and please do share your valuable thoughts and opinions in the comment section below.


nothing is developed that is really functional, where we can offer our customers whole projects.
you sometimes use store systems that nobody needs. you build restaurant templates without order processes. if i were you, i would rethink and go with the times.
there are order forms and store systems that are so great, why don't you continue to expand your same old websites?
that's my frustration... sorry.