

Creating a poll
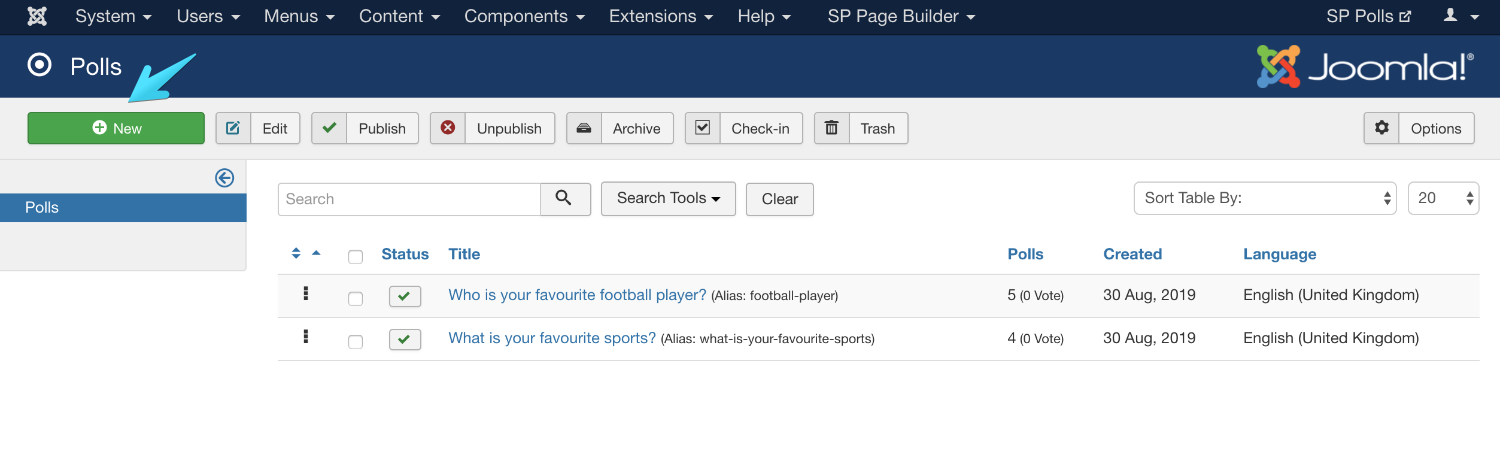
When you have successfully installed SP Polls on your website. You will find it under the Component section of the top bar on your Joomla backend. You can access the administrator panel by going to Joomla backend > Components > SP Polls.

Once you are on the SP Polls administrative panel you can start creating your polls. To create a new poll you need to click on the “New” button.
Clicking on the New button will open up the poll creation settings.
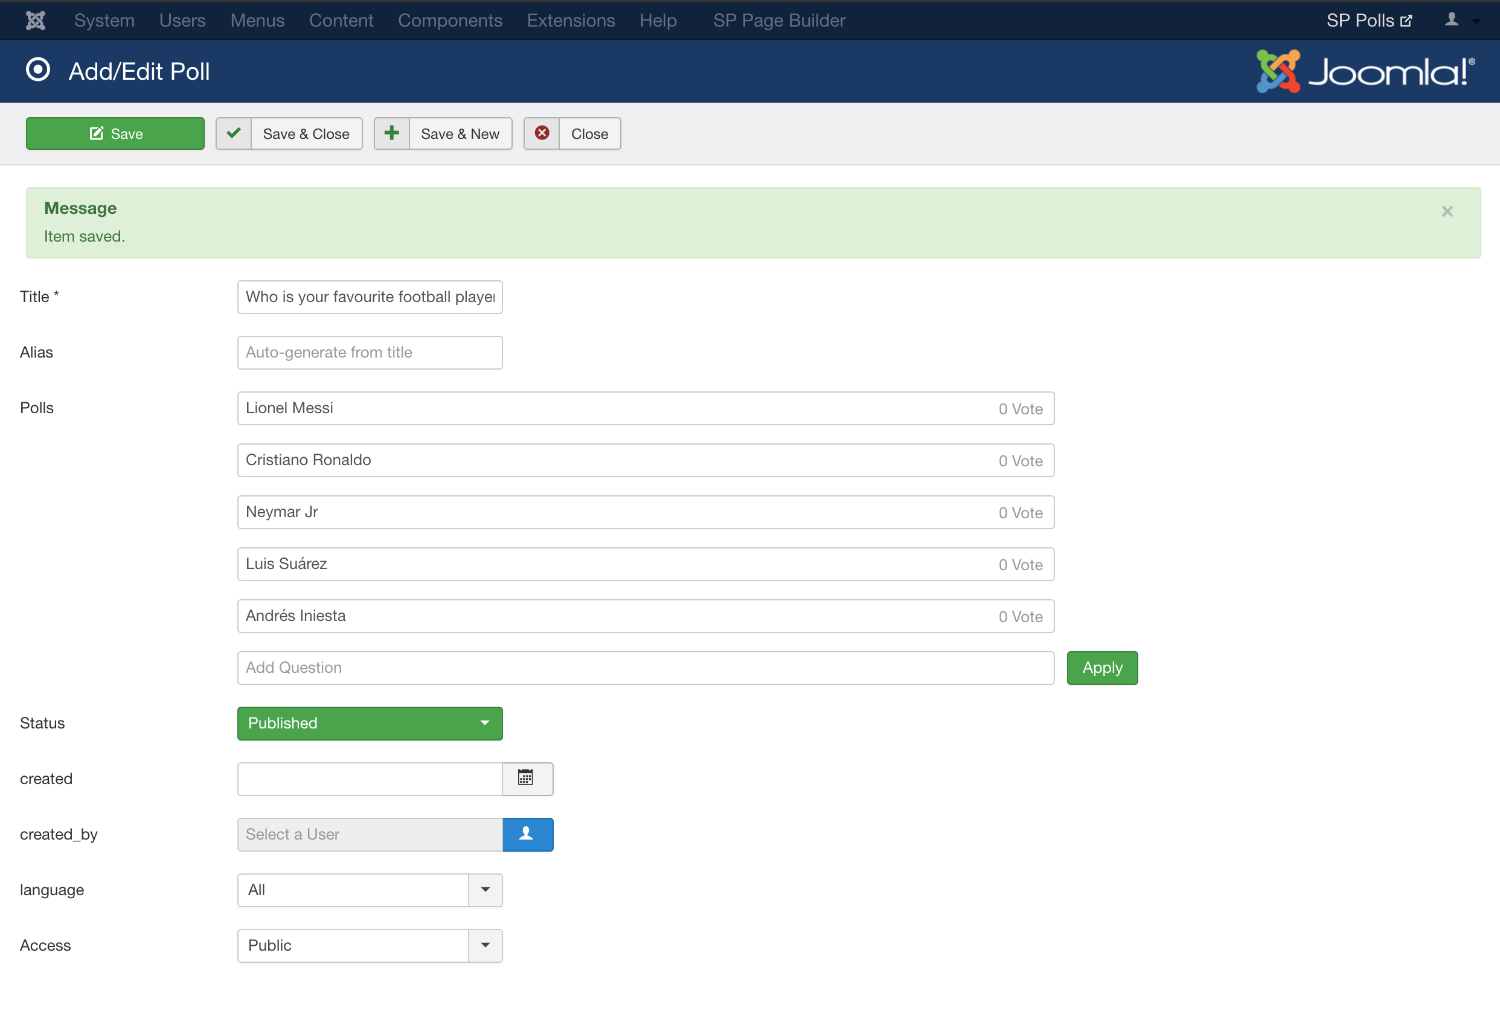
Title: This is where you need to type in your Poll question.
Alias: It’s the unique link for all the polls that you create. You can put a custom alias or leave it blank. If left blank Joomla will automatically create a unique alias.
Polls: This is where you add all the choices of the poll. You can create as many options as you want. After writing a choice hit apply to add it in the list.
Status: Control if you want to publish the poll.
Created: It is the creation date that is automatically retrieved by the system but you have the liberty to change the date.
Created By: This field is also filled automatically by the system but if you want to change the user, hit the blue button to assign the poll to a different user.
Access: Joomla has a few default access levels and you can also create your own access level as well by going to Joomla backend > Users > Access Levels > Add New Access Level. You can define the access level for this particular pool from here.
Finally hit save and close when you are done creating the poll.
By repeating this process you can create as many polls as you want.