

How to create a Udemy like eLearning platform using Joomla

Everyone, including professionals, students, even researchers look for online courses at some point in their life. And the success of a platform like coursera, udemy, lynda show us how desperate are people to learn the right thing that they need to boost up their skills. If you’re wondering how to start an online learning platform in Joomla. Well, look no further. Today is your lucky day!
There are a few ways to do it. If your Joomla site is already up and running and you want to turn it into an online learning platform you can use an LMS extension. The term LMS stands for “Learning Management System”. The best one on the market is SP LMS for that purpose. We’ll build one online learning platform ourselves using it. If you don’t have any website up and running then no worries either. We’ll build it from scratch.
First thing first
Creating an online learning course platform in Joomla will require the following things:
- Domain Name: A domain name is your website address. Like joomshaper.com
- Hosting account: The storage of your website’s files.
- Setting up Joomla: For a functional website.
- LMS extension: We will use SP LMS here.
A brief discussion on how to create a Joomla website will be found HERE.
Let’s get started
I’ll assume that you already have set up your Joomla website by the help of the above article. Your next job will be creating an online course platform. To do so, follow the steps below.
Setting up SP LMS
You can download the SP LMS extension from HERE. Then follow these steps:
- Log into your Joomla Control Panel.
- In the top menu, go to Extensions and then click on Manage > Install.
- Under Upload Package File, click Browse and select the component that you downloaded above.
- Then click Upload & Install.
As you know, the Joomla control panel top menu looks like the following. You might not see it in our screenshots in this post, because we've tried to keep them focused to the main contents.

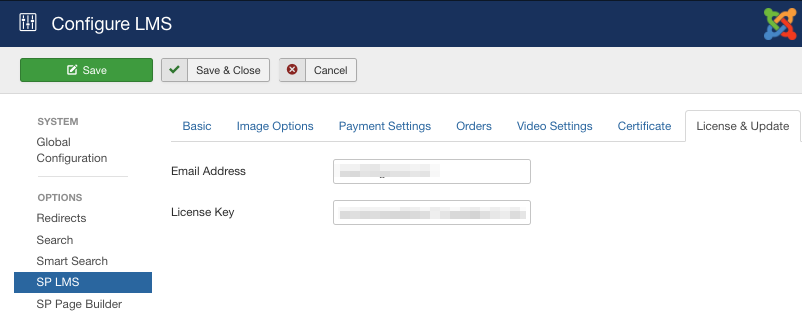
After successful installation, you need to add your email and license key. Go to System > Global Configuration > SP LMS > License & Update to set it up.
Configure the settings
It’s advised to configure all the settings of SP LMS before adding any courses. Navigate to System > Global Configuration > SP LMS to do so.
Basic
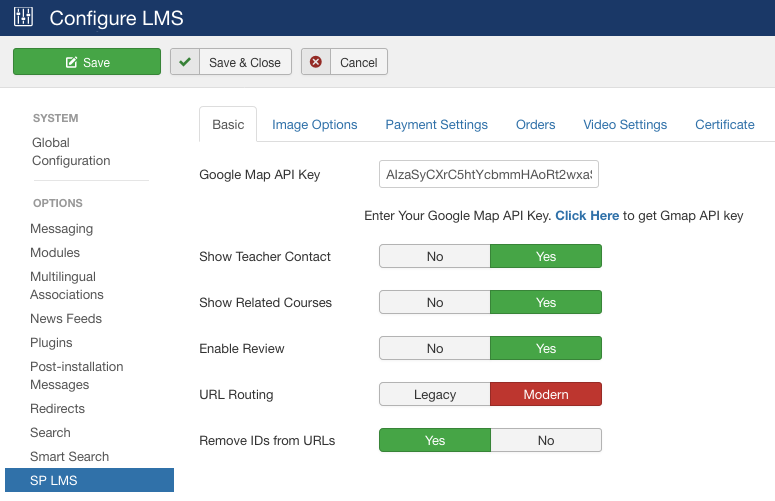
If you are going to arrange any event, you might want to show the location on Google Maps. To show your event location, you need to add your Google Maps API key here. The Basic tab will also allow you to control if you want to show teachers contact info, related courses, and review. You may want to hide IDs from URLs, in that case, you need to set URL Routing to “Modern” and select “Yes” from “Remove IDs from URLs”.
Image Options

Set the course and event thumbnails size from this menu.
Payment Settings
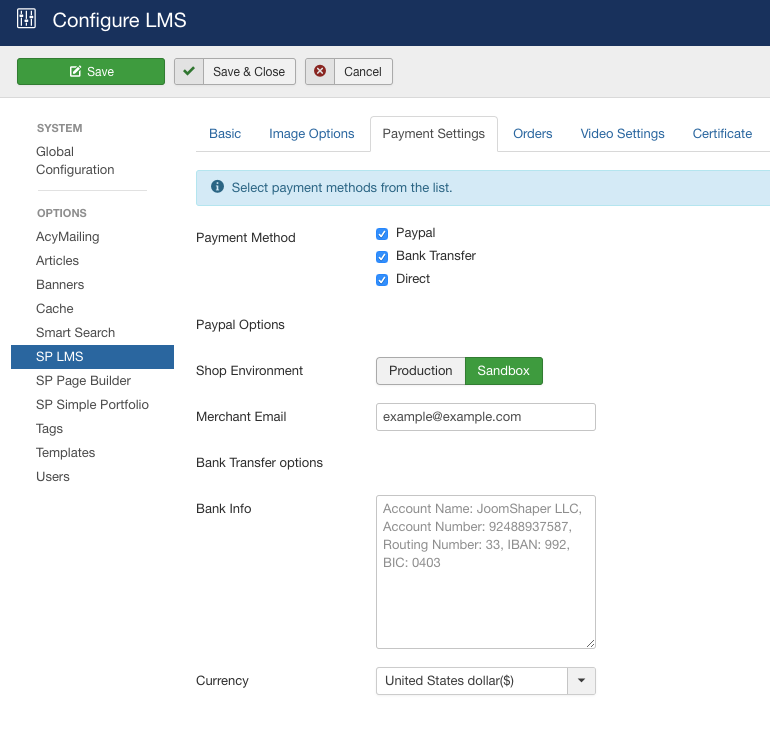
You can choose the payment method you want to use from this section. Set your Paypal email address if you want to use Paypal. Add Bank info if you want to set Bank Transfer as your payment method. You can also select all three of them. To set native currency, go to the "Currency" option and select your desired one from the dropdown list.
Orders
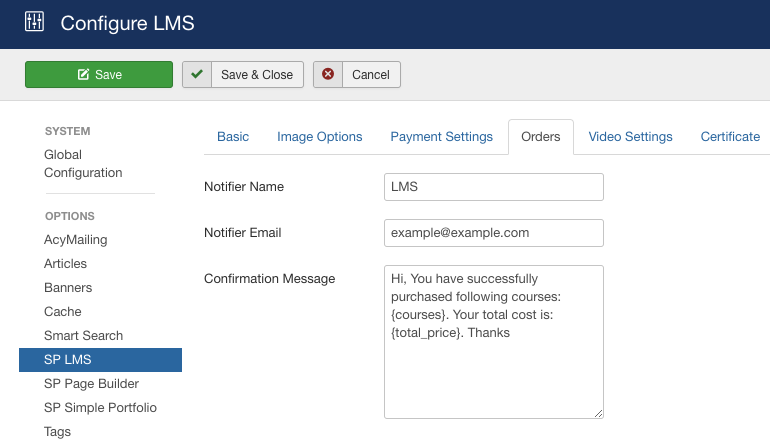
After a successful purchase of any course, the user should get an automatic email confirmation. You can set up the credentials from this section.
Certificate

Set your certificate details and logo from this section. We will see how to add a certificate for a particular user later.
Permission (ACL)
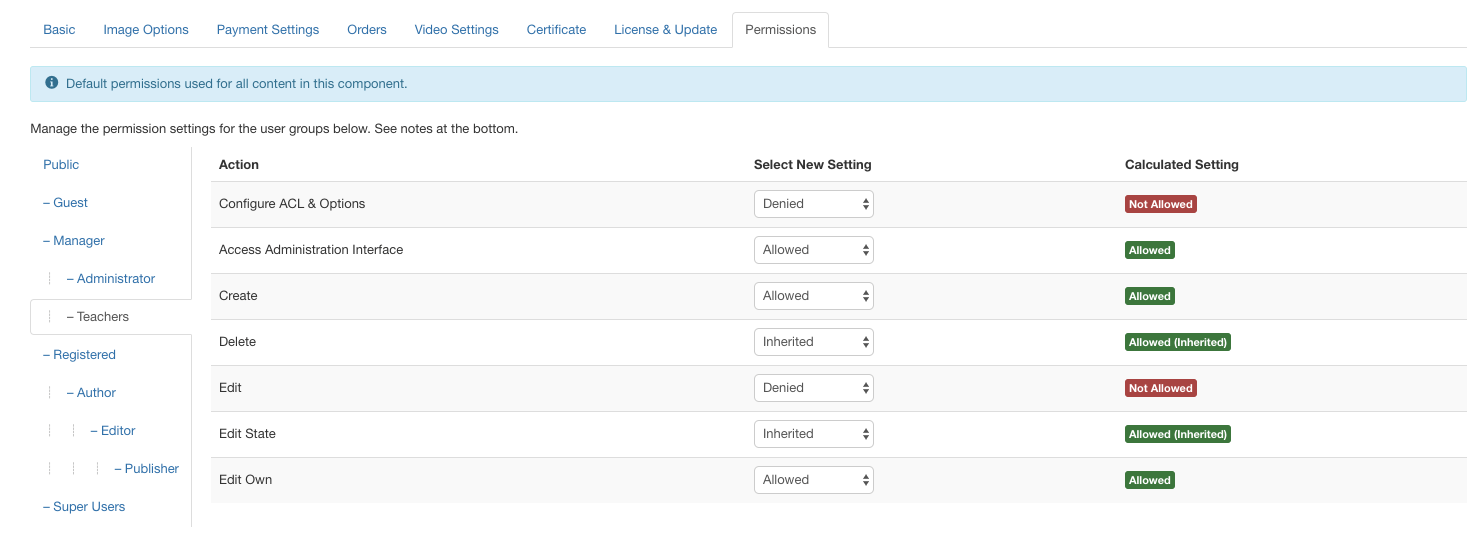
SP LMS lets you assign a particular set of access controls for a specific user group. As the admin, you can set the permission for a user group, like enabling teachers to add courses and lessons, give them access to modify them. This way the admin will have less workload and the teachers would have independence to their work.
Creating your very first course
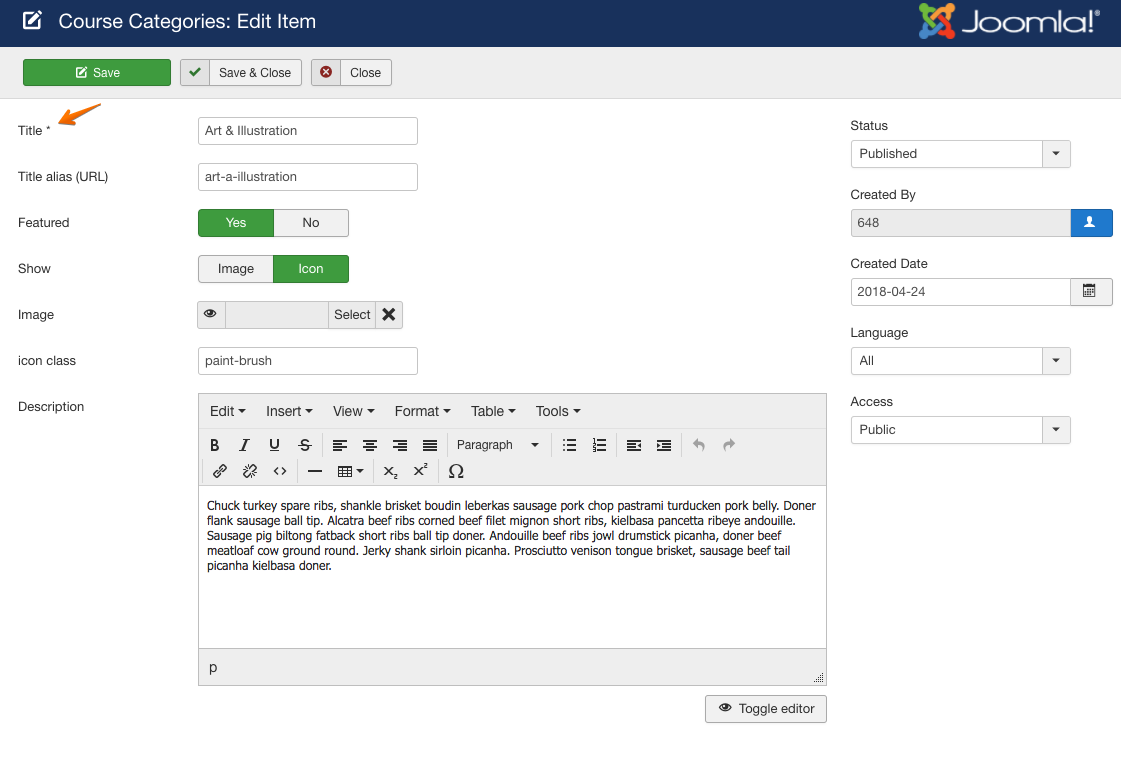
Before creating a course, you first need to add course category. To do so, go to the top menu, hover over Components and click on SP LMS. Then find Course Categories from the left sidebar.
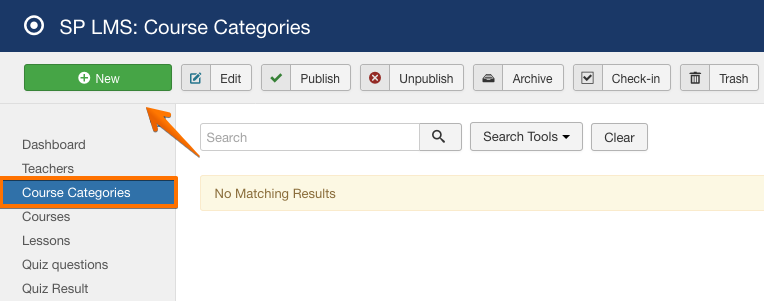
The title is a must for creating a course category. Other functions are optional, but its advised to fill them out.
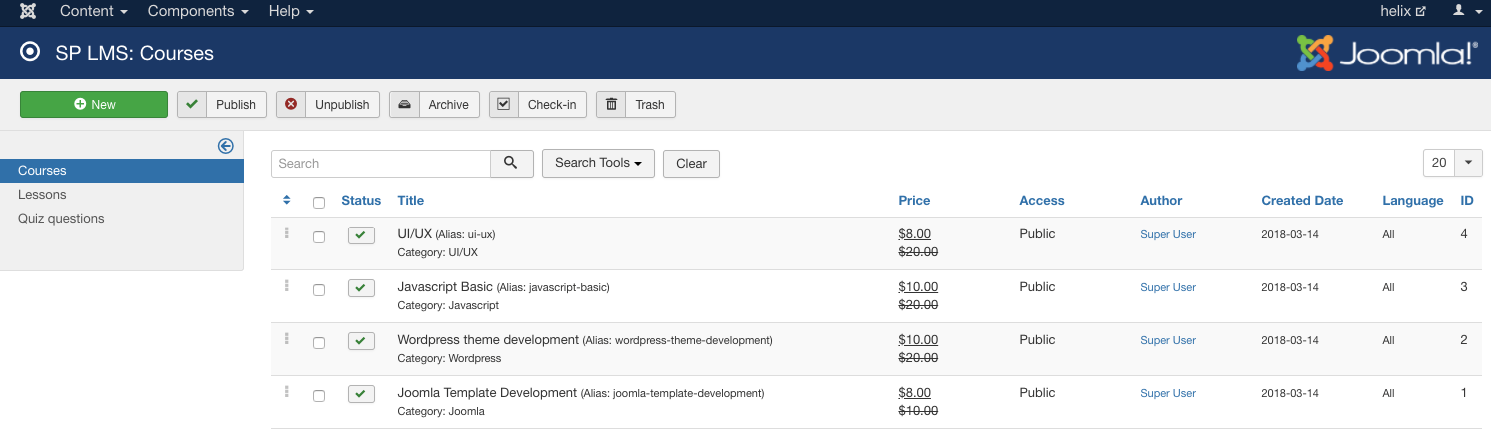
Now to add the course you need to select “Courses” from the left sidebar, then click on “New”. The options are pretty self-explanatory.
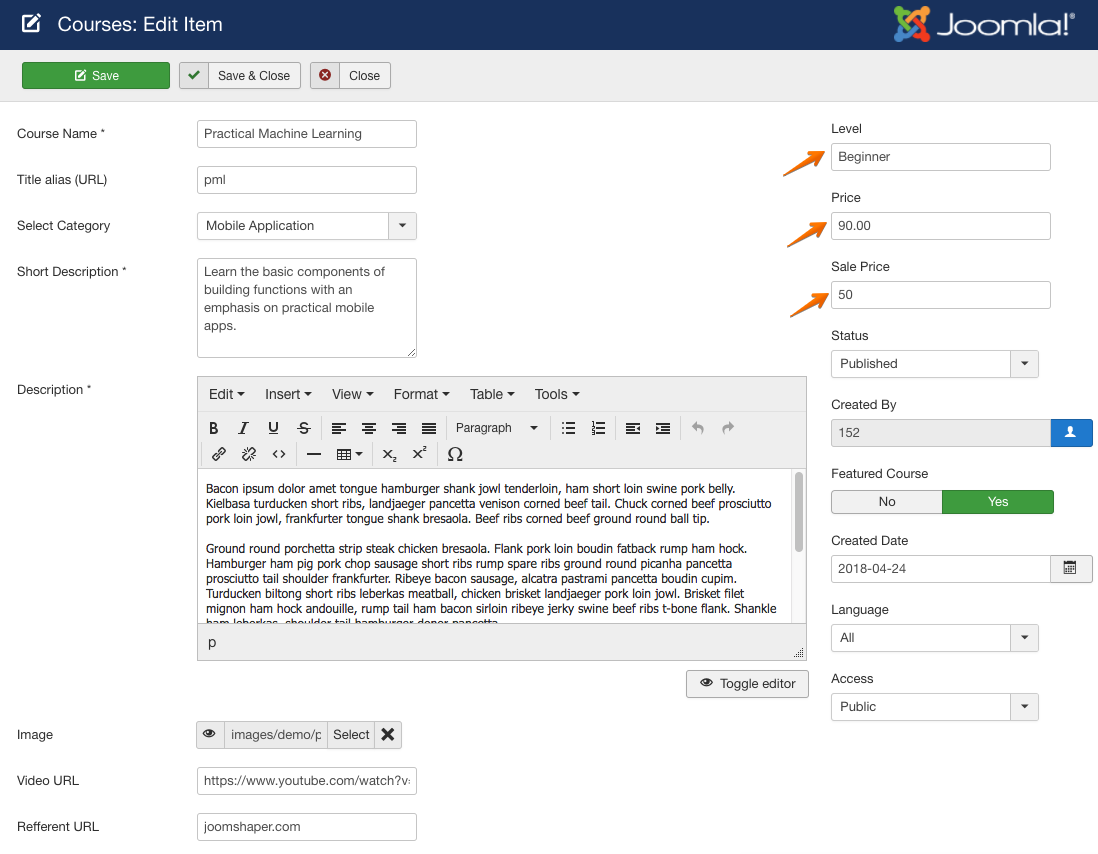
Tip: To run a free course just set the price to “0.00”. To hide a course completely you can set the Status to “Unpublished”. You can set the course schedule from the bottom of this settings.
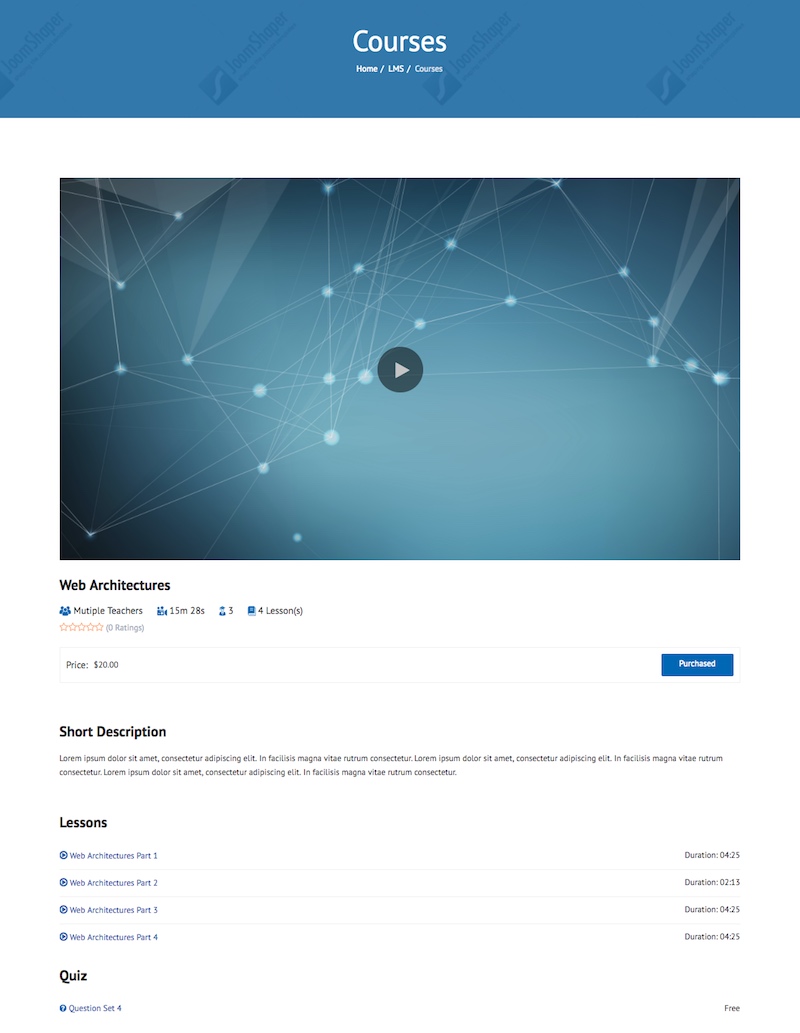
The single page of a course should look like above.
Create lessons
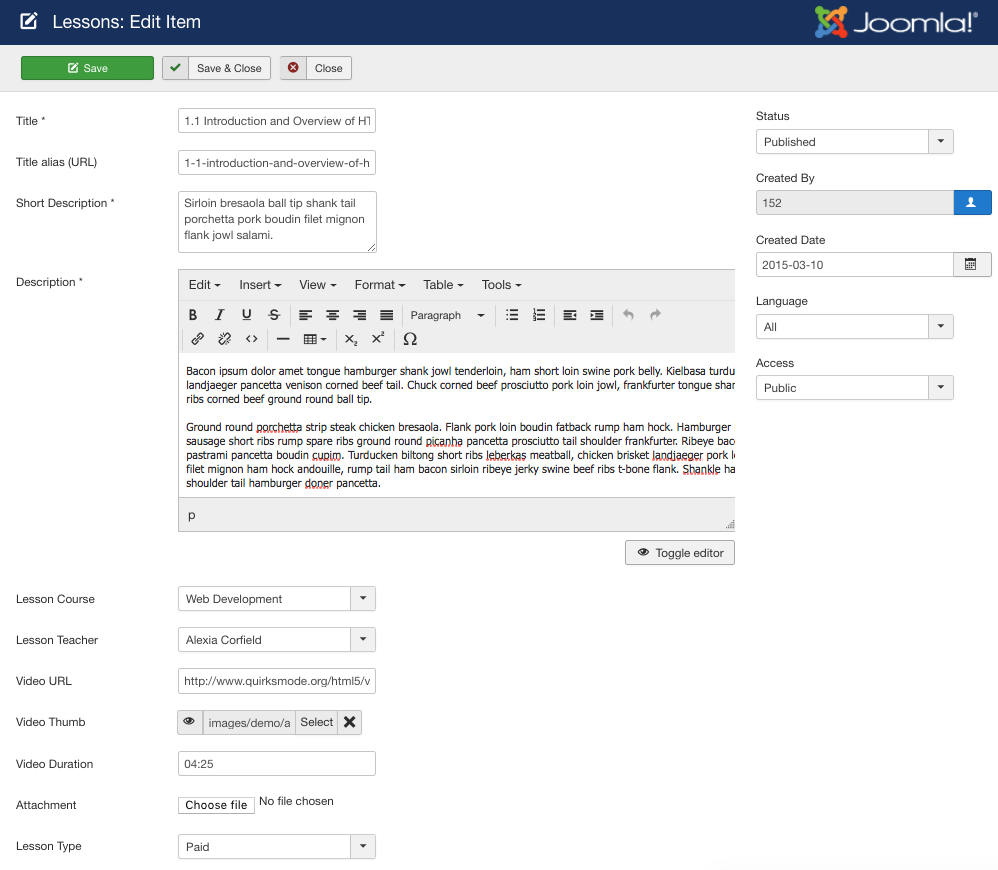
To add lessons to your course. Navigate to the left sidebar, select “Lessons” and hit “New”. One course can have an unlimited number of lessons. When creating a lesson, you need to select course name, assign teacher, add video lesson URL. If you need to attach any file you can do that as well. Please note, your user can access a paid course lesson if you select the Lesson Type as “Free”.
Add teachers
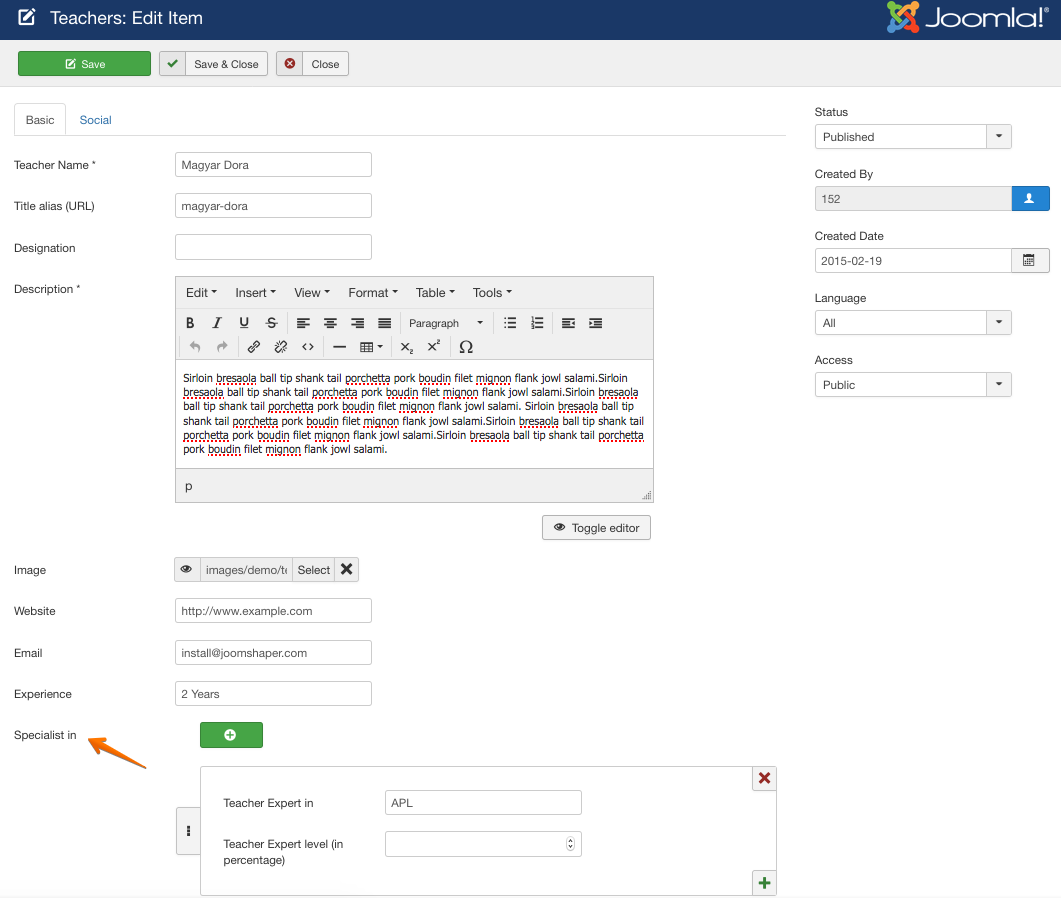
The teacher is the person who has complete control over any selected course. S/he can manage, organize and administer a given course. To add teachers select “Teachers” from the left sidebar then go to “New”. You can also add multiple specialized areas of a teacher.
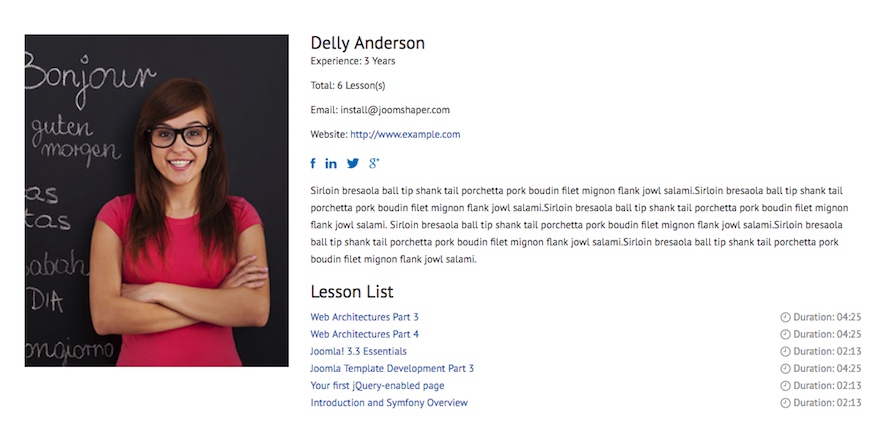
You can even add social media profiles of a teacher from the “Social” section. The frontend will look like the above picture.
Setting up quiz
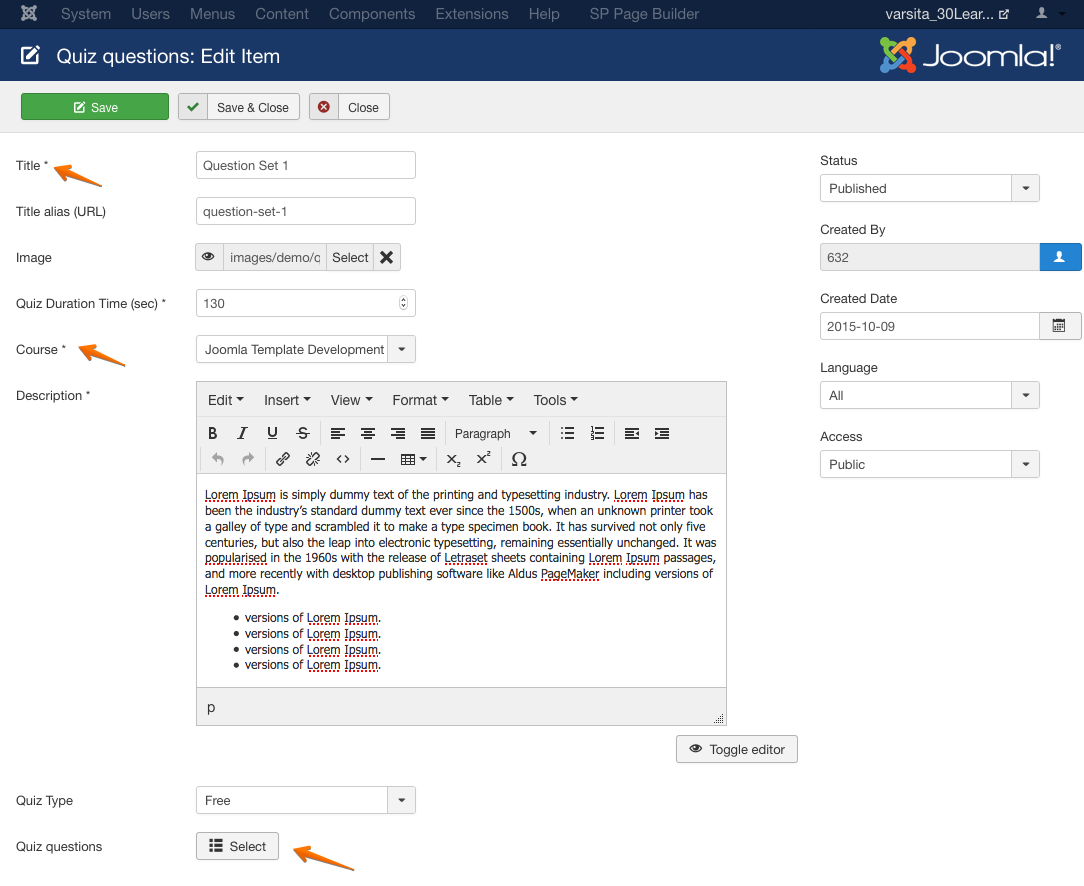
To add a question set you first need to fill out the mandatory fields like which course does this quiz belong to, the time allocated for this quiz, the quiz type: Free/Paid.

Once you set up all that, you need to set the questions. To do that, click on “Select” from “Quiz Questions”. You'll get a popup window for entering the questions.

When any student takes the quiz you’ll be able to see that from the backend.
Certificate
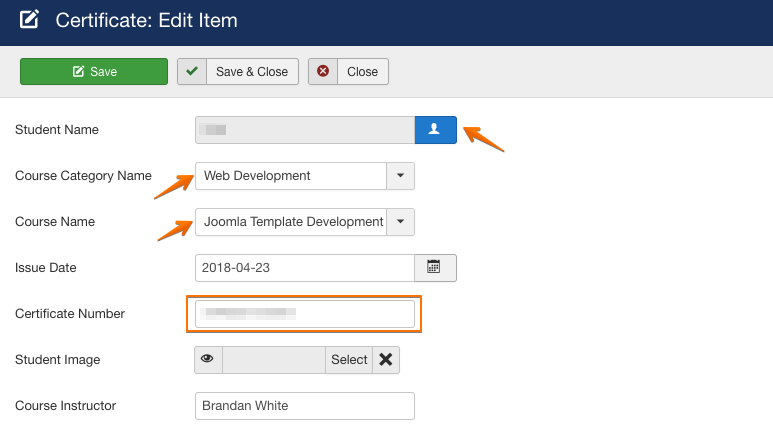
You can give a certificate to a particular user using this option. Find the respective user from the Student Name, select his/er course and category, provide a certificate number and issue date.
Setting up events
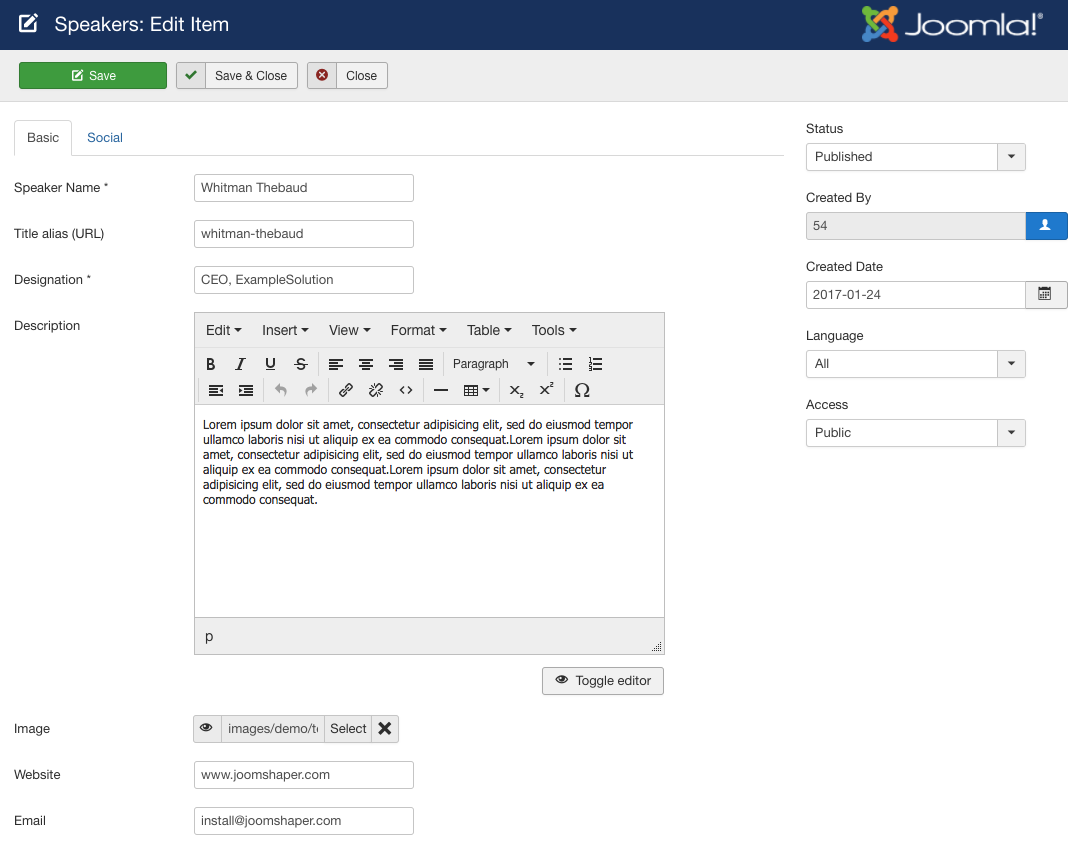
The first thing you need to do to create an event is to set up the Speakers. In order to set up a speaker go to the left sidebar, select “Speakers” and hit “New”. Speaker Name and Designation are mandatory fields, you can add image, social links, website link, and email address in addition to that.
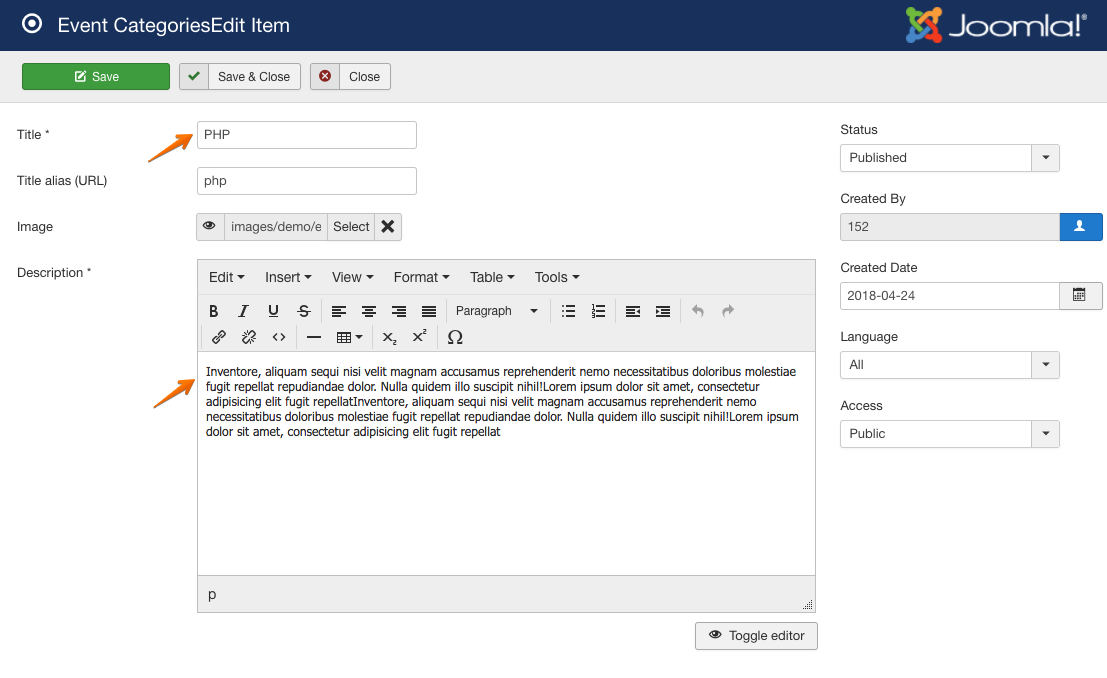
The next thing you need to do after setting up speakers is to create Event Categories. You just need to give the category a name and a description that's it.
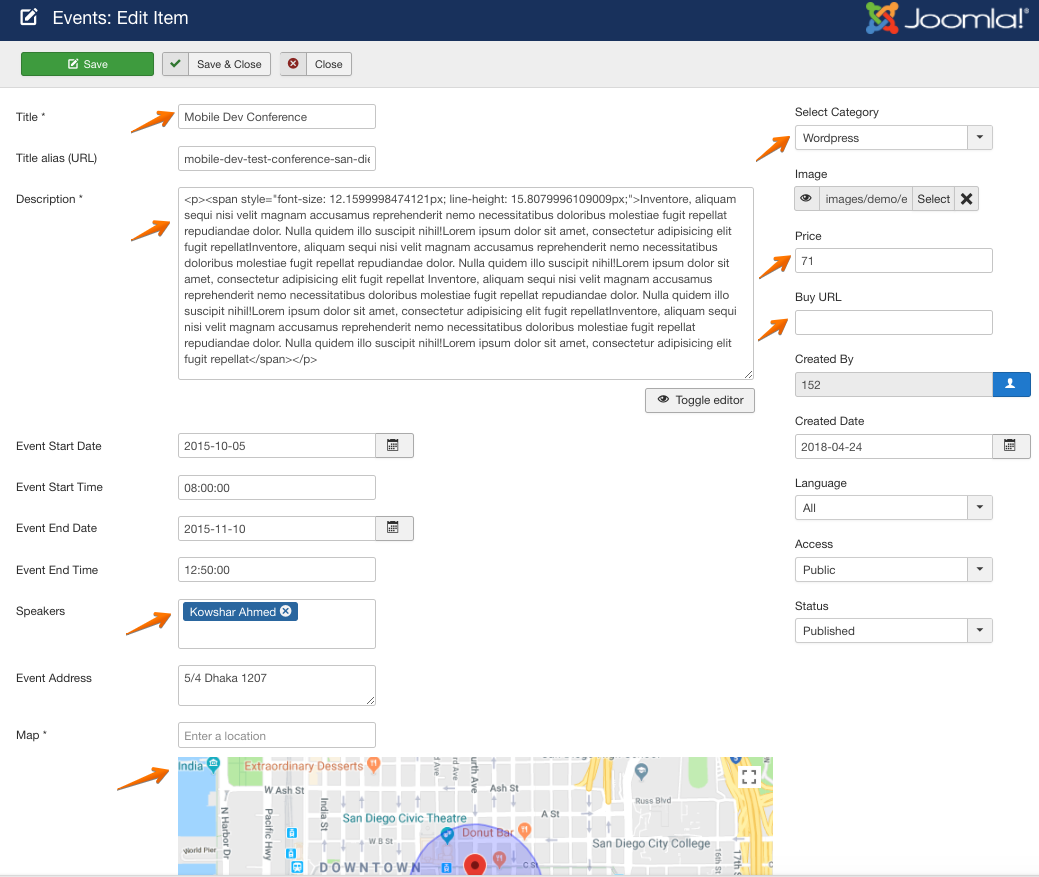
Finally, go to the “Events” option to create a New event. Few important fields are here in this option. You can set the price and ticket buying link. You can add starting/ending time and date. You can select speakers. You can even assign speakers according to their topics. The Map location field is a mandatory one, but unless you’ve added Google Maps API, it won’t work.
Orders
This option lets you see all the information about the purchases made. Use the search field to find any transaction. There’s an interesting feature, if a user faces any issue while buying a course, you can manually set up the order by clicking on “New”.

Setting up the front-end
Since we’ve set all the elements needed on the backend, we just need to show them in the Main menu. Let's do that.
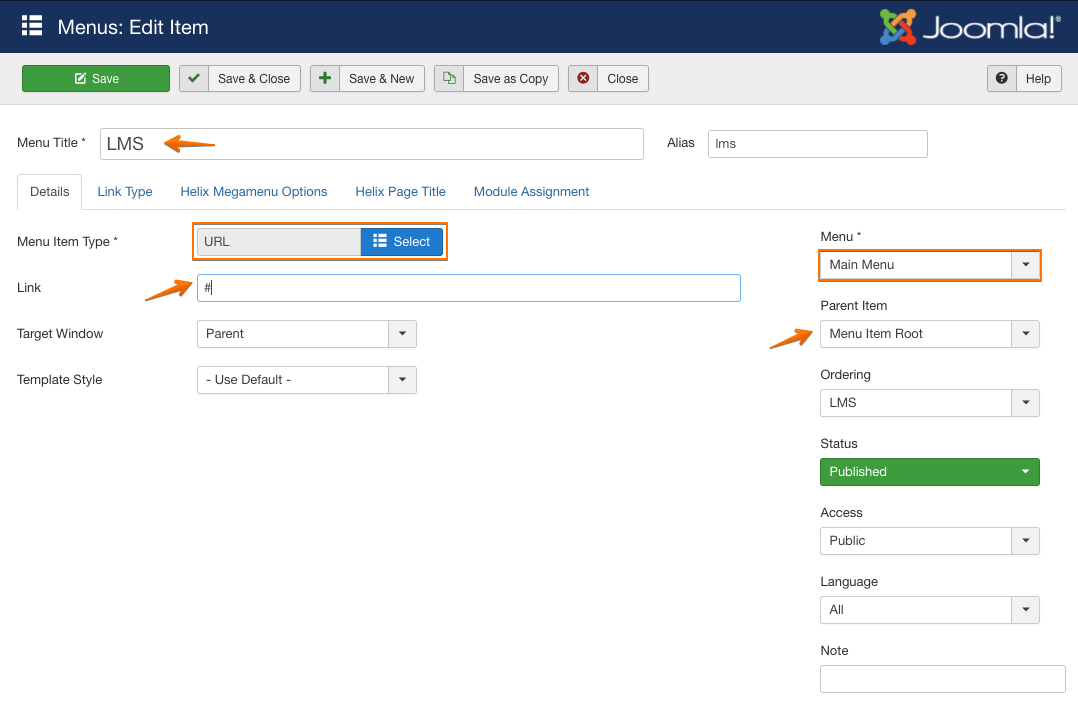
Hover over Menu form the top menu bar, find Main Menu > Add New Menu Item and click on it. Give the Manu name as you like, but we’ll go with “LMS” for now. Since, we’ll show categories, courses, events and all that from this menu. Let's set the “Menu Item Type” as “URL” and put a “#” on the “Link” filed. Leave the rest of the fields as they are.
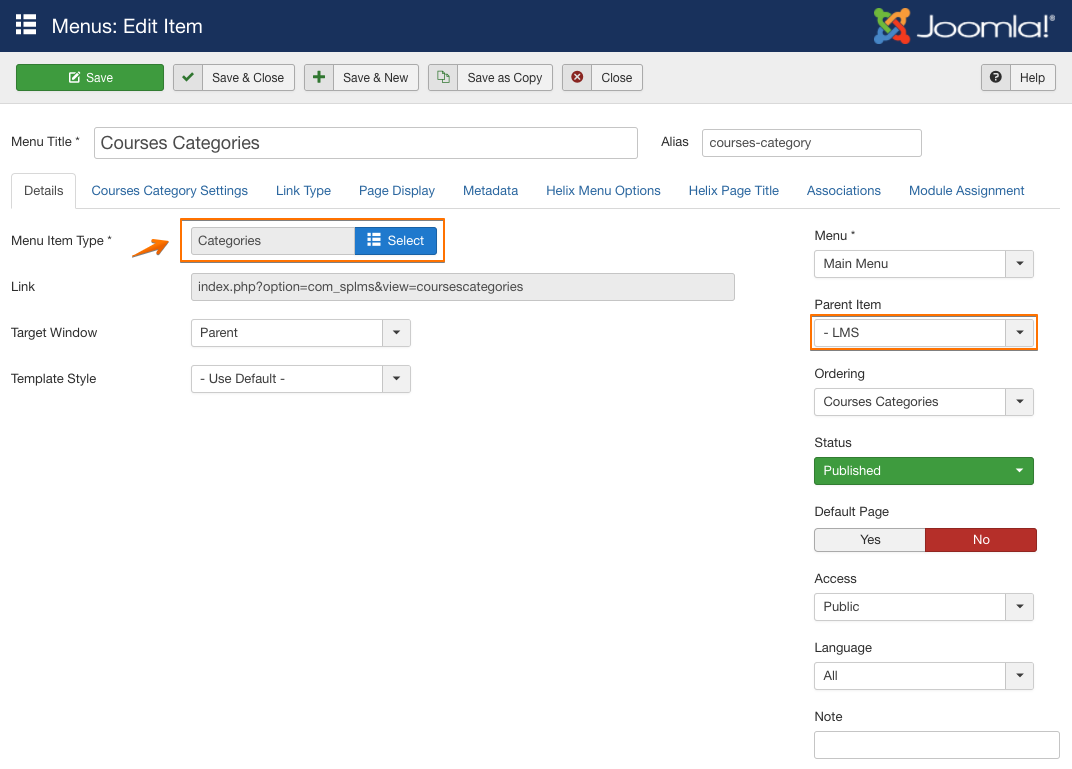
Now let's show everything one by one. We will start with “Course Category”. I’d hope that you’re in the “Menu Items” page of “Main Menu”, if not then from the top menu bar, hover over “Menus” and click on “Main Menu” it will get you to the “Menu Items” page. Now click on the green “New” button, it will open up a new window. Give the menu item a name, let’s say “Course Categories”. Here is the main part, click on the blue “Select” button of “Menu Item Type”. You’ll see a popup window.
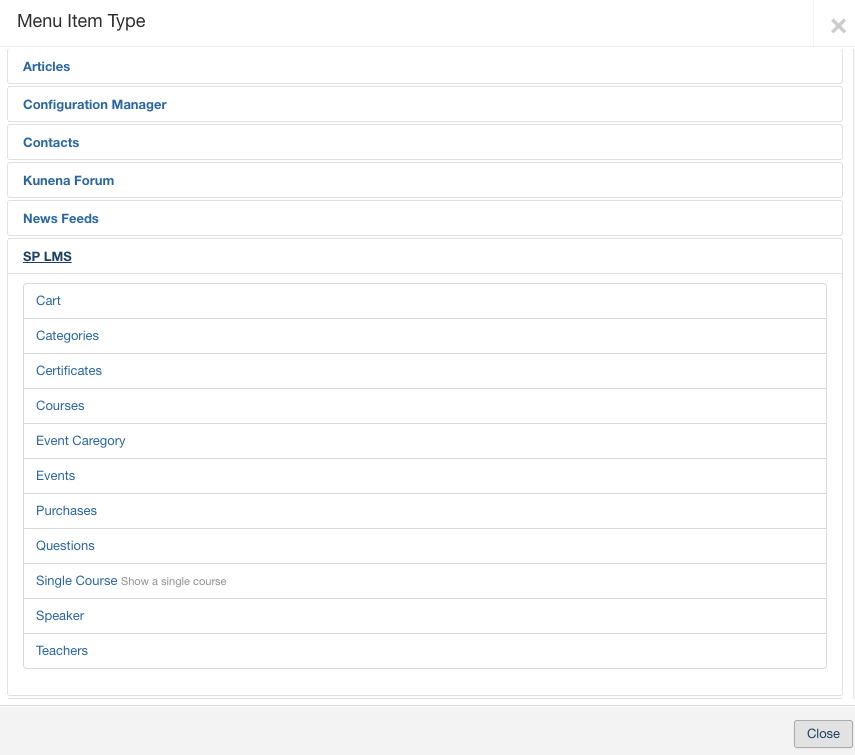
Find “SP LMS” from the list and click on it. You’ll see the menu item types provided by SP LMS. Select "Categories". From the right sidebar, set the “Parent Item” to “LMS”. Our primary work here is done, if you want to explore more options do so by browsing other tabs. Click on “Save & New” since we will be adding more items on the menu.
Adding courses and all
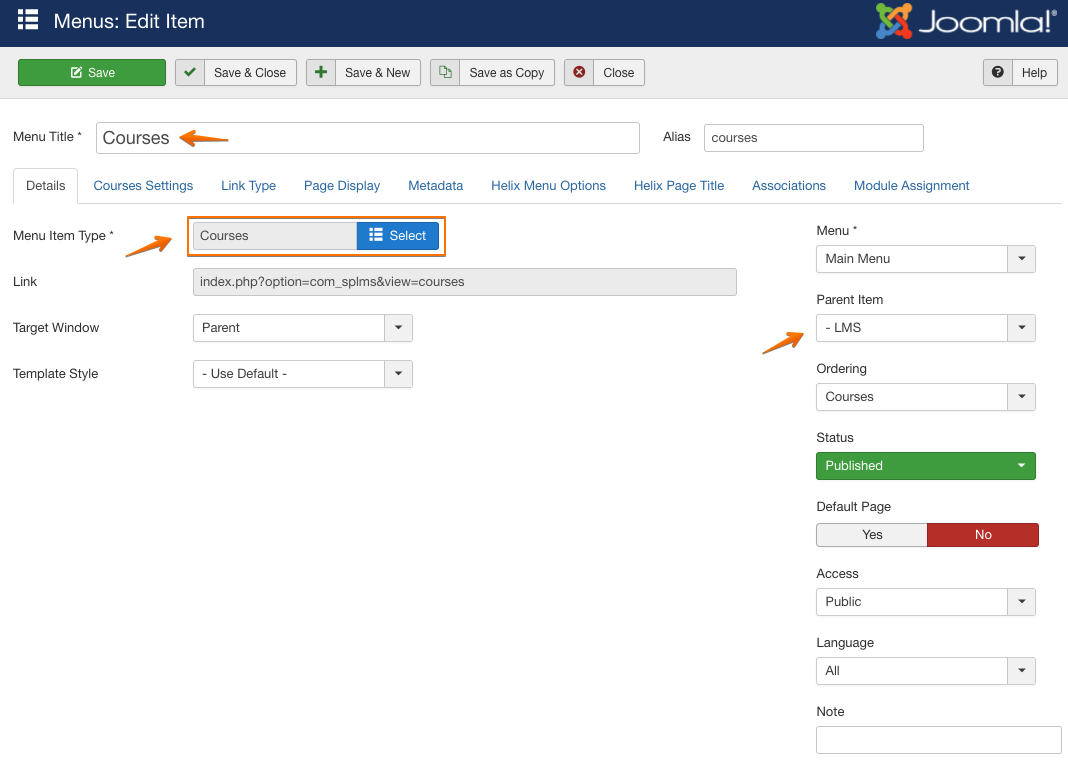
Adding courses is no different than adding Course Category. Give a name, select the “Menu Item Type” as “Courses” from “SP LMS” menu type list and then set the “Parent Item” to “LMS”, finally save it. Adding teachers, events and all the rest are pretty similar. Give the menu item a name and then set the respective type from SP LMS’s Item Menu Type list.
The ending
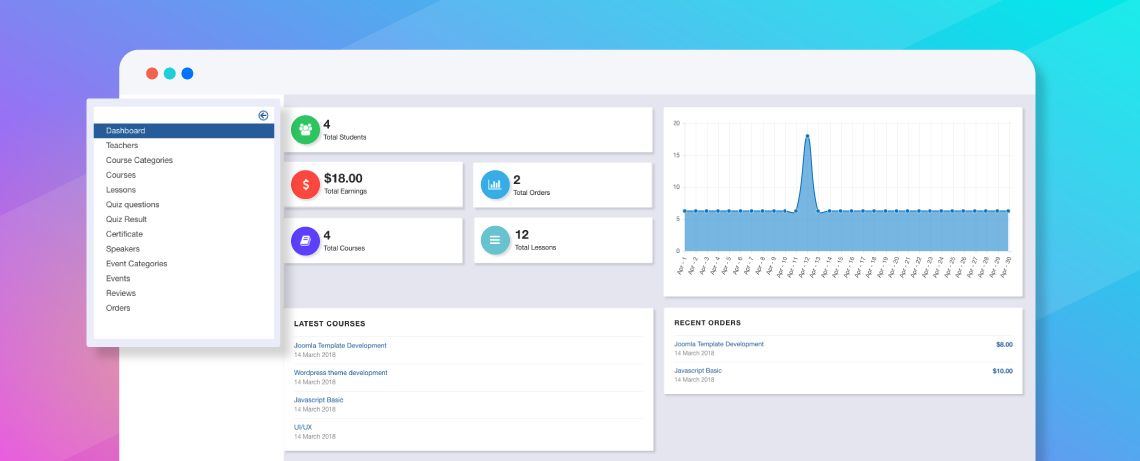
When you've done everything mentioned above, you get your LMS site ready. Later, you can check the site activity status from SP LMS dashboard.
Now we’ve done all this on Joomla. If you don't use any specialist LMS template, your website is going to look pretty ordinary. We recommend you to use one of our LMS Joomla templates (e.g. Educon/Varsita), that will look stunning. When you purchase one of our LMS templates, you get the SP LMS extension and SP Page Builder Pro included inside the package. Have a look at the final output of the course list below (we've used our Educon template in this view).
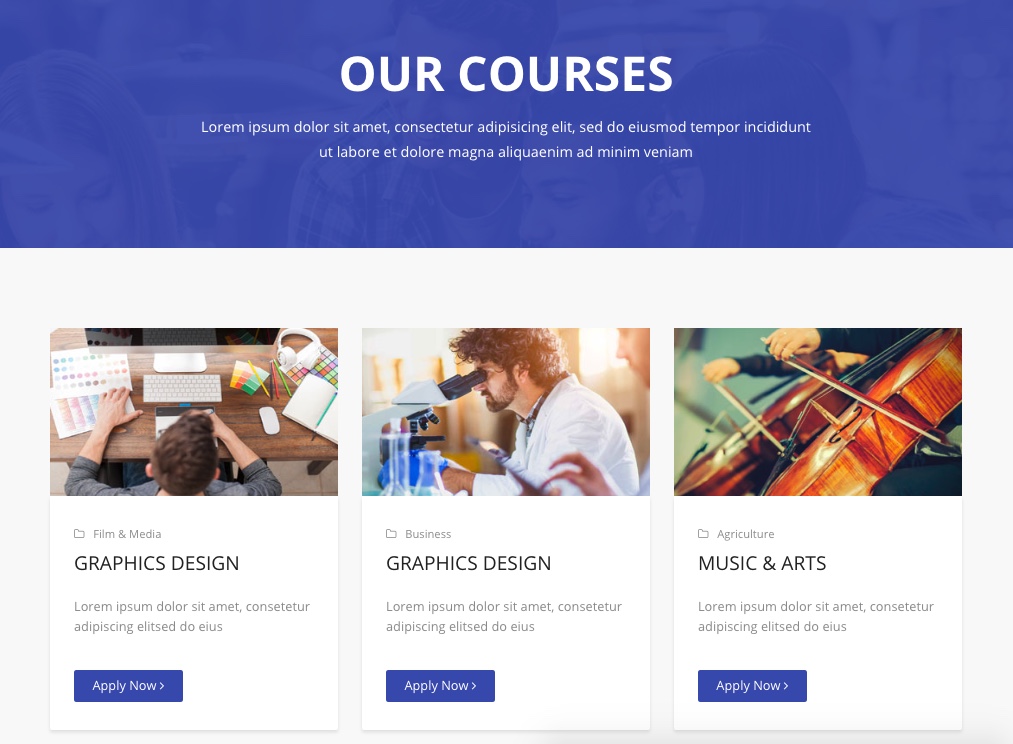
If you wish to give your online learning platform a gorgeous look, you can check out these templates: Educon, Yoga, Varsita. They come with SP Page Builder Pro a Joomla drag and drop page builder which will let you customize your website and give an even better look. I hope you find this article helpful and don’t forget to appreciate us if you do ;) In case you face any difficulties, just reach out, we’re always here to help. Thanks for being with JoomShaper. Happy earning :)


I am engaged in info business and I build my LMS only with the help of SP Pape Builder. I can build the course and the student office, as I need to and adjust very flexible. Categories - this is what is not enough for complete happiness. I reviewed LMS - this is not a flexible solution. Personally, it does not suit me.
"...Hi guys. In my opinion, you are spraying forces instead of concentrating on the main thing..." = I'm totally agree if an SP LMS means to still wait months for a yet [url="https://www.joomshaper.com/forums/basic-social-icons-custom-how-to#reply-204677"]solved fix bug[/url]... just an example...
I cook a lot and I want to offer my cooking to the world. Since my cooking are divinely inspired and are expression of love, I want to offer recipe (or the general idea of what goes into the food) to people so that they can make it themselves.
I thought of just creating pages in Joomla and offering subscription. As a subscriber, you can access the published recipes. Then I remember what I read about drip content and the recommendation is not to make all the content available in one go.
Second, I thought of using a Joomla download component to handle the recipes. With this example, I will publish each recipe as a PDF. I will charge a fee for each PDF. The idea with this approach is that people can pay to download the recipe they want.
Since I have not been active with Joomla for sometime, I am looking for recommendation on components and templates to make this happen.
Any ideas?
All thoughts will be greatly appreciated.
- Regards.
If only we all have our own customization team, everything will be bliss.
I'm still waiting for a SP LMS update with the ability to show or hide the price of a training.
We offer tailor-made courses and the price of the training will depend on each client case.
I had suggested setting up a switch on / off prices.
At the moment no news.
Thanks
I sincerely apologize for your trouble. I think our team has failed to comminute with you properly and I feel partly responsible for that.
As you know the last update of SP LMS was released in February 2019. We have been working on a major update ever since. The new version of SP LMS is SP LMS v4.0 which will introduce a completely new approach that is way more improved than the current LMS platforms built with Joomla.
The new version is scheduled to be released in late - 2019. I can promise that you'll be amazed by this update. Maybe even go far as to say something like - it was worth the wait.
Any word on when version 4.0 will be released? I am excited to see what changes you made.
Sincerely,
Doug
We use a lot of JoomShaper's templates and SP Page Builder.
We think that Udemy's platform concept is to host vaious vendors of training course or learning modules. This is actually what we are looking for: A LMS integrated with a community system like JoomSocial or Community Builder where we can host vendors in a more broader marketplace concept. So SP LMS was never and is not the right fit and does not at all compete with Udemy or is not in any sense like Udemy. However, if there's someone who has built a multiclient LMS on top of SP LMS please tell us your story. :P
It's a privilege to have someone like you on board. You have been with us for the past 4 years and you know almost everything about JoomShaper. We are humbled to have you as a part of our family.
I would like to thank you for your constructive suggestions. However, if I may, I would like to inform you that, SP LMS focuses on the eLearning part of udemy/lynda/edx. It does not come with the community engagement functionalities.
With SP LMS, multiple users can sign up as Teachers (in your words that would be "multiclient" if I assumed correctly) and create/publish their courses. Using the [url="https://www.joomshaper.com/blog/sp-lms-3-0-is-here-with-acl-review-cart-more"]ACL functionality[/url] the admin can control other related features.
Again, I would like to thank you so much for your informative suggestions. It's an honor to have a consumer like you who supports us improving a product.
PS: The next version of SP LMS is scheduled to be released in late - 2019 and it is coming with a radically new approach, the experience would be completely different.