

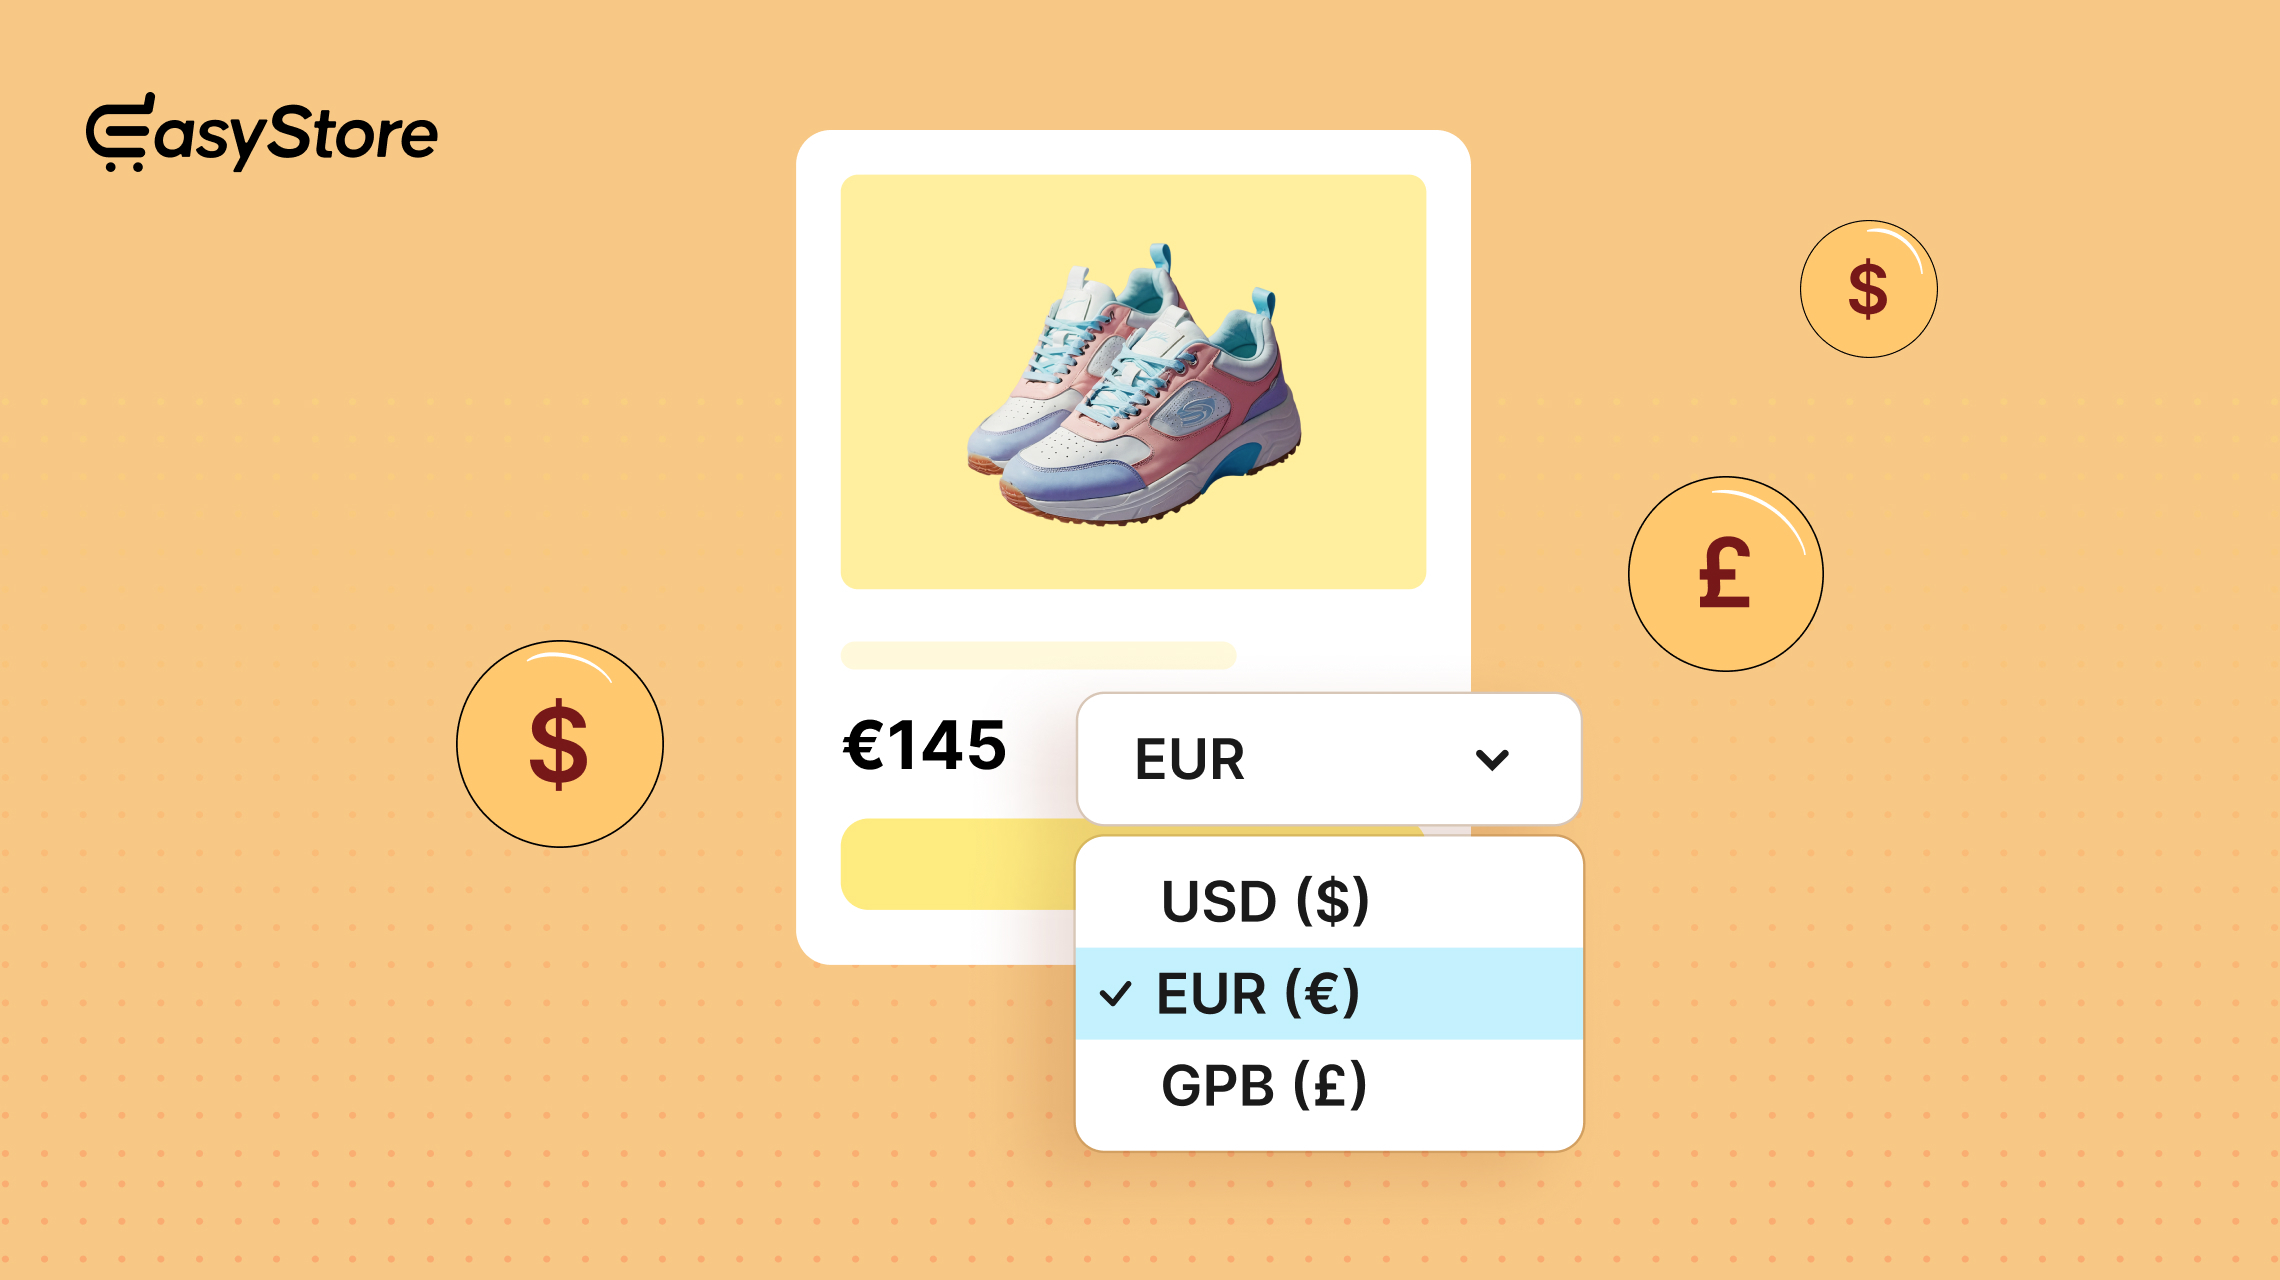
When selling internationally, a common issue arises: customers want to see prices in their own local currency.
In this tutorial, we’ll show you how to achieve just that on your own Joomla eCommerce website using EasyStore.
There are three parts to this setup. First, you’ll learn how to enable and configure multi-currency inside EasyStore. Then, we’ll show you how to enable automatic exchange rate updates. And the final step of this guide is to enable a way for customers to switch currencies directly on the frontend.
So, let’s get started!
How Multi-Currency Works in EasyStore
Before you begin, it is important to understand how the multi-currency management feature works in EasyStore.
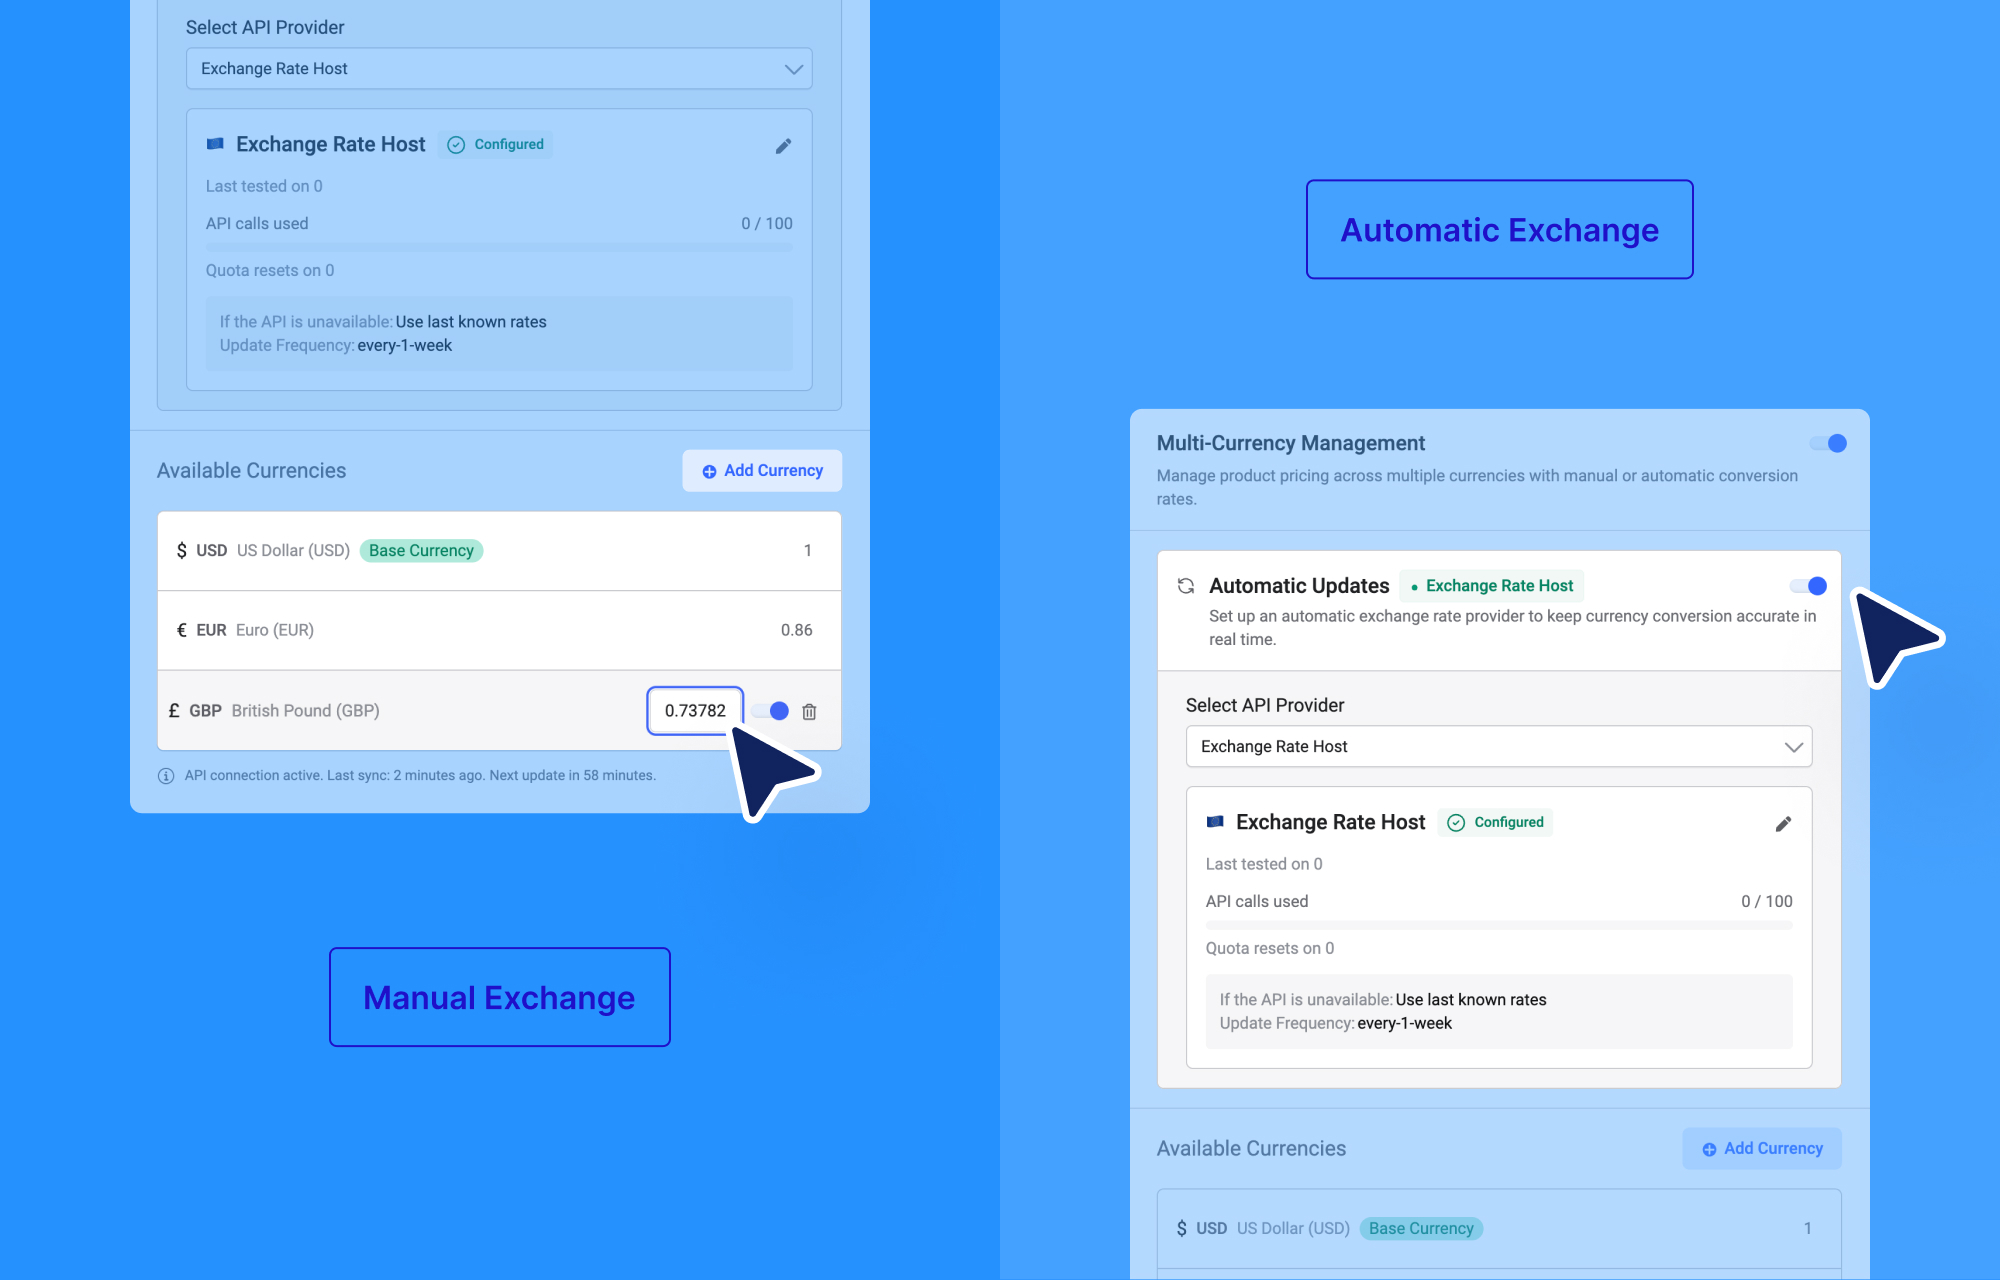
Essentially, there are two ways you can configure exchange rates:
Manual Exchange Rates
Initially, you can add currencies and their exchange rates relative to your store's base currency within the EasyStore settings. This gives you complete control over pricing and is useful if you want to maintain stable prices regardless of daily market fluctuations.
Automatic Exchange Rates
Once you've added alternate currencies, you can also update exchange rates automatically using the ExchangeRate Host API. Activating this method lets you choose the frequency of currency rate updates, eliminating the need for manual adjustments each time currency values change.
What you’ll need:
- Multi-currency Management is available only in the Pro version of EasyStore v3.0.0 and above.
- To use automatic exchange rates, you need to get an ExchangeRate.host API key. API usage limits depend on your subscription plan, and the free plan includes up to 100 monthly requests.
Step 1: Set up Multi-Currency
Set a Base Currency
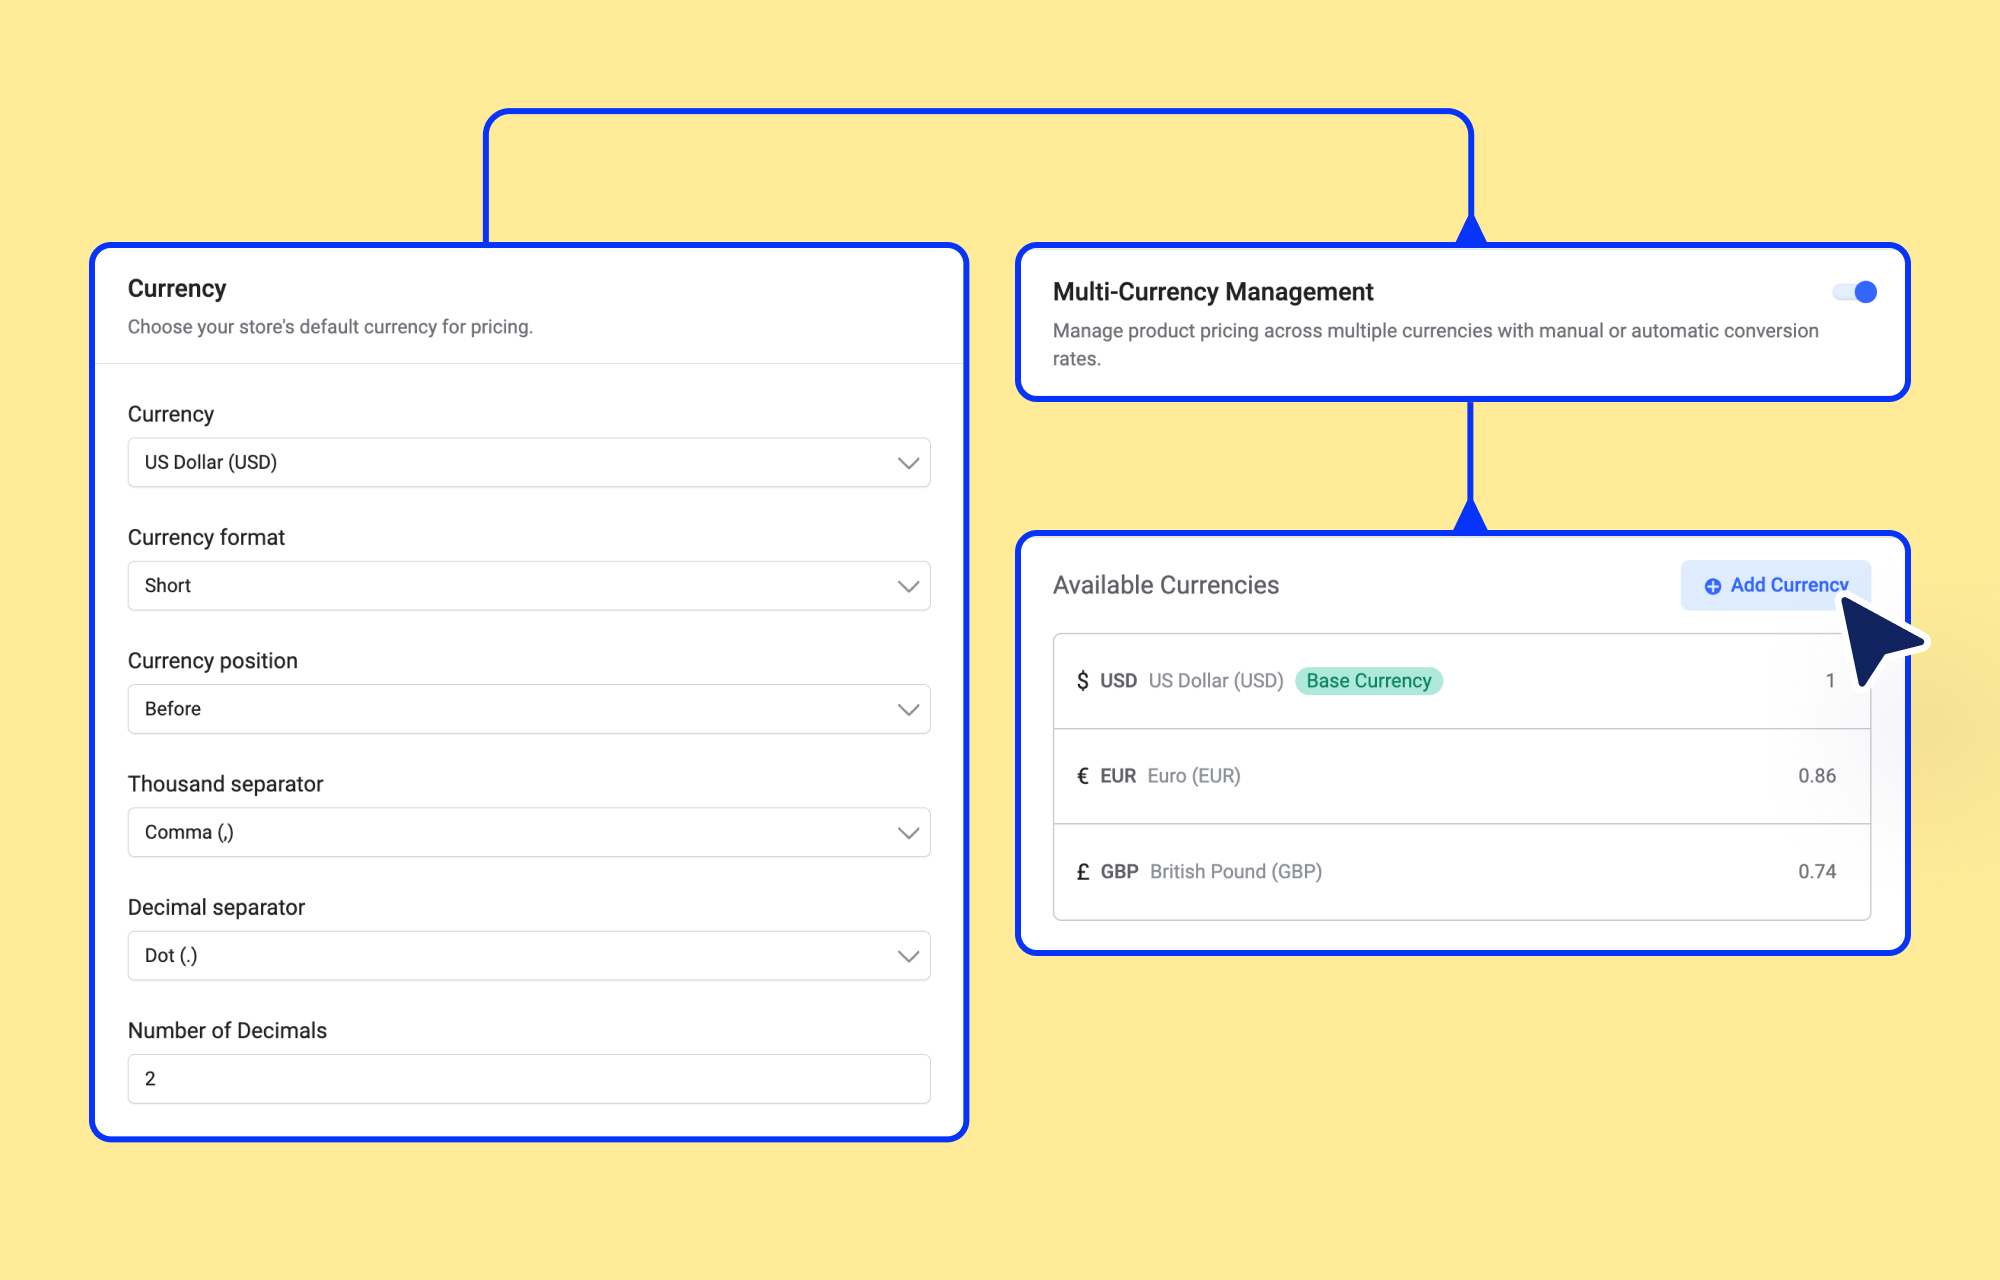
First, you’ll need a base currency for your store. Exchange rates will be calculated with respect to this base currency.
- Go to Components > EasyStore > Settings > General.
- The Base Currency can be set in the Currency section of EasyStore Settings.
Enable Multi-Currency Management
- Go to Components > EasyStore > Settings > General.
- Enable Multi-Currency Management.
Add Store Currencies
- Click on + Add Currency and select the currencies you want to make available.
- Set the appropriate exchange rates for each currency relative to your base currency. For instance, if your base currency is the US Dollar ($ USD) and you include the Japanese Yen (¥ JPY) as an additional currency, then $1 would be equivalent to ¥158.407502.
Step 2: Enable Automatic Exchange Rates
Next, you can use the ExchangeRate.host API integration to update exchange rates automatically over a specified period. Here’s how:
Get Your ExchangeRate.host API Key
- First, go to the ExchangeRate Host website.
- Click on Get Free API Key.
- Create an account and log in.
- Once logged in, go to the Dashboard.
- You’ll find your API key in an aptly named section of the dashboard. Copy the key.
- Optionally, you can choose to get a subscription plan for additional features depending on your requirements.
Connect the API to EasyStore
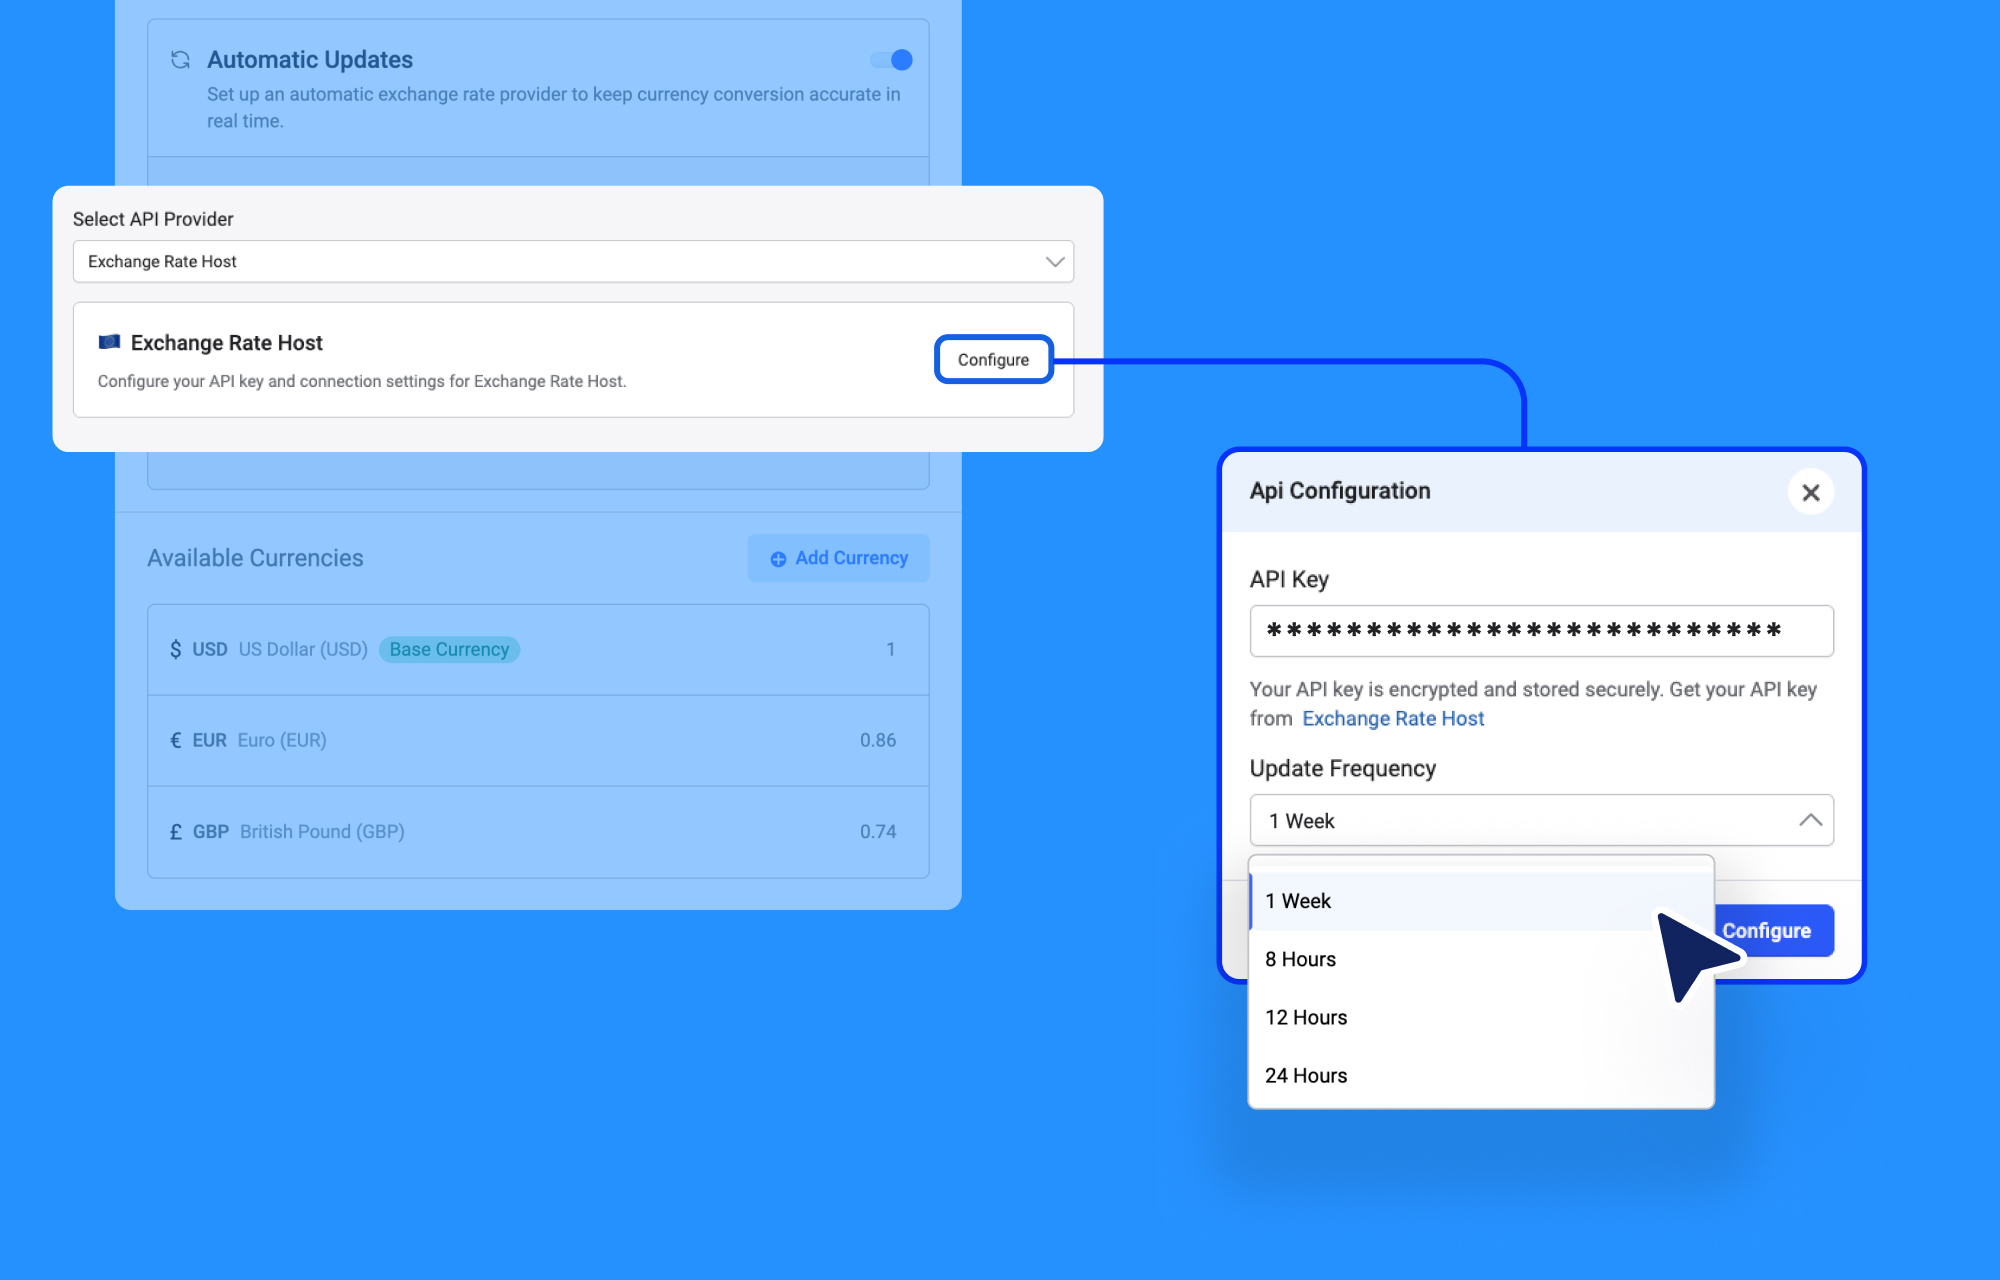
- Go back to Components > EasyStore > Settings > General > Multi-Currency Management.
- Enable Automatic Updates.
- With Exchange Rate Host selected as your API Provider, click on Configure.
- Paste the key into the API Key field.
- Select an Update Frequency of your choosing. For example, if the frequency is set to 1 week, then EasyStore will check for updated exchange rates every week.
If you have a paid package, the exchange rate will update continuously.
Note: Exchange rates reflect global market changes, so values may fluctuate over time.
Step 3: Add the Currency Switcher
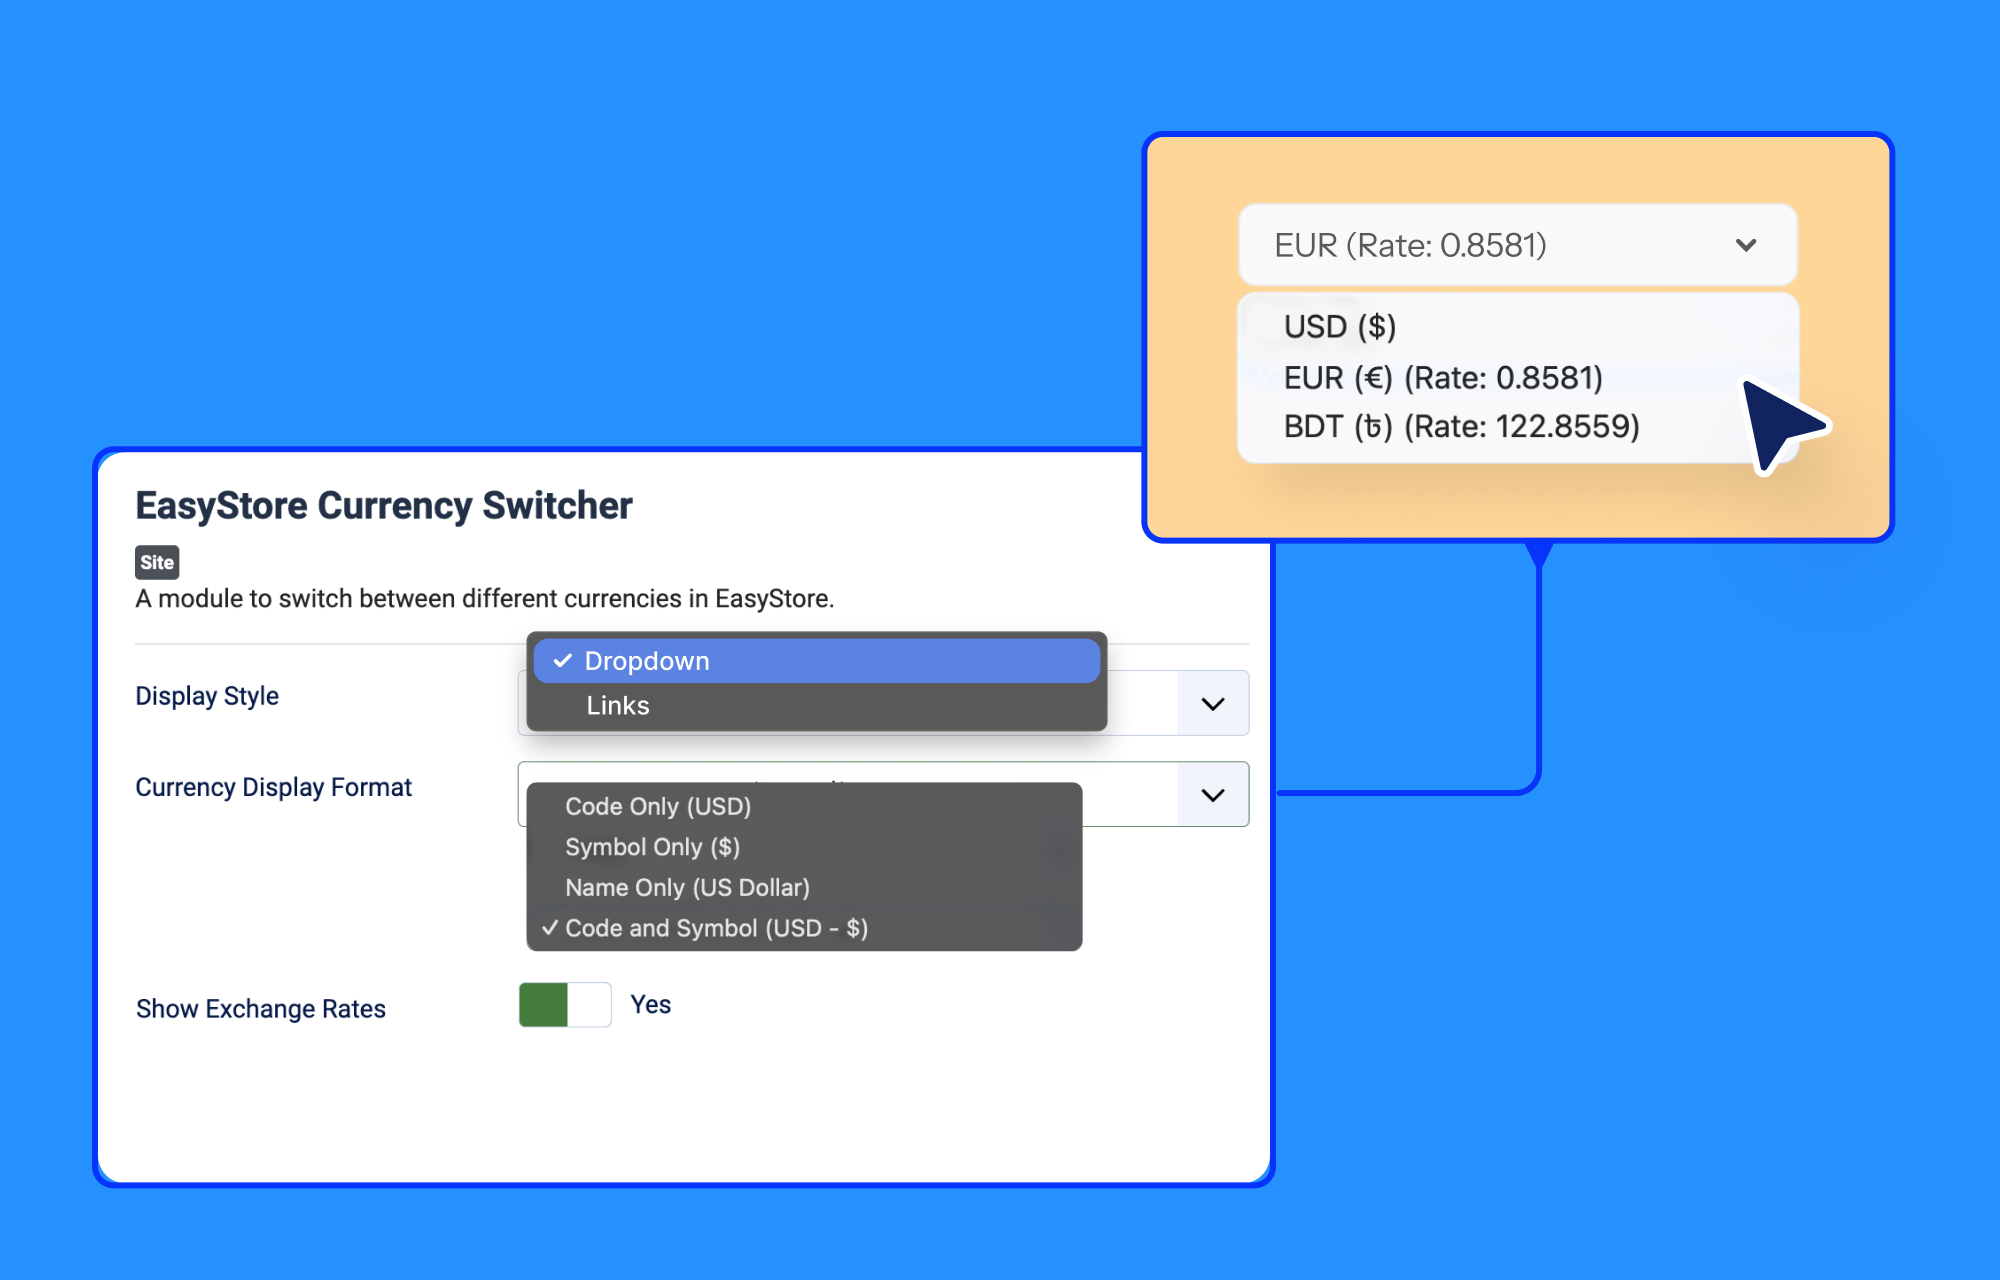
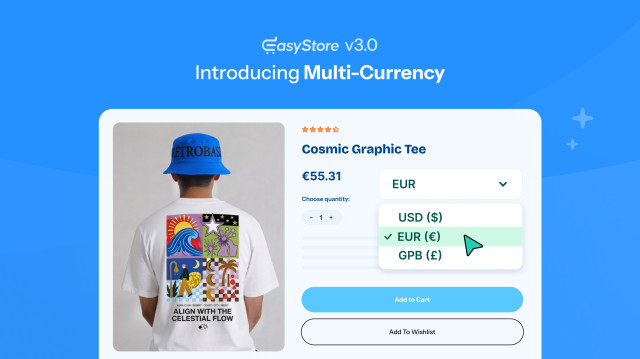
The final step is to provide a way for customers to easily switch between currencies. You’ll need a clear button that users can utilize to switch between currencies easily.
To achieve this, you need to make use of the dedicated Currency Switcher Module.
1. Go to Content > Site Modules and enable the EasyStore Currency Switcher module.
2. Add the module to the desired position in the store layout, such as the navigation bar. Alternatively, you can position the module near the "Add to Cart" or "Buy Now" buttons on your product details page with SP Page Builder. This depends entirely on your design goals.
3. Customize the appearance and functionality of the module. Here’s a brief rundown on how you could go about styling the currency switcher on your site:
- Display Style: The currency switcher can primarily be presented as a dropdown or as buttons that link to currency options.
- Currency Display Format: Choose what you want displayed over the button, such as the currency’s name, code, symbol, or a combination of both.
- Show Exchange Rates: Finally, choose whether to show exchange rates next to the currency format in the button.
4. Publish the module.
Now, visitors can switch currencies directly from your storefront.
What Customers Will See
Besides being able to switch currencies using the module, your store’s customers can also set up their preferred currency and store language in their Customer Profile.
Once a customer selects a different currency, EasyStore displays product prices using that currency throughout the shopping experience.
Your original store prices don’t change. Instead:
- The base currency remains the reference.
- Converted prices are displayed to customers.
- The selected currency stays active while they continue browsing.
Making Payments in Different Currencies
When customers proceed to checkout, they’ll continue to see prices in the currency they’ve selected while browsing your store. Regardless of your store’s base currency, if your payment gateway supports the user’s chosen currency, they can complete payment in that same currency without any hassle.
Essential Details to Get You Started
Before you start exploring multi-currency management on your website, it’s important to answer a few questions and reiterate the key points from this tutorial.
1. Can I use the multi-currency switcher in the Free version of EasyStore?
No, multi-currency support is available only in EasyStore Pro.
2. Does changing currencies affect my base currency?
No. Your base currency remains as the reference currency, while EasyStore converts prices for the additional currencies you’ve enabled.
3. Does switching languages also switch currencies?
No. Multilingual support and multi-currency are independent of one another. Users who change the store's language must also update the currency via the Currency Switcher module.
4. How can customers configure languages and currencies?
Users have the ability to select their preferred currency and the language of the store within their Customer Profile settings under the aptly named Preferred Currency and Preferred Language options.
To learn more about the latter, be sure to check out our tutorial on how to set up a multilingual shop in EasyStore.
5. Where should you place the currency switcher module?
The currency switcher works best when customers notice it before they start shopping. A visible switcher reduces confusion and encourages customers to browse in their preferred currency immediately.
Common placements include:
- Header navigation bar
- Sidebar
- Footer (least recommended)
- Within the product details page itself
But ultimately, the placement depends on your particular design sensibilities.
6. Why do I need multi-currency, anyway?
Well, enabling multi-currency options in your store provides international customers with clearer pricing. Of course, it's not mandatory for domestic sales or if you're focused solely on the local market. However, if you intend to sell your products globally, it's recommended to provide customers with the convenience of changing currencies.
Finally, in addition to this tutorial, you can consult our official documentation on multi-currency management for more information and instructions.
Start Selling to More Customers
With EasyStore's streamlined multi-currency capabilities, your store can now tap into international markets and become more accessible to overseas shoppers.
We hope you’ll find this tutorial useful. Like always, we're keen to hear your thoughts and recommendations for other tutorials that might improve your online business journey, and we'll be sure to deliver them to you!
Best of luck!

Sabil
There are no comments posted here yet