
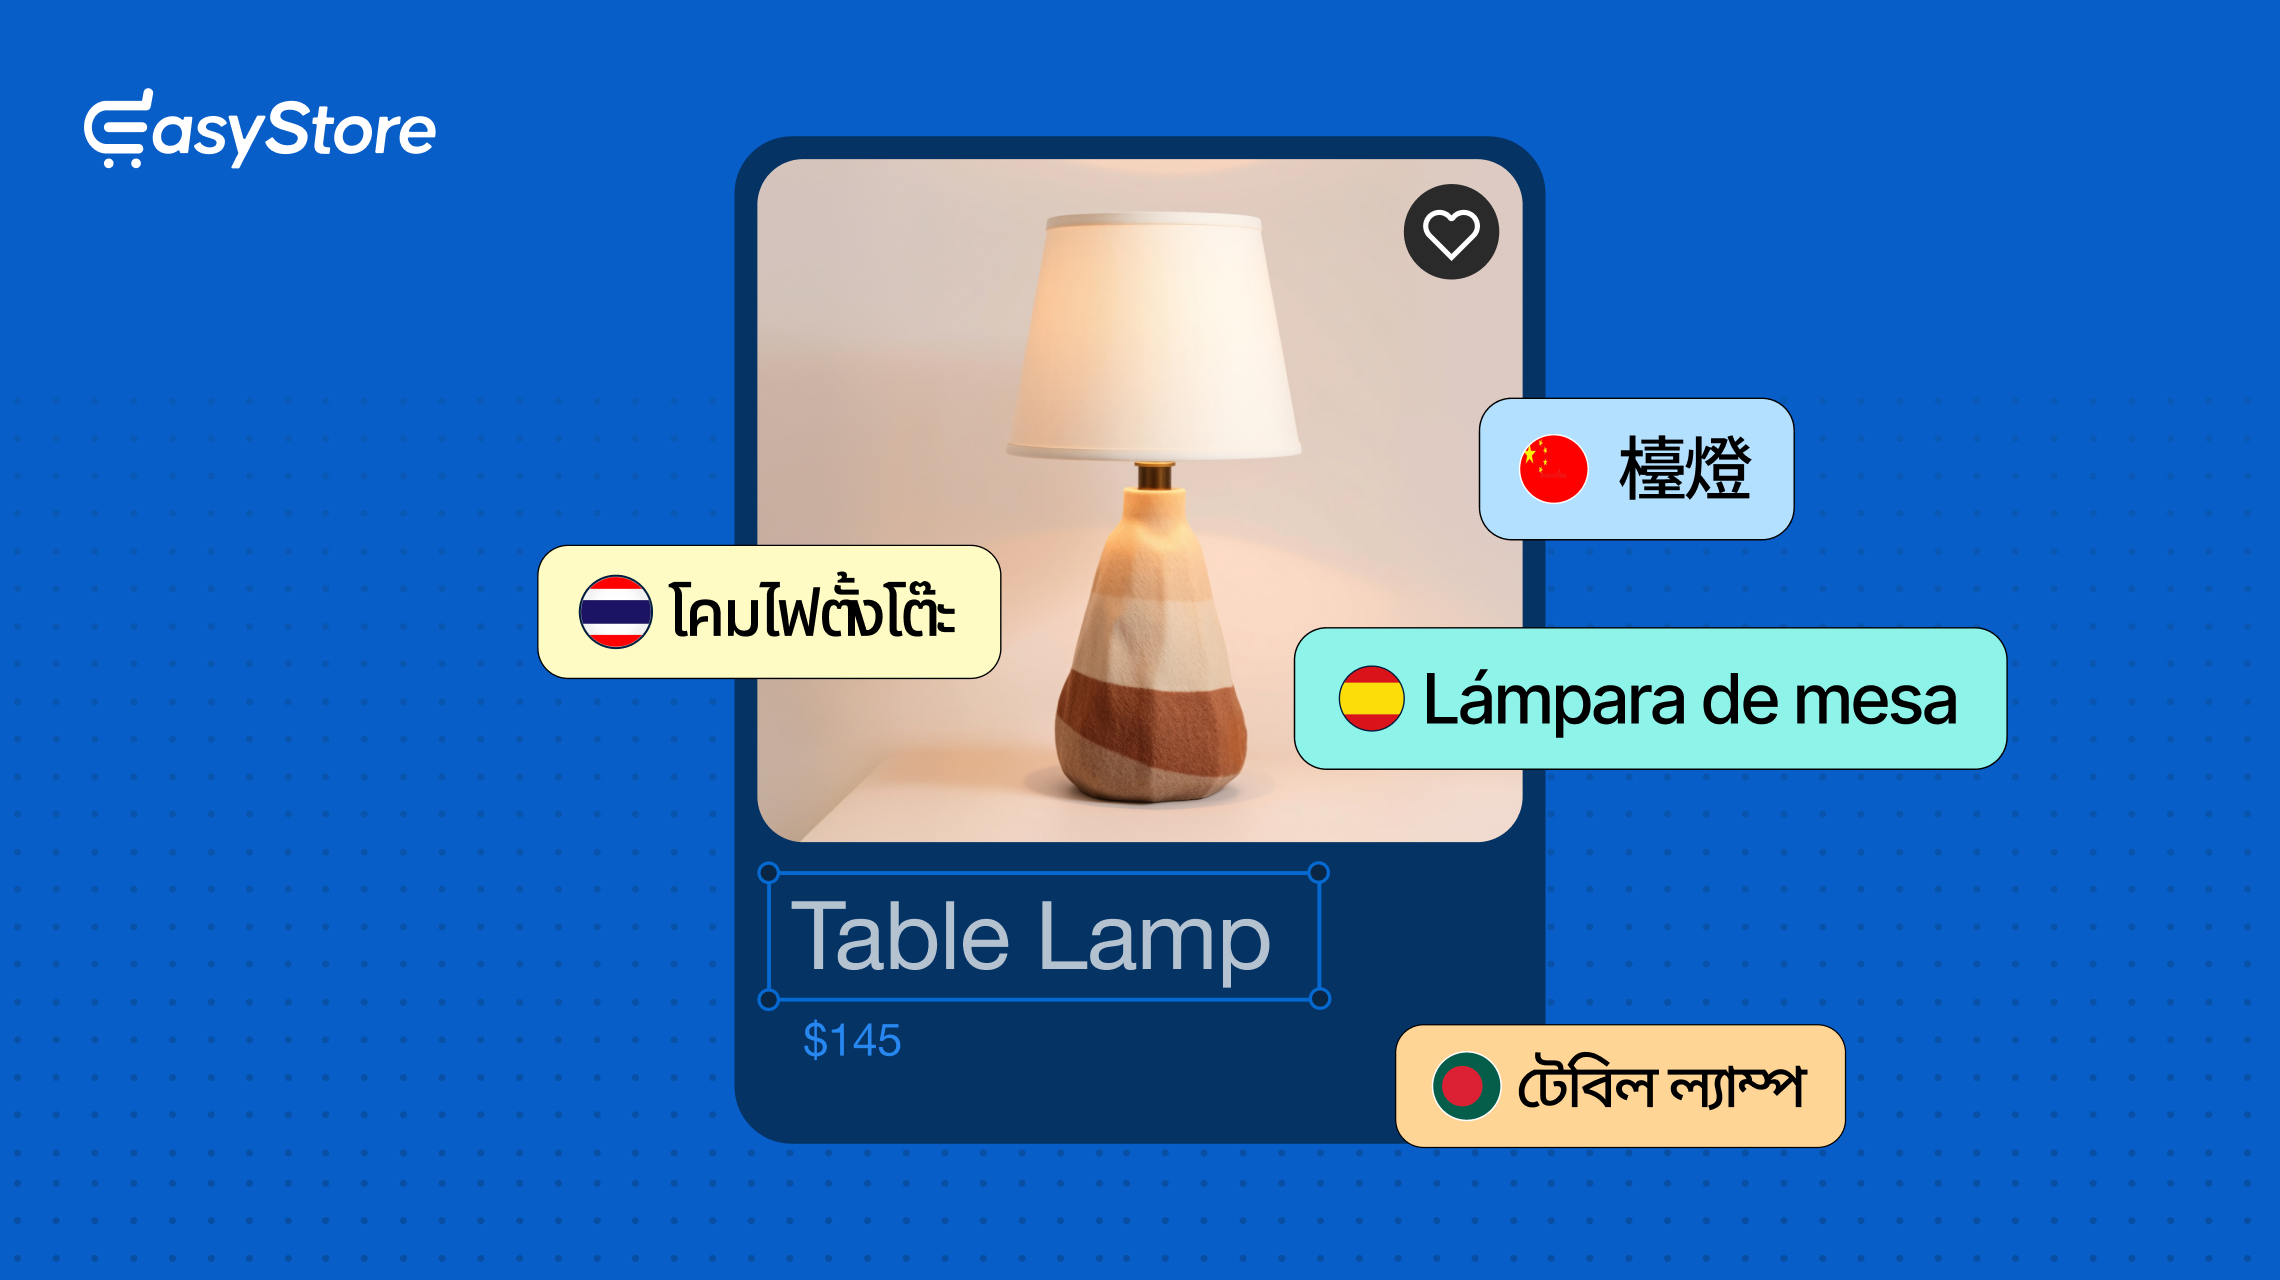
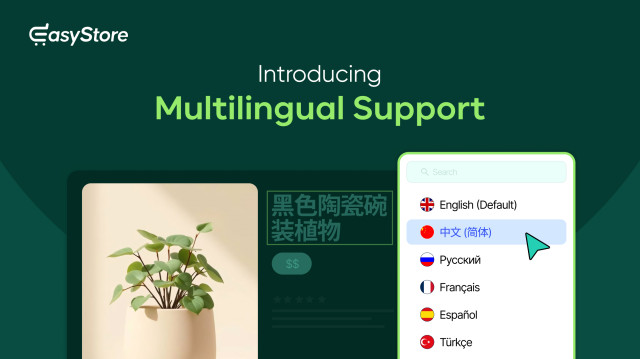
Running a store in one language limits who can buy from you. With EasyStore's new multilingual support, you can translate your entire storefront, products, and checkout experience into any language your customers speak.
In this tutorial, we'll walk through the full setup using a demo store that starts out entirely in English. Our goal: translate the product listing and details page into Chinese, step by step.
There are two layers to this process. First, you'll set up multilingual support at the Joomla core level, the same way you would for any Joomla site. Then you'll enable and use EasyStore's own translation tools on top of that. If you skip the first layer, EasyStore will have no language structure to translate into, so both parts matter.
Good to Know Before You Start
Each language gets its own URL/slug, so your translated pages are fully indexable on their own. For example:
- English:
https://example.com/index.php/en - Chinese:
https://example.com/index.php/zh
What you'll need:
- EasyStore v2.1.0, multilingual support doesn't exist in earlier versions, so update first if you're on an older release.
- An AI API key, if you want to use Auto Translate instead of translating fields manually. You'll set this up in EasyStore's global configuration (more on this in Step 7).
Part 1: Set Up Multilingual Support in Joomla
EasyStore's multilingual feature is powered by Joomla's built-in multilingual system. So, before diving into EasyStore's translation tools, let's first configure Joomla to support multiple languages on your website.
Step 1: Install and Publish Your Content Language
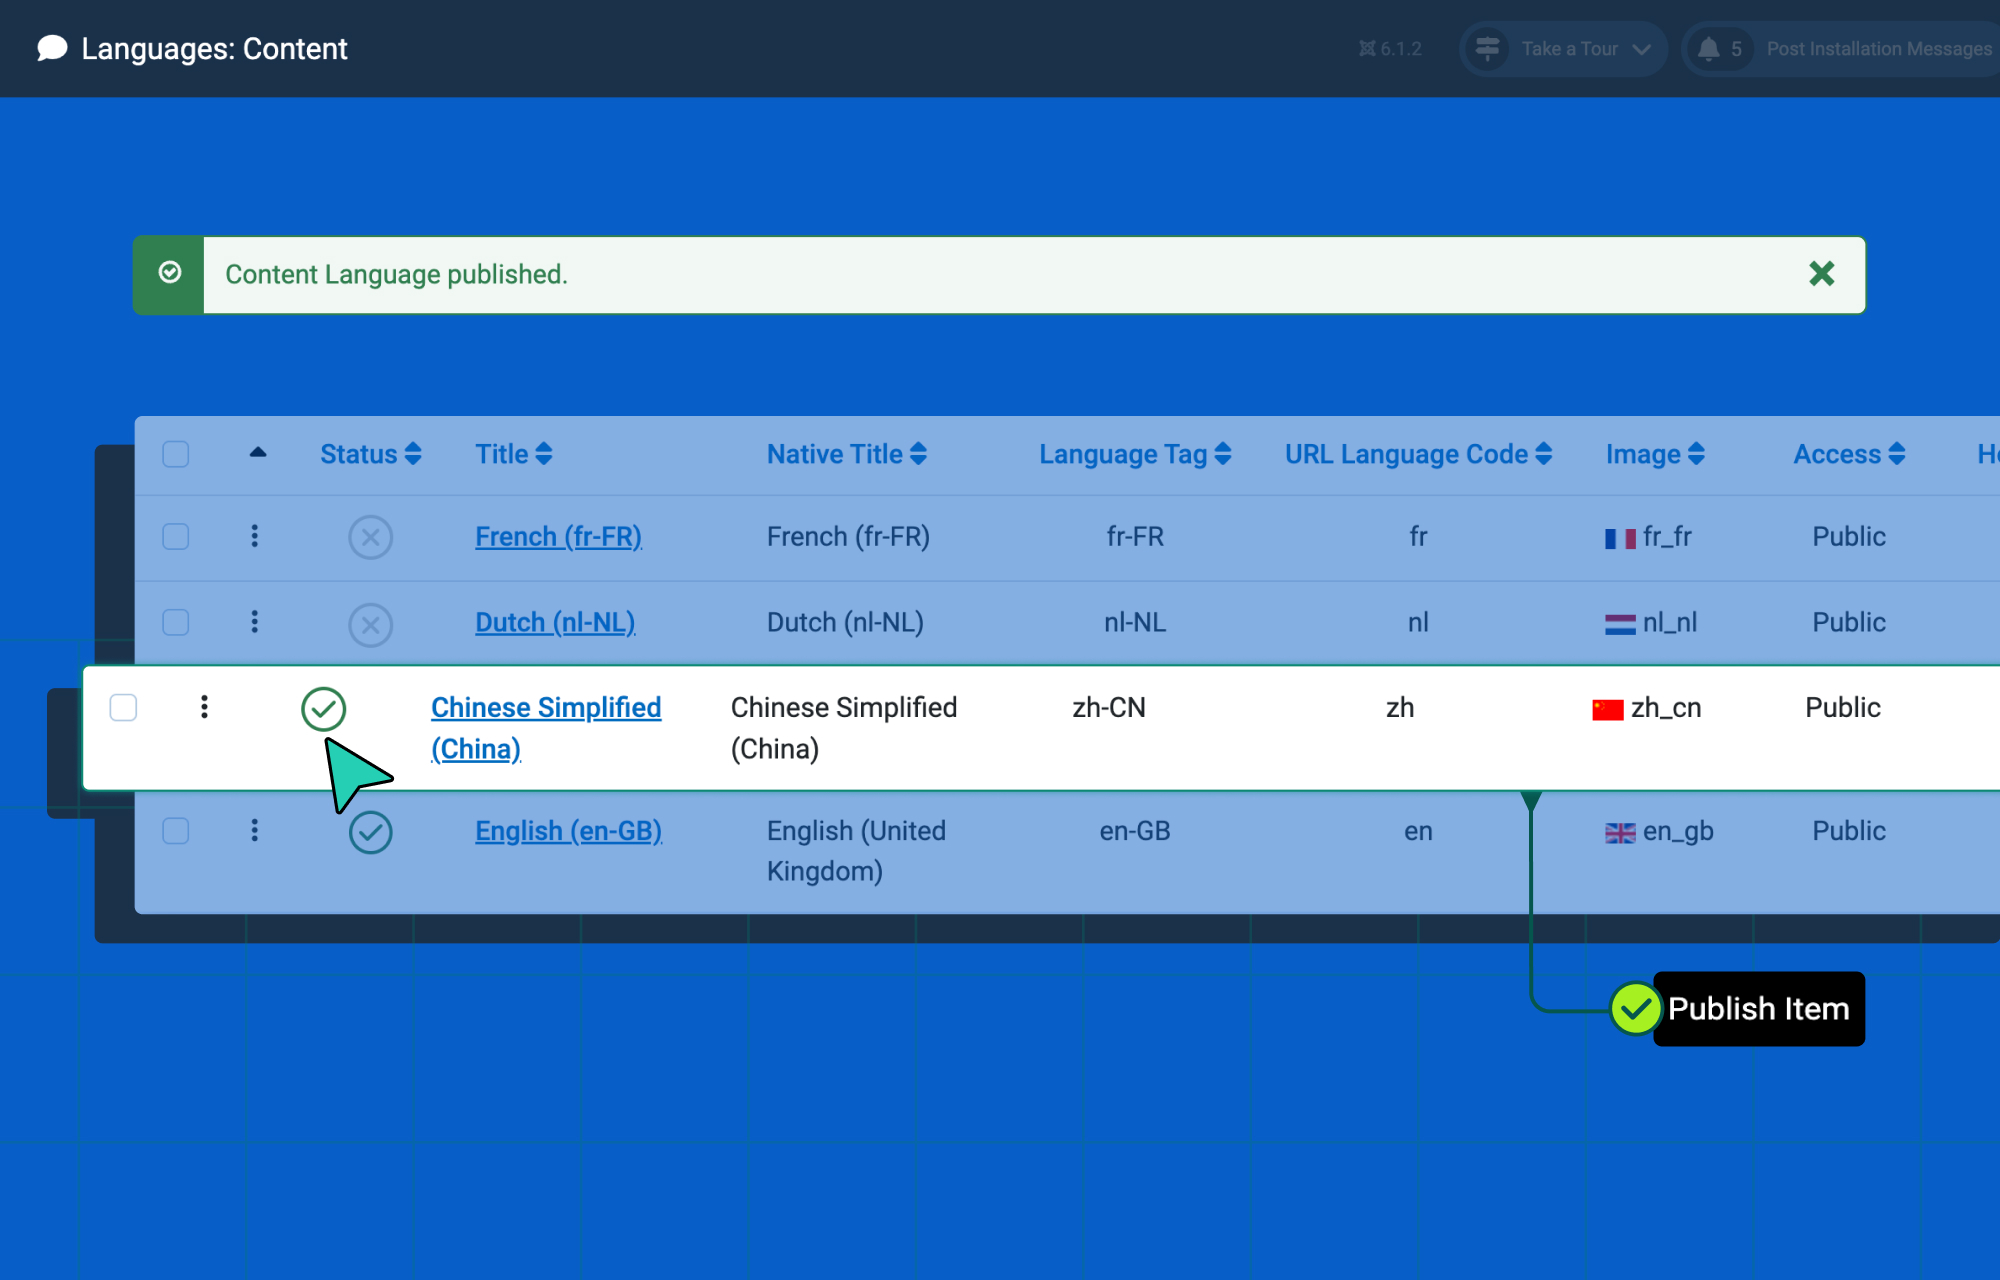
Before Joomla can display anything in any other language, it needs the language pack installed.
- From your Joomla dashboard, go to System > Manage > Languages.
- Find and install your desired language. For this demonstration we are installing Chinese (Simplified).
- At the top of your screen click Content Languages and publish your installed language.
Step 2: Enable the Required Plugins
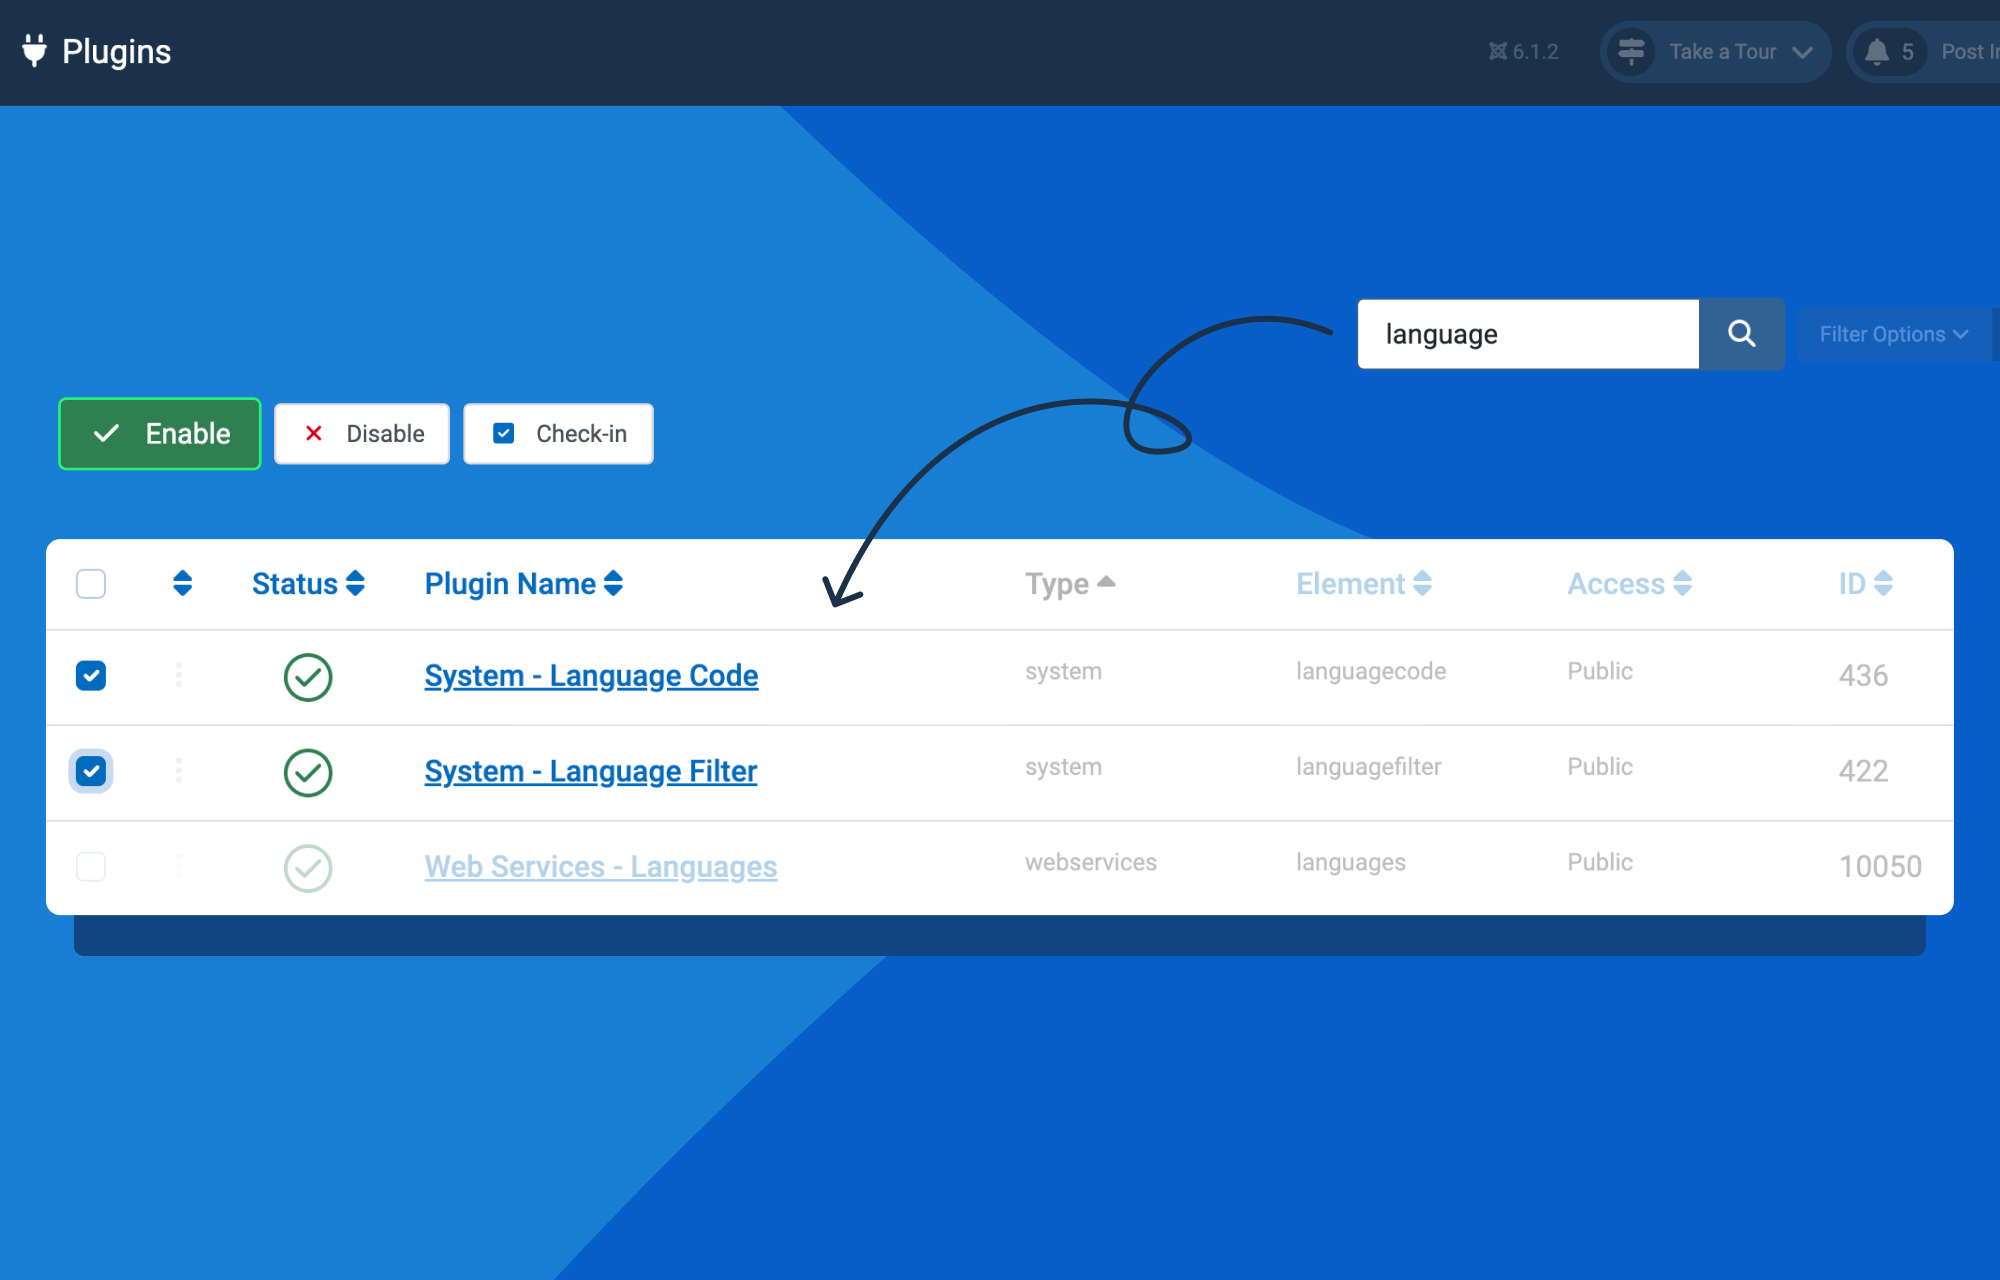
Next, enable the Joomla plugins that power your multilingual website. These plugins ensure the correct language is displayed to visitors based on your multilingual configuration.
- Go to System > Manage > Plugins.
- Find System - Language Code and System - Language Filter.
- Enable both.
Step 3: Create a Menu for Each Language
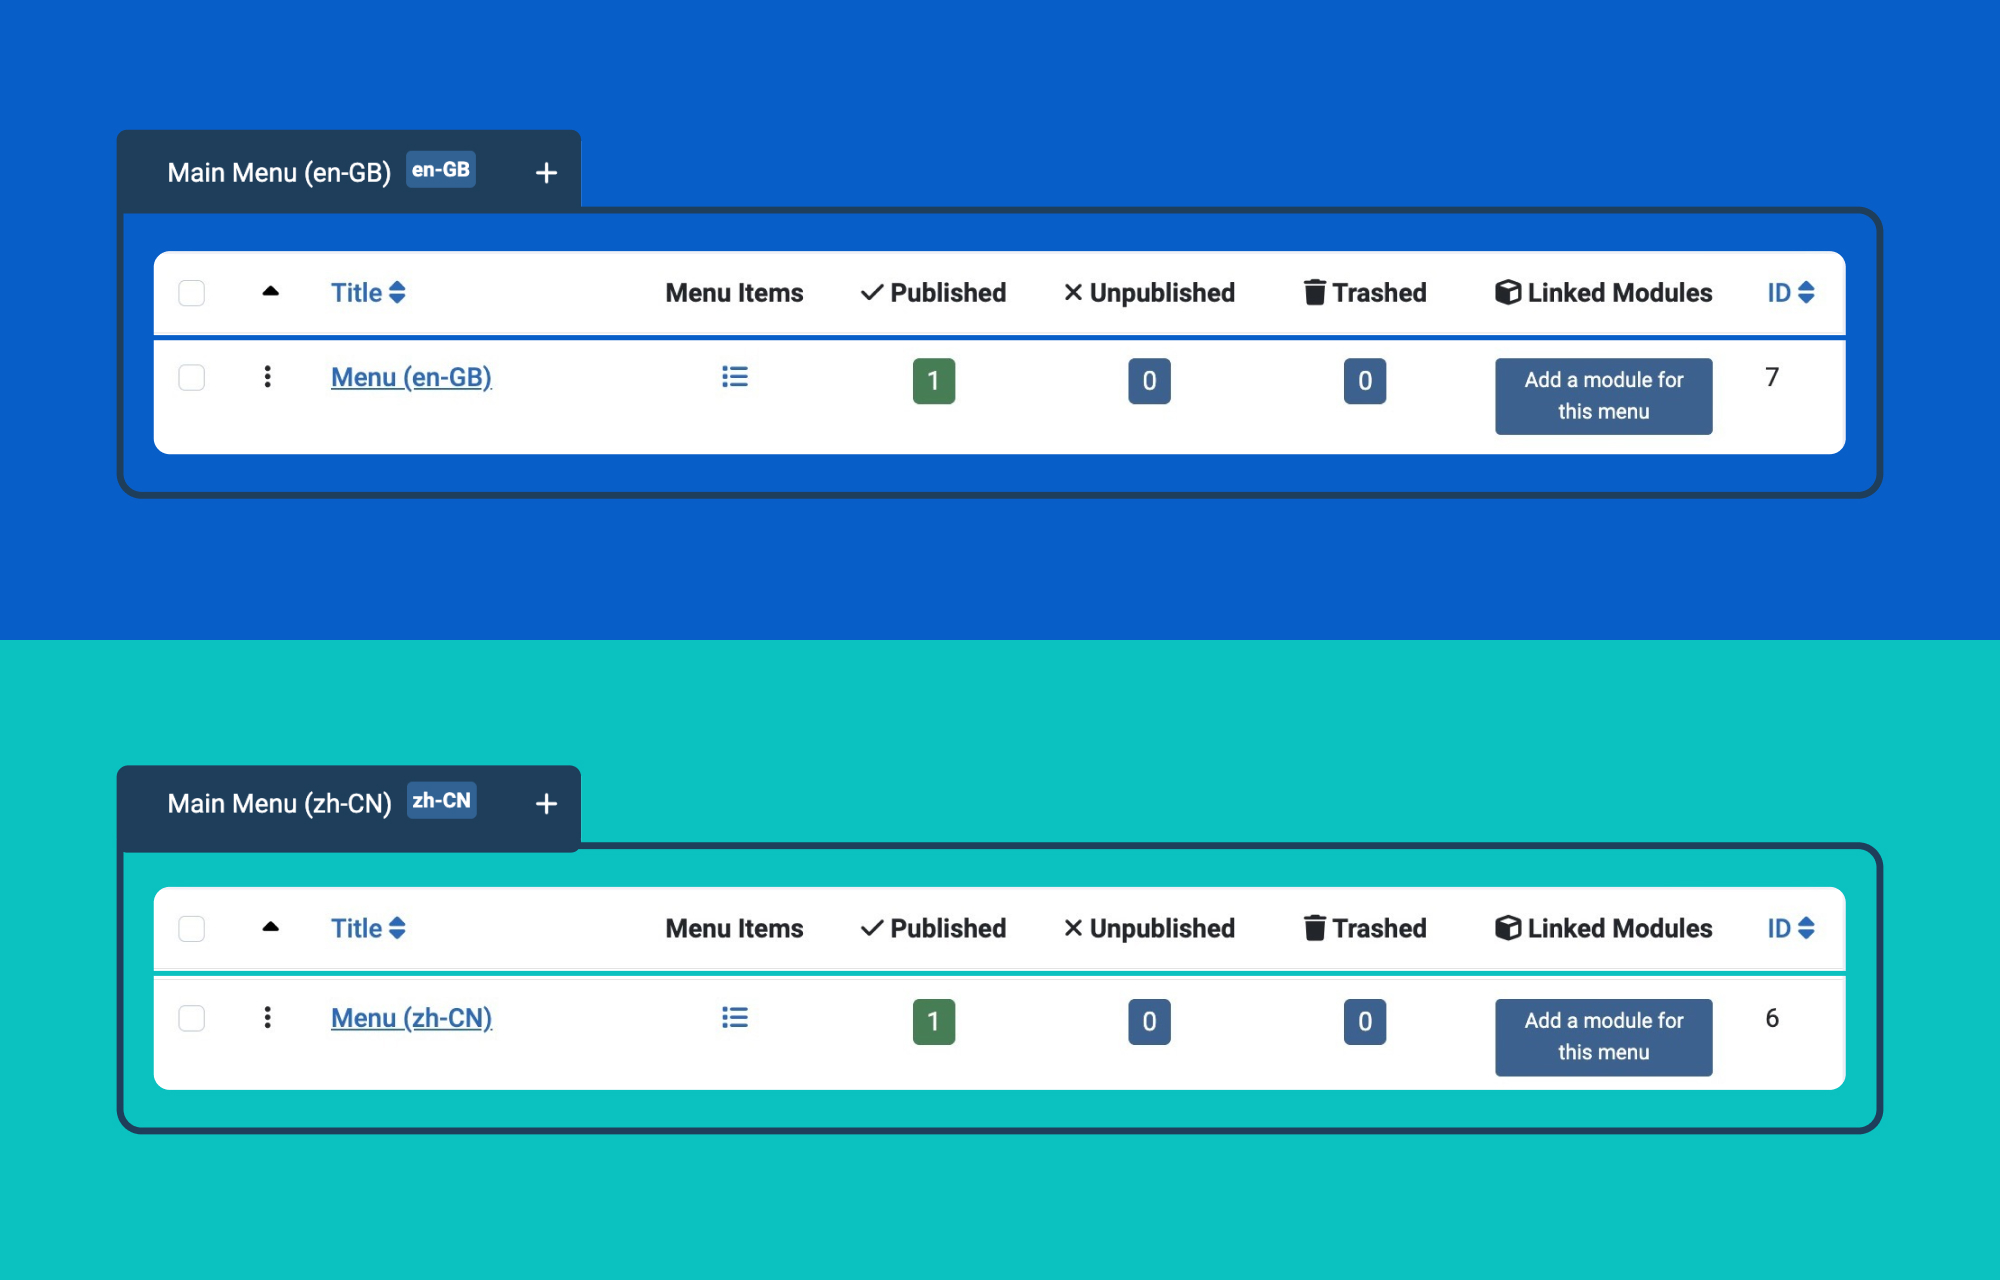
Like you already know, Joomla ties content to menus on a per-language basis, so each language needs its own menu. From your dashboard:
- Go to Menus > Manage and click + New.
- Give the menu a title and a unique name, then Save & Close.
- Repeat this for every language you're supporting. Since we're working with Chinese and English, we'll end up with two menus, one per language.
Step 4: Create a Menu Item for the Newly Created Menu
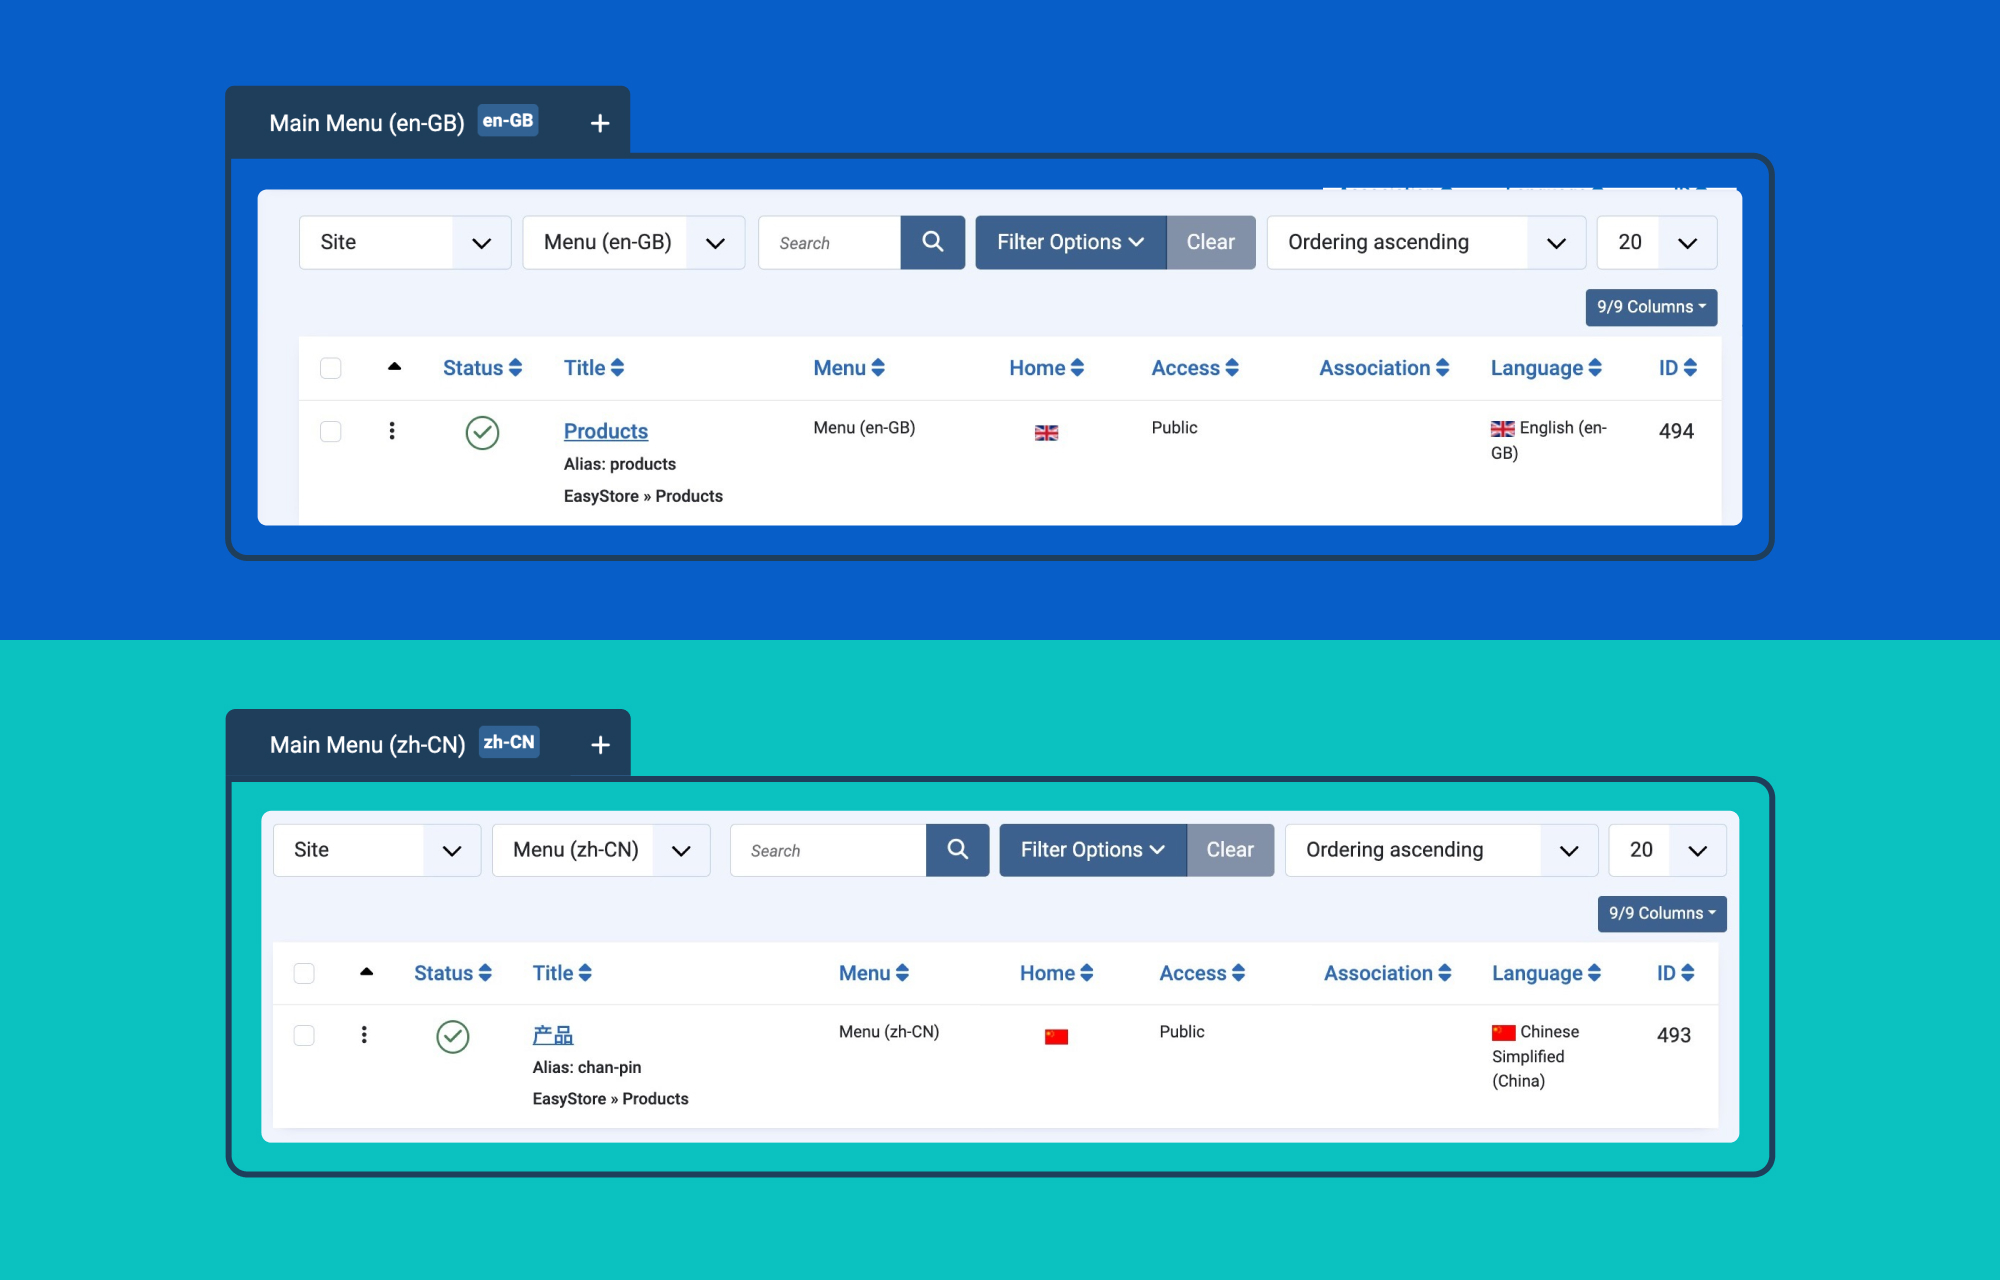
Since we created the menu, it has to have an item right? Go on and create an item for this Main Menu (zh-CN)
- Title: 产品
- Menu item type: EasyStore > Products
- Menu: Main Menu (zh-CN)
- Language: Chinese (simplified)
Hit Save and Close.
Repeat the Same Process for the English Language.
Step 5: Add a Language Switcher Module
This is the flag icon your visitors will actually click to change languages, so don't skip it.
- Go to Content > Site Modules and click + New.
- Select the Language Switcher module.
- Give it a title and assign it to a module position. In this demo, we're placing it in the main menu area.
Your Joomla core is now fully multilingual-ready. The next part is where EasyStore comes in.
Part 2: Translate Your Products with EasyStore
Now that your Joomla site is multilingual-ready, you can start translating your store content with EasyStore. So let's jump into it:
Step 6: Enable the EasyStore Multilingual Plugin
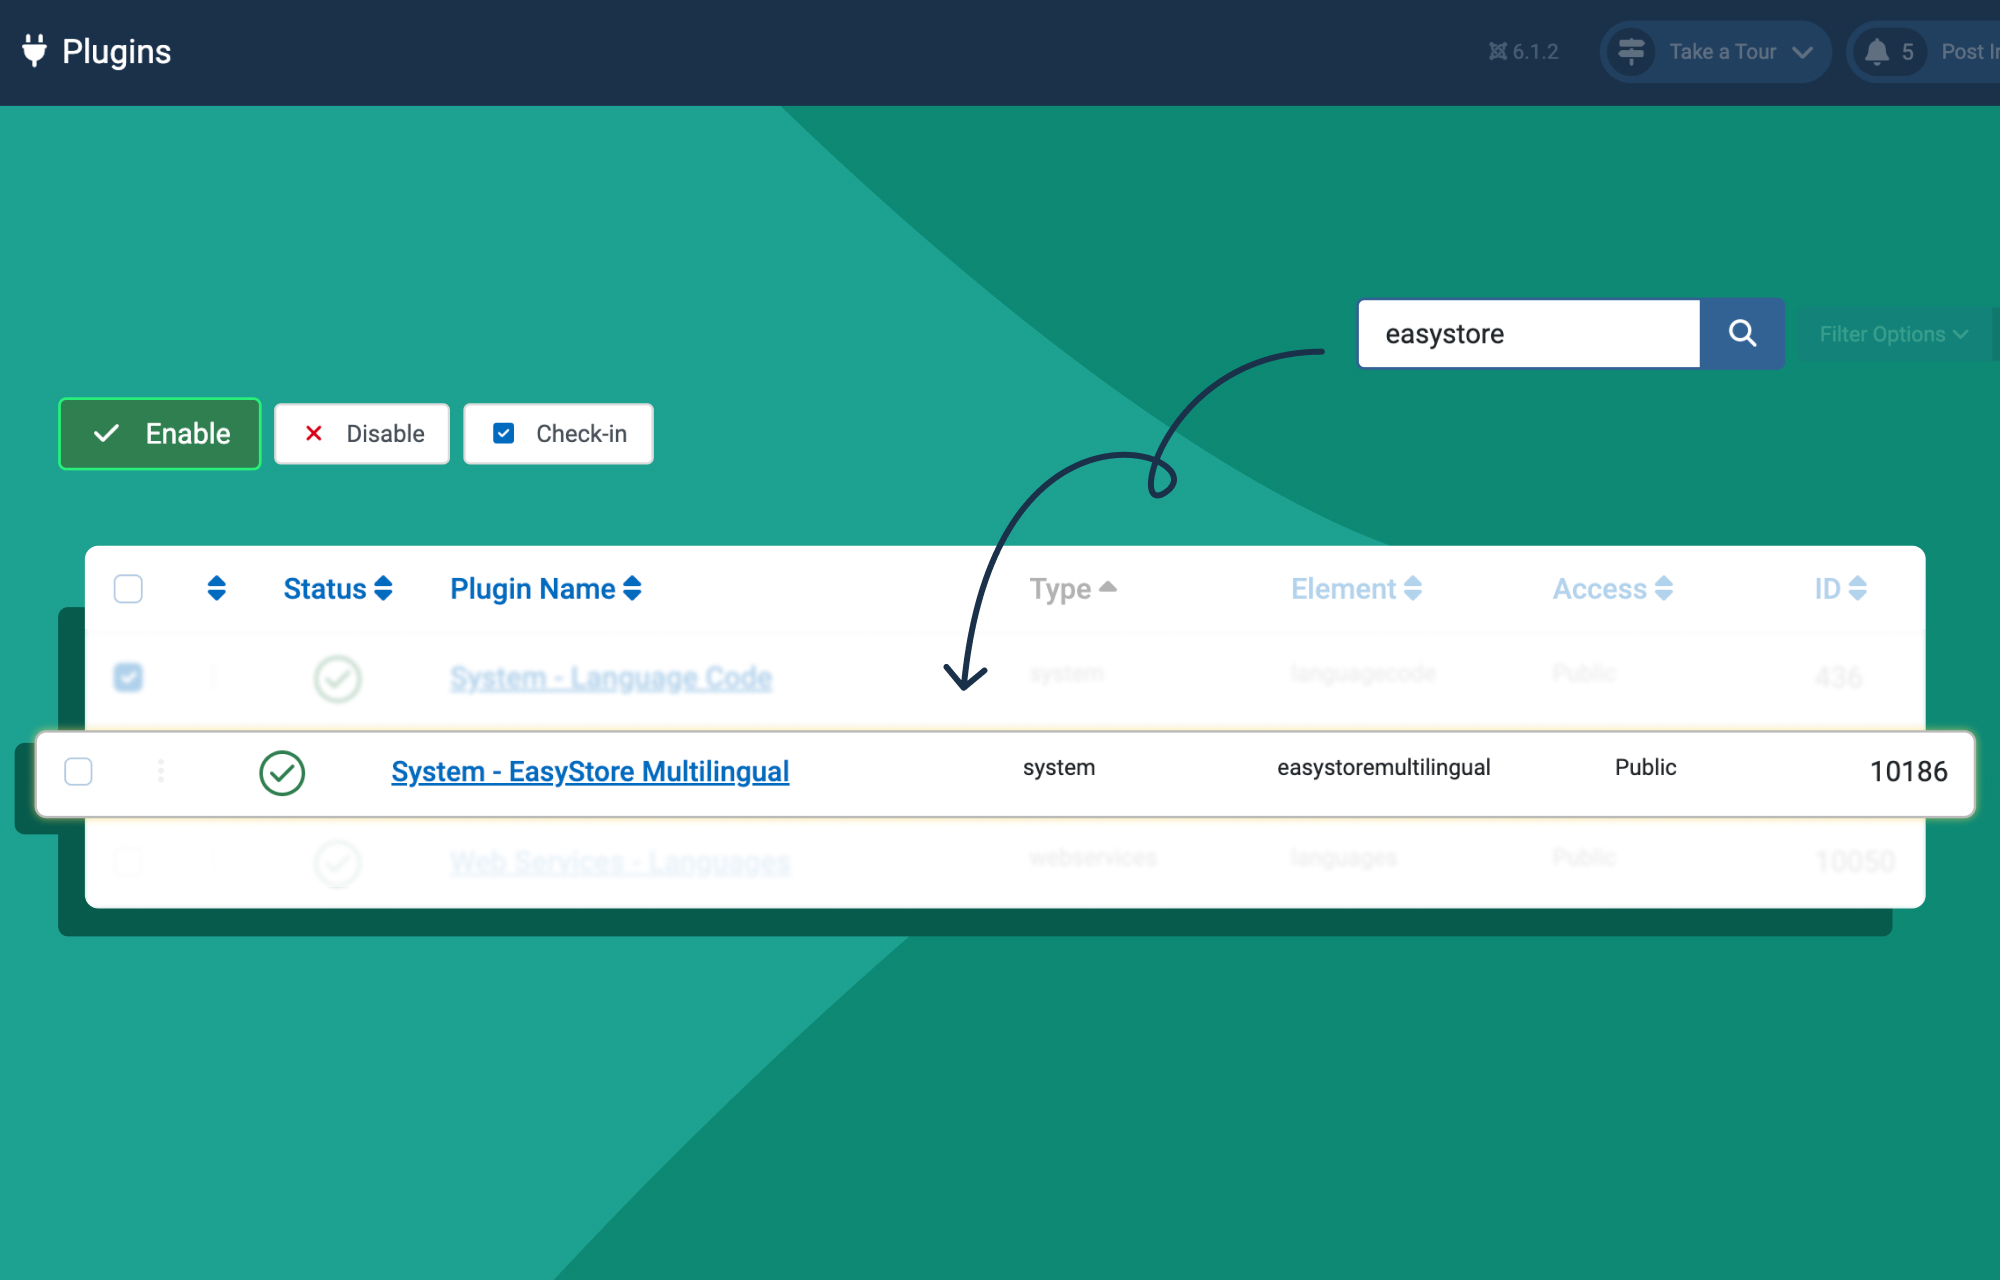
- Go back to System > Manage > Plugins.
- Find System - EasyStore Multilingual and enable it.
Note: This plugin is what unlocks translation across EasyStore. It is a compulsory step to activate this plugin. Without it, EasyStore's translation interface won't appear at all.
Step 7: Configure AI Auto-Translation (Optional)
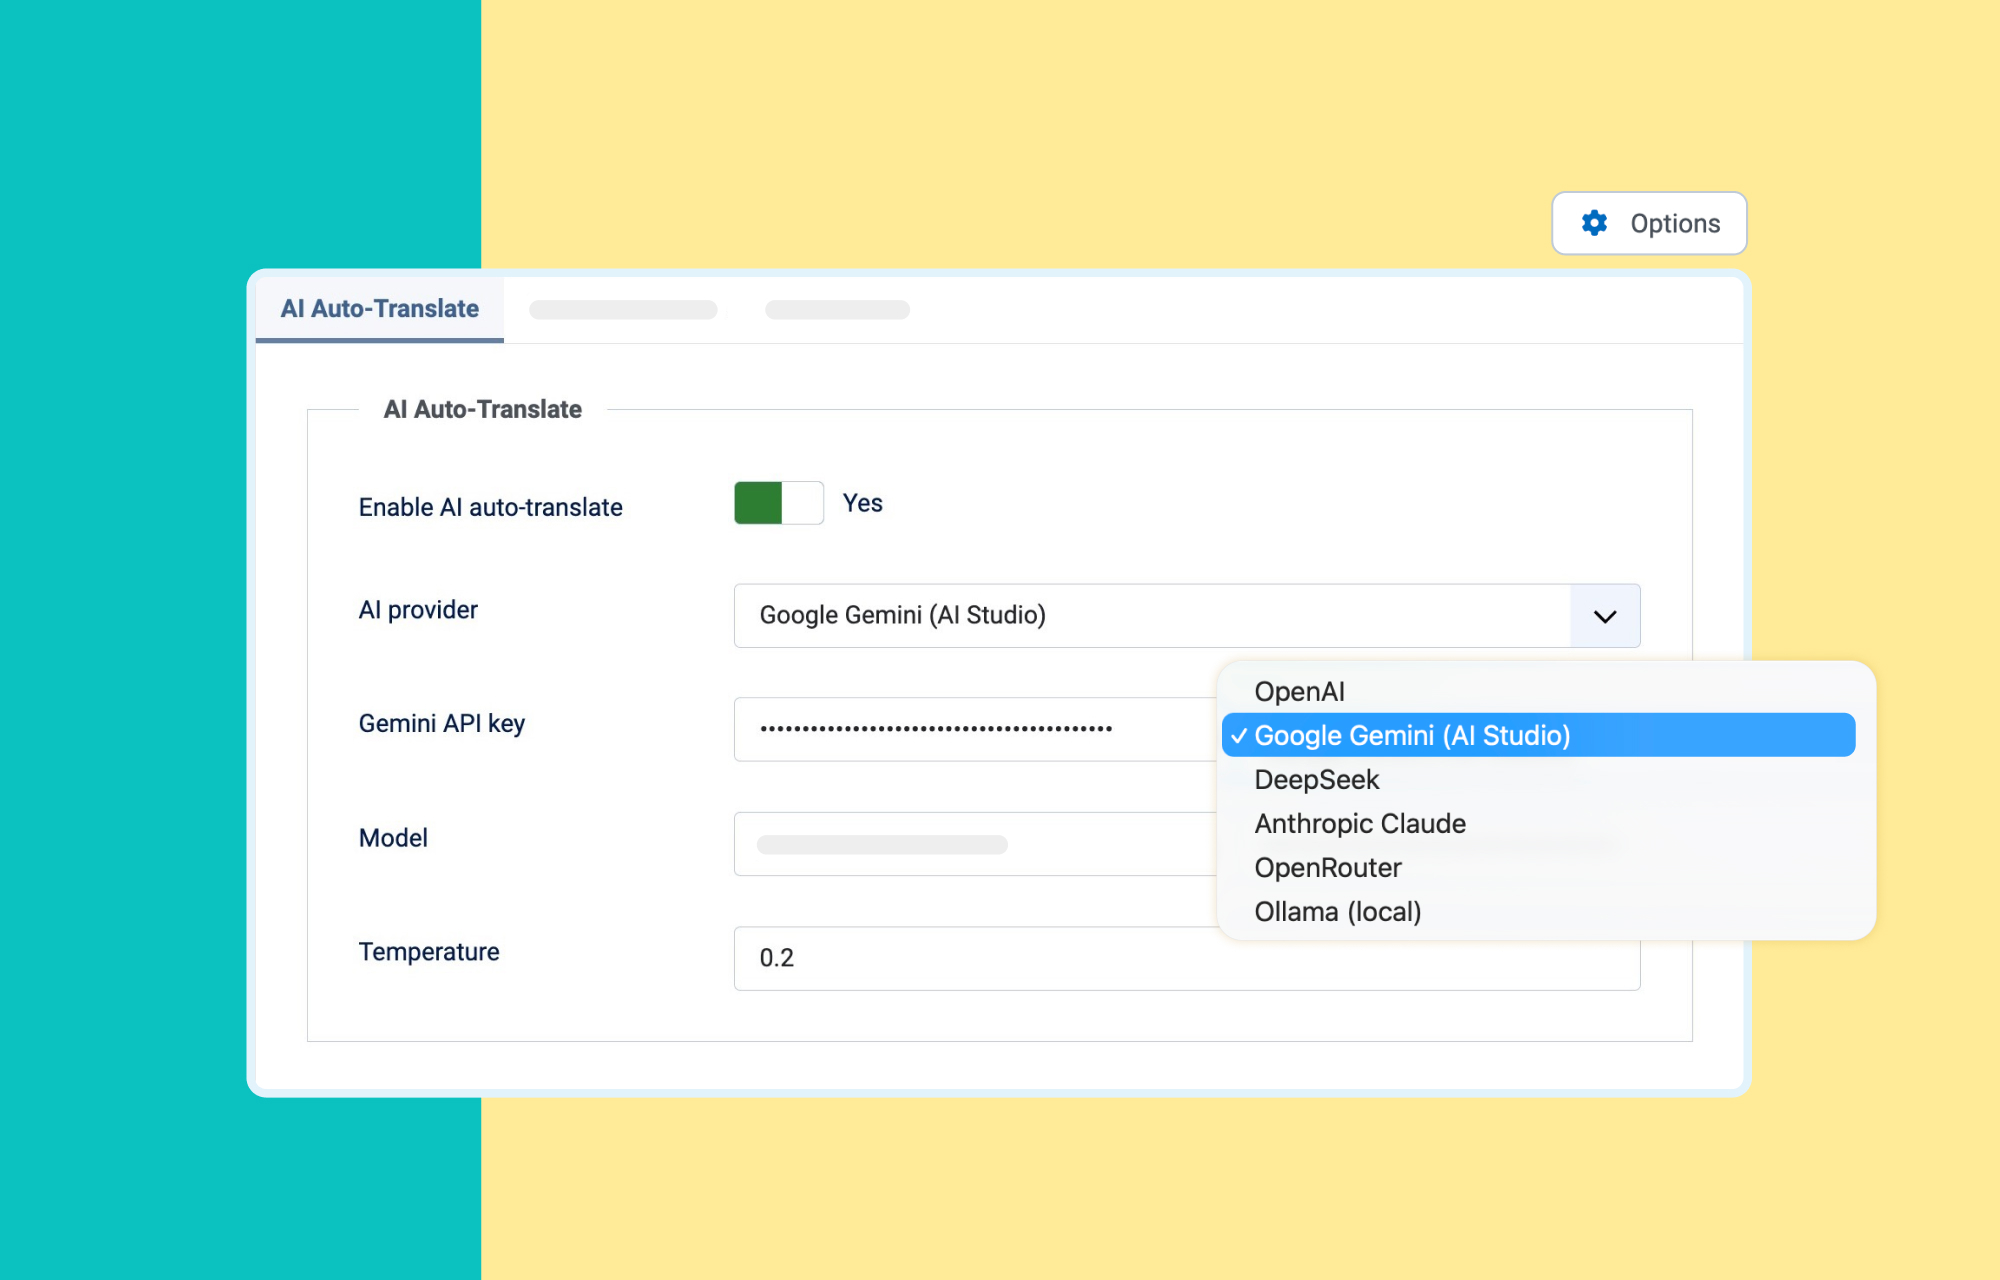
EasyStore supports AI-powered translations using supported AI providers. Once configured, AI translation becomes available across supported content, including Products, Categories, Tags, Attributes, and Settings. Skip this step if you plan to translate everything manually.
Enable AI Auto-Translate
- Go to System > Global Configuration.
- Select EasyStore from the left sidebar.
- Open the AI Auto-Translate tab.
- Enable AI Auto-Translate.
Configure an AI provider
Choose your preferred provider from the AI Provider dropdown. The list currently includes:
- OpenAI
- Google Gemini (AI Studio)
- DeepSeek
- Anthropic Claude
- OpenRouter
- Ollama (local)
After selecting a provider, enter the required API credentials. For example, Google Gemini (AI Studio) needs:
- Gemini API Key
- Model
- Temperature (a low value like 0.2 is generally recommended for translation tasks)
Click Save or Save & Close once configured.
With this done, an Auto-translate button will appear in the translation editors for Products, Categories, Tags, Attributes, and Store Settings. Treat AI-generated translations as a starting point, not a final draft. Review them before publishing to make sure they match your intended meaning, brand voice, and terminology.
Step 8: Set Your Default Products to "All" Languages
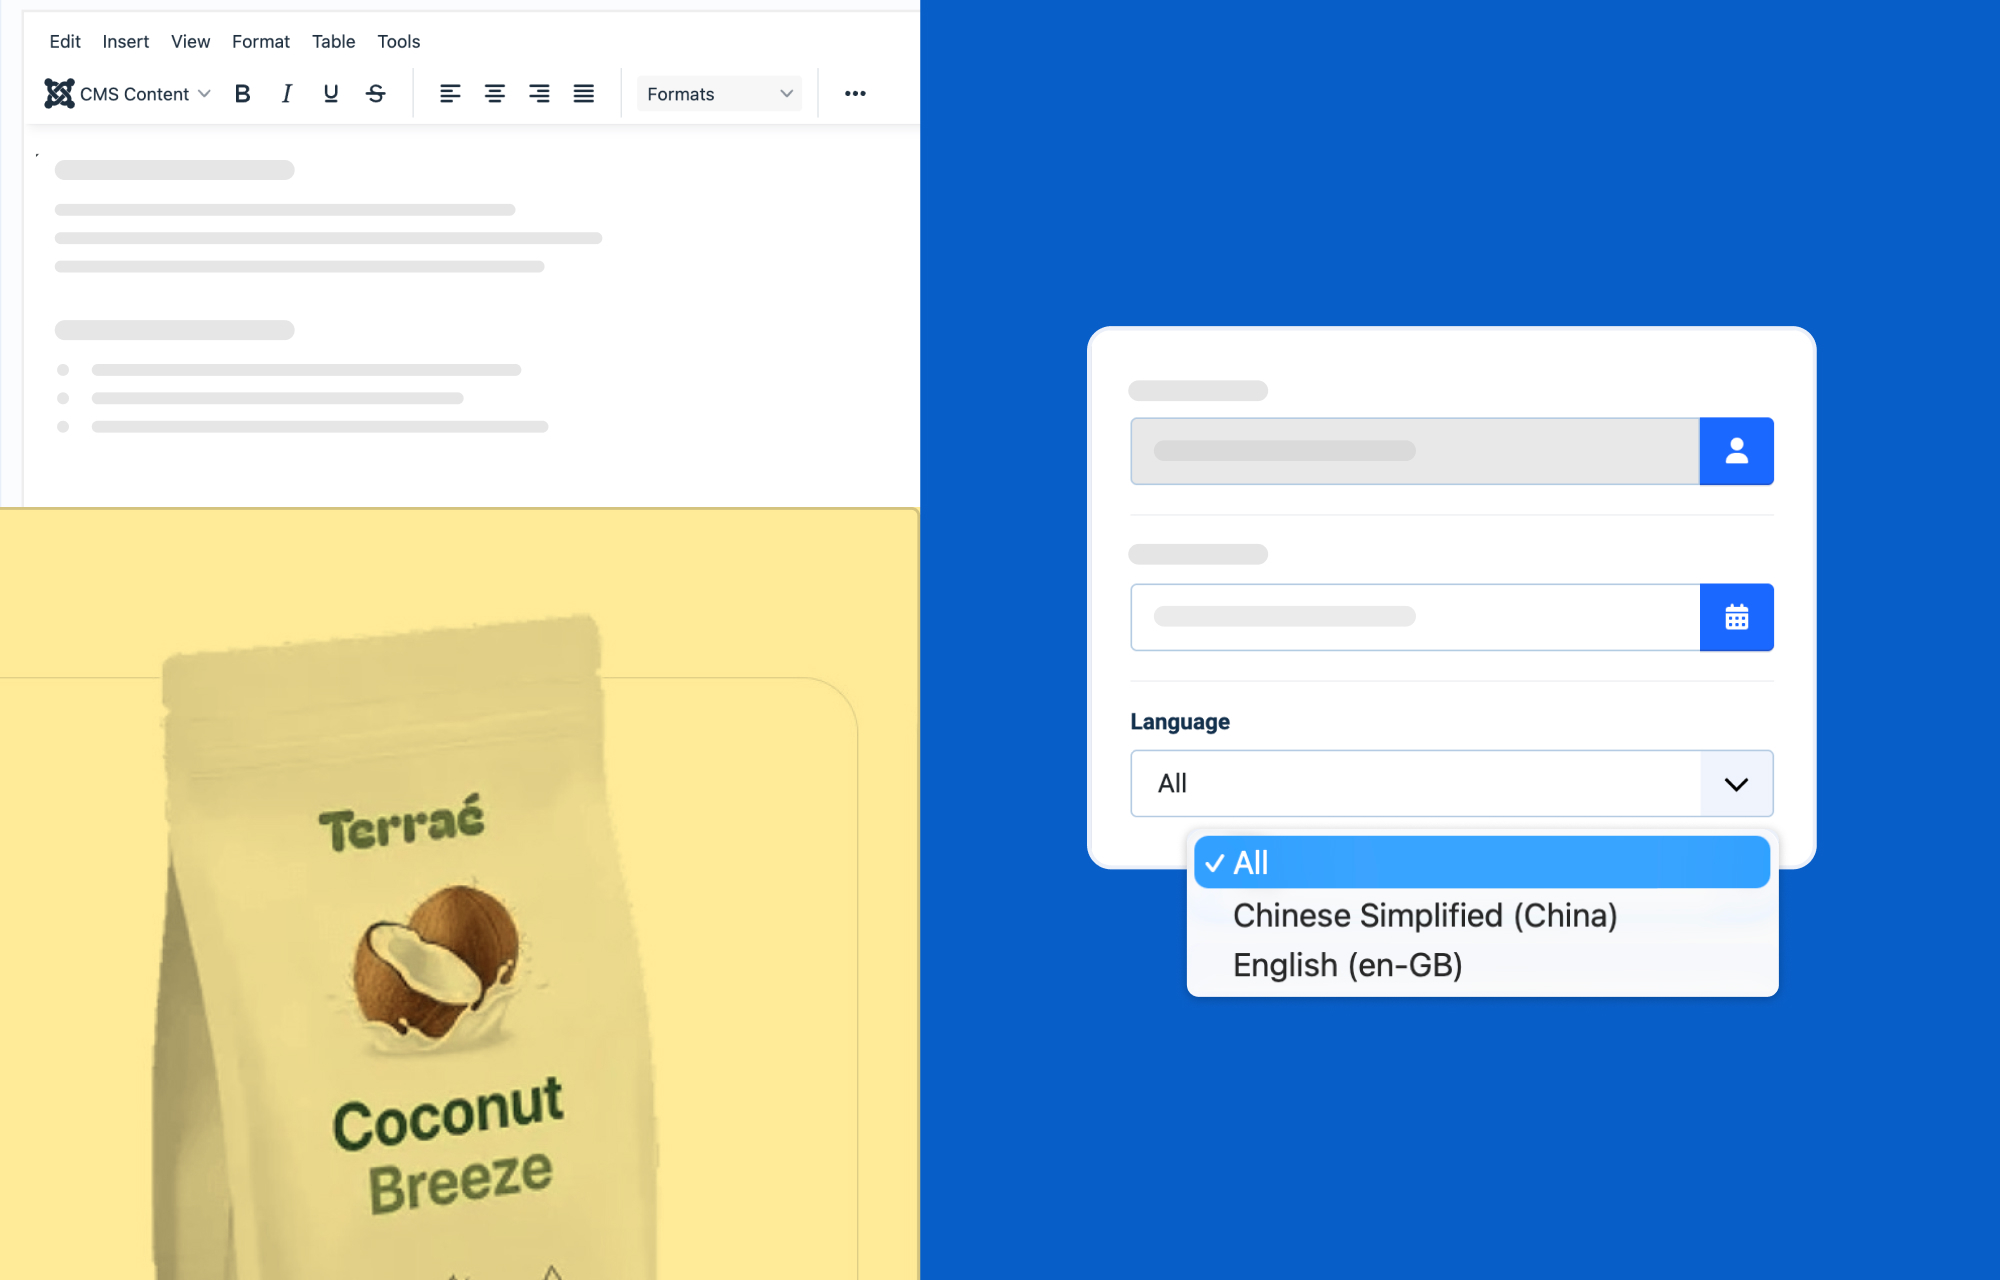
Before translating anything, check the language setting on your existing products.
Go to Components > EasyStore > Products and confirm each product's language is set to All, not a specific language like English.
This step is easy to overlook, but it's essential: if a product is locked to one language, EasyStore won't treat it as a source you can translate from.
Double-check this before moving on.
Step 9: Start Translating the Product Strings
- From Components > EasyStore > Products, click the Translate button next to any product. This opens the translation interface.
- You have two ways to fill in the translated fields:
- Manually, by typing the translated text into each target field next to its source field.
- Automatically, by clicking Auto-translate, available if you configured AI in Step 7. - Any field you haven't filled in yet will show a Missing status pill, a quick visual cue for what still needs attention.
- Once all the fields are translated, click Save Target.
Repeat this for every product you want available in Chinese.
If you edit a product later, you don't need to redo the whole translation. Only the fields you changed need retranslating; everything else stays as is.
Do check out our documentation to learn more about translating products.
Step 10: Translate Categories, Tags, Collection or Brands
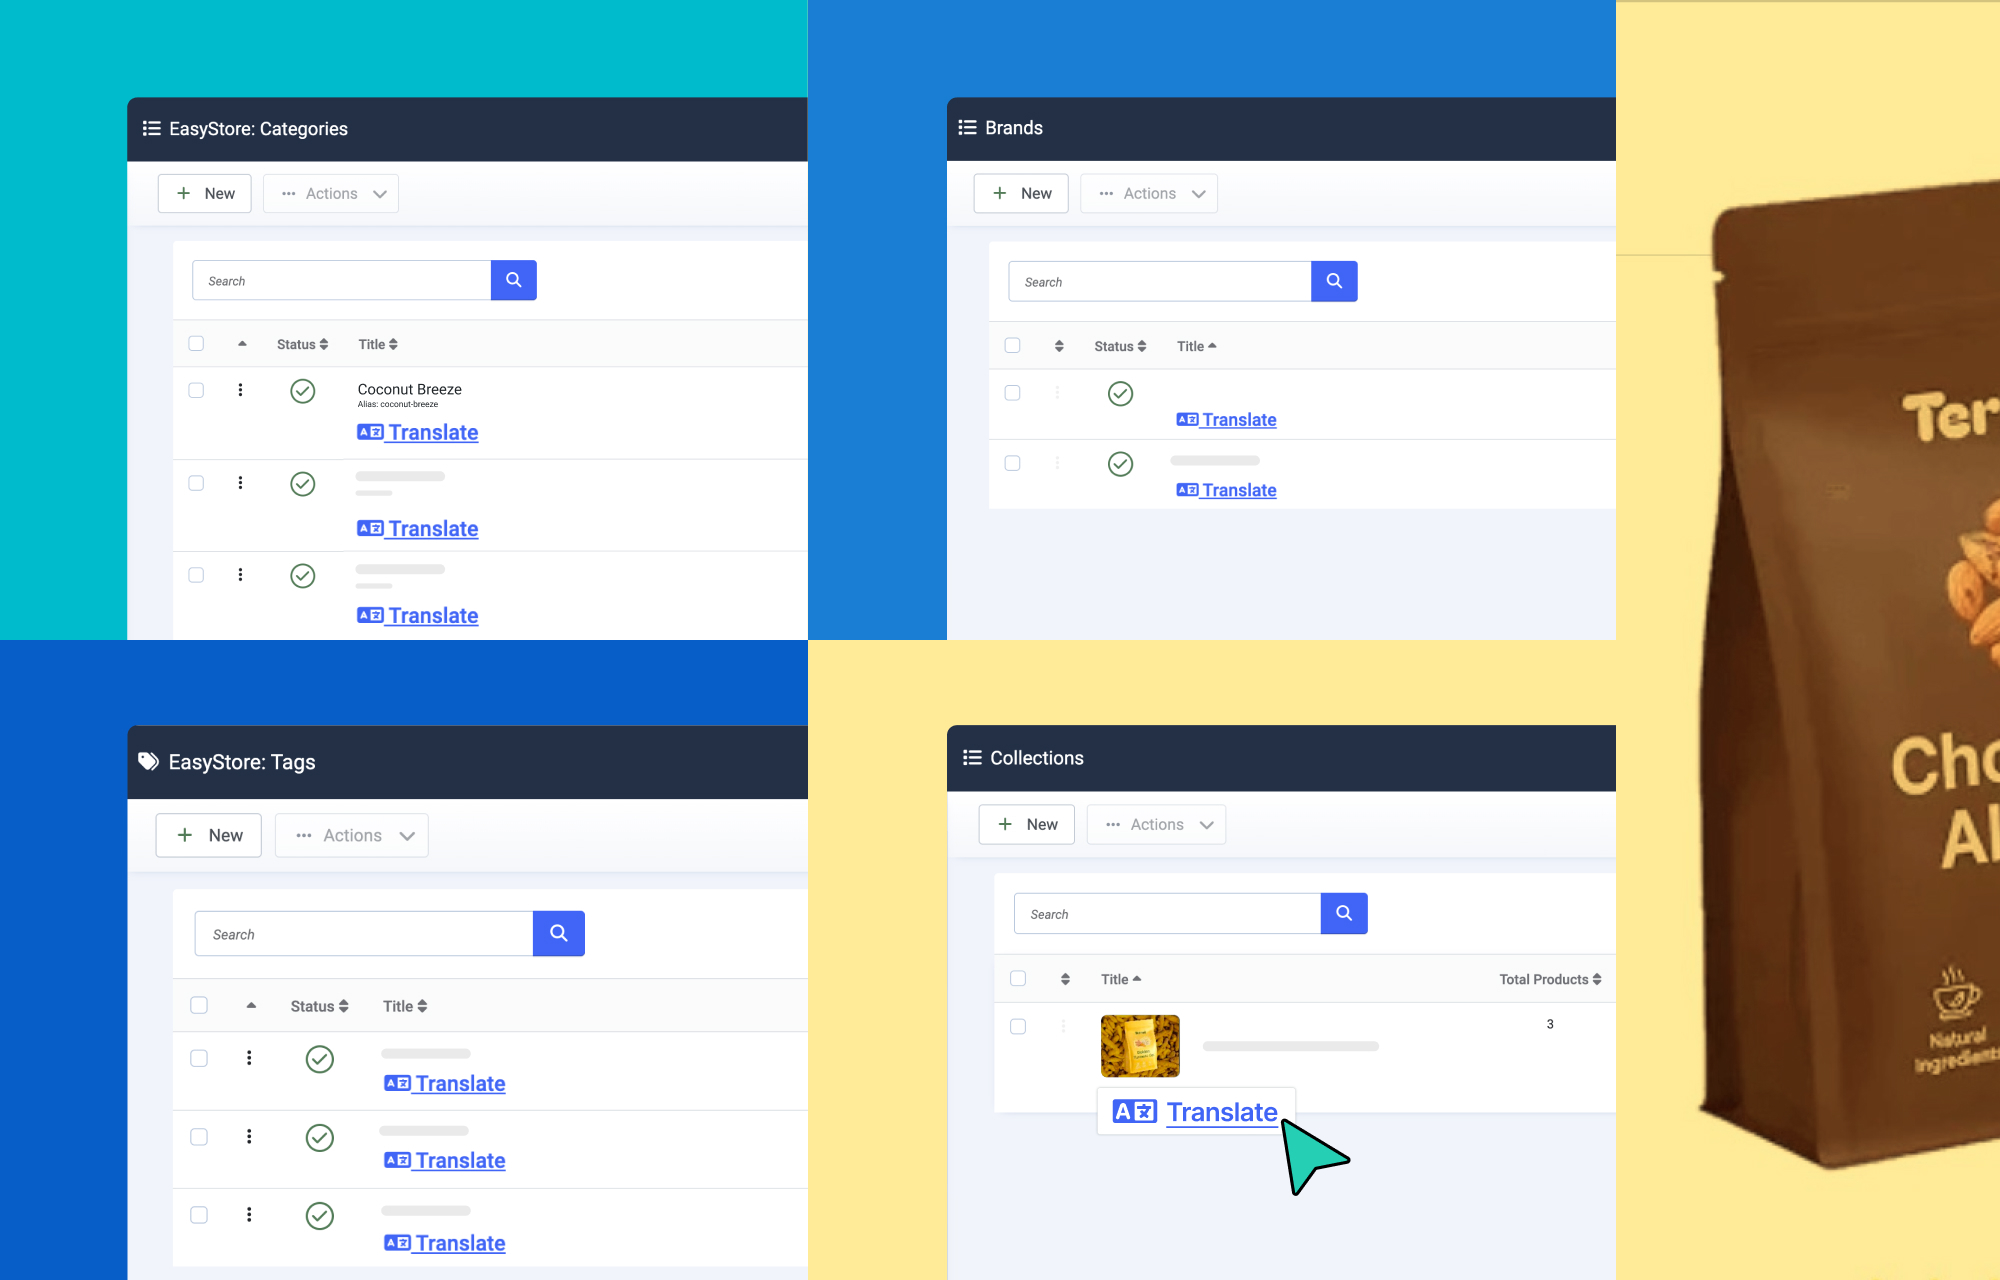
Go on and translate the strings related to your Categories, Tags, Collections, or Brands. It's similar to the way you translated the strings for your products.
Just select the option, Collections, Tags, Categories, or Brands, and begin translating individually.
You can check out the documentation on translating Categories, Tags, as well as Collections, and Brands for further help.
Step 11: Translate the Settings and Attributes Strings
So far you have finished translating the product language strings. There are also options or attributes pulled from the settings that were not associated with product translation, and that appear in various places on the product page.
So even after translating the strings related to your product, you will still need to translate a few other areas:
Translating Settings:
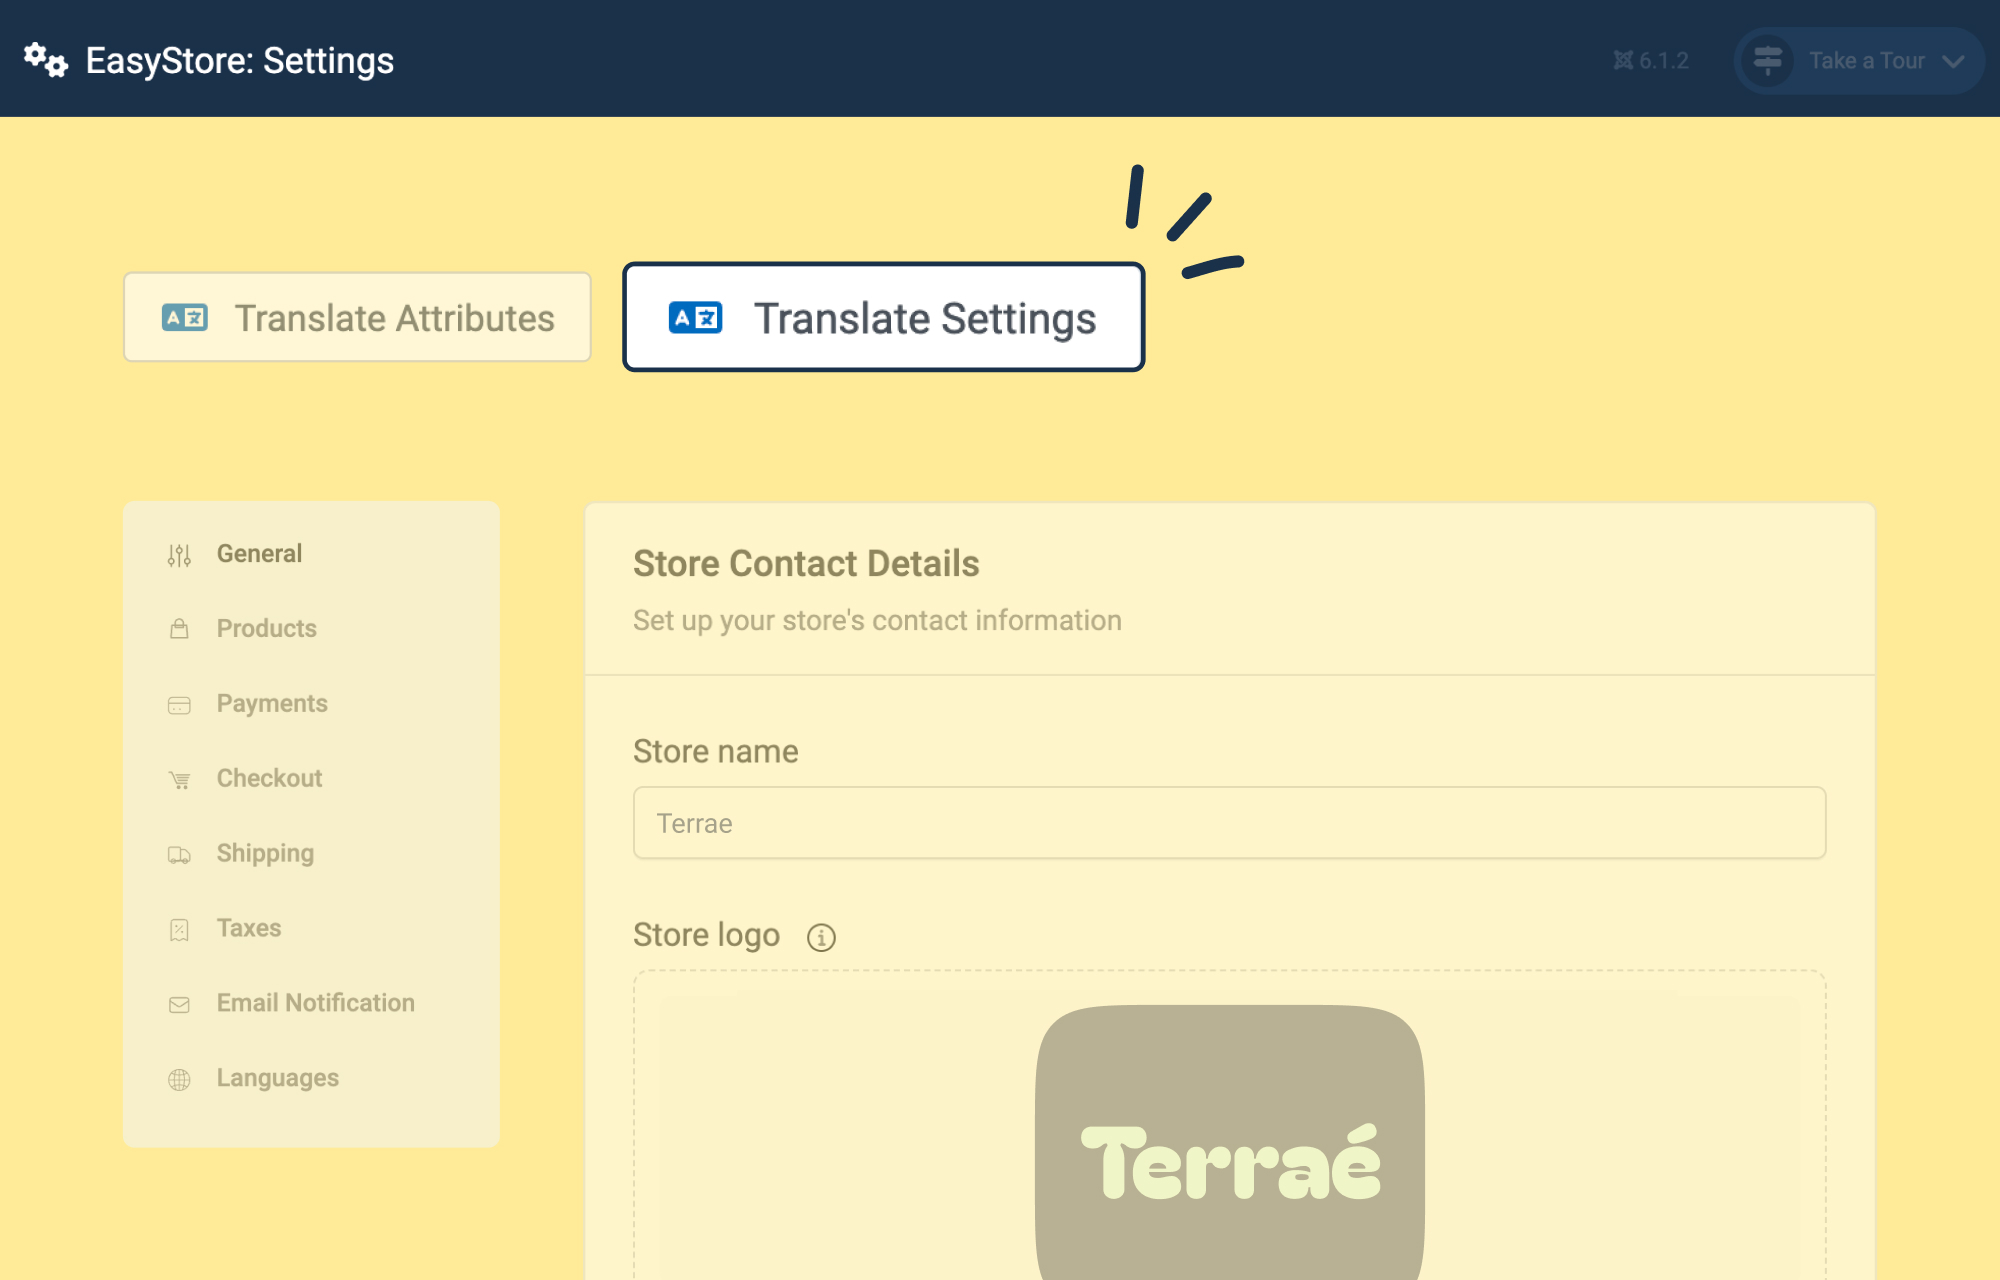
From Components > EasyStore > Settings, click Translate Settings. From here you can translate all the settings strings. You can either manually translate the strings or click Auto-Update to let your configured AI do the job.
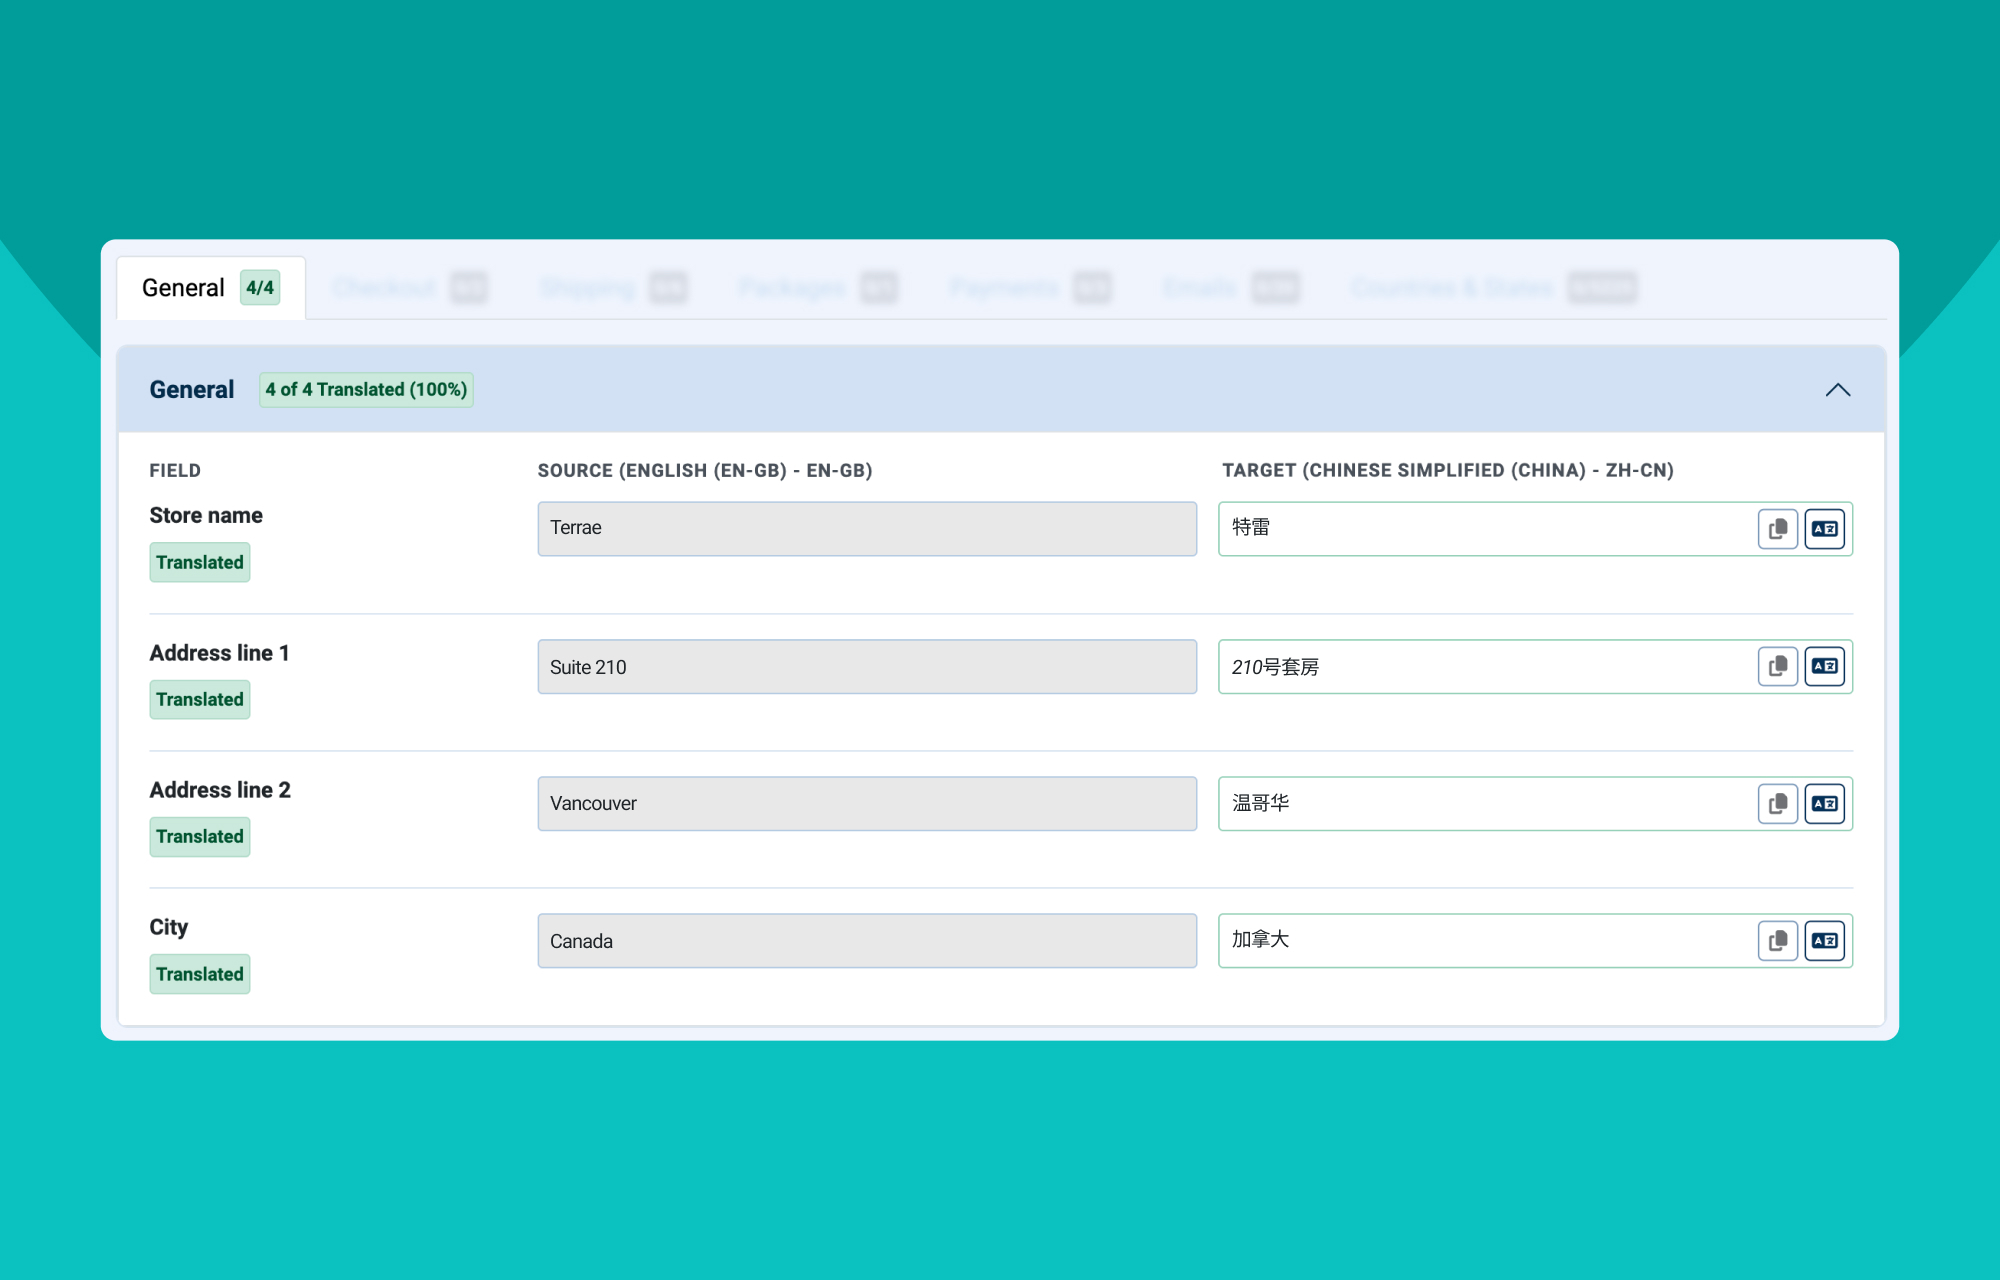
Translating Attributes:
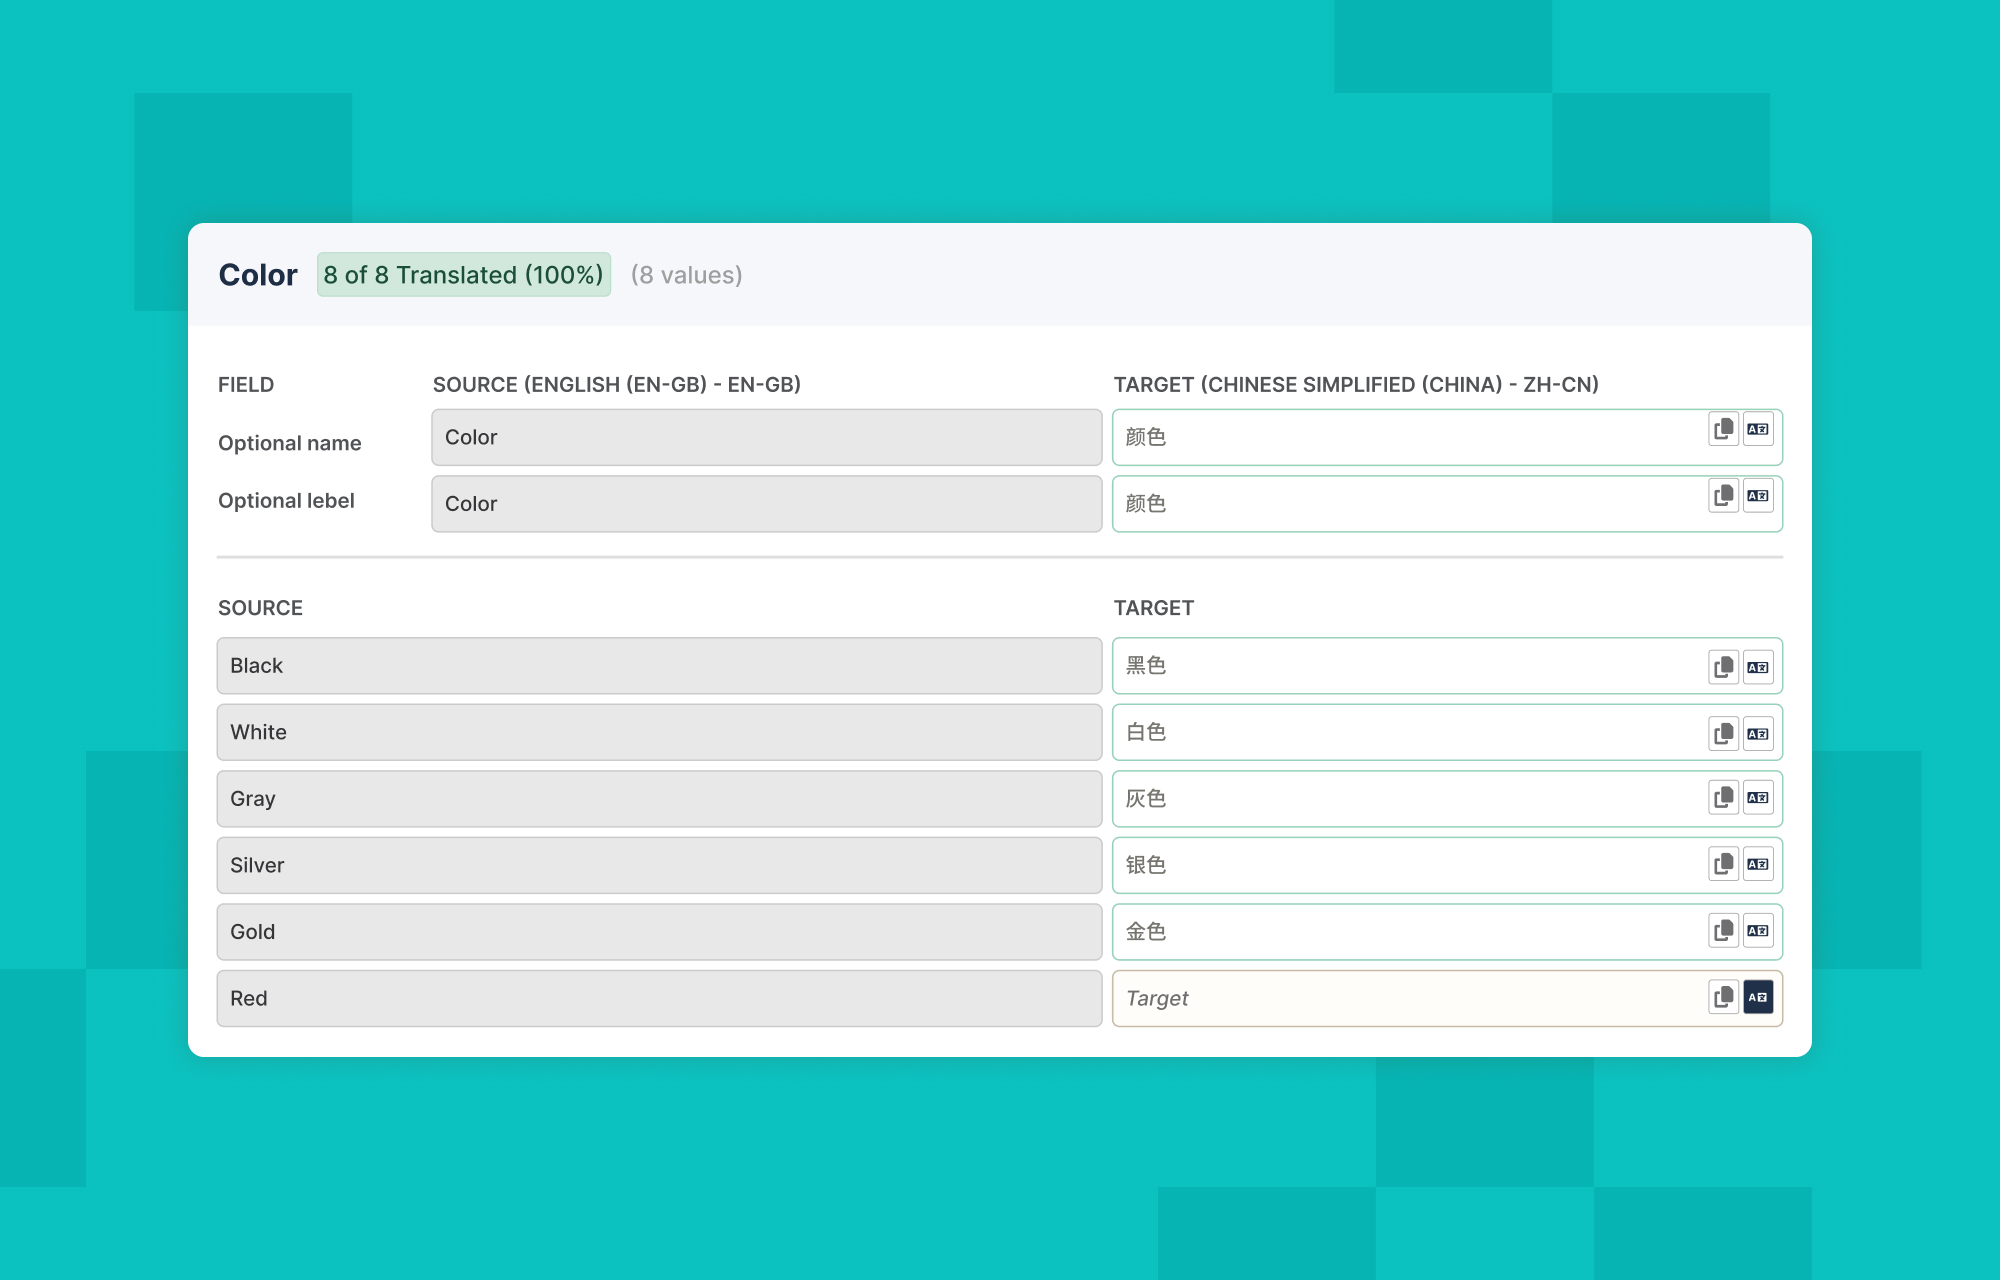
From Components > EasyStore > Settings, click Translate Attributes.
Translate the attributes the same way.
If you need a hand you can check out the documentation on translating settings and attributes here.
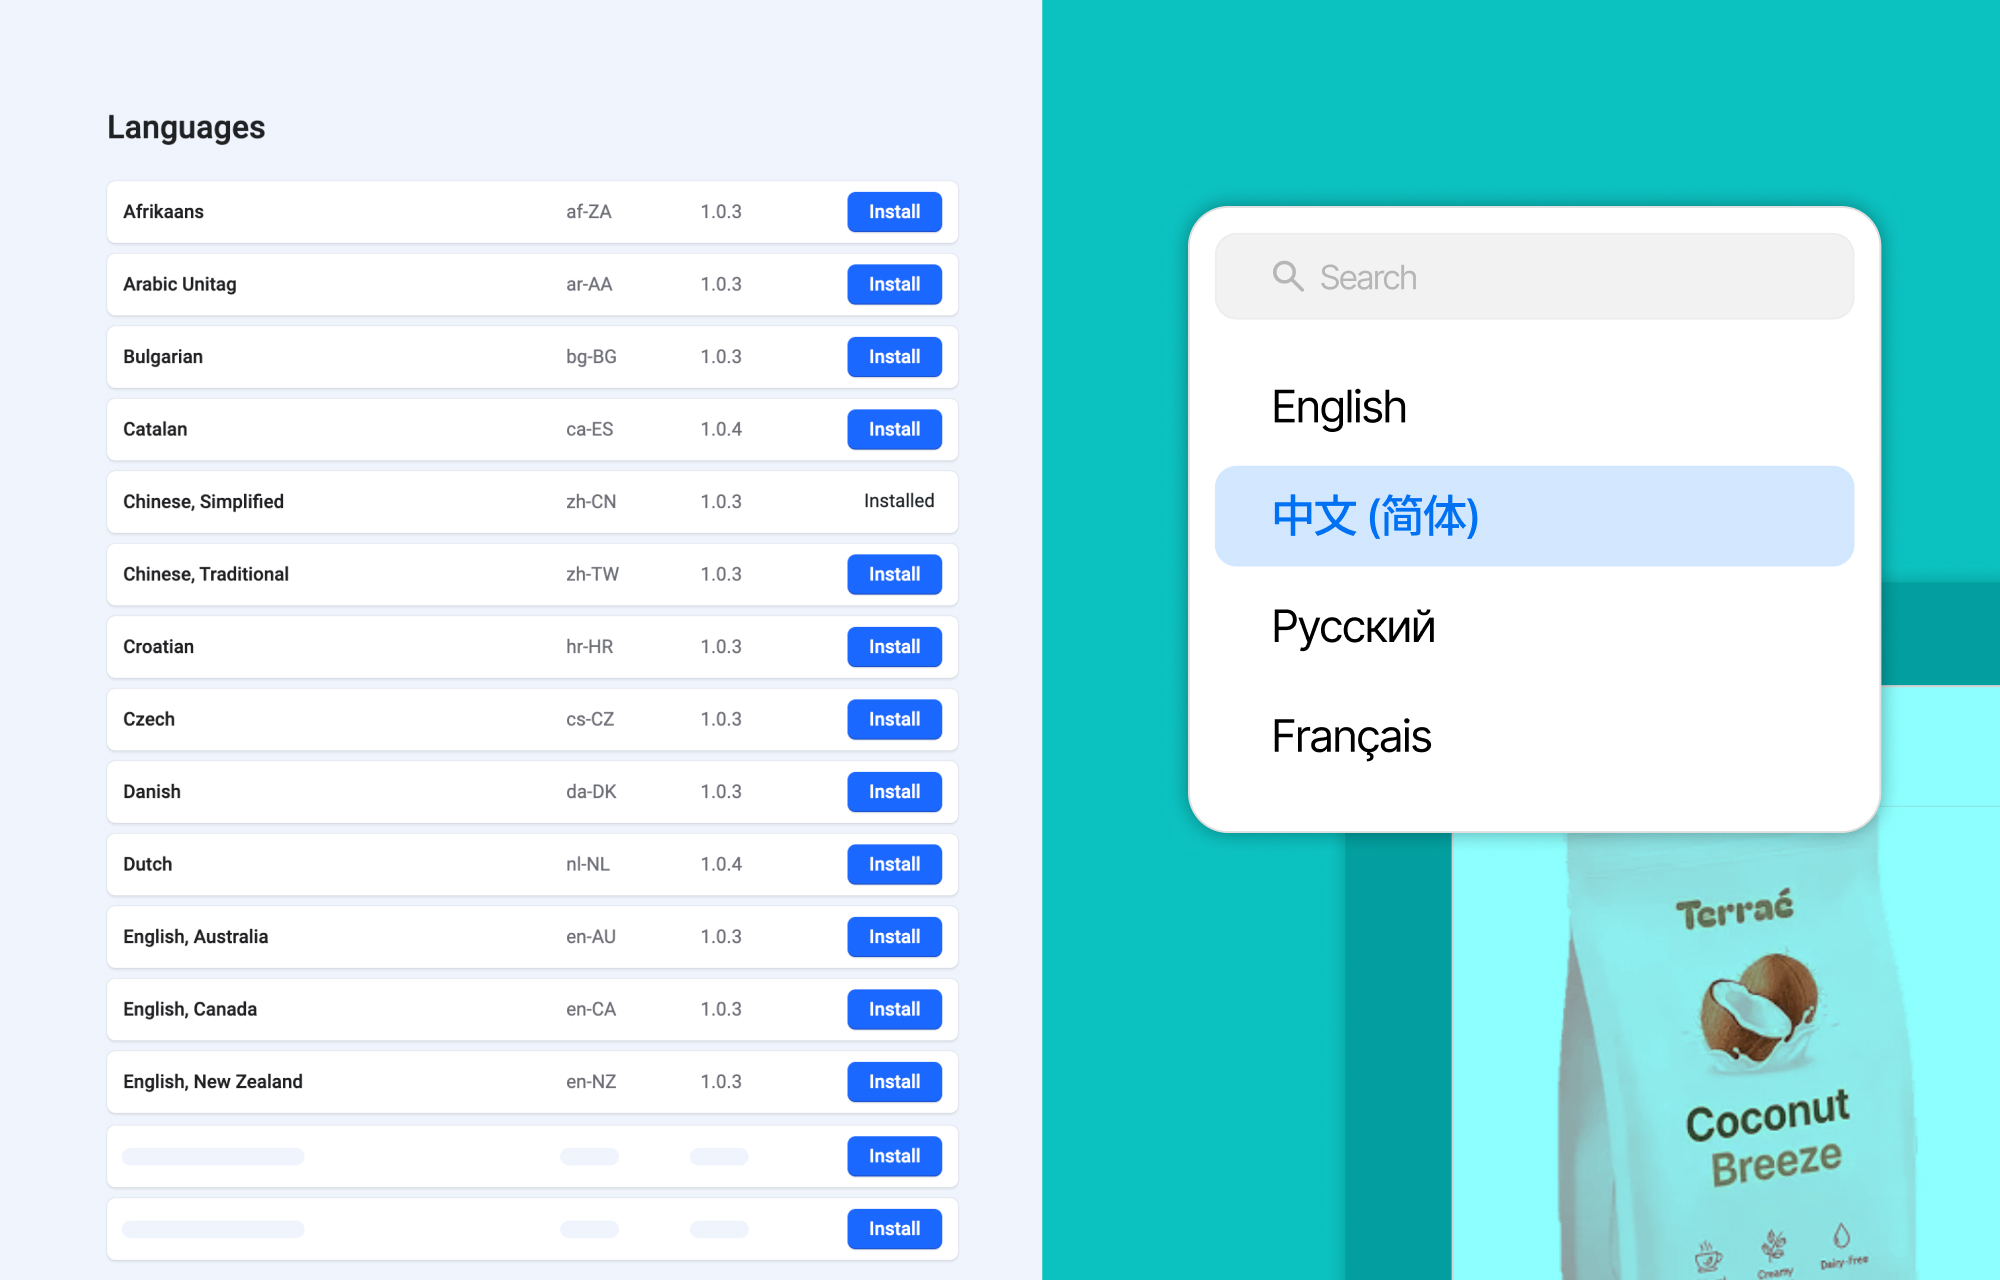
Step 12: Install EasyStore Language Pack
Simply head to EasyStore > Settings > Language, choose your desired language, and install it. For this demonstration we are installing the Chinese language pack.
Step 13: Troubleshooting Missing Translations
While EasyStore's translation tools cover most of your store content, you may occasionally come across a piece of frontend text that isn't available in the translation editor. In these cases, Joomla's Language Overrides feature lets you customize individual text strings
1. Find the Language Constant
Every translatable string in Joomla is associated with a unique language constant (for example, COM_EASYSTORE_CART_CLEAR). To create an override, you'll first need to identify the language constant for the text you want to translate.
- Go to System > Global Configuration.
- Open the System tab.
- Set Debug Language to Yes.
- Click Save.
Joomla will now display the language constant alongside the corresponding text on the frontend, making it easy to identify the correct key.
2. Create a Language Override
Once you've found the language constant, you can create an override for your target language.
- Go to System > Site > Language Overrides.
- Select the language you want to edit from the Language dropdown.
- Click New.
If you're unsure whether an override already exists, use the search box to look up the language constant first. - Enter the language constant exactly as it appears in the Language Constant field.
- Enter your translated text in the Text field.
- Click Save & Close.
Overrides are stored in language/overrides/zh-CN.override.ini and always take priority over the core language files, so they'll survive future updates without being overwritten.
Step 14: Final Result
That's it. Your store now speaks two languages, and your customers get to shop in the one they're comfortable with!
What to Double Check if Products Still Show Untranslated
If you've followed every step and the frontend still shows English instead of your translated content, check these first:
- Content language isn't published. Go back to System > Manage > Languages and confirm the language is published under Content Languages, not just installed.
- EasyStore Multilingual plugin is disabled. Without it enabled, translated content won't render on the frontend even if you've filled in every field.
- The product's language is set to a specific language instead of "All." This locks EasyStore out of treating it as a translatable source, so double-check Step 8 again.
- Translation wasn't saved. Filling in fields isn't enough. If you didn't click Save Target, none of it is stored.
- Site or browser cache is showing an old version. Clear your site cache and hard-refresh the browser before assuming the translation didn't take.
Working through this list in order clears up most cases.
FAQ
1. Can I remove a language later without breaking anything?
Yes. Unpublish the language from Content Languages, and it's removed from the frontend cleanly. Nothing else breaks; you can republish it later and pick up where you left off.
2. Do email notifications (order confirmations, shipping updates) get translated too, or only the storefront?
You can translate the email notifications too. Once you've translated your settings and product content, those emails reflect the customer's selected language too.
3. What happens to translations if I uninstall the EasyStore Multilingual plugin later?
Your saved translations remain in the database. Disabling or uninstalling the plugin stops them from rendering on the frontend, but re-enabling it brings everything back without needing to retranslate.
4. Can I add multilingual support to a store that's already live with existing orders and customers?
Yes. Turning on multilingual support doesn't touch your existing orders, customers, or products. Your current content stays in place, you're just adding translated versions on top of it.
5. Is multilingual support available on both EasyStore Free and Pro?
Yes. Multilingual support isn't a Pro-only feature, it's available to both Free and Pro users as long as you're running v2.1.0 or later.
Start Selling in More Languages
Whether you're expanding into new markets or building a better experience for the customers you already have, EasyStore gives you what you need to localize your store without the complexity.
We'd love to hear where you're taking your store next, drop your target language in the comments!

Sreema
There are no comments posted here yet