- TemplatesTemplates
- Page BuilderPage Builder
- OverviewOverview
- FeaturesFeatures
- Dynamic ContentDynamic Content
- Popup BuilderPopup Builder
- InteractionsInteractions
- Layout BundlesLayout Bundles
- Pre-made BlocksPre-made Blocks
- DocumentationDocumentation
- EasyStoreEasyStore
- ResourcesResources
- DocumentationDocumentation
- ForumsForums
- Live ChatLive Chat
- Ask a QuestionAsk a QuestionGet fast & extensive assistance from our expert support engineers. Ask a question on our Forums, and we will get back to you.
- BlogBlog
- PricingPricing
Categories
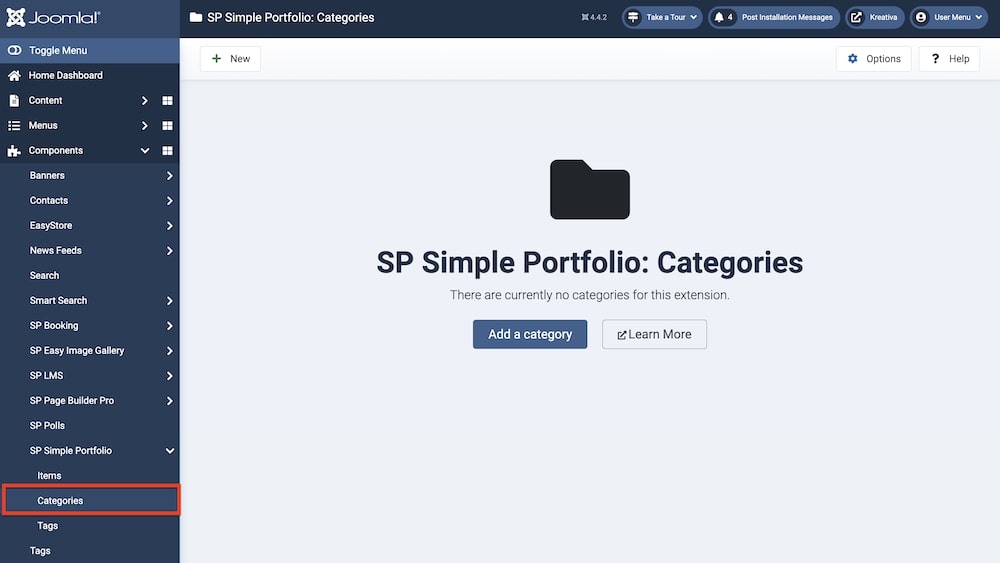
To create or edit categories, go to Joomla backend > Components > SP Simple Portfolio > Categories. To create a new item, click on “+New” or “Add a category”. You can also edit pre-existing categories by clicking on them.
You will get the following options in the New Category settings:
Title: Enter the name of the category.
Alias: You can either automatically generate an alias from the title or manually enter one yourself. If you want the alias to be auto-generated, leave the field blank.
Additionally, you will get the following tabs and subsequent options:
Category
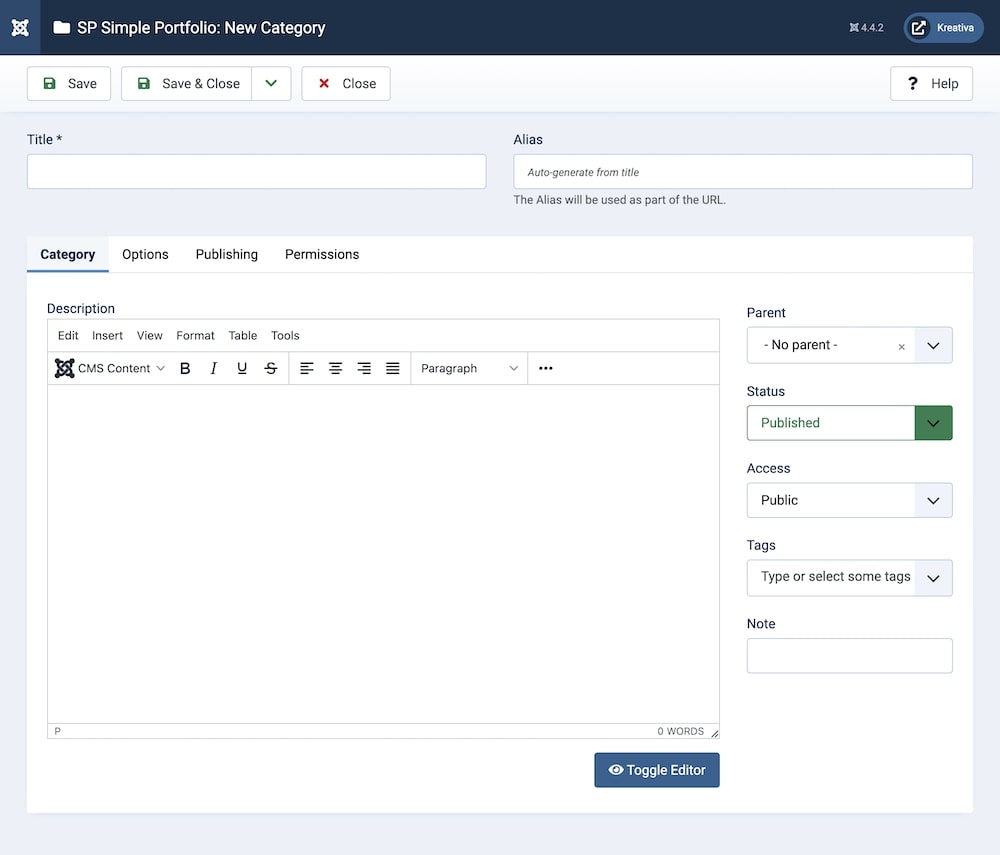
Under Category, you will find the following options:
Description: A detailed description of the category. This text field allows you to describe any other relevant information regarding the category with full control over font typography. Additional options in this field include the ability to add CMS media to the description, paste external source codes for swift editing, and much more.
Parent: Using the dropdown menu you can select whether this category belongs to a parent category. By default, this option is set to “No parent”.
Status: You can show/hide the speaker by changing its status from Published/Unpublished.
Access: Controls which user groups can view this category. You can restrict access to certain categories based on user permissions. You can choose between
- Public
- Guest
- Registered
- Special
- Super Users
Tags: Using the dropdown menu you can choose a tag for this category.
Note: Add any additional note regarding this category if applicable.
Options
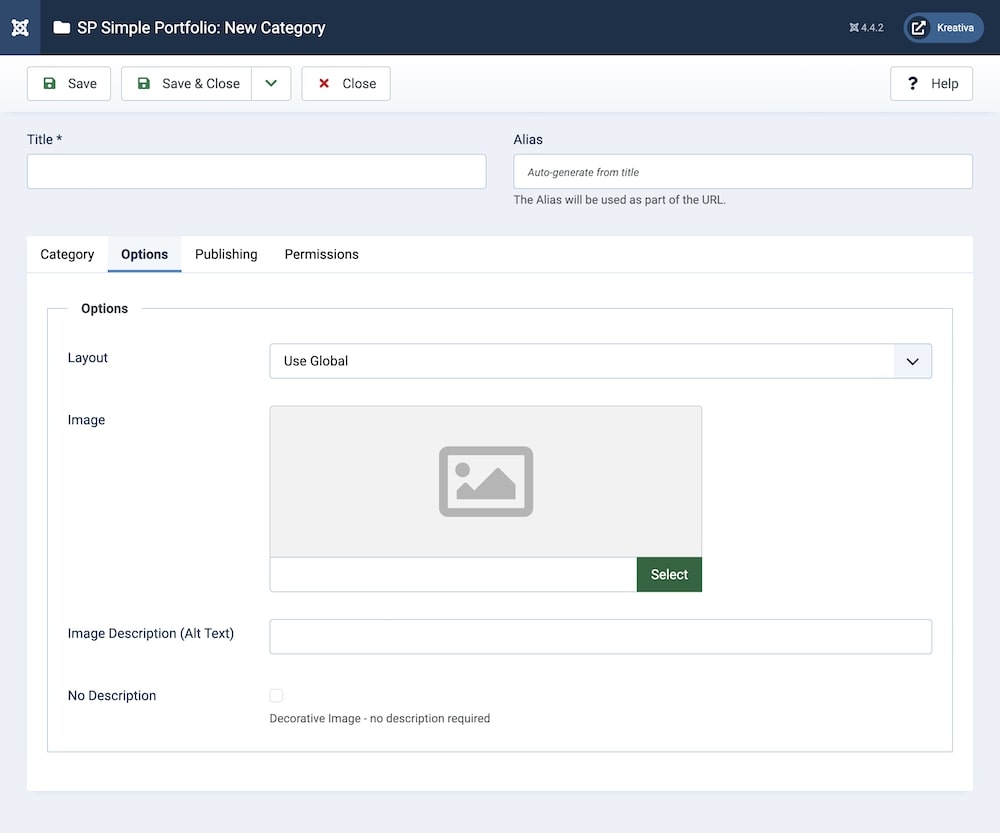
Under Options, you will find the following options:
Layout: Set the layout for this category. By default, it is set to “Use Global”.
Image: Add an image to represent the category.
Image Description (Alt Text): You can provide an additional description/alt text for the image in this field.
No Description: Toggling this option will determine whether the image will have a description or will be descriptionless, i.e., the image will be a “Decorative Image”.
Publishing
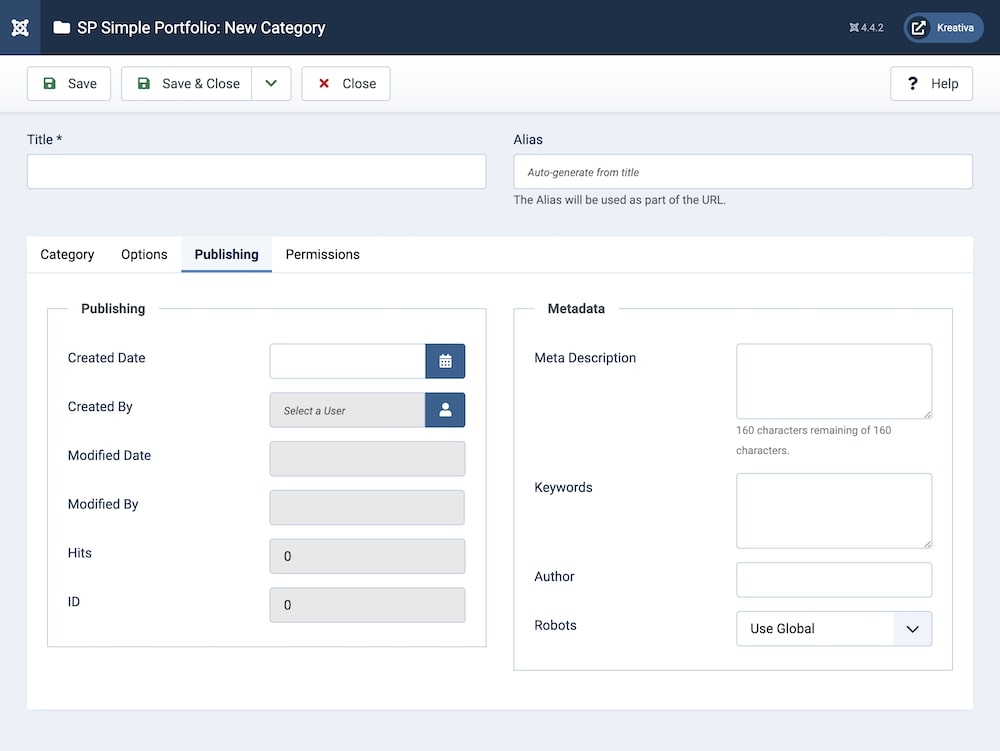
Under Publishing, you'll find two additional sections: one named Publishing and the other labelled Metadata.
The first section, Publishing, includes the following settings:
Created Date: Clicking on the calendar icon will enable you to set a different date for the creation date but if left blank, it will automatically take the current date when the lesson is created.
Created By: The person who creates an event will be automatically assigned to this field once the lesson is created, but an admin (Super User) can change the user at any time.
Modified Date: This field shows the date the category has been modified.
Modified By: This field shows the user who last modified the category.
Hits: This field shows the album's hits/the amount of times users have clicked on the category.
ID: This field shows the category ID.
The Metadata section includes the following settings:
Meta Description: An optional paragraph to be used as the description of the page in the HTML output. This will generally be displayed in the results of search engines.
Keywords: This is an optional comma-separated list of keywords and/or phrases to be used in the HTML output.
Author: Set the author of the category.
Robots: Meta robots are HTML tags that instruct search engines on how to index and crawl a webpage, controlling its visibility in search results. By default, this option is set to “Use Global”.
Permissions
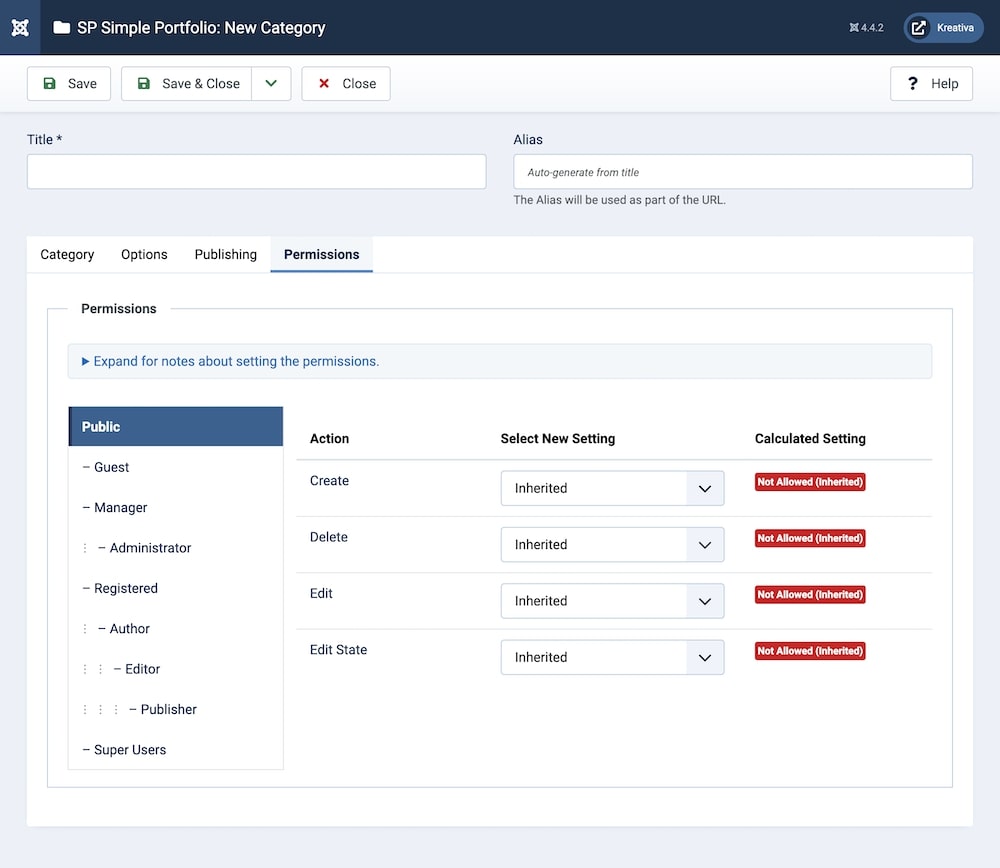
You can control the permissions for the category. This determines who can use or edit the category. You can choose between Public, Guest, Manager, Administrator, Registered, Author, Editor, Publisher, and Super Users.

