

Getting to know the panel
The following panel is the core of SP LMS, using which every single item of SP LMS can be created, edited or deleted. The following panel is common for every section of SP LMS but their action changes depending on which section you are currently in. For instance, if we hit the New button while we in the Teachers section, a new teacher profile will be created. But while we're in the Course section, a new course will be created. This is how the following panel controls every single item of SP LMS.

New: The New button lets you create any types of item in SP LMS.
Now for the rest of the buttons of the panel to work, you need to select at least one item, like the following:
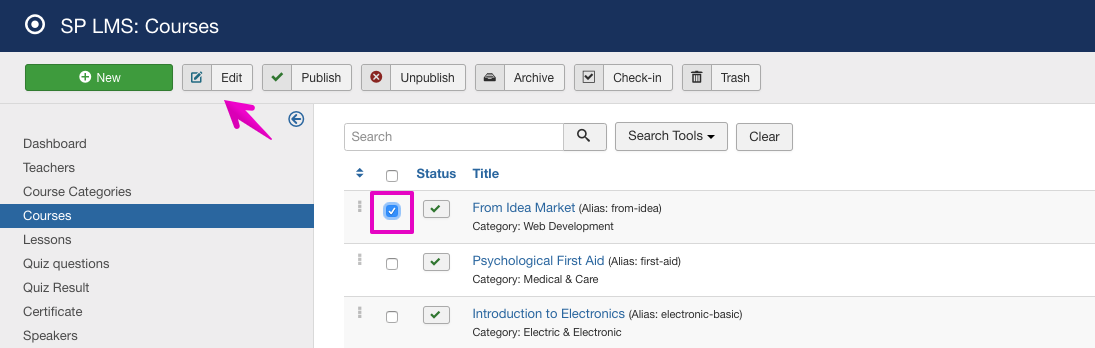
Edit: Now that an item is selected, clicking on the Edit button will enable us to edit that particular item.
Publish: When any item(s) is in unpublish state, clicking on this button after selecting the item will publish that/those item(s).
Unpublish: As the name suggests, it works quite the opposite of the Publish button.
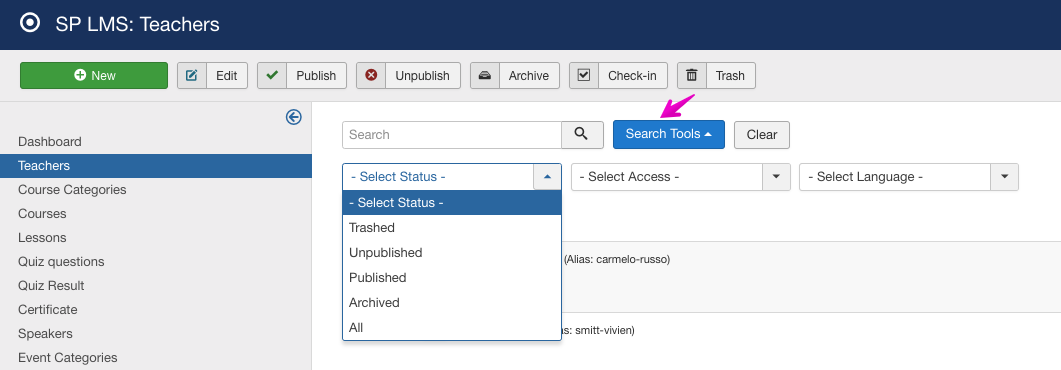
Archive: This will make any item(s) to archive. To get the archived item back, click on the "Search Tools", then from the "Select Status" drop-down list choose "Archived".
Check-in: Sometimes you might forget to "close" an item after opening it, or a different user might be working with that item. Either of the cases will lock the item, to gain control select the item(s) and click the "Check-in" button.
Trash: As the name suggests, if you wish to delete any item(s), select that/those and click the "Trash" button. To get the trashed item(s) back, click on the "Search Tools", then from the "Select Status" drop-down list choose "Trashed".