

Blog
This area of settings allows you to enable some appearance elements (Image Sizes in px) as much a social comments, Author Info and social share buttons.
Images
Used to set the image size and resolution (“Blog Option” tab only) used inside different article views. To change default values just check [x] option next to the size name and insert your values in pixels. Then a new value would be used for newly uploaded images. That's why we recommend setting those values at the beginning before adding blog posts. Images may be cropped if their original photo resolution would be different from what you set. It also means that photos with people's faces may be cut. Use this feature wisely / cautiously.
By default, only a thumbnail image is created. The main image is kept as the original uploaded photo.
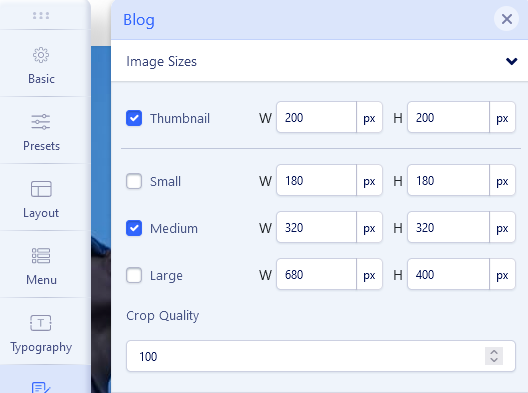
Crop Quality
It allows you to set image quality for better compressions for image size resolution. Applicable for JPG images only. By default is set on 100% to keep the best quality. But we recommend using lower value to reduce file size.
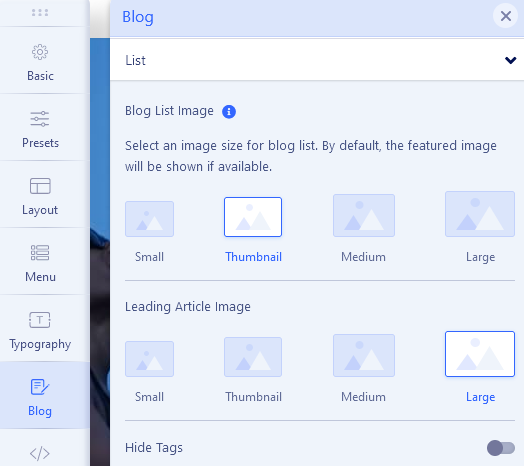
Blog List
Select image size for:
- Blog List Image (Category view). By default, the featured image will be shown if available and thumbnail size should be used.
- Leading Article Image. By default, the featured image will be shown if available.
- Hide tags: this option allows you to hide article tags only from the list view of articles.
- Read Time: Enable this option to display an estimated reading time of the article. This time will be displayed both in the article list as well as the article details page.
- Disable Module Position: Choose which module positions to deactivate. Select the desired module position options from the dropdown list.
List Type:
Default: Selecting this option will keep your article list in the default layout.
Masonry: Selecting this option will apply a masonry layout to your article list.
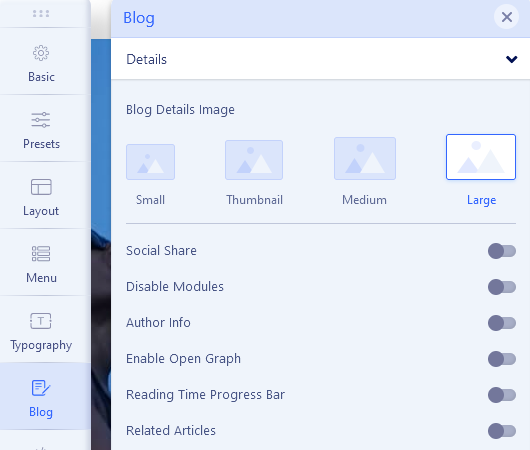
Blog Details
Blog Details Image
Select image size for single article details view. By default, the large and featured image (from Blog Options) will be shown if available. You can choose displayed images from 4 sizes: Small, Thumbnail, Medium or Large.
Social Share
Show or Hide social share buttons (Facebook, Twitter, LinkedIn) above the content of a single article. By default, they are aligned in the top right corner under the article title. In the upcoming updates, we will add more social networks.
Disable Modules
This option will disable all modules from the left or right sidebar from the article details page. Of course, this module position must exist in the template layout.
Author Info
This option will show the user bio as author information along with the author profile image taken from Gravatar if the profile plugin is enabled. By default, images are presented at 64px by 64px. The relation is based on the Joomla user email. What happens when an email address has no matching Gravatar image? By default, you would get a random gravatar logo inside.
Enable Open Graph
This option will add open graph content to the article HTML code so that social media like Facebook & Twitter can show the correct image for the article. Disable this option if you want to use 3rd party open graph extension. Facebook App ID and Twitter Username may be needed.
Reading Time Progress Bar
It displays the estimated reading timer (progress bar) on the blog details page. If enabled, when any user is scrolling through a Joomla article, a bar will be on the top or bottom showing the reading progress and what’s the remaining time for analyzing that particular page. It gives visitors a quick idea about the time needed to read a post and encourages them to go on till the end. You have controls for defining the line height, changing the color, and setting its position (top/bottom).
Related Articles
Show related articles in the article details page based on category and tags. Showing related content to new visitors can turn them into potential readers. You have control over the view type, changing the title and the number of related articles you want to show. This feature it's used in all articles.
Full-width Layout
By default, the blog detail page layout will be in a container (area with left and right padding). But, some of you might want a full-width blog detail page. For that particular reason, we have added a new option to enable a full-width layout in the blog settings. You can easily turn off the container layout and set a full-width layout.
Enable this option to display the article detail page in full-width layout now. It may be useful when you use SP Page Builder Pro inside the Articles by Article Integration feature. Then your design (Rows, Columns with addons inside) can be used and displayed also on the full template width.
How to Add a Feature Badge on Blog List & Blog Details
Navigate to the Articles section within your Joomla dashboard and designate an article as featured. This will display the featured batch on both the Blog List and Blog Details pages.
Comments
This build-in option allows you to add IntenseDebate Comments system, Facebook comments and / or Disqus Comments to your site. A feature-rich comment system complete with social network integration allows your readers to log in via a preferred social network and add comments under the article. All you have to do is choose and set the correct Facebook Application ID, IntenseDebate Account or Disqus Username/Subdomain. You can use only one selected social comments system or disable it and use your own based on the extra comments component or plugin.
Important! Disqus Comments have three membership plans, and a free Basic one with Ads (advertising) displayed.
- Select Categories - select single or multiple categories from the list to where comments will be applied. Comments option will be available for subcategories if the parent category is selected.
- Comments Width - select width of the comments area in pixel, eg. 500. Note: Facebook doesn't provide a Facebook Comment code for responsive (fluid grid) websites. It uses only static width for the comments box.
- Comments Count - show or hide comments count on blog view or front page.