Payments
In the Payment Settings of EasyStore, you can efficiently add, manage, and configure the payment methods available for your online store.
Adding a Payment Method
Begin by accessing the Payment Settings within your Joomla backend. Navigate to Components > EasyStore > Settings > Payments.
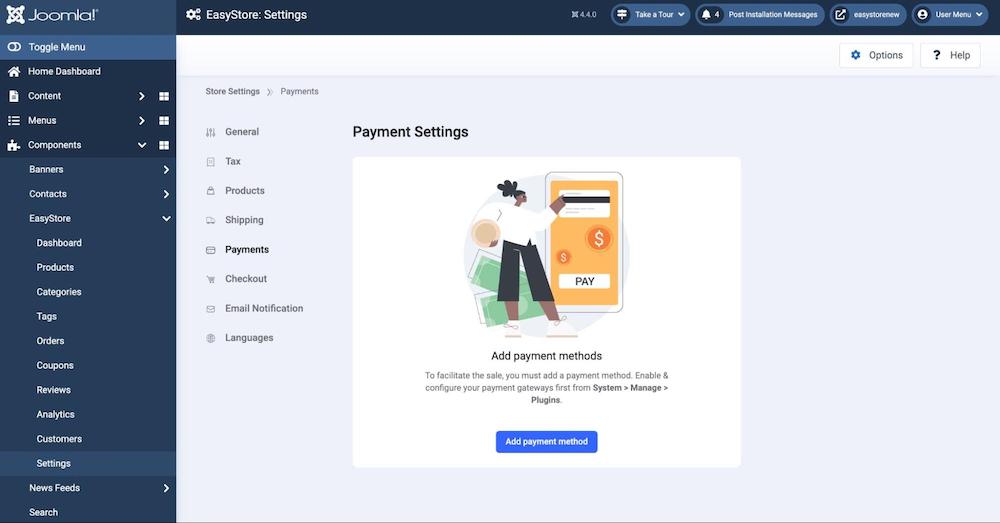
Within Payment Settings, locate the "Add Payment Method" button.
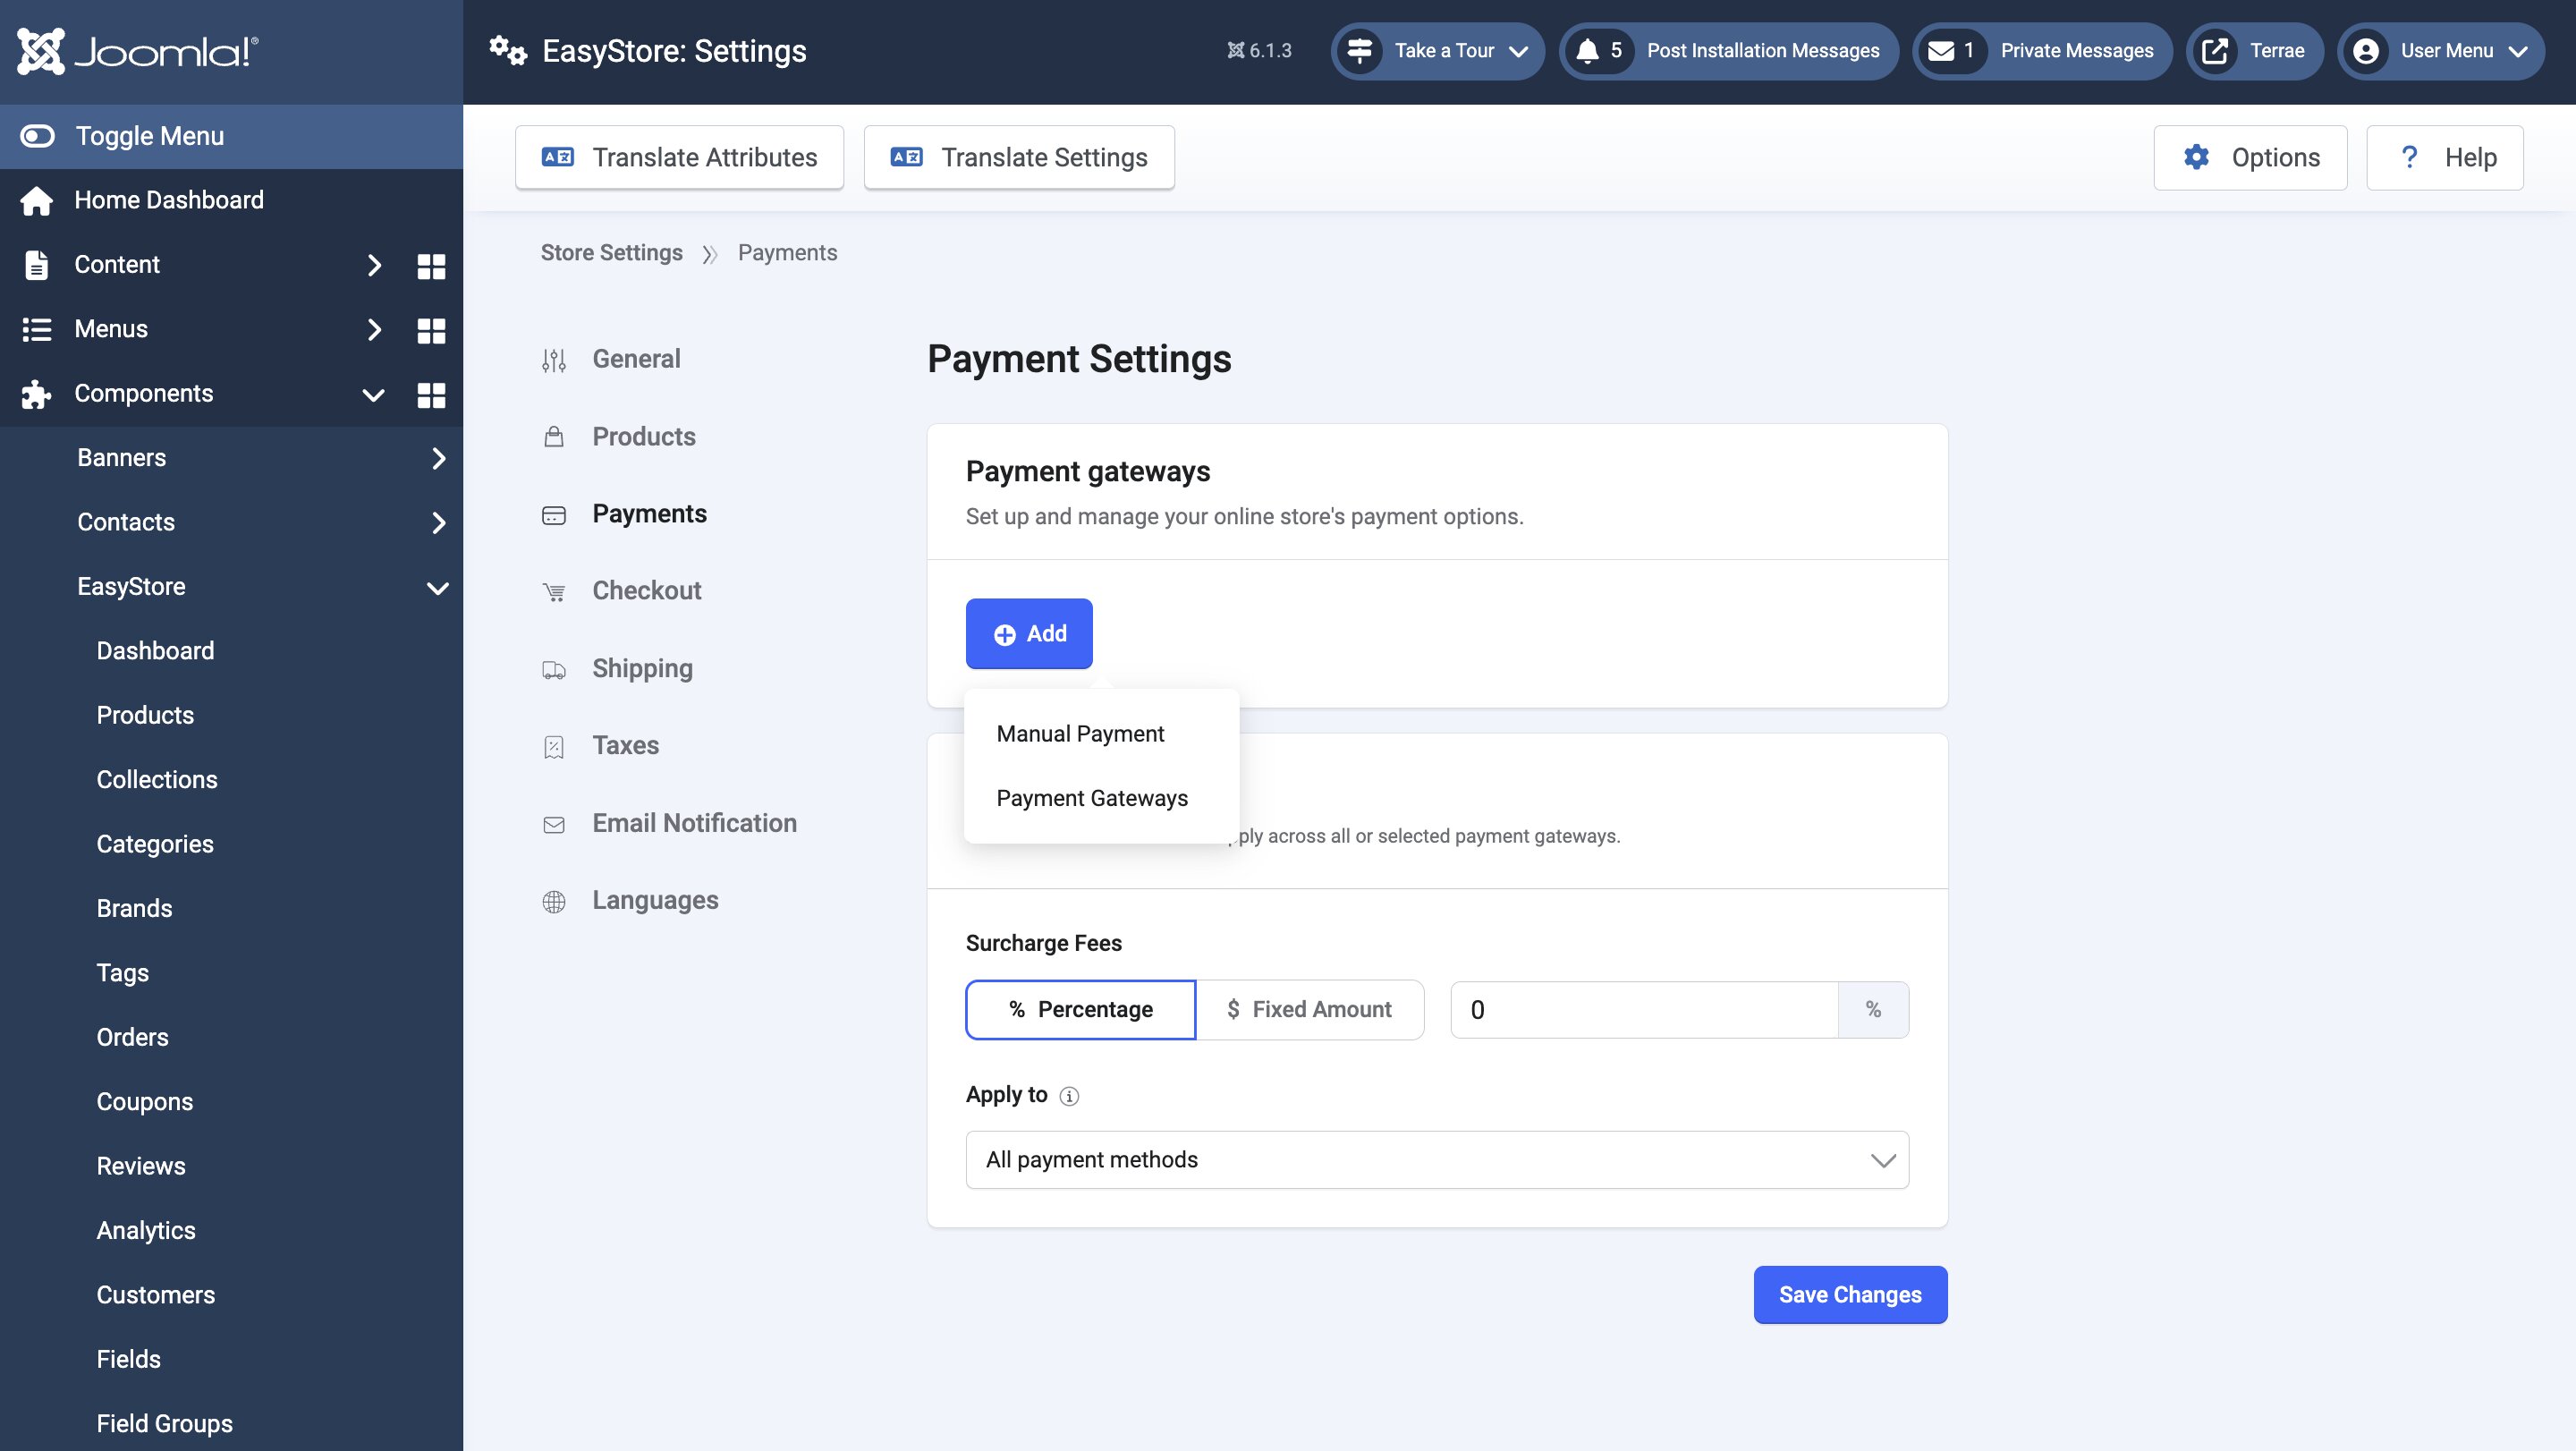
Once in the Payment Settings area, you will be able to set up your Manual and Online Payment methods. After clicking on the + Add button, you will find these options:
- Manual Payment Methods: Click on the “Add Manual Payment” button to access EasyStore’s manual payment options.
- Payment Gateways: Click on the “Add Payment Gateway” to access the comprehensive list of all EasyStore’s available online payment methods.
Manual Payment Methods
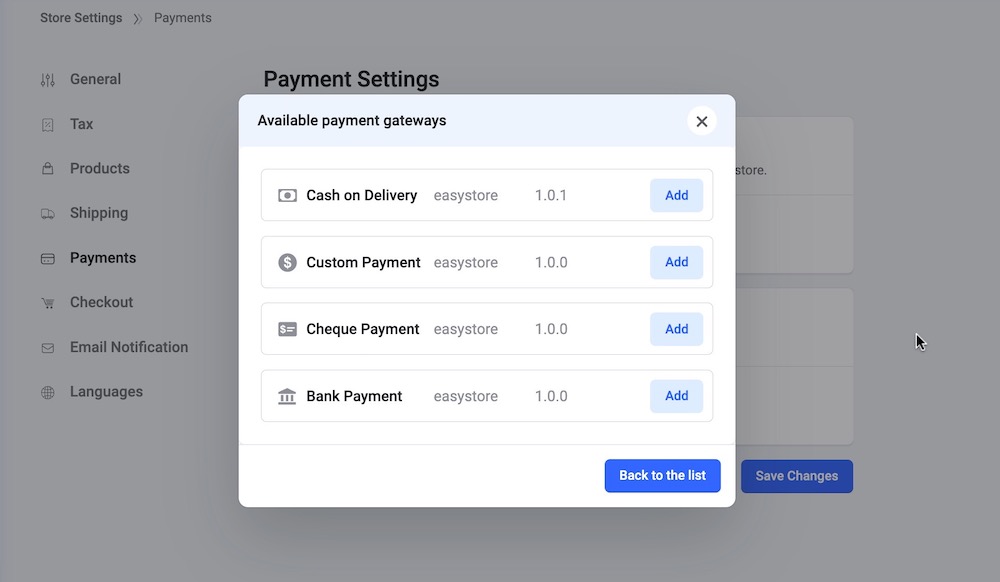
To provide your users with manual payment options during checkout, select from the following available methods: Cash on Delivery, Custom Payment, Cheque Payment, and Bank Payment. Click here to learn more about how to set up these manual payment methods.
Payment Gateways
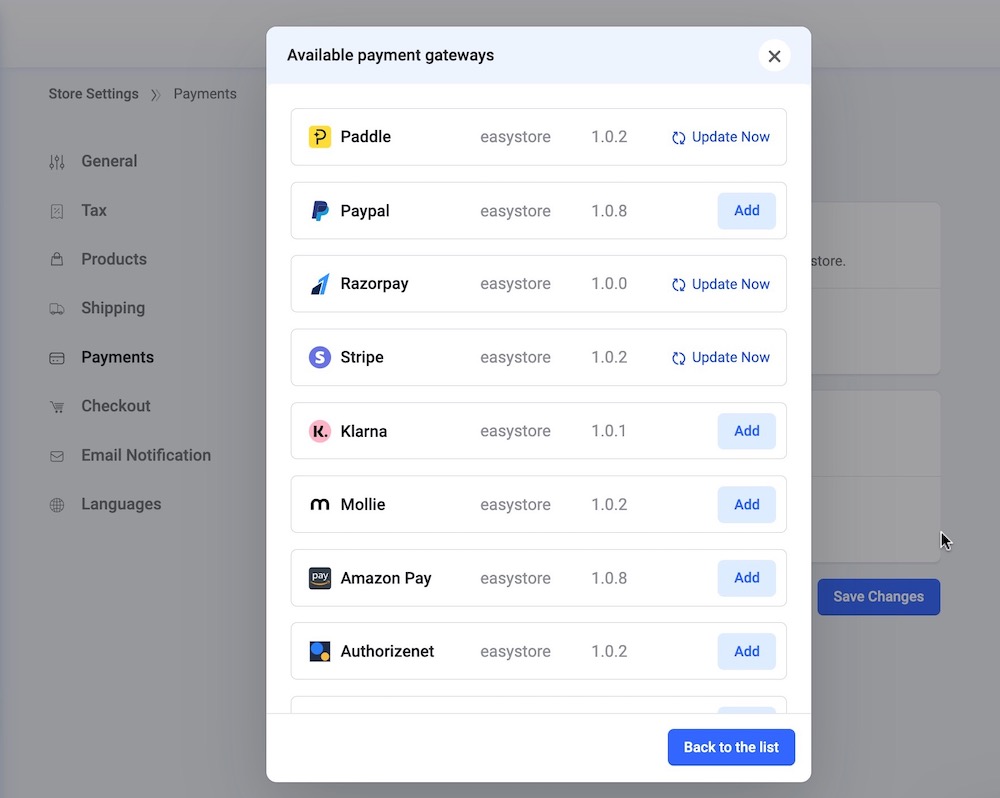
To offer your users online payment options during checkout, choose from EasyStore's comprehensive list of available online payment methods.
From the provided list, select your desired payment method and click "Add".
This action will automatically download and install the corresponding payment gateway for you. Repeat this process for each preferred payment method.
If there's an update available for the plugin, an "Update Now" button will appear beside the payment method. Click on it to update the plugin to the latest version.
Once all desired payment methods are added, click "Back to the list" to return to the main payment settings. There, you can configure each payment method according to your requirements.
Note: If you wish to use a payment plugin not included in the provided list, you must first install and enable the plugin from the Joomla backend. From the Joomla backend, navigate to Extensions > Install, and upload your payment plugin. Then enable the plugin to make it available for selection within EasyStore.
Configure Payment Methods
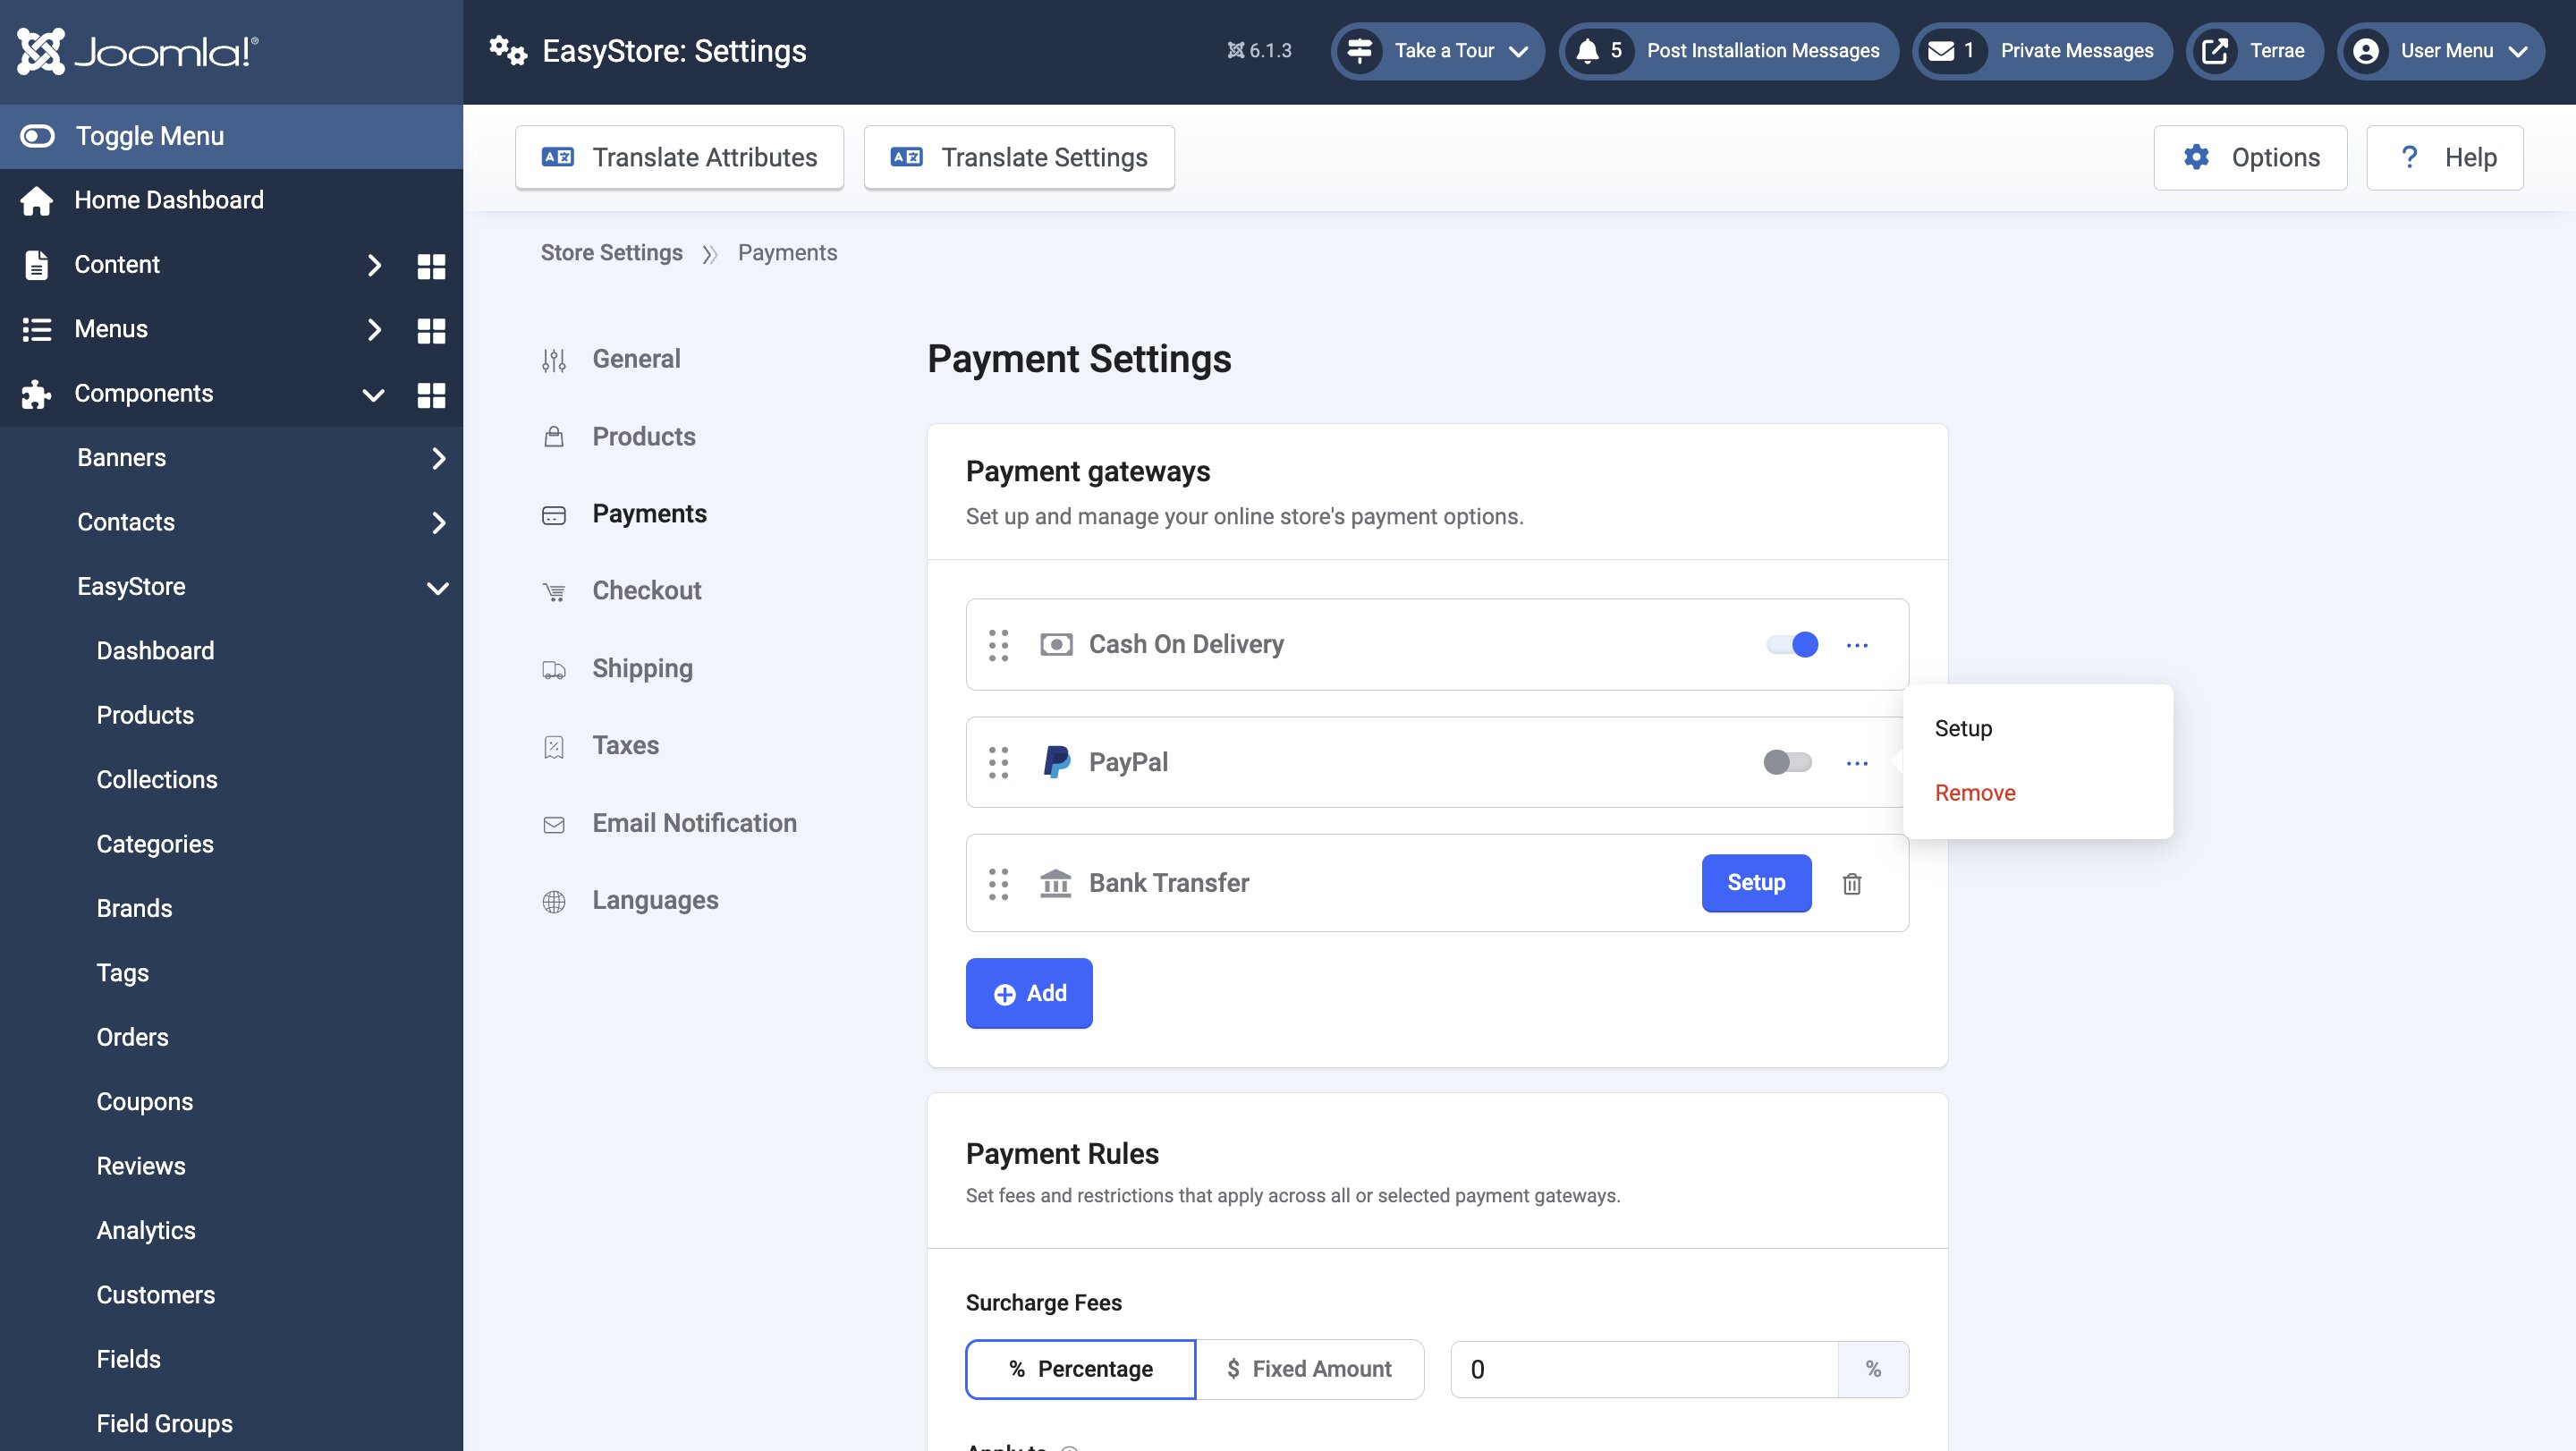
After adding your preferred payment methods, locate the "Setup" button adjacent to each method.
Click on it to configure your chosen payment plugin. Each plugin features dedicated documentation outlining the configuration process. Refer to these resources for comprehensive guidance.
Once configured, you have the flexibility to enable or disable each payment method based on your business needs.
If you need to modify the configuration or remove a payment method from your store's available options, simply click on the three dots (...) next to the respective method. This action will allow you to further modify the configuration or remove the payment method as necessary.
Payment Rules
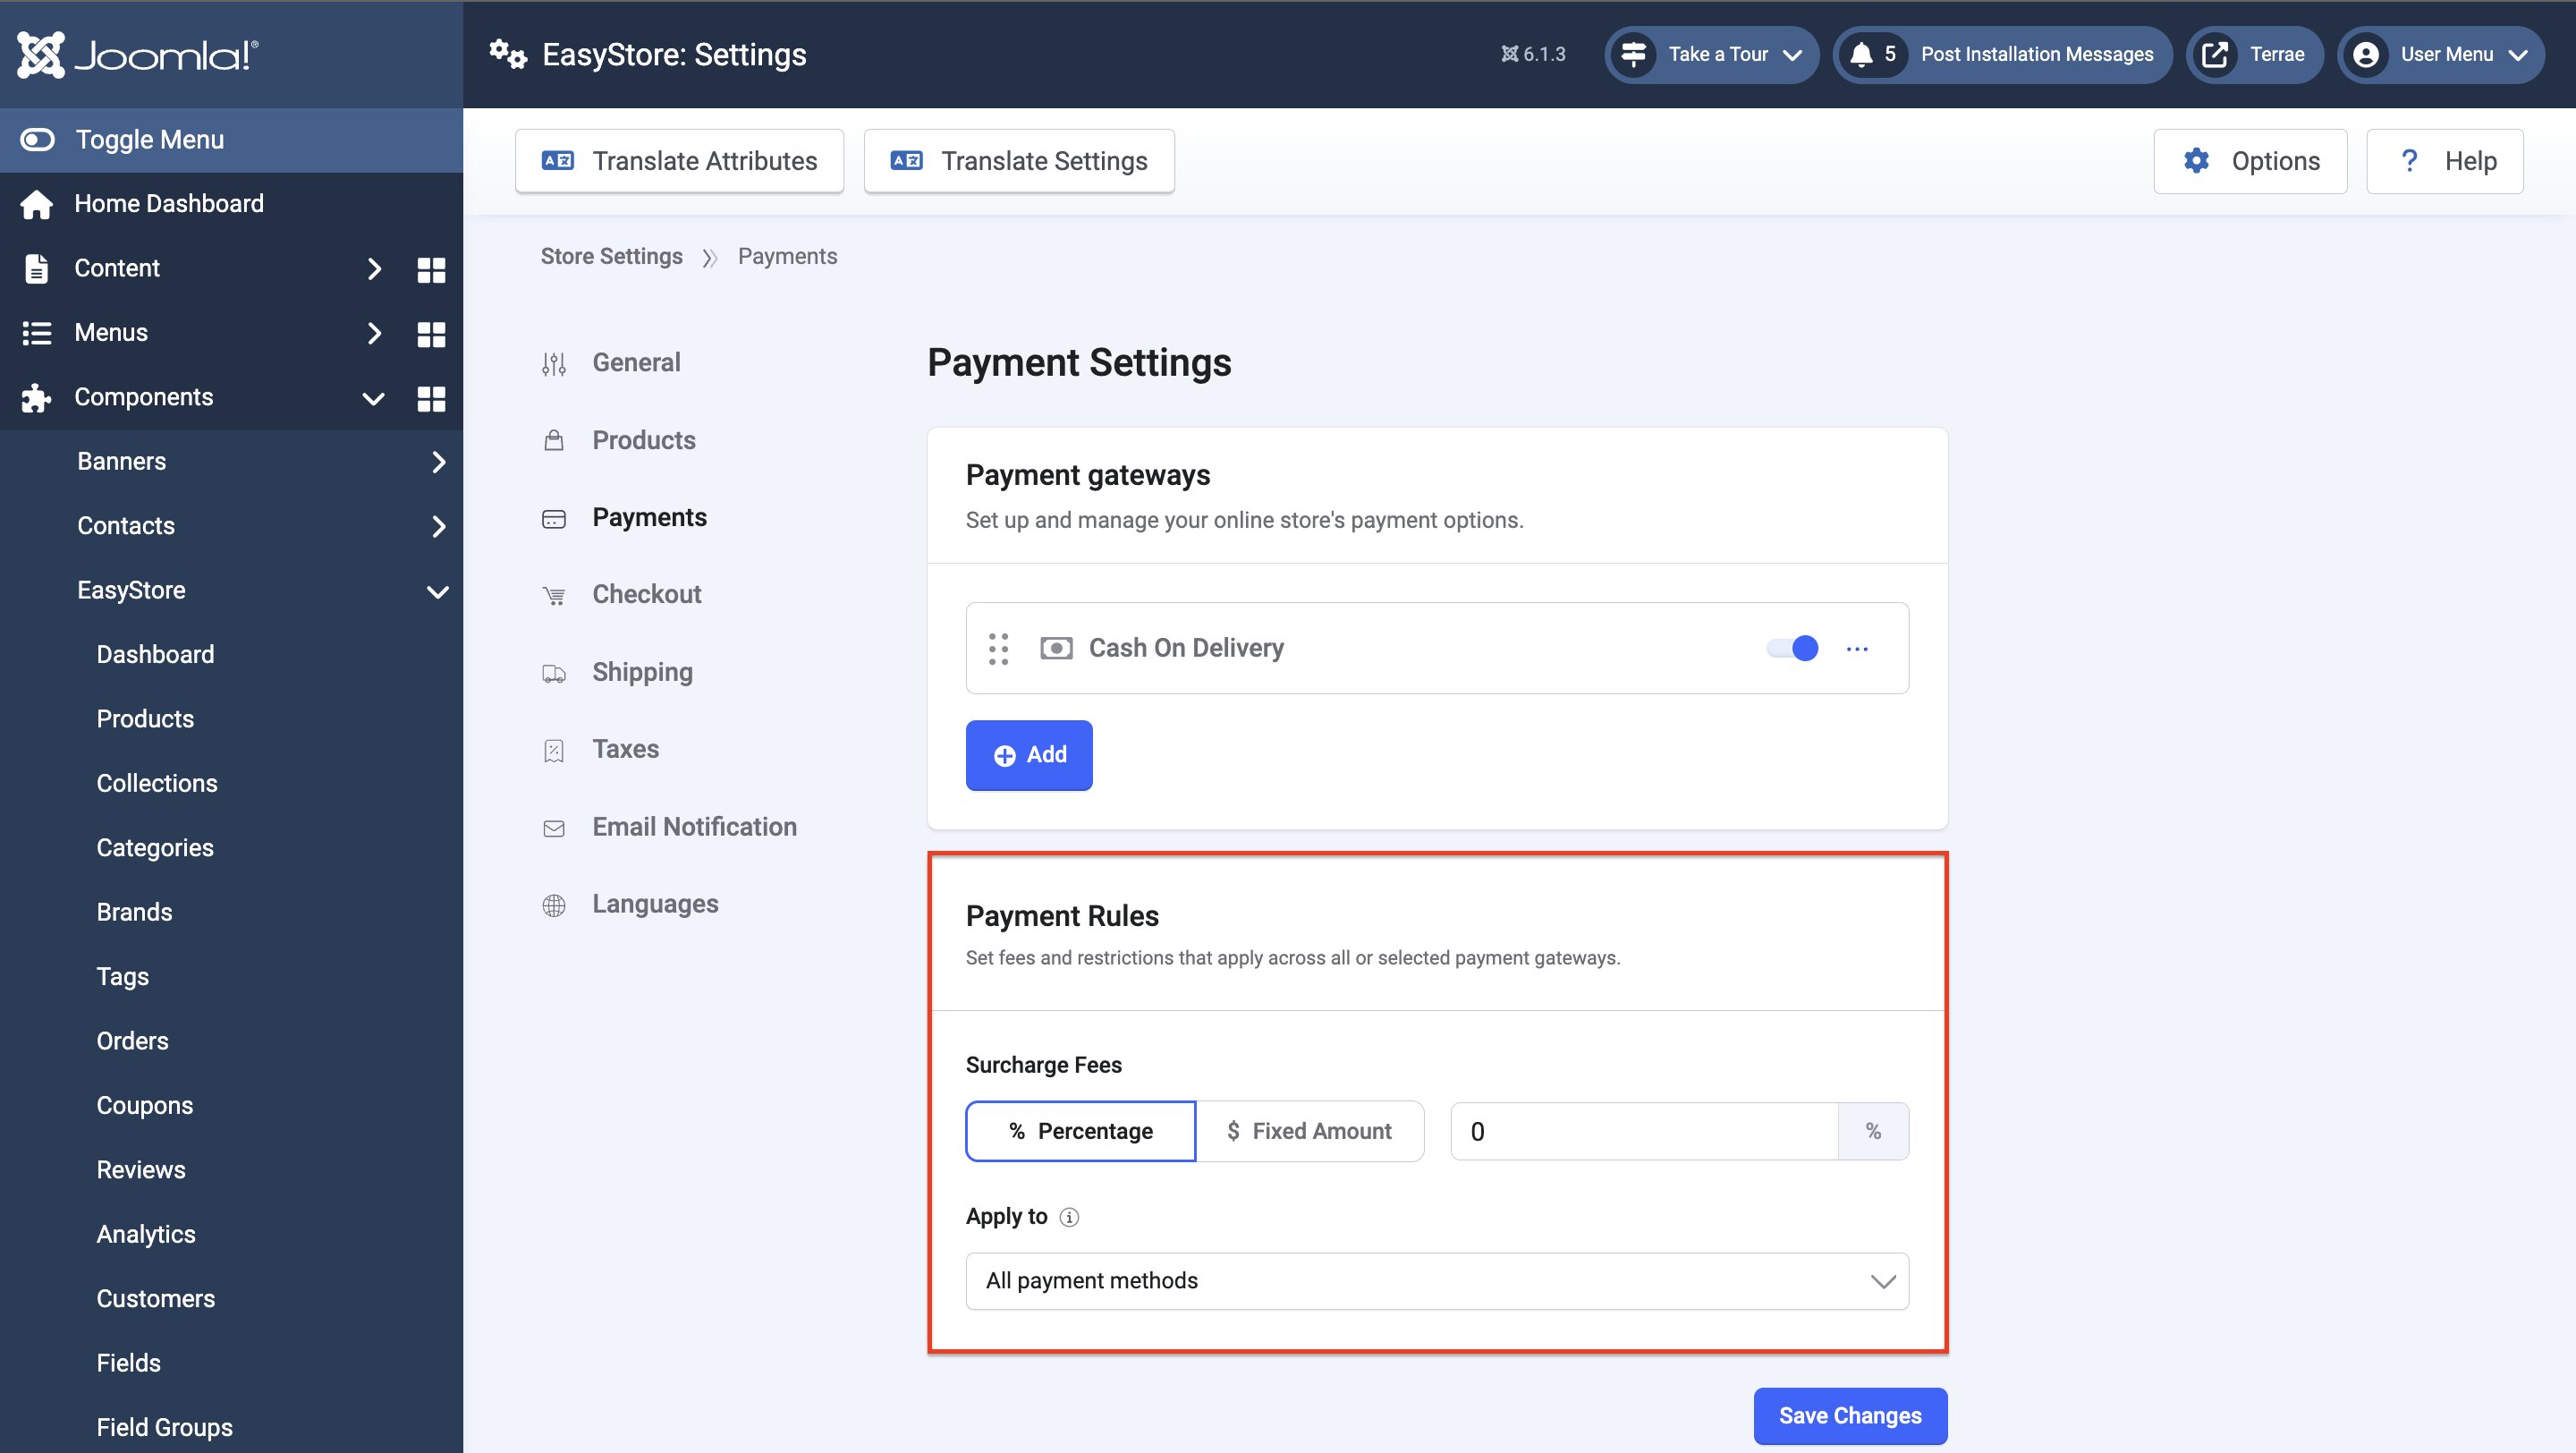
The Payment Rules settings enable you to set fees and restrictions that apply across all or selected payment gateways.
Under the aptly titled Payment Rules section, you will find the following customization options:
Surcharge Fees: You can include a surcharge fee, an additional charge on a purchase or transaction designed to cover processing expenses, regulations, or high-wealth taxes. Choose between "Percentage" and "Fixed Amount" to define how the fee is calculated. Afterward, enter the amount in the field shown on the right.
Apply to: Determine which payment methods this fee applies to. Using the dropdown, you can select between:
- All payment methods: This imposes the surcharge fee across all payment methods available on your store.
- Specific payment methods: Selecting this option will display an additional setting called Select Methods. By clicking the “+” icon, you’ll get a menu to select between the payment gateways you have enabled on your store.