- TemplatesTemplates
- Page BuilderPage Builder
- OverviewOverview
- FeaturesFeatures
- Dynamic ContentDynamic Content
- Popup BuilderPopup Builder
- InteractionsInteractions
- Layout BundlesLayout Bundles
- Pre-made BlocksPre-made Blocks
- DocumentationDocumentation
- EasyStoreEasyStore
- ResourcesResources
- DocumentationDocumentation
- ForumsForums
- Live ChatLive Chat
- Ask a QuestionAsk a QuestionGet fast & extensive assistance from our expert support engineers. Ask a question on our Forums, and we will get back to you.
- BlogBlog
- PricingPricing
Certificates
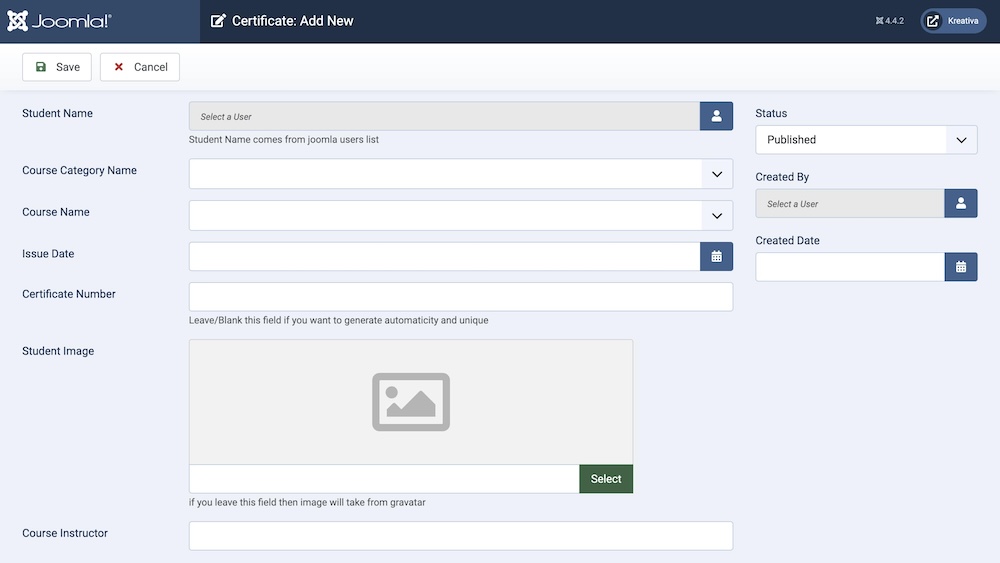
To create certificates, you need to browse to Components > SP LMS > Certificate > Click “+New”. Then you’ll be presented with the following screen.

Student Name: You need to select the student from the drop-down list.
Course Category Name: Choose the course category from this list.
Issue Date: You can select a specific issue date, otherwise leaving the field blank will put the present date automatically.
Certificate Number: You can put a number for each certificate manually if you feel the need, otherwise leaving it blank will create a random number for the certificate.
Student Image: You can manually upload the student image, otherwise leaving it blank will generate the default image for that profile.
Course Instructor: You can write down the name of the instructor for that course.
Status: You can show/hide the certificate by changing its status from Published/Unpublished.
Created By: The person who creates the certificate will be automatically assigned to this field once the lesson is created, but an admin (Super User) can change the user at any time.
Created Date: Clicking on the calendar icon will enable you to set a different date for the creation date but if left blank, it will automatically take the current date when the lesson is created.
Language: Specifies the language for this category. If your site is multilingual, you can assign the category to a specific language. If it's meant to be available in all languages, you can set it to "All".
Access: Controls which user groups can view this category. You can restrict access to certain categories based on user permissions. You can choose between
- Public
- Guest
- Registered
- Special
- Super Users

