- TemplatesTemplates
- Page BuilderPage Builder
- OverviewOverview
- FeaturesFeatures
- Dynamic ContentDynamic Content
- Popup BuilderPopup Builder
- InteractionsInteractions
- Layout BundlesLayout Bundles
- Pre-made BlocksPre-made Blocks
- DocumentationDocumentation
- EasyStoreEasyStore
- ResourcesResources
- DocumentationDocumentation
- ForumsForums
- Live ChatLive Chat
- Ask a QuestionAsk a QuestionGet fast & extensive assistance from our expert support engineers. Ask a question on our Forums, and we will get back to you.
- BlogBlog
- PricingPricing
Speakers
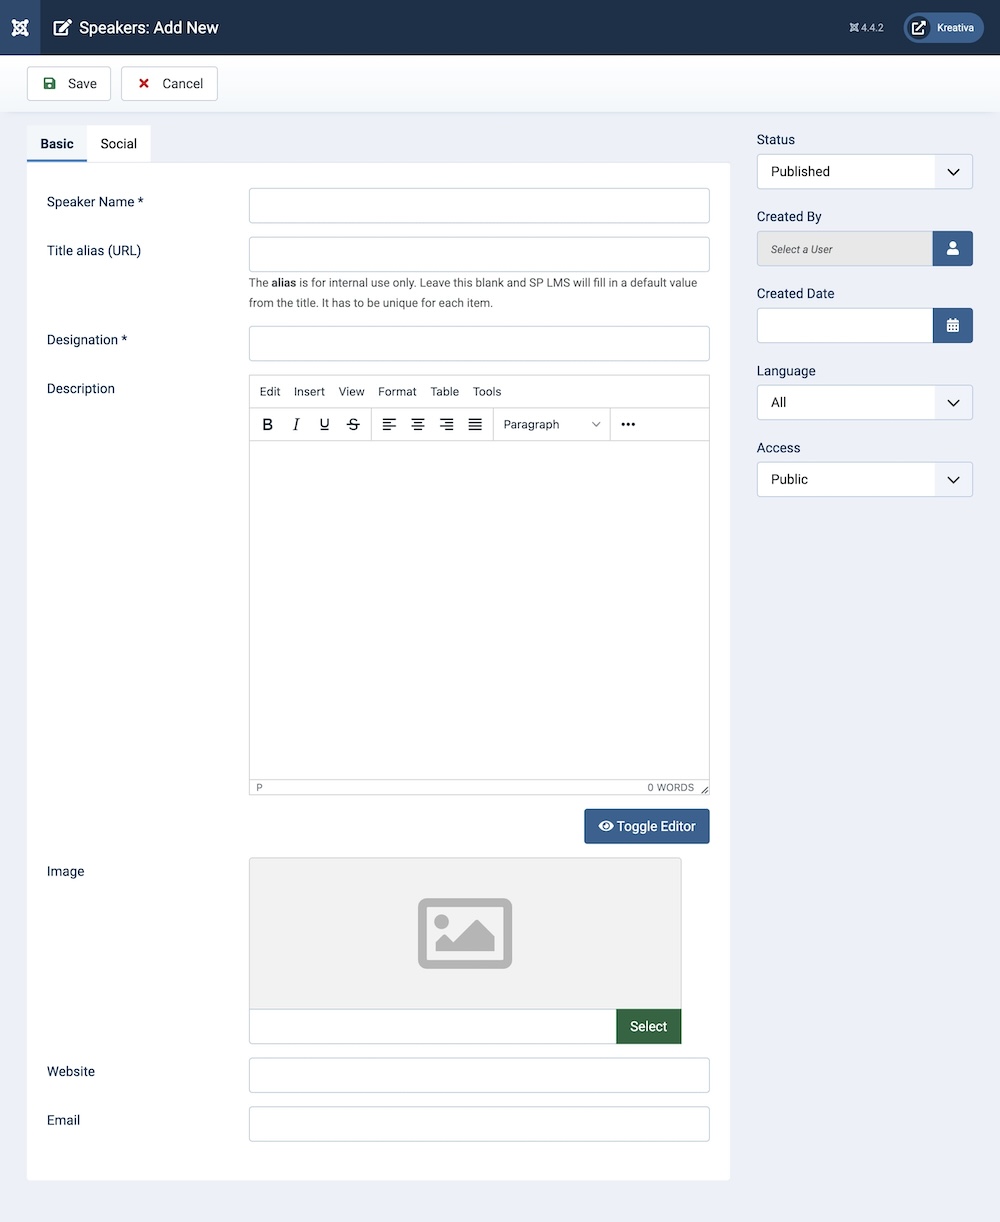
Creating a package plan is similar to creating categories, coupons, or rooms. You need to browse to Components > SP LMS > Speakers > Click “+New”. Then you’ll be presented with the following screen with two tabs.
Basic

Under Basic, you will find the following options:
Speaker’s Name: Enter the name of the speaker.
Title Alias (URL): You can either automatically generate an alias from the title or manually enter one yourself. If you want the alias to be auto-generated, leave the field blank.
Designation: You can provide a designation for the instructor.
Description: A detailed description of the speaker. This text field allows you to describe any other relevant information regarding the speaker.
Image: You can upload an image to represent the speaker.
Website: In this field, you can enter the website of the speaker, if applicable.
Email: In this field, you can enter the email address of the speaker.
Social

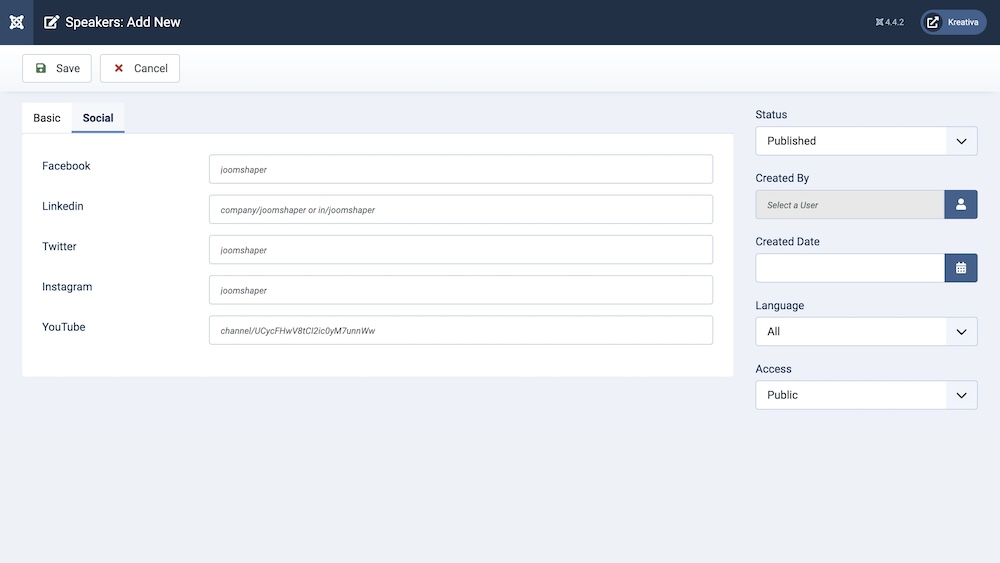
Under Social, you will find the following options:
Facebook: Enter the speaker’s Facebook account, if applicable.
Twitter: Enter the speaker’s Twitter/X account, if applicable.
Linkedin: Enter the speaker’s LinkedIn account, if applicable.
Instagram: Enter the speaker’s Instagram account, if applicable.
YouTube: Enter the speaker’s YouTube account, if applicable.
Additional Settings
You will find these additional settings under the Teachers category to finalize all the previous changes made in the other tabs.
Status: You can show/hide the speaker by changing its status from Published/Unpublished.
Created By: The person who creates the speaker category will be automatically assigned to this field once the lesson is created, but an admin (Super User) can change the user at any time.
Created Date: Clicking on the calendar icon will enable you to set a different date for the creation date but if left blank, it will automatically take the current date when the lesson is created.
Language: Specifies the language for this category. If your site is multilingual, you can assign the category to a specific language. If it's meant to be available in all languages, you can set it to "All".
Access: Controls which user groups can view this category. You can restrict access to certain categories based on user permissions. You can choose between
- Public
- Guest
- Registered
- Special
- Super Users

