- TemplatesTemplates
- Page BuilderPage Builder
- OverviewOverview
- FeaturesFeatures
- Dynamic ContentDynamic Content
- Popup BuilderPopup Builder
- InteractionsInteractions
- Layout BundlesLayout Bundles
- Pre-made BlocksPre-made Blocks
- DocumentationDocumentation
- EasyStoreEasyStore
- ResourcesResources
- DocumentationDocumentation
- ForumsForums
- Live ChatLive Chat
- Ask a QuestionAsk a QuestionGet fast & extensive assistance from our expert support engineers. Ask a question on our Forums, and we will get back to you.
- BlogBlog
- PricingPricing
Authorize.Net
Authorize.Net is an extensively used payment solution. Authorize.Net provides a secure and reliable platform for handling online transactions, and its services are utilized by a wide range of businesses, from small startups to large enterprises.
Click here to see which countries and currencies support Authorize.Net.
Note: Before setting up the Authorize.Net payment method make sure to enable Search Engine Friendly URLs. To do that, navigate to your Joomla dashboard and choose Global Configuration. In the Site tab, scroll down to find the SEO section and activate the Search Engine Friendly URLs option.
Authorize.Net is compatible with up to PHP 8.0 and will not function properly with versions beyond 8.0.
Adding Authorize.net to Your Payment Options
- Log in to your Joomla Dashboard and navigate to Components > EasyStore > Settings > Payments.
- Within Payment Settings, locate the “Add Payment Method” button and click on it.
- From the list of available payment methods, choose Authorize.net and click on the “Add” button.
- This action will successfully add Authorize.net to the list of available payment options for your store.
Configuring Authorize.net Integration
After adding Authorize.net as your preferred payment method, locate the newly added option in the list and click on the "Setup" button next to it.
Clicking on the "Setup" button will trigger a popup screen to appear, allowing you to configure the Authorize.net plugin for seamless integration with your store's checkout process.
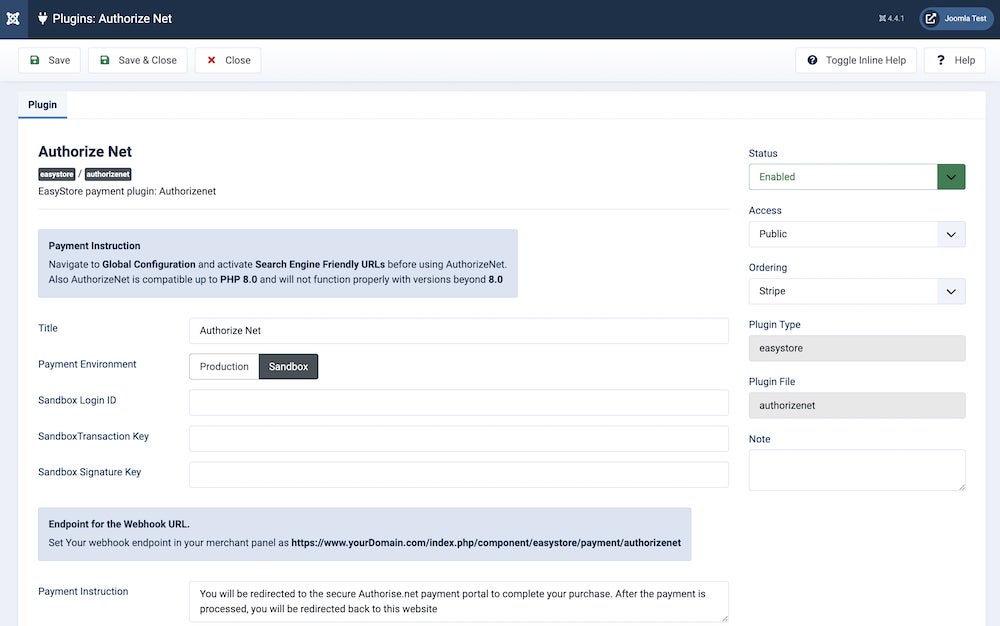
Title
Give your Authorize.Net integration a title (e.g., "Authorize.Net"). This is a user-defined title that helps you identify this integration within your Joomla Dashboard.
Payment Environment
Choose between "Sandbox" or "Production" depending on whether you want to test payments in a sandbox environment or process real transactions in a production environment.
Sandbox Login ID
The Sandbox login ID is the access information needed to log in to your Sandbox environment.
How to Obtain Login ID
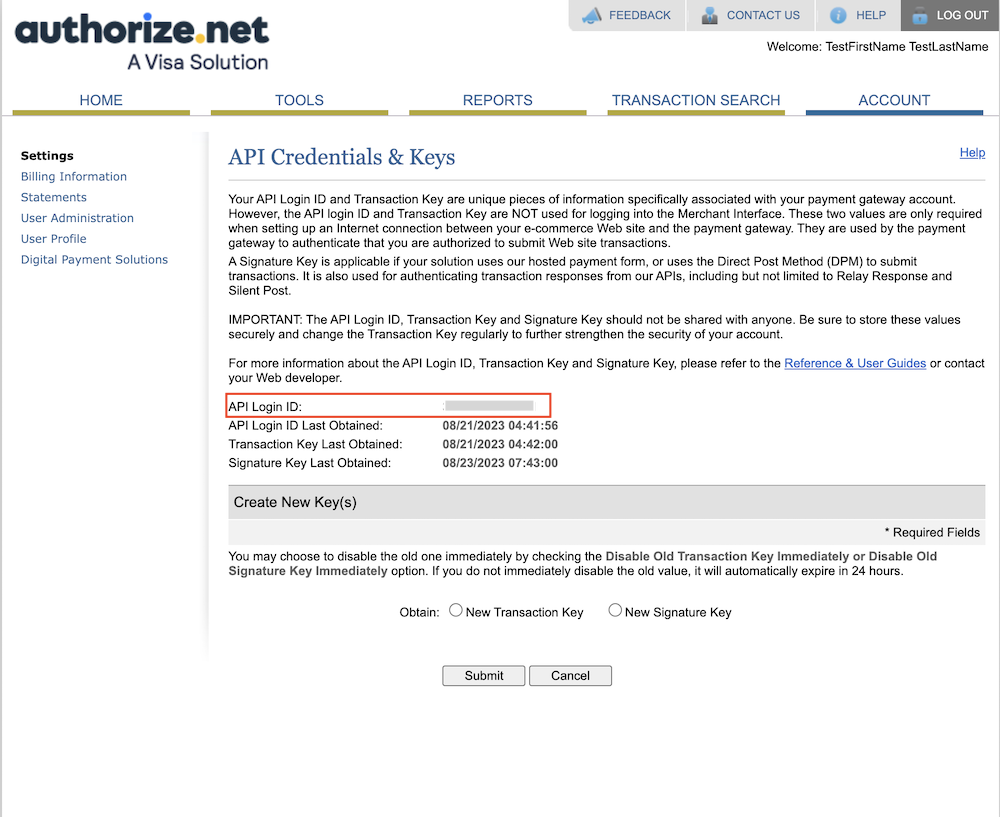
- Visit https://sandbox.authorize.net/ and log into your account
- From the Account tab navigate to the Security Settings section and choose API Credentials & Keys
- On the API Credentials & Keys page, you can find the API Login ID
Transaction Key & Signature Key
The Transaction Key is used to authenticate and authorize transactions in the payment processing system.
The Signature Key is used in the APIs and webhooks for secure communication between different systems.
How to Obtain Transaction Key & Signature Key
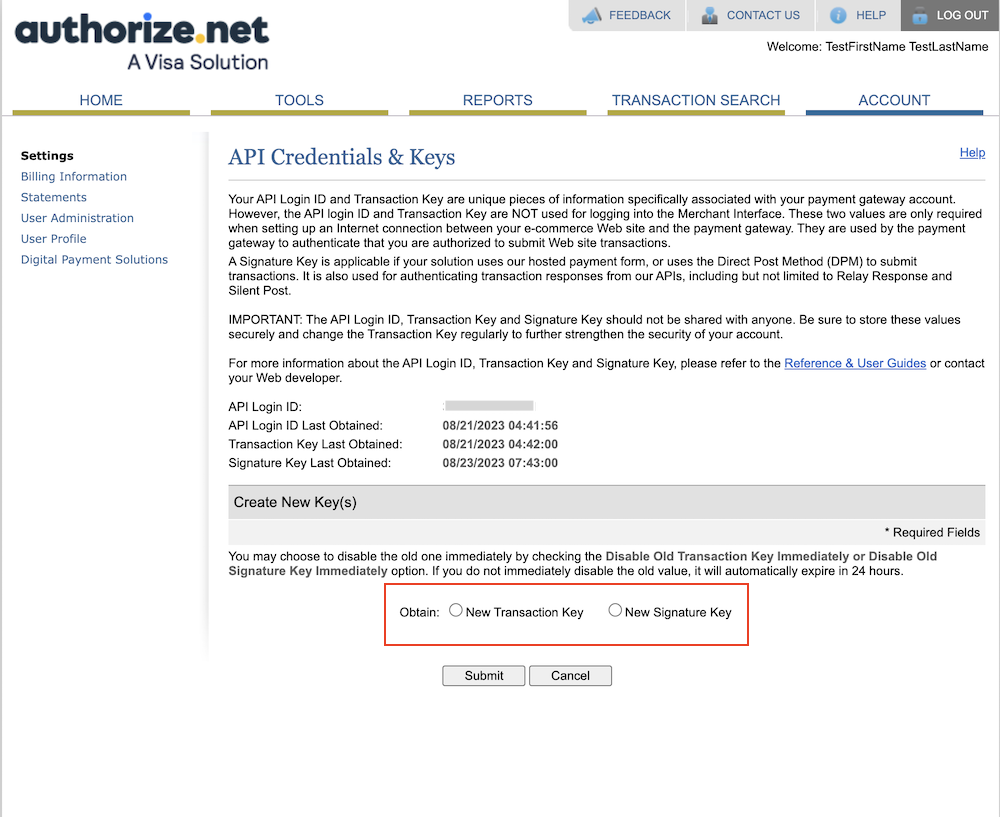
To obtain your Transaction Key and Signature Key navigate to the Create New Key(s) section located on your API Credentials & Keys page.
- Choose the Transaction Key option
- Click on the Submit button
- Complete the simple verification steps
Upon completing the verification steps, you will be redirected to a new page where you will find the generated Transaction Key.
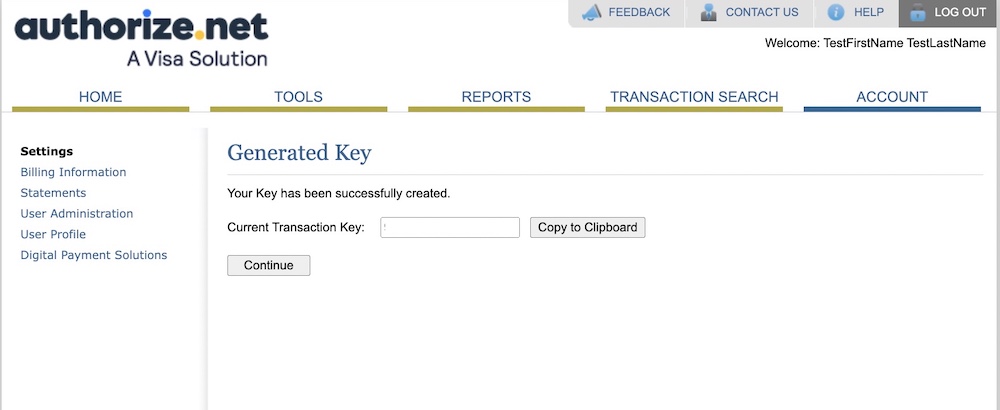
You can obtain your Signature Key following the same way.
Webhook in Authorize.Net
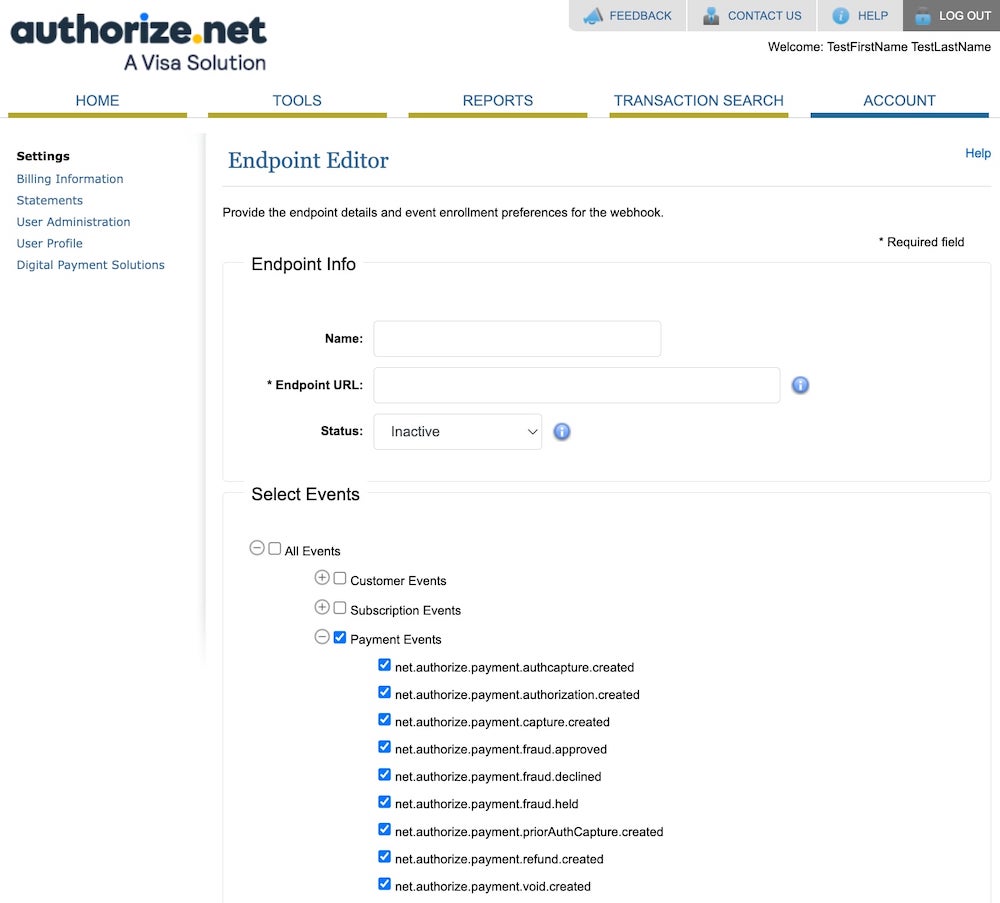
Follow these steps to configure your webhook endpoint settings:
- To configure your webhooks endpoint settings, visit https://sandbox.authorize.net/ and log in to your account.
- From the Accounts tab, scroll down and choose Webhooks.
- Click on the Add Endpoint button to access the Endpoint Editor page. Set Your webhook endpoint in your merchant panel as https://www.yourDomain.com/index.php/component/easystore/payment/authorizenet. (Replace "www.yourDomain.com" with your actual domain name)
- Then proceed to select events according to your preference. Select the specific events for which you want to receive notifications. These events may include orders, payments, or other related actions depending on your requirements. However, you must include net.authorize.payment.authcapture.created events.
Payment Instruction
Add any specific payment instructions if necessary. Use this field to provide customers with any additional information or instructions related to payments.
Once you've filled in all the information, click the "Save" or "Save & Close" button to save your Authorize.Net integration settings. Your online store can now accept secure payments via Authorize.Net, providing a convenient and trusted payment method for your customers.
To make the Authorize.Net payment method available for your online store, you need to add it to your list of payment methods from EasyStore > Settings > Payments. Learn more.

