

Stripe
EasyStore offers seamless integration with Stripe, a renowned payment gateway known for its security and efficiency. With Stripe integration, you can conveniently process payments for your online store.
Here are the Stripe supported countries and currencies list.
Adding Stripe to Your Payment Options
- Log in to your Joomla Dashboard and navigate to Components > EasyStore > Settings > Payments.
- Within Payment Settings, locate the “Add Payment Method” button and click on it.
- From the list of available payment methods, choose Stripe and click on the “Add” button.
- This action will successfully add Stripe to the list of available payment options for your store.
Configuring Stripe Integration
After adding Stripe as your preferred payment method, locate the newly added option in the list and click on the "Setup" button next to it.
Clicking on the "Setup" button will trigger a popup screen to appear, allowing you to configure the Stripe plugin for seamless integration with your store's checkout process.
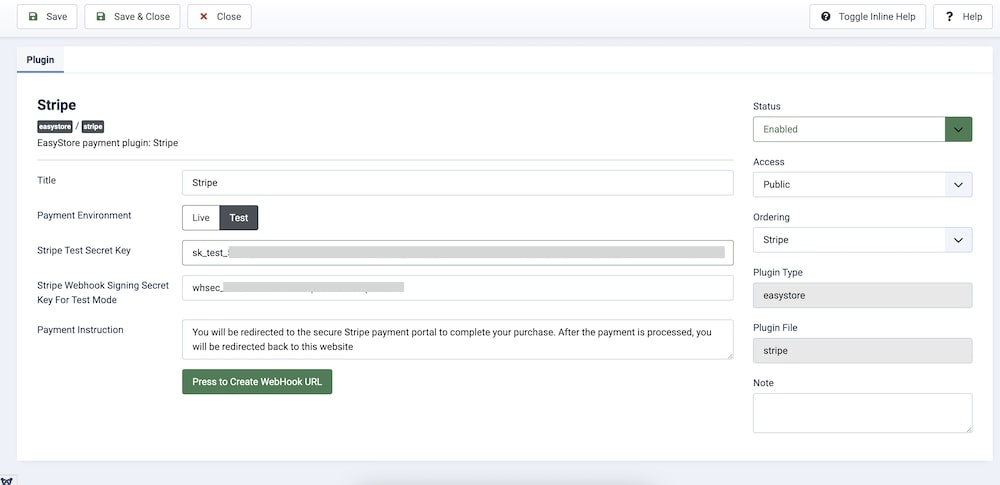
Title
Provide a title for this Stripe integration. This title is for your reference and can be something like "Stripe Payment."
Payment Environment
Choose between "Live" or "Test" depending on whether you want to test payments or process real transactions in a production environment.
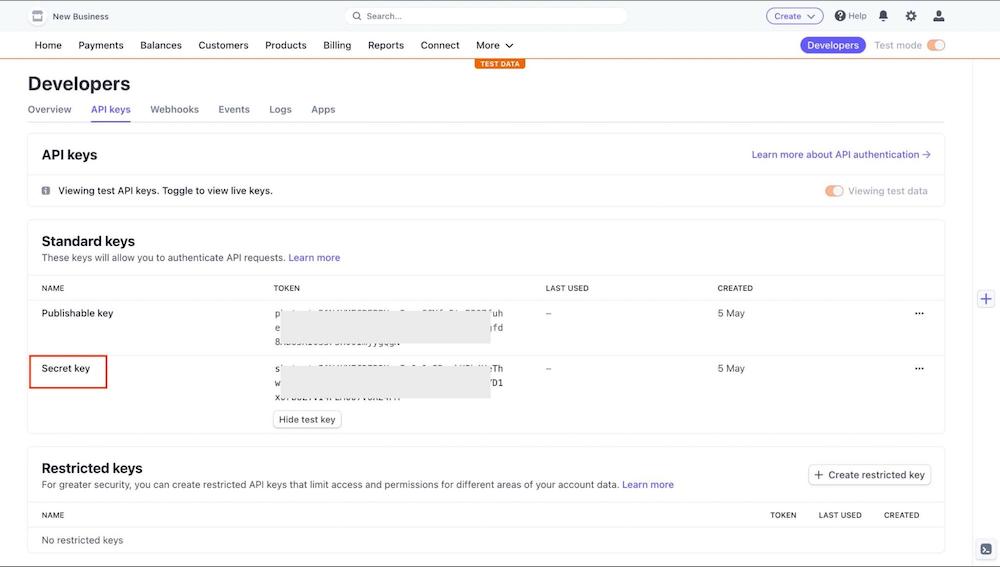
Stripe Secret Key
To obtain your secret key, log in to your Stripe account, visit the developer dashboard, and then API keys. Select whether you want to generate a key for Test purposes or Live transactions.
Copy the secret key and simply paste it into the Stripe Secret Key field.
Please note that if you generate a secret key for Test purposes it will start with the prefix "sk_test" and for Live transactions, the secret key will start with the prefix "sk_live".
Stripe Webhook Signing Secret Key
To obtain the Webhook Secret in Stripe, please follow these steps:
- Access your Stripe dashboard.
- Navigate to the Developers Dashboard > Webhooks.
- Click on "+ Add Endpoint."
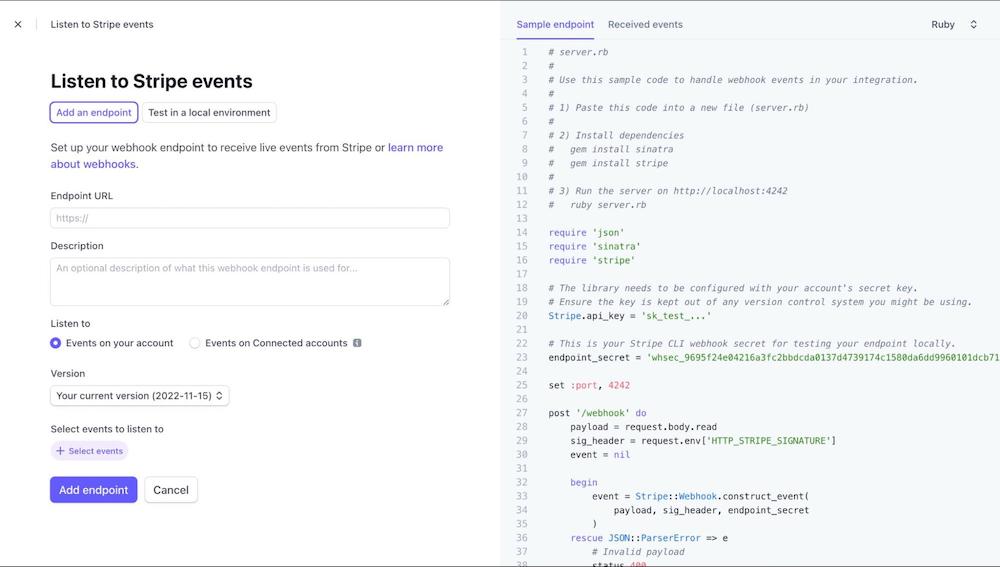
- Endpoint URL: For the "Endpoint URL," you should configure your webhook endpoint as follows:
https://www.yourDomain.com/index.php?option=com_easystore&task=payment.onPaymentNotify&type=stripe.
Replace "www.yourDomain.com" with your actual domain name.
- Select the specific events for which you want to receive notifications. However, you must select the "payment_intent.payment_failed", "checkout.session.completed", "payment_intent.partially_funded", "payment_intent.cancelled" events for smooth operation.
- Click on Add Endpoint to save the webhook. Once saved, copy the webhook "Signing secret" and paste it into the Stripe Webhook Signing Secret Key field.

Note: If you don’t want to create a webhook manually like shown above, simply click on "Press to Create Webhook URL" to set up a secure and functional integration of Stripe with your EasyStore.
Payment Instruction
If needed, supply your customers with any payment instructions or supplementary information. This could encompass details on completing a payment or any special instructions regarding Stripe payments.
After configuring the above settings, click on Save & Close to save the integration.
To make the Stripe payment method available for your online store, you need to add it to your list of payment methods from EasyStore > Settings > Payments. Learn more.