

Razorpay
Razorpay is a renowned payment gateway known for its strong focus on security and its efficient payment processing capabilities. By seamlessly integrating Razorpay into your EasyStore, you'll be able to offer your customers a hassle-free and secure payment experience.
Click here to see which currencies support Razorpay.
Adding Razorpay to Your Payment Options
- Log in to your Joomla Dashboard and navigate to Components > EasyStore > Settings > Payments.
- Within Payment Settings, locate the “Add Payment Method” button and click on it.
- From the list of available payment methods, choose Razorpay and click on the “Add” button.
- This action will successfully add Razorpay to the list of available payment options for your store.
Configuring Razorpay Integration
After adding Razorpay as your preferred payment method, locate the newly added option in the list and click on the "Setup" button next to it.
Clicking on the "Setup" button will trigger a popup screen to appear, allowing you to configure the Razorpay plugin for seamless integration with your store's checkout process.
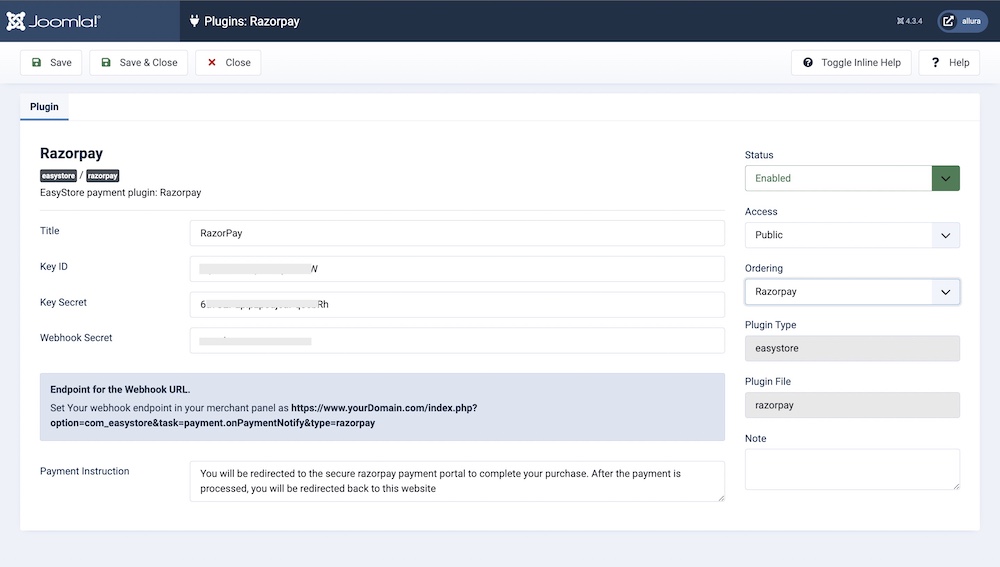
Title
Give your Razorpay integration a title (e.g., "Razorpay Integration"). This is a user-defined title that helps you identify this integration within your Joomla Dashboard.
Key ID & Key Secret

You'll need to enter your Razorpay Key ID here. You can obtain the Key ID by following these steps:
- Log in to your Razorpay dashboard.
- Navigate to the "Settings" and then the "API Keys" section.
- Click on Generate Live Key to generate the API Key. Copy and paste the Key ID & Secret Key into the Key ID & Secret Key field in EasyStore.
Webhook Secret
To obtain the Webhook Secret and set up your webhook in Razorpay, please follow these steps:
- Access your Razorpay dashboard.
- Navigate to the "Settings" section.
- Within the "Settings" menu, select "Webhooks."
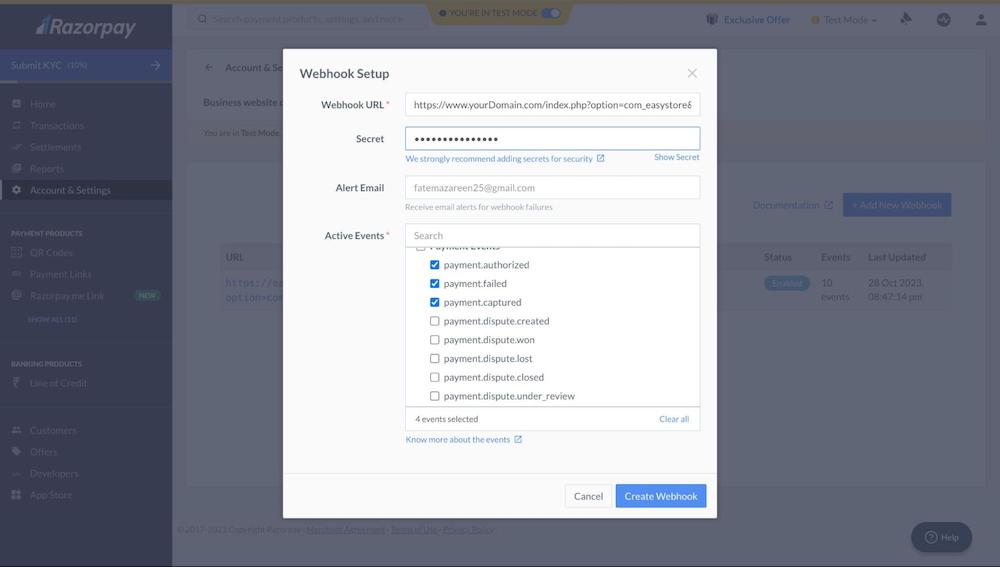
- Click on "Add New Webhook."
- Webhook URL: For the "Endpoint for the Webhook URL," you should configure your webhook endpoint in your merchant panel as follows:
https://www.yourDomain.com/index.php?option=com_easystore&task=payment.onPaymentNotify&type=razorpay.
Replace "www.yourDomain.com" with your actual domain name.
- Enter your webhook secret. This is essentially a password that ensures the security of your webhook. You will need to enter this secret in the Webhook Secret field during the integration process in EasyStore.
- Provide your alert email address. This is where Razorpay will send payment notifications and alerts.
- Select the specific events for which you want to receive notifications. These events may include orders, payments, or other related actions depending on your requirements. However, you must include payment.authorized, payment.failed, payment.captured, and order.paid events.
After configuring the above settings, click on "Create Webhook." By following these steps, you'll set up a secure and functional webhook in Razorpay and obtain the necessary Webhook Secret for integration with your EasyStore.
Payment Instruction
Add any specific payment instructions if necessary. Use this field to provide customers with any additional information or instructions related to payments.
After entering the requisite information, click the Save & Close button to establish the connection between EasyStore and Razorpay.
To make the Razorpay payment method available for your online store, you need to add it to your list of payment methods from EasyStore > Settings > Payments. Learn more.