- TemplatesTemplates
- Page BuilderPage Builder
- OverviewOverview
- FeaturesFeatures
- Dynamic ContentDynamic Content
- Popup BuilderPopup Builder
- InteractionsInteractions
- Layout BundlesLayout Bundles
- Pre-made BlocksPre-made Blocks
- DocumentationDocumentation
- EasyStoreEasyStore
- ResourcesResources
- DocumentationDocumentation
- ForumsForums
- Live ChatLive Chat
- Ask a QuestionAsk a QuestionGet fast & extensive assistance from our expert support engineers. Ask a question on our Forums, and we will get back to you.
- BlogBlog
- PricingPricing
Rows
What is a Row
Rows give you an initial horizontal structure to your frontend page where you can apply styling to an entire row or add new add-ons to it, such as Columns, Text Blocks, etc.
How to Add Rows
There are 2 ways you can add a row.
On a New Page:
While creating a brand new page from scratch you should be able to see Add New Row button.

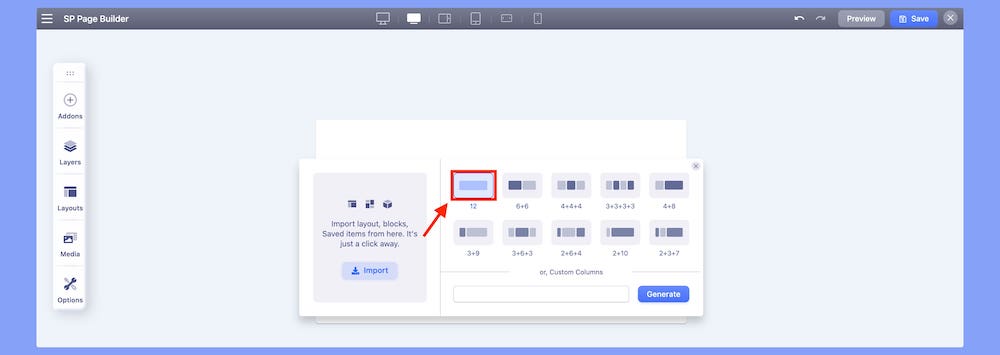
Click on the Add New Row button to get the option to choose your row layout. Choose the first layout (12) to add your row.

Using the (+) button:
Under each panel of rows and columns, you should be able to find an Add New Row Button (+) as shown in the screenshot.

Click on the Add New Row Button (blue plus sign) to get the column generator. From the column generator, you can now choose and add your rows.
How to Add Nested Rows
Make sure to add your rows first. Once you have added your rows, navigate to the frontend sidebar and choose Addons. From the Structure Section choose Row. Drag and drop the row on your previously created rows. Your nested rows have been created.
You can also repeat the process multiple times to create a complex row and column layout.
Adjust Column Size
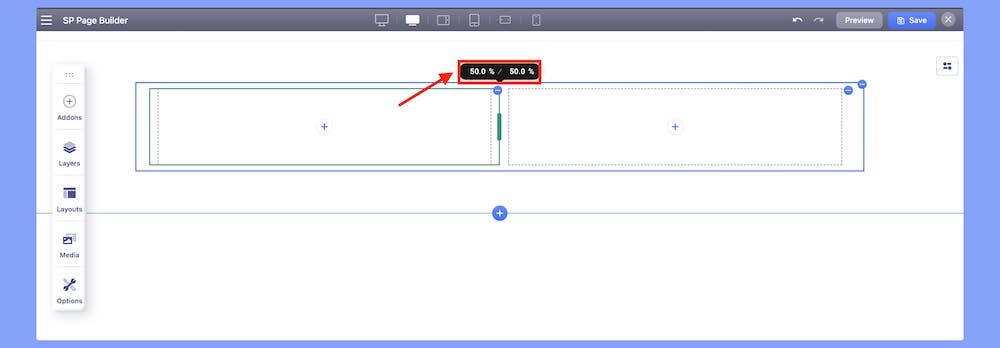
To adjust your column width, simply drag the column boundary and adjust the size according to your preference.
Or you can also resize your columns using the inline width percentage block by simply specifying the width percentage.

Add Elements to a Row
Once you have created your Rows you can now add your preferred addons. Navigate to the SP Page Builder Sidebar and simply choose your required addons. Drag and drop the addons inside the rows according to your requirements.
ACL Functionality

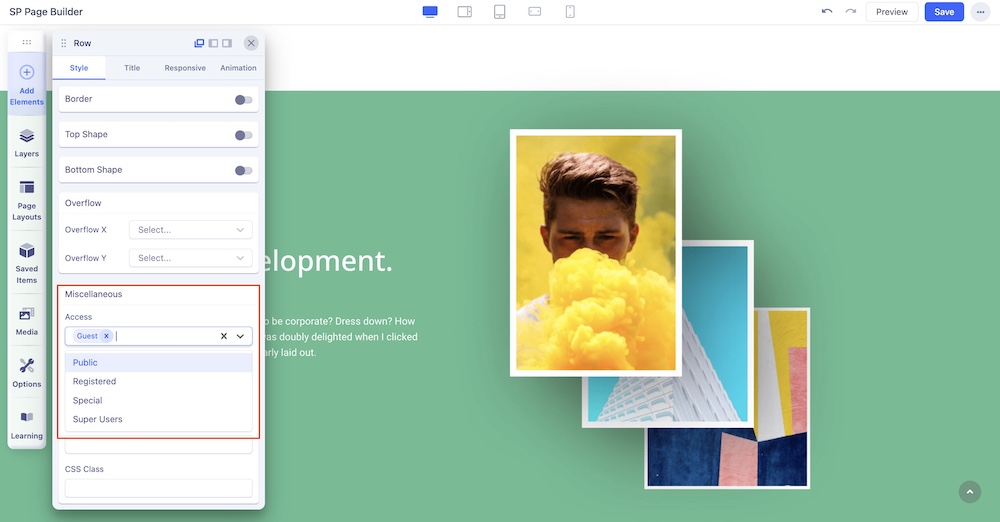
The ACL functionality of the Row settings lets control over permissions and restrictions for users accessing and modifying row settings. From your Row’s Style settings, scroll down to the Miscellaneous section and locate “Access”. Click on the dropdown menu and designate the permitted users. Please note that you can choose one or more users from the dropdown list.

