- TemplatesTemplates
- Page BuilderPage Builder
- OverviewOverview
- FeaturesFeatures
- Dynamic ContentDynamic Content
- Popup BuilderPopup Builder
- InteractionsInteractions
- Layout BundlesLayout Bundles
- Pre-made BlocksPre-made Blocks
- DocumentationDocumentation
- EasyStoreEasyStore
- ResourcesResources
- DocumentationDocumentation
- ForumsForums
- Live ChatLive Chat
- Ask a QuestionAsk a QuestionGet fast & extensive assistance from our expert support engineers. Ask a question on our Forums, and we will get back to you.
- BlogBlog
- PricingPricing
Creating a Customer
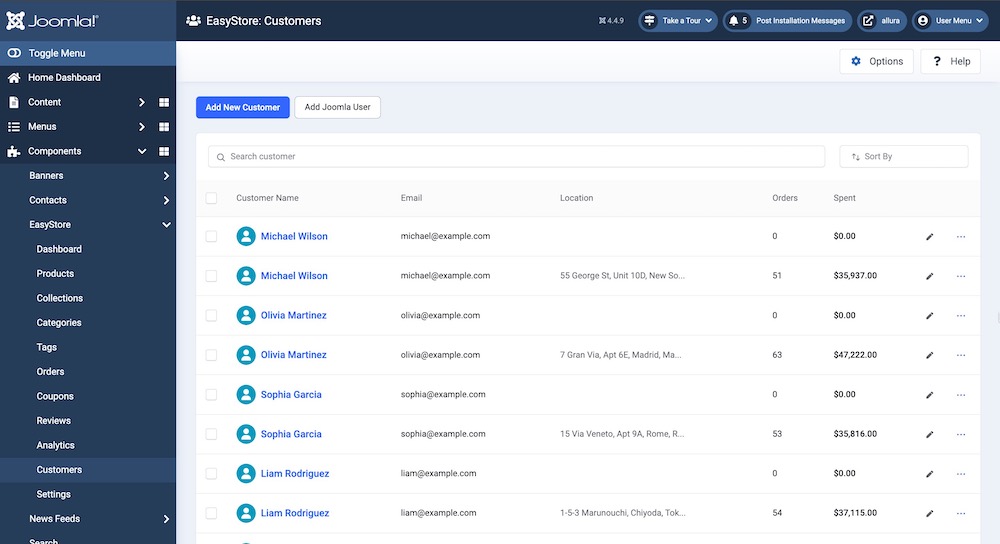
EasyStore's customer management feature lets you easily view, manage, edit, and manually create customer profiles for your Joomla online store.
When a customer purchases from your EasyStore shop, their information is automatically added to this section. Additionally, if you're migrating from J2Store to EasyStore using the migration tool, your existing customers will be imported and listed here.
Creating a Customer
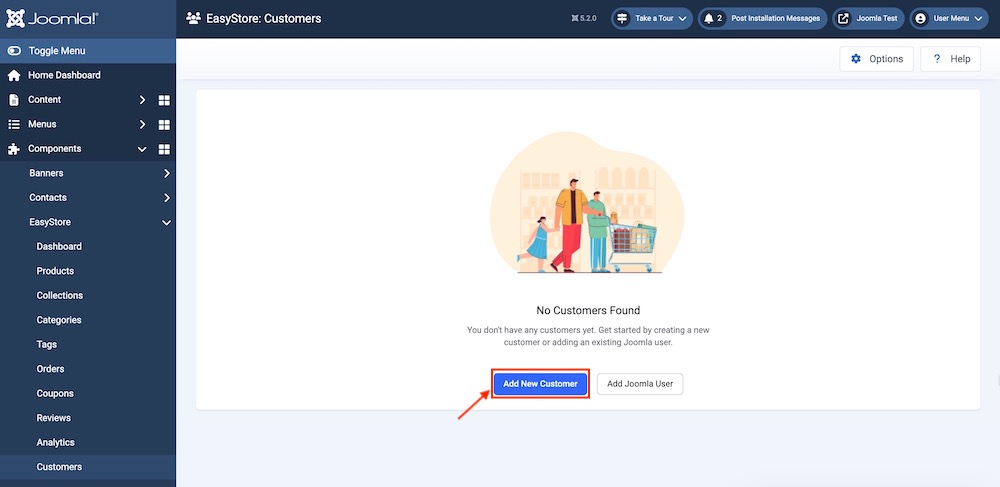
To create a customer, go to the Joomla backend Dashboard > Components > EasyStore > Customer and click on “Add New Customer.”
Basic Information
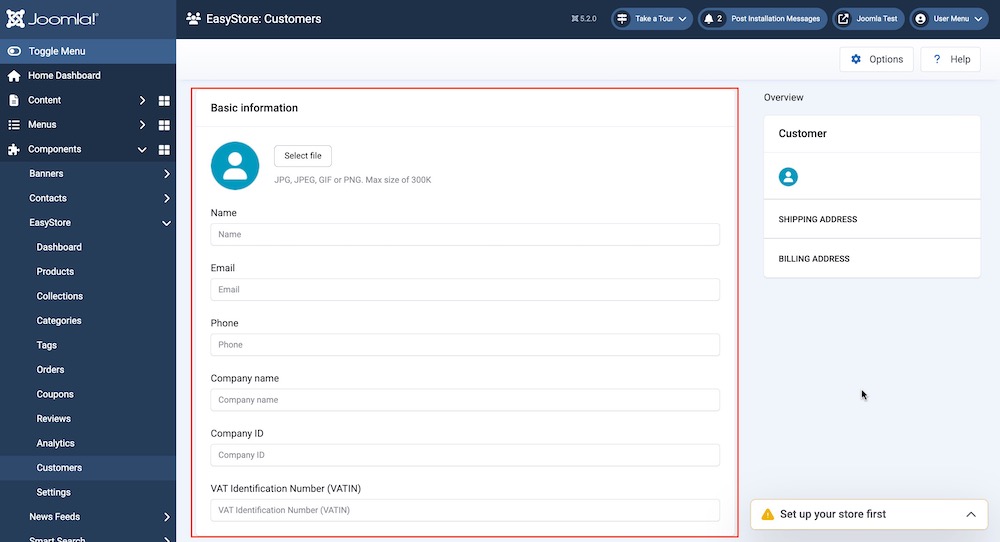
- User avatar: Upload an image for the new customer you are manually creating. Accepted file formats include JPG, JPEG, GIF, and PNG, with a maximum file size of 300KB.
- Name: Enter the name of the new customer.
- Email: Enter the customer’s email address. This is used for sending order updates, shipping notifications, promotional offers, and other important information related to the customer’s account and purchases.
- Phone: Enter the customer's phone number. This contact number will be used to reach the customer for order updates, shipping information, or customer support.
- Company Name: Enter the name of the customer's company, if they are purchasing on behalf of a business.
- Company ID: Enter the unique identification number (ID) assigned to the customer's company. This could be a business registration number or any other form of identification used to recognize the company.
- VAT Identification Number (VATIN): Enter the VAT Identification Number used for tax purposes. It’s required for businesses that need to deal with Value Added Tax (VAT) within certain countries or regions. This number helps validate the business's tax status, especially for cross-border transactions within the EU or other tax-regulated areas.
Shipping Address
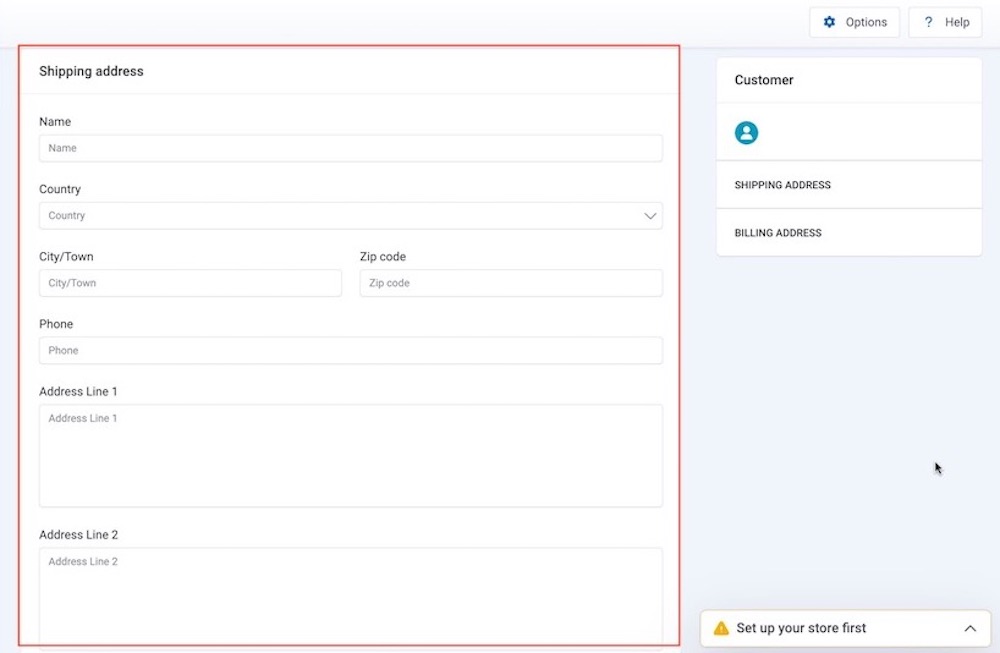
- Name: Enter the customer's full name, which will be used to address the shipping label and ensure the package is sent to the correct recipient.
- Country: Enter the country where the customer’s order will be shipped.
- City/Town: Enter the city or town where the customer’s shipping address is located. This helps with accurate delivery routing and ensures the order reaches the correct location.
- Zip Code: Enter the postal or ZIP code of the customer's shipping address. This helps further refine the delivery address to ensure the package is sent to the correct area.
- Phone: Enter the customer's phone number, used by the shipping carrier or store for any delivery-related inquiries, notifications, or issues.
- Address Line 1: Enter the primary address line that includes the main street address, P.O. Box, or building name. This is the first part of the shipping address.
- Address Line 2: Enter an optional second line for additional address details, such as apartment numbers, suite numbers, or building specifics, to ensure more accurate and complete delivery.
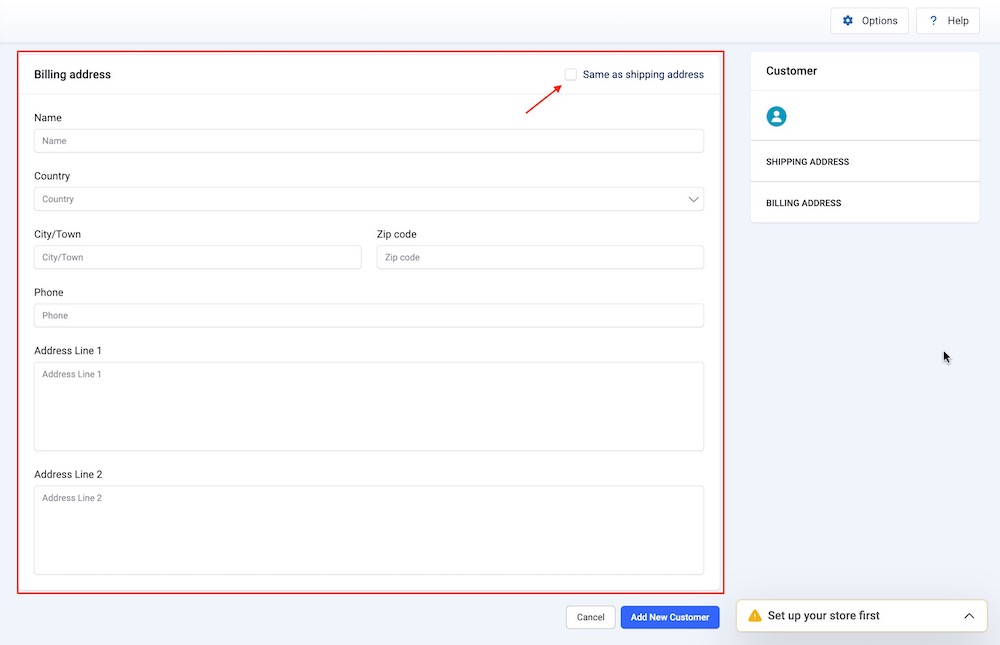
In some cases, the shipping address and billing address may be different. If they are the same, simply select the "Same as shipping address" option. This will ensure that the customer's bill is sent to the address specified in the Shipping Address section.
If the Billing Address of the customer is different then enter the information in the following fields:
- Name: Enter the full name of the customer as it appears on their payment method. This ensures the billing information matches and helps prevent any issues with payment verification.
- Country: Enter the country associated with the customer’s billing address.
- City/Town: Enter the city or town of the customer’s billing address. This helps with payment verification and ensures the billing details are correctly matched.
- Zip Code: Enter the postal or ZIP code for the customer’s billing address. This helps to further verify the payment method and ensures the accuracy of the billing information.
- Phone: Enter the customer’s phone number, which may be used for any issues related to payment verification or billing inquiries.
- Address Line 1: Enter the primary address line associated with the customer’s billing address, such as their street address, P.O. Box, or building name. This is the main part of the billing address.
- Address Line 2: Enter an optional second address line for additional billing address details, such as apartment numbers or suite numbers, to ensure the payment information is fully accurate.
After entering the required customer details, click the "Add New Customer" button to add the new customer to your store.
Managing the Created Customers
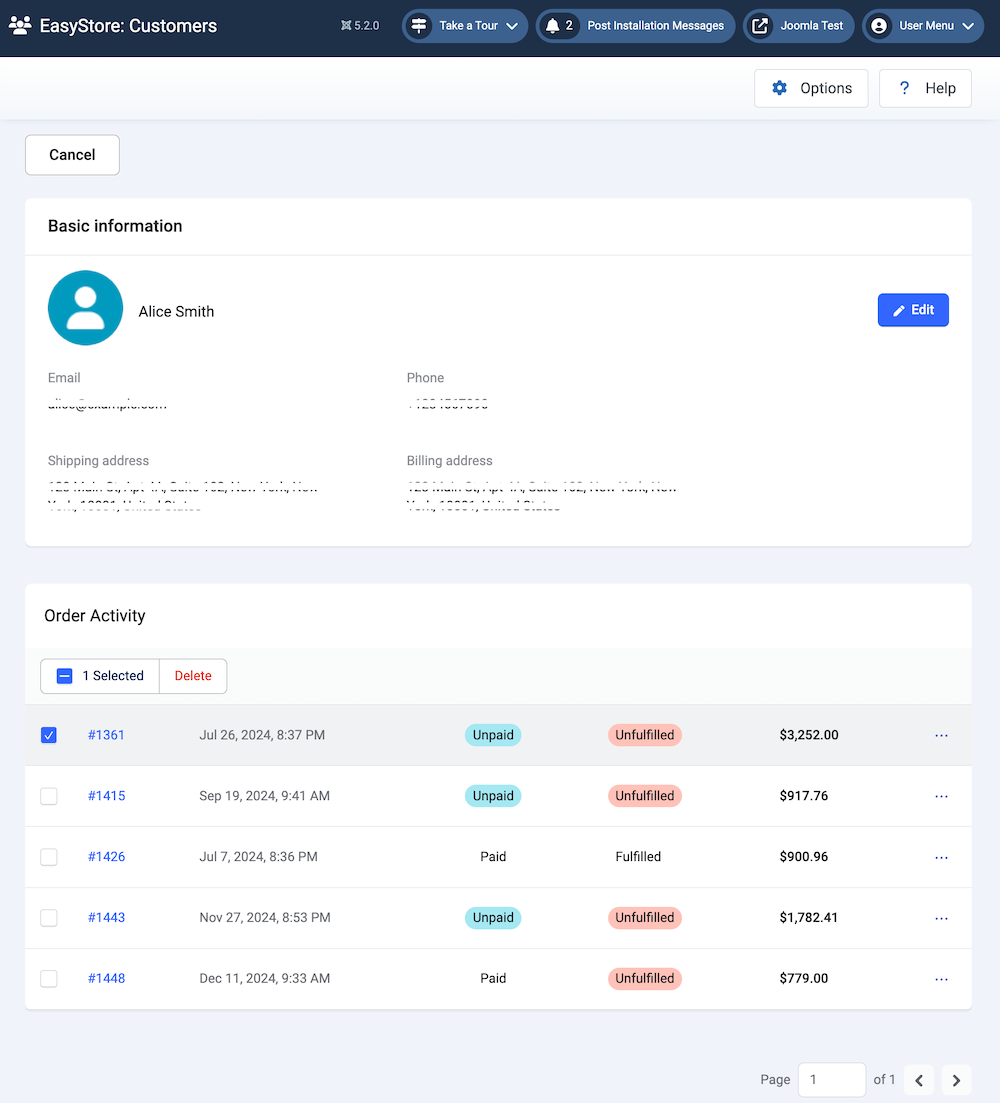
From your Customers dashboard when you click on individual customers, it will take you to the managing interface from where you can view the basic information of each customer and view their order activity. You can click on the Edit button to start editing the customer’s information.
Order Activity
In the Order Activity section, you can view a list of orders associated with a specific customer. This includes details such as the number of orders placed, the time of each order, payment status, fulfillment status, and the total amount for each order.
- In the “Order” column, click on an individual order to view its specific details.
- To delete an order, select the individual order you want to remove.
Note: Deleting an order from this section will also remove it from the order list in the EasyStore Orders option.

