- TemplatesTemplates
- Page BuilderPage Builder
- OverviewOverview
- FeaturesFeatures
- Dynamic ContentDynamic Content
- Popup BuilderPopup Builder
- InteractionsInteractions
- Layout BundlesLayout Bundles
- Pre-made BlocksPre-made Blocks
- DocumentationDocumentation
- EasyStoreEasyStore
- ResourcesResources
- DocumentationDocumentation
- ForumsForums
- Live ChatLive Chat
- Ask a QuestionAsk a QuestionGet fast & extensive assistance from our expert support engineers. Ask a question on our Forums, and we will get back to you.
- BlogBlog
- PricingPricing
Overview
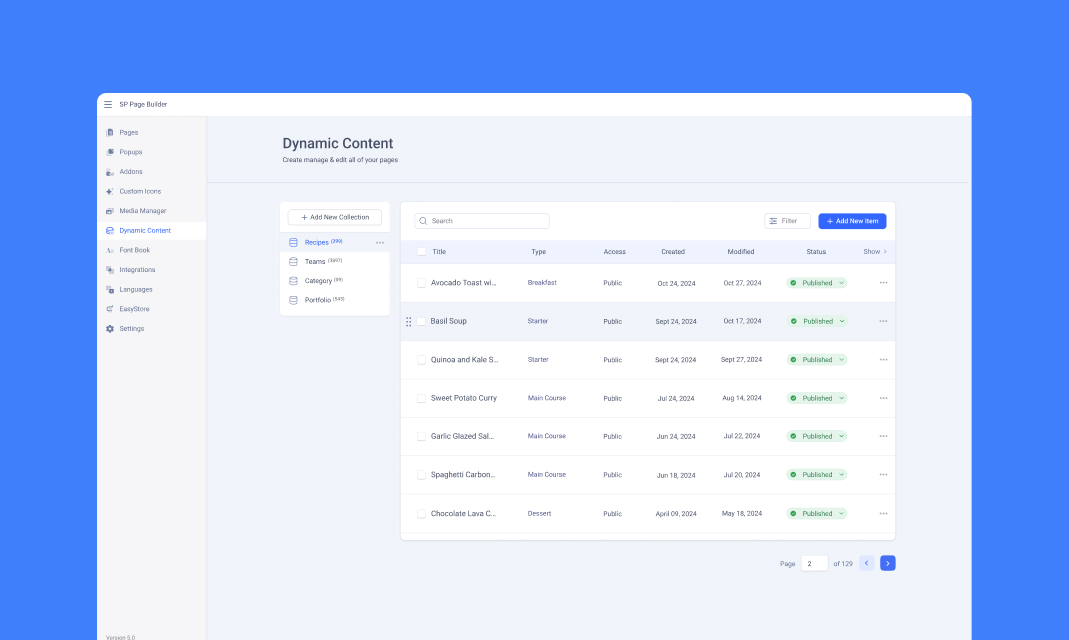
Dynamic Content is a powerful feature in SP Page Builder designed to streamline the creation, organization, and management of dynamic content on your website. It serves as a central hub in SP Page Builder. Here, you can define content structures, input data, and seamlessly integrate this data into your site’s design.
Whether you’re managing a portfolio, client database, or any other type of content, Dynamic Content provides a user-friendly interface to efficiently manage it all.
Key Features and Benefits:
- Centralized Content Management: Manage all your content in one place, making updates and organization simple and efficient.
- Dynamic Content Integration: Easily integrate your content with your website’s design, ensuring that updates are reflected across all relevant pages automatically.
- Custom Fields: Utilize a variety of field types (text, images, dates, etc.) to capture exactly the information you need.
- Collection Presets: Start quickly with predefined collections for common content types like portfolios, recipes, and team members.
- Scalability: Effortlessly handle a growing amount of content without compromising on performance or usability.
- Efficiency: Save time with bulk actions, conditional visibility rules, and other features designed to enhance your workflow with data.
Accessing Dynamic Content in SP Page Builder

To access the Dynamic Content in SP Page Builder:
- Start by logging into the backend of your SP Page Builder website.
- Under Components > SP Page Builder Pro, you’ll find the Dynamic Content.
Dynamic Content Overview

Static content refers to content that requires manual updates whenever changes are needed.
In contrast, dynamic content allows you to link your design to the data stored in Dynamic Content, enabling automatic updates across multiple instances. This approach streamlines content management and allows you to create dynamic index and template pages that update automatically as new data is added.
Step 1: Create Collections
To start, navigate to the Dynamic Content and click on Add New Collection. Name your collection based on the type of content it will hold (e.g., “Recipes", "Team Members").
If you prefer, you can start with a predefined collection template that matches your content type. This can save time and provide a ready-made structure for your content.
Step 2: Define Collection Fields
Collection Fields define the structure of your Collection, dictating the type of information each item will hold. For instance, a "Recipe" Collection might include fields for the recipe title, details, preparation time, etc.
- Add Fields: When creating or editing a Collection, you can add various fields such as text, image, date, number, link, etc. Each field type is designed to capture specific kinds of data, allowing for precise content management.
- Customize Fields: Customize each field to suit your needs. For example, you can set a text field as mandatory, limit the number of characters, or allow rich text formatting.
Step 3: Add Collection Items
Once your Collection is set up, you can start adding individual items. Each item in the Collection will have the fields you defined where you can input data for each field.
Step 4: Display Dynamic Content
With your Collection items ready, you can now integrate them into your website using SP Page Builder’s addons:
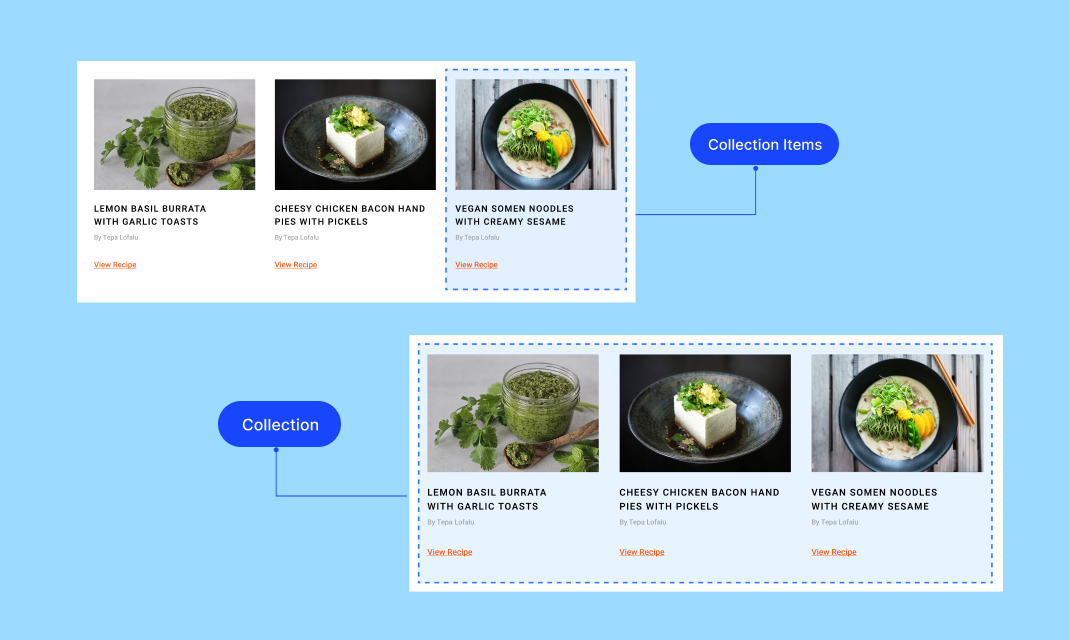
- Collection Index: The Collection element allows you to display lists of your Collection items on any page. For instance, you can create a dynamic recipe list on your homepage or showcase team members on an "About Us" page.
- Collection Pages: Collection Pages enable you to design a single layout that applies to all items in a Collection. For example, if you have a "Team Members" Collection, you can design a page layout with placeholders for the team member's name, picture, bio, and contact information. The data for each team member will automatically populate these placeholders when the page is viewed.
In the next section, explore how Collections help you organize and display dynamic content efficiently.
Export/Import Dynamic Collections
The Export/Import functionality enables you to transfer dynamic collections, including their fields and items, between projects seamlessly. Additionally, you can export pages containing dynamic content along with the associated data and import them into different projects.
Exporting Dynamic Content
- From the Joomla dashboard, navigate to SP Page Builder > Dynamic Content.
- Access the Export button at the top right.
- A downloadable .json file will be generated containing the collections and their items.
Importing Dynamic Content
- From the Joomla dashboard, navigate to SP Page Builder > Dynamic Content.
- Click the Import button at the top right and select the .json file you exported earlier.
- All exported dynamic collections, including their items, will be imported.
Note: To successfully import or export images used in collection items, you must provide their absolute image URLs. Images stored in the Media Manager cannot be included in the import/export process.

