- TemplatesTemplates
- Page BuilderPage Builder
- OverviewOverview
- FeaturesFeatures
- Dynamic ContentDynamic Content
- Popup BuilderPopup Builder
- InteractionsInteractions
- Layout BundlesLayout Bundles
- Pre-made BlocksPre-made Blocks
- DocumentationDocumentation
- EasyStoreEasyStore
- ResourcesResources
- DocumentationDocumentation
- ForumsForums
- Live ChatLive Chat
- Ask a QuestionAsk a QuestionGet fast & extensive assistance from our expert support engineers. Ask a question on our Forums, and we will get back to you.
- BlogBlog
- PricingPricing
Creating Popups
SP Page Builder 5’s Popup Builder allows you to create and customize popups for your website. Popups are overlay windows that appear on top of a webpage, typically used for displaying important messages (also Age), capturing leads, promoting offers, or guiding user interactions after a time delay. You can use this popup builder to create popups for your EasyStore site as well.
Upgrade to SP Page Builder v5.4.0 or later to access the popup builder feature.
Notice! The popup window is not blocked by uBlock Origin or most browser popup blockers if you would use neutral, common content inside. However, if you use inside content that would be classified as advertising content, then the pop-up content may (but not necessarily) be blocked by the browser add-on. It depends on the type of browser add-on and the type of filters enabled.
How to Access Popup Builder
Accessing the Popup Builder in SP Page Builder 5 is straightforward, similar to creating a regular page.
-
Log into your Joomla admin panel.
-
Navigate to Components > SP Page Builder > Pages.
This will take you to the Page Builder dashboard, where you can create, manage, and edit your SP Page Builder pages, including Dynamic Pages and Popups.
How to See Only The Popups
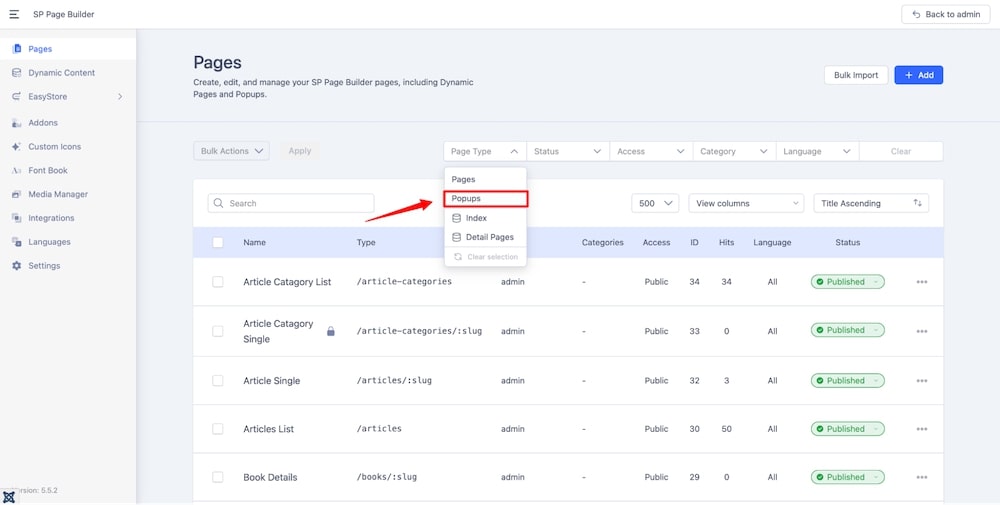
To only see the Popup pages in the Dashboard, click on Page Type from the top filtering bar, then select Popups from the dropdown.
How to Create a New Popup
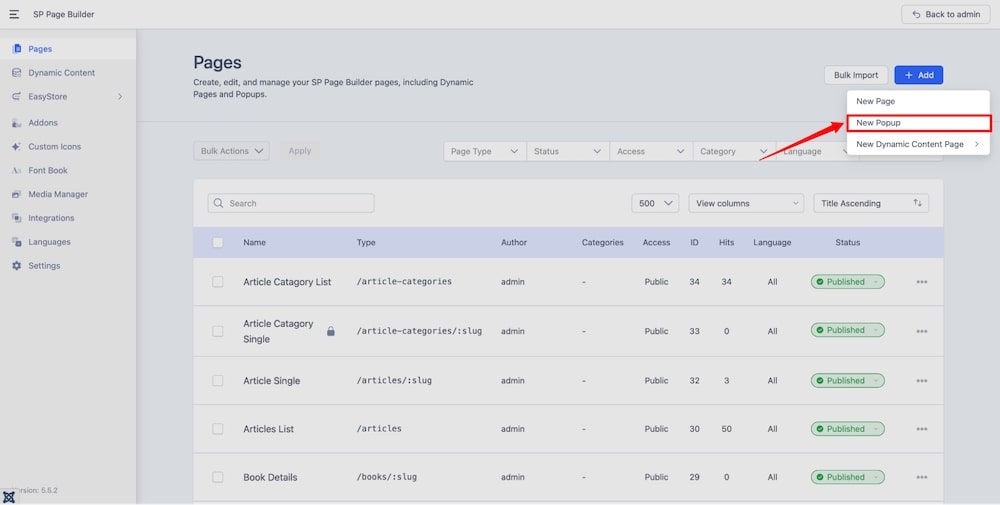
From the Dashboard, click on the +Add, then select New Popup. Insert the name of the popup and hit Save. This will take you to the backend editing interface of the popup builder.
Premade Layout
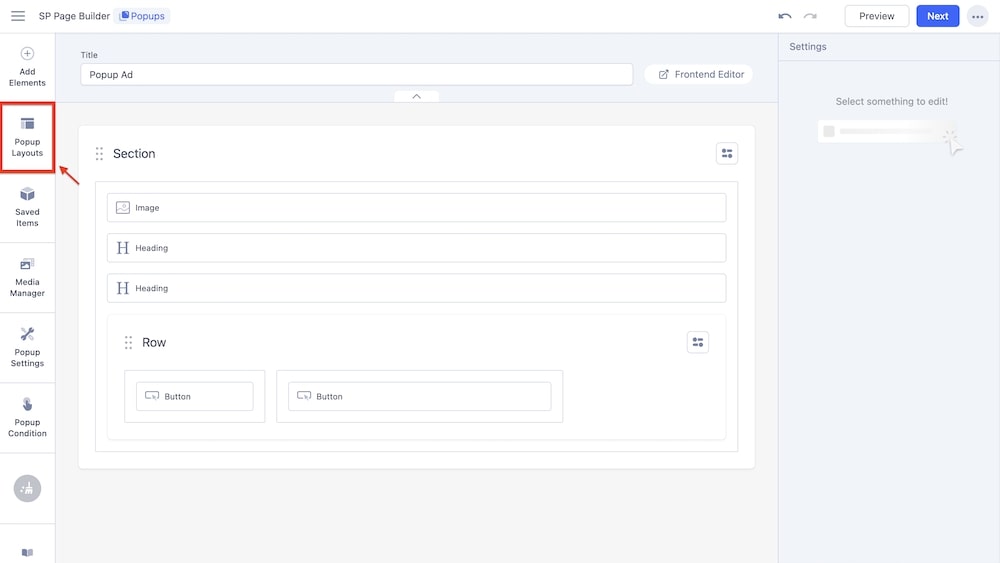
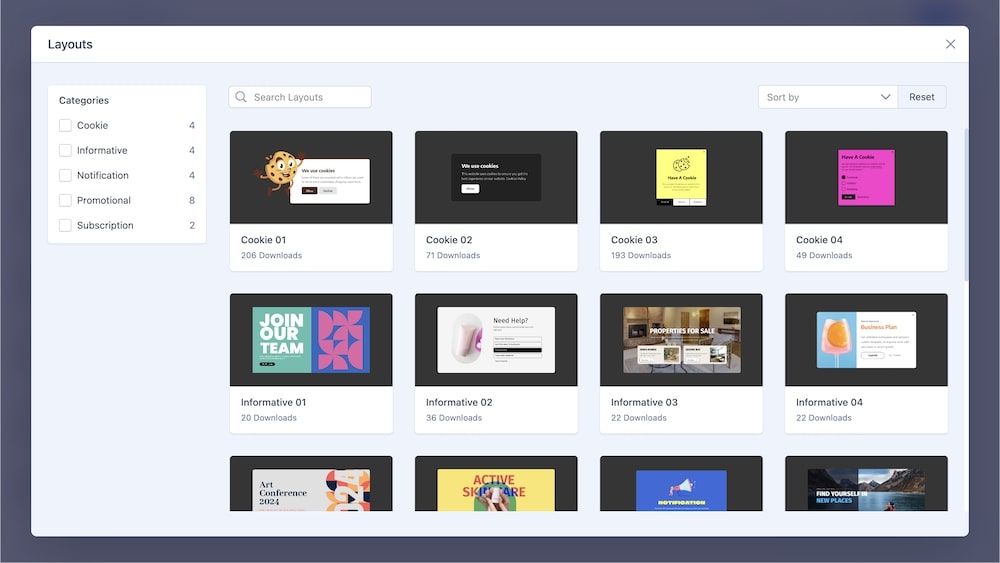
You can speed up your layout creation by accessing the premade popup blocks. From the Main Menu Bar of your frontend or backend editor, navigate to Popup Layouts, where you'll find a variety of beautifully designed blocks to choose from. Select a block and click Import to bring it into your project.
Bulk Import and Export
To export popups, select the ones you want to export, then choose Export from the Bulk Action dropdown menu. The selected popups will be saved in .zip format.
To bulk import your popups, click the Bulk Import button next to +Add New Popup, then browse your device to upload the file. Make sure the file is in .zip format.
Popup Condition
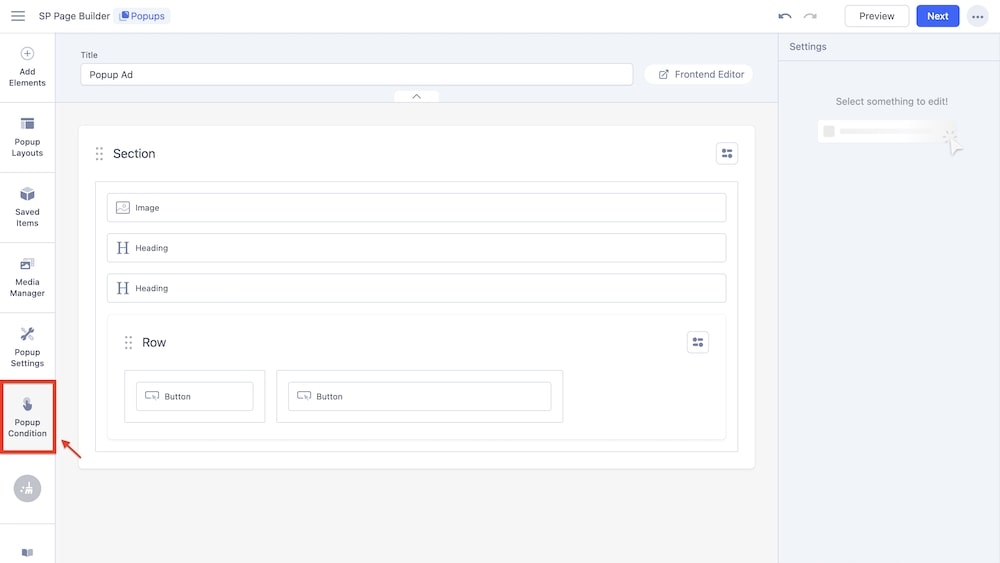
Popup conditions are a key feature for any popup ad. You can easily configure these triggers to control when, where, and how your popups appear.
In your popup's backend or frontend editor, navigate to the Main Menu Bar and click Popup Condition. This will open a screen where you can adjust both Visibility and Trigger Settings.
Visibility
Popup Visibility lets you define where your popup will appear on the site. You can specify the exact location on your site (any specific page or specific menu) under which the popup will be triggered.
Please note that Visibility is a mandatory condition that must be set before you can proceed to configuring the Trigger conditions.
You can choose between 3 options: Entire Site, Specific Pages, and Specific Menu Item(s).
Entire Site
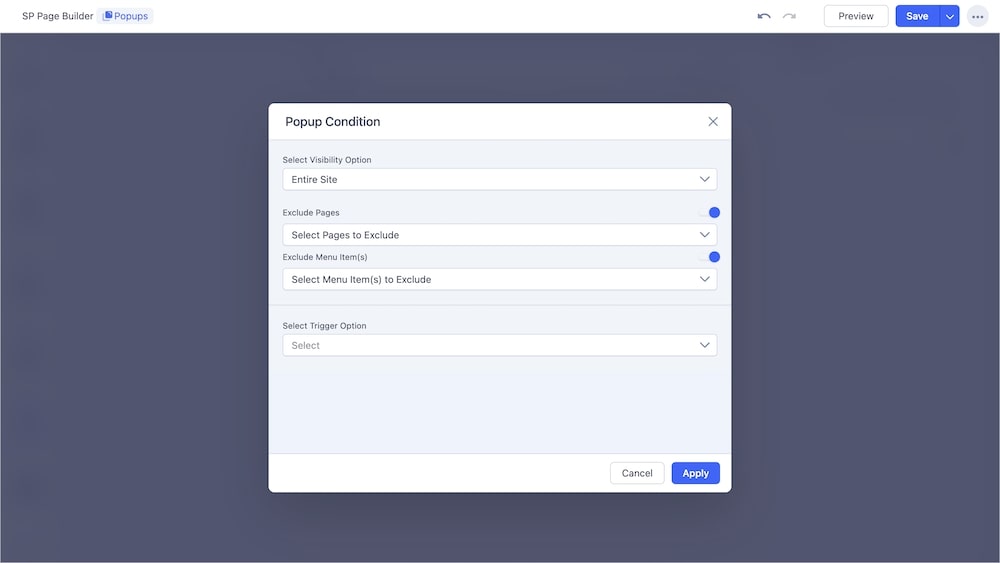
You can choose to have your popup appear on every page of your website. However, you will also be able to set exclusions, such as:
-
Exclude Pages: When you click on this option you will be presented with a list of every pre-existing page on your site. You can select any specific page or pages where the popup will not appear. So the user will receive the popup when they enter any page on your site except the selected ones.
-
Exclude Menu Item(s): Similarly, you can also choose specific menus to ignore the popup. Simply select your desired menu from the list as you would do in the case of excluding pages. When the user is viewing your chosen menu, they will not see the popup.
Specific Pages
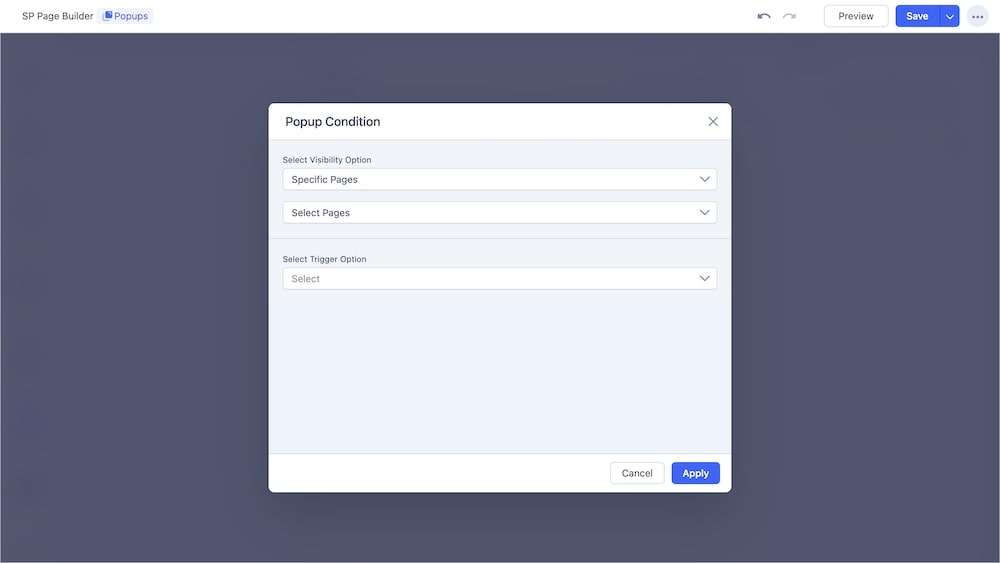
You can select which page or pages you want your popup to appear. When you click on Select Pages, a dropdown menu will appear showing you all the available pages on your site. Simply click on the one you wish to exclude.
Specific Menu Item(s)
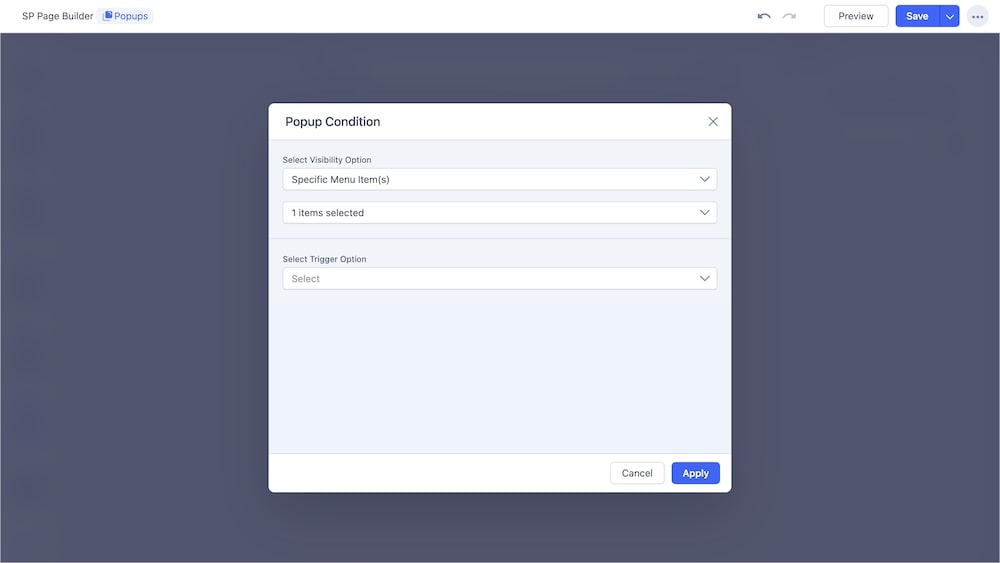
Similarly, you can also choose to have your popup not appear over certain menus. Following the same process, click Select Menus and choose your desired menus for excluding.
Trigger
The Trigger condition determines when and how a popup will appear on your site. Please note that trigger conditions can only be applied after setting the visibility conditions.
On Scroll
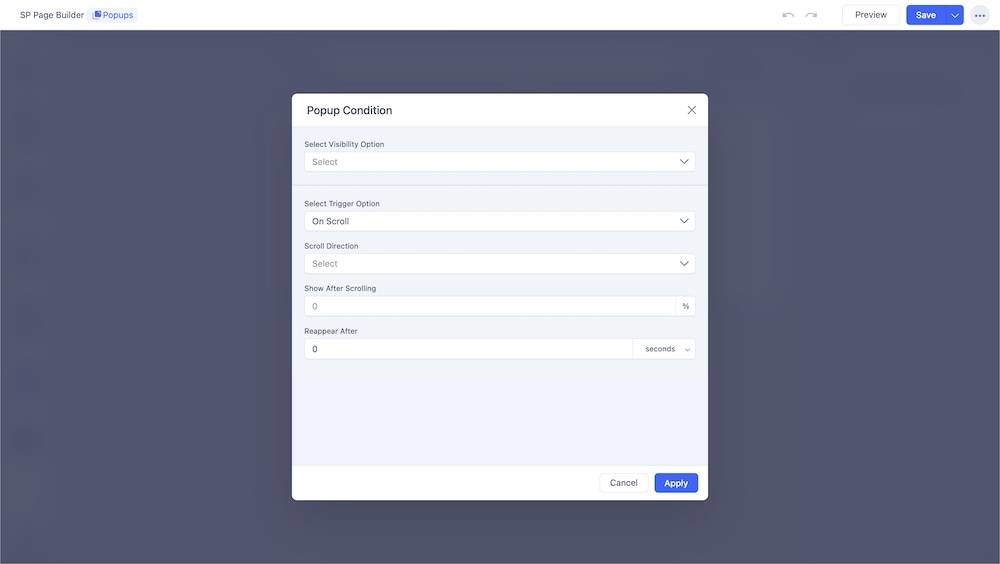
- Scroll Direction: You can adjust the scroll direction such that the popup will only trigger when the user either scrolls up or down.
- Show After Scrolling: Then you can set the percentage amount the user needs to scroll before the Popup triggers.
- Reappear After: Define the interval before the popup can reappear after its initial trigger. Options include seconds, minutes, hours, days, or setting it to never reappear.
On Landing
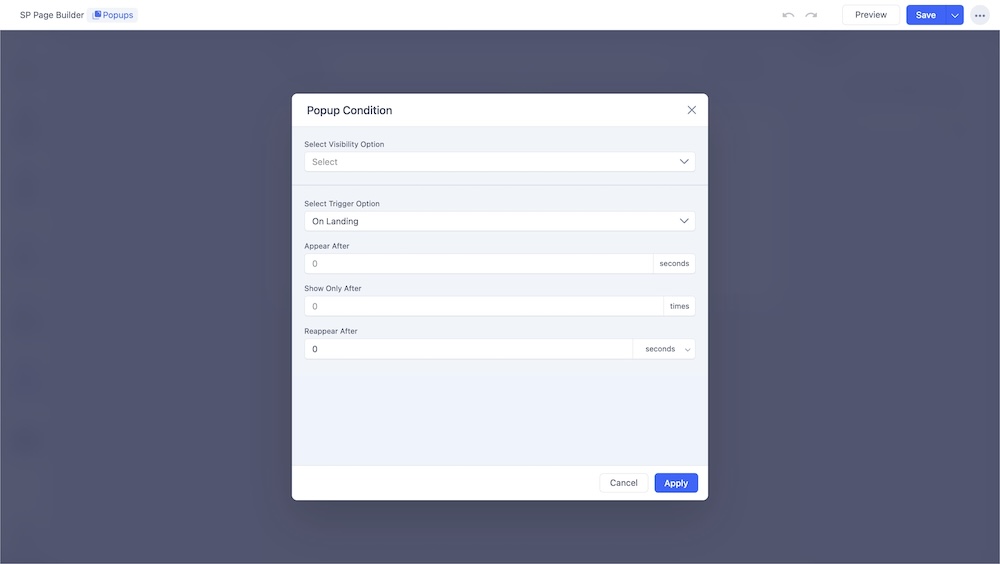
- Appear After: You can customize how long it will take the popup to appear (in seconds).
- Show Only After: With this option you can set how many times the user needs to land on the page for it to appear.
- Reappear After: Define the interval before the popup can reappear after its initial trigger. Options include seconds, minutes, hours, days, or setting it to never reappear.
On Click
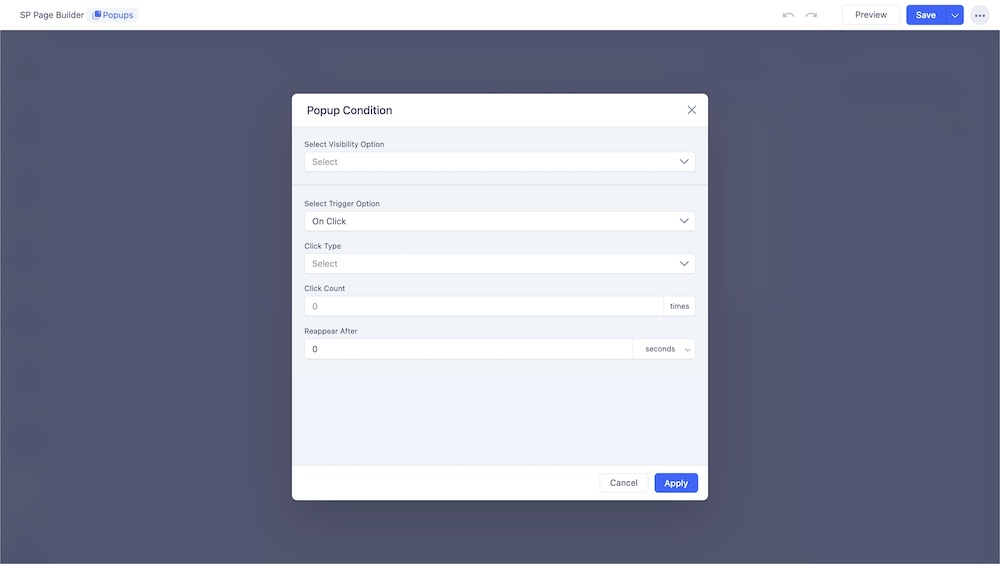
You can set the popup to trigger when the user either clicks on the page.
- Click Type: Select whether the popup will appear if a user clicks on any random position on the page or a specific element.
- Click Area: If Click Type was set to “Specific Element”, the click area can be adjusted using the name of the element or its css-class.
- Click Count: You can also set the amount of times the user needs to click to trigger the popup.
- Reappear After: Define the interval before the popup can reappear after its initial trigger. Options include seconds, minutes, hours, days, or setting it to never reappear.
On Hover
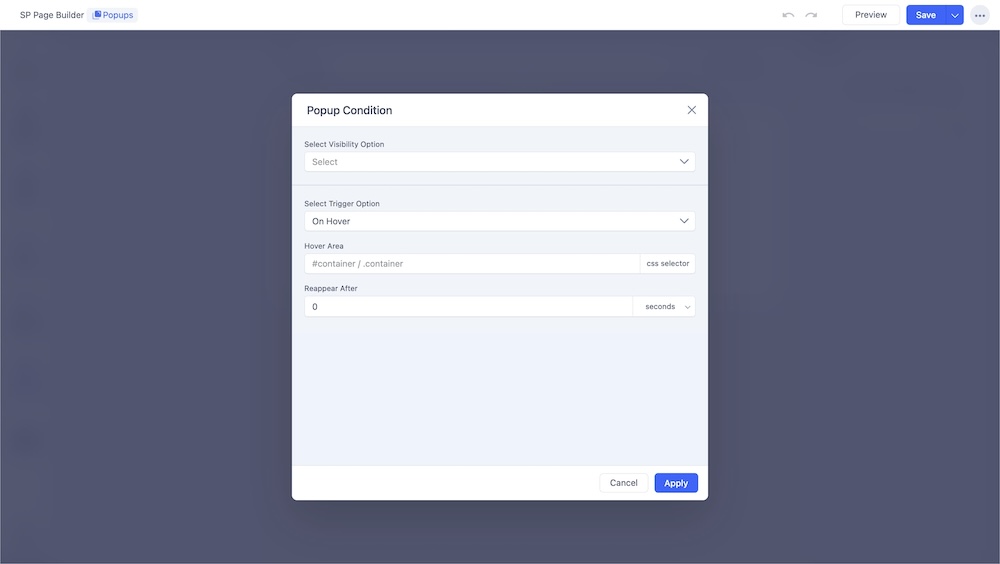
Through this option, you can set the popup to appear once the user hovers over a specific element.
- Hover Area: The hover area can be adjusted using the name or css-class.
- Reappear After: Define the interval before the popup can reappear after its initial trigger. Options include seconds, minutes, hours, days, or setting it to never reappear.
After Inactivity
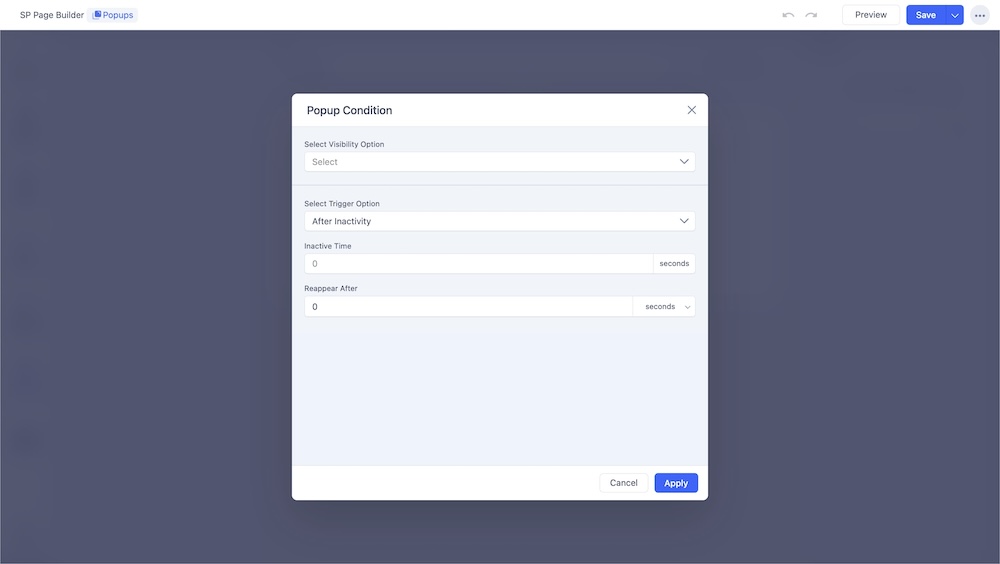
The popup can be set to trigger after a certain period of inactivity from the user's end.
- Show Only After: You can set the number of seconds before the popup appears on the screen.
- Reappear After: Define the interval before the popup can reappear after its initial trigger. Options include seconds, minutes, hours, days, or setting it to never reappear.
Date Range
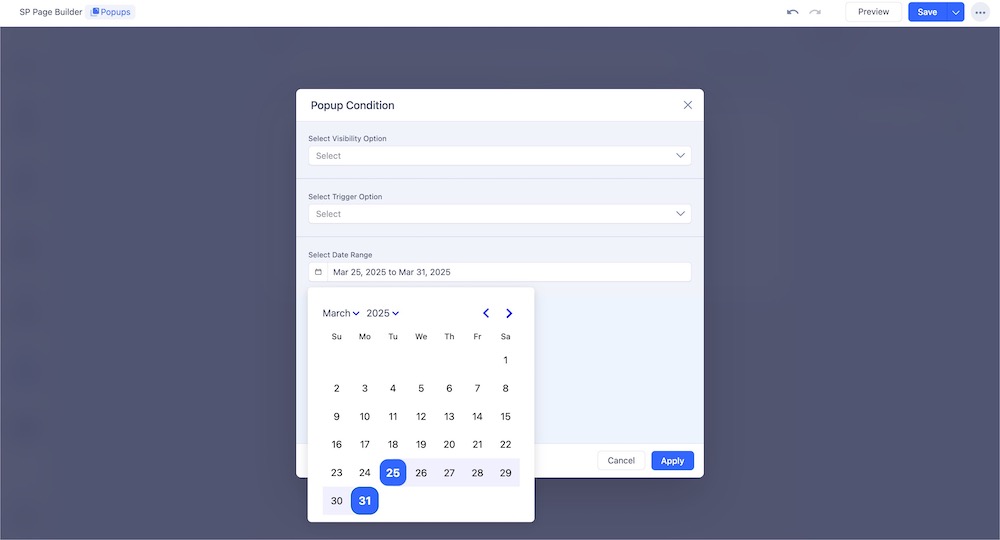
The Set Date Range option in the Popup Builder allows you to schedule your popups to appear within a specific date range. Set a date range to ensure your popups are displayed only within that specified time frame.

