

Animation & Interaction
Animations
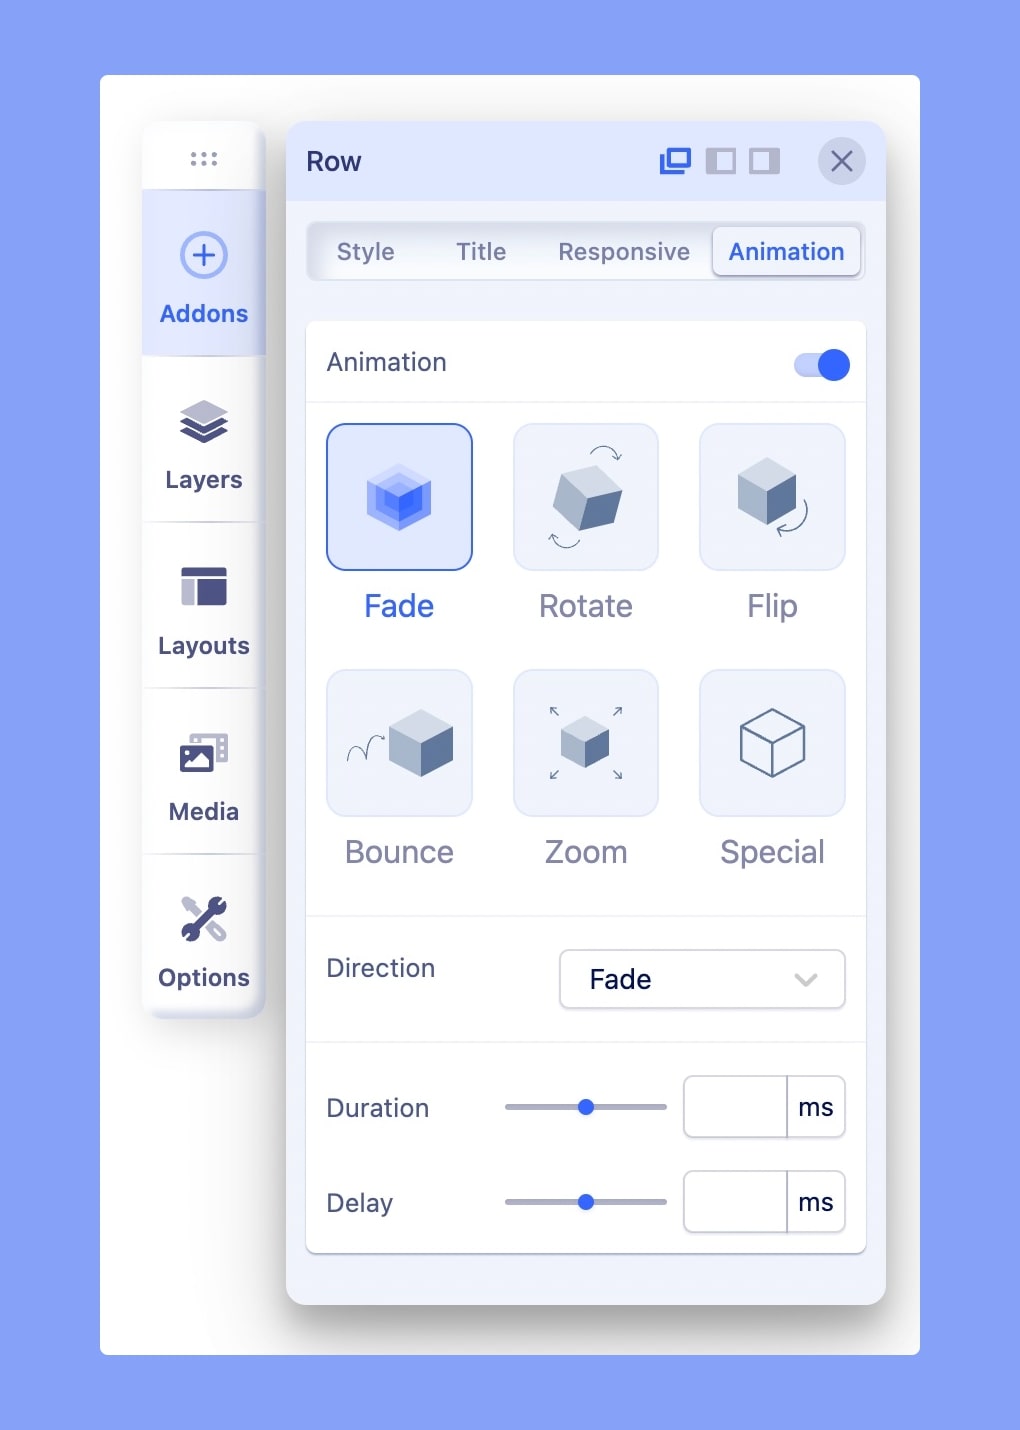
The Animations feature lets you animate your Addons, Rows (Sections), and Columns. This way, as your website visitor scrolls down the page, the elements appear with an entrance animation. You can choose:
- Animation Type - choose effect used for animation (fade, flip, rotate, bounce, zoom).
- Animation Duration - set how many milliseconds an animation will take to complete one cycle.
- Animation Delay - set when the animation will start, this value is defined in milliseconds.
Interactions
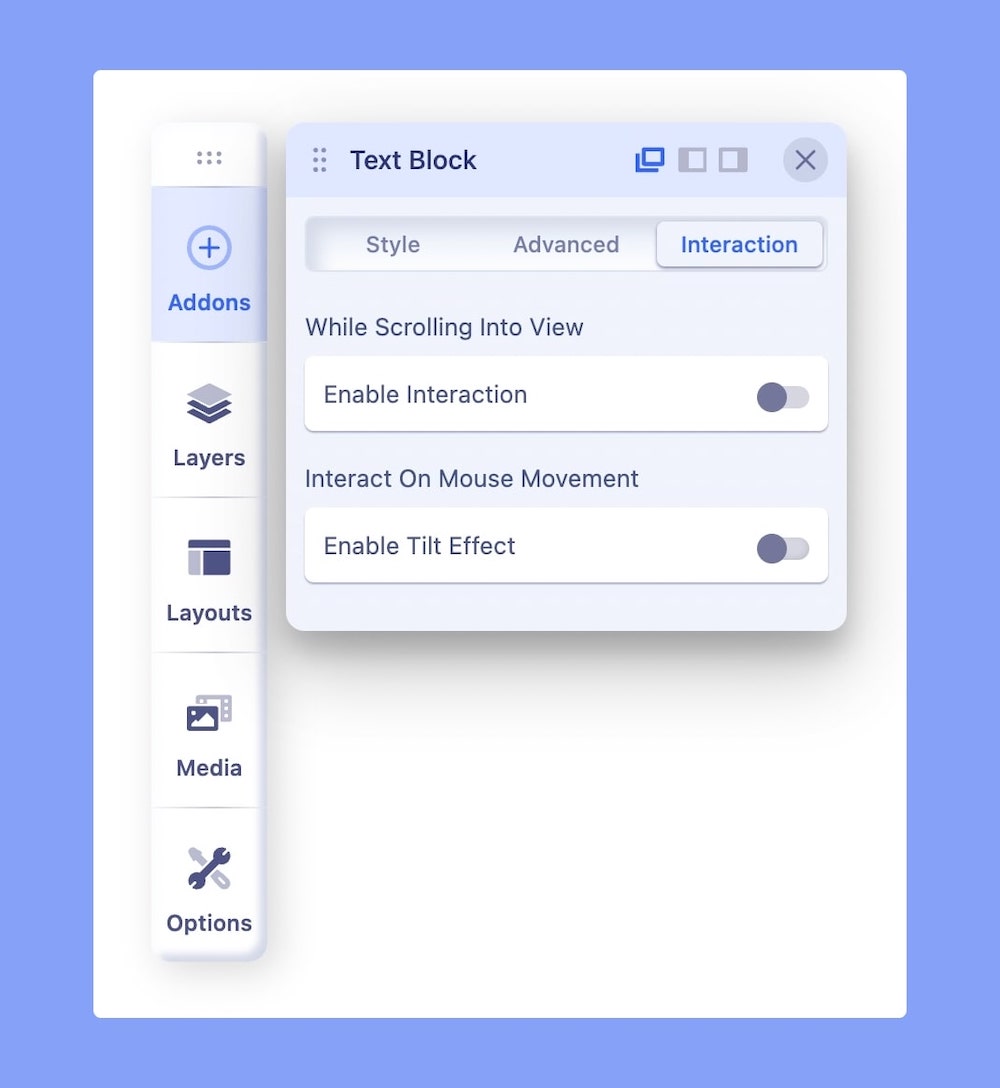
Addon Interaction lets you (as a web developer) unleash your creativity, and makes you do crazy stuff. With interaction in SP Page Builder, you have a whole new way to create live motion effects on your site. It has a set of powerful controls that lets you add attractive transitions and beautiful animations. All Addon offers two kinds of interaction options:
- While Scrolling Into View
- Interact On Mouse Movement > Enable Tilt Effect
The effects you can create with the all-new interaction controls.
- Move
- Scale
- Rotate
- Skew
- Opacity
- Blur
- 3D Tilt
These controls can be categorized into two sets of settings.
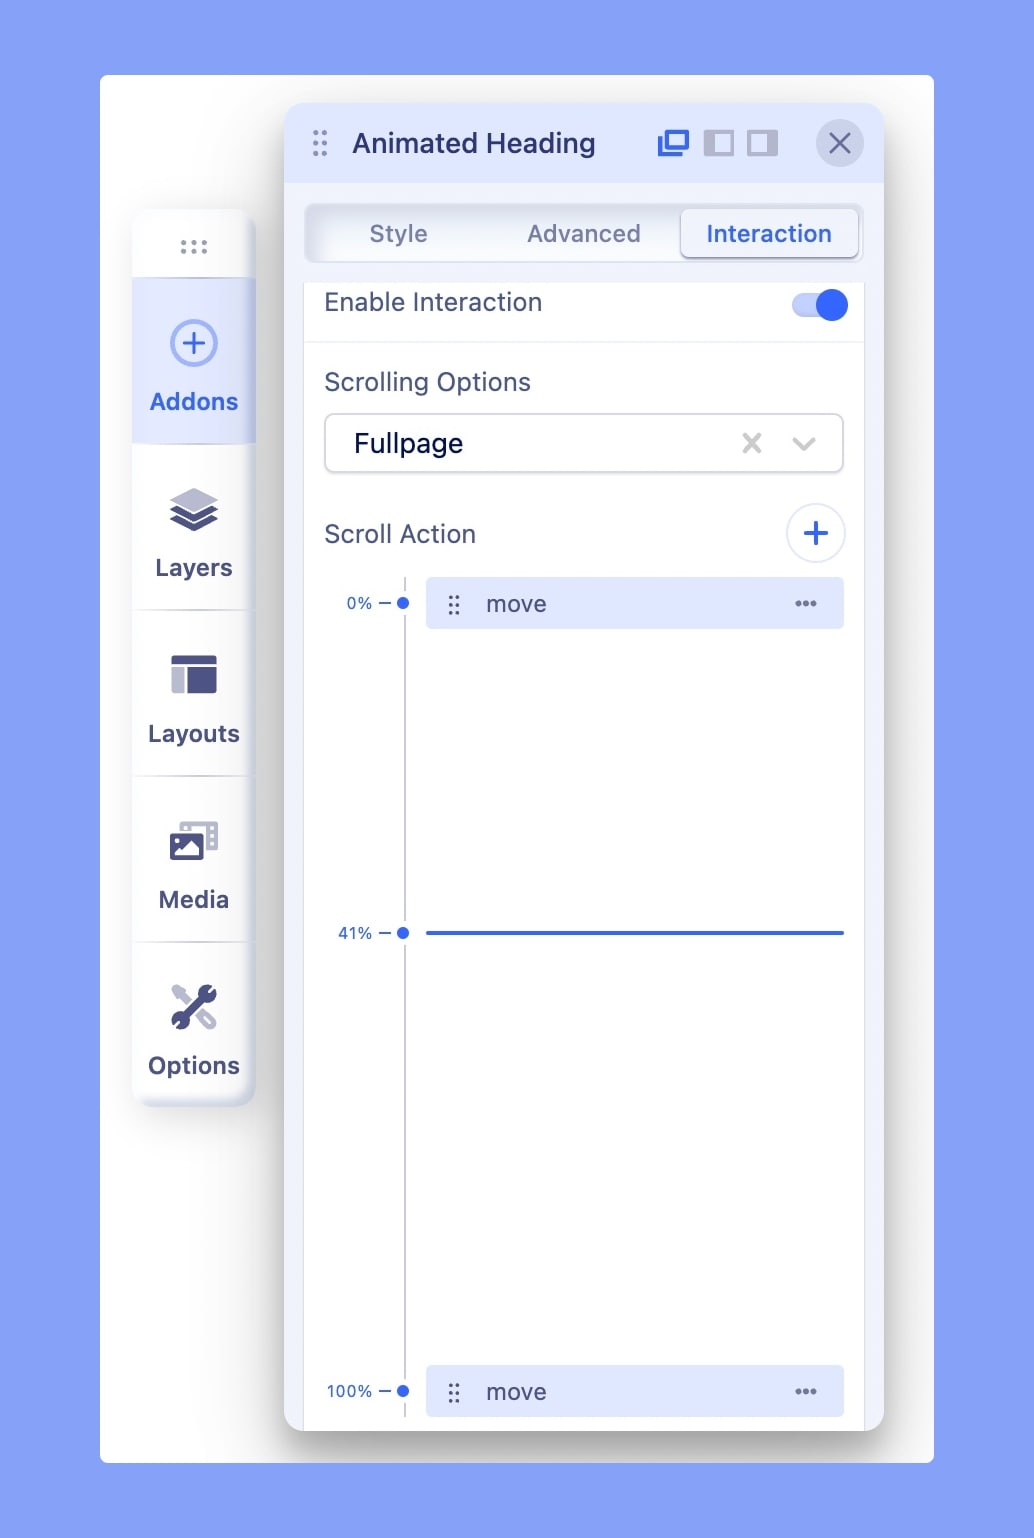
Scrolling Effects: Using scrolling effects you can create animations for when visitors scroll through a web page. A motion effect is created by determining a starting and an ending point.
Mouse Effects: Using the mouse effect you can create transitions for when users hover mouse on a particular element.
Before we go any further, let’s learn where the interaction can be used. Well, basically everywhere on a webpage. The feature is available in all the SP Page Builder addons. After going to the edit mode, choose an addon and you’ll find the “Interaction” tab in the addon settings.
In order to use interactions effectively, you need to understand a few things. With interaction, you can bring life to your website. Meaning, you can apply motion effects to your contents so that they will dynamically react when an interaction is made. Now we need to understand how the controls work.
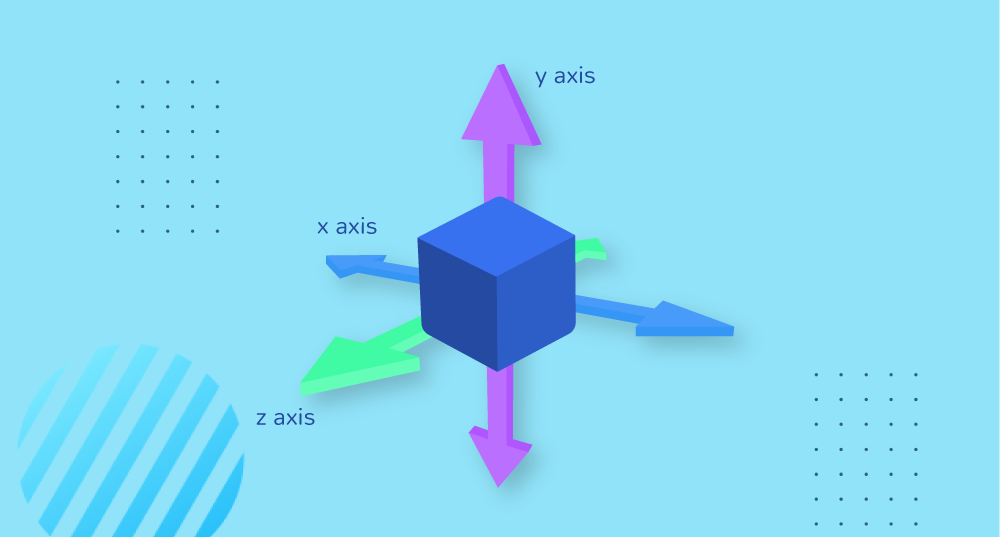
All the effects are controlled with their axis values, here we have x, y, and z. The x-axis refers to horizontal, y-axis refers to vertical and z is the third axis which is perpendicular to both x and y.
Timeline: to make the control more user-friendly, we introduced Timeline. The Timeline divides the viewport (the visible area of a webpage) from 0% to 100%. Where 0% indicates the bottom of the screen, 50% indicates the middle of the screen, and 100% indicates the top.
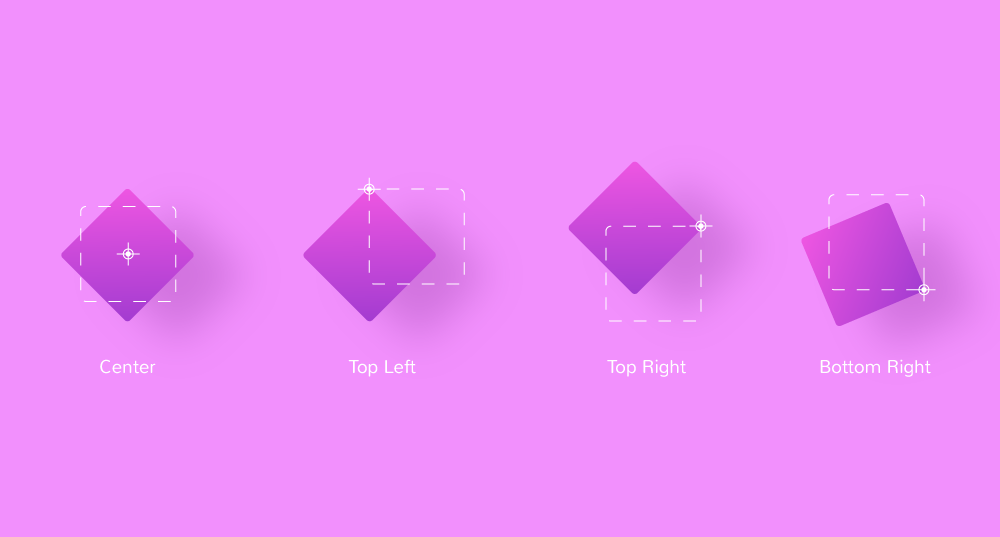
There’s another setting common to all interaction effects, i.e Transform Origin for x-axis and y-axis. It works as the anchor for the effects. You can define the starting point of all the effects using these options.
For instance, if you set Transform Origin of the x-axis to right and the y-axis to bottom (refer to the above video). The interaction effect will start the action from the bottom rightmost corner of the element.
Move Effect
The Move effect lets you move an addon from X and Y points towards the defined directions, where X means horizontal and Y means vertical direction. For these controls, a positive value indicates right (down), and a negative value indicates left (up).
There’s also the Z-axis to reposition an element. It controls the z-axis in 3D space which specifies how far inward or outward an element will move. The perspective CSS property is used to add a feeling of depth to a scene (or an object) by taking the element higher on the Z-axis. We set the default value for perspective view as 1000.
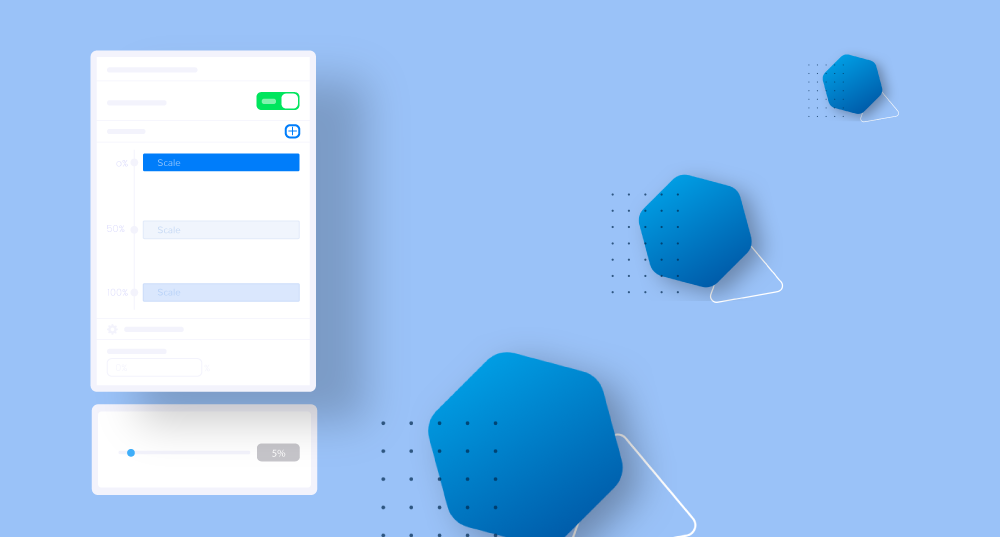
Scale Effect
With the Scale effect, you can make an element either larger or smaller in aspect of its absolute position. A positive value makes an object stretch and a negative value makes an object shrink. Here the x-axis controls horizontal scaling and the y-axis controls vertical scaling.
Rotate Effect
This effect lets you rotate an element. To see the rotation in motion, you need to take two rotating effects on the timeline. One will determine the starting point and the other will set the ending point. For a vertical flip, you need to change the x value; for a horizontal flip, you need to change the y value; and for clockwise or counter-clockwise rotation, you need to change the z value. The above video is an example of clockwise rotation.
Skew Effect
The Skew effect makes an element skew on a two-dimensional space. Meaning you can make any element an uneven parallelogram using the Skew effect. It has two controls, a higher (positive) value of x-axis will make an element tilt horizontally towards the right side and a lower (negative) value will make it tilt towards the left side. A similar effect is true for the y-axis as well. A possible use-case of the skew effect is, you can make an object look on top of another in a 2D surface.
Opacity Effect
With Opacity, you can manage the visibility of an element. It comes with only one control where a 0 makes the element completely invisible and 1 makes it completely visible. Using opacity along with other effects makes the design a bit more interesting. An example is given above. Here we used Opacity, Move, and Rotate on the same image.
Blur Effect
This effect is used for making an element blurry. It comes with only one control, the value range is 0-100. A higher value makes an element more unclear whereas a lower value makes it clearer. The effect has many applications, the best one would be making an element blurry when it appears on the screen and making it clearer as it comes to the focusing point.
Tilt Effect
The Tilt effect is a 3D mouse movement effect. Similar to other effects, it has the controls to determine if you want to see the effect on mobile devices. As for the settings, Tilt Direction defines what will happen upon mouse hover. The forward Direction makes the element move towards the mouse and the Opposite Direction makes the element move backward.