
Before You Begin
EasyStore uses Joomla's built-in multilingual system to manage translations. Before translating products, categories, or tags, make sure your Joomla multilingual site is fully configured.
Configure Joomla Multilingual Environment
Before translating your EasyStore content, you must configure Joomla's multilingual environment. This includes installing the required languages, enabling Joomla's multilingual plugins, creating language-specific menus, and publishing a Language Switcher.
Install a Content Language
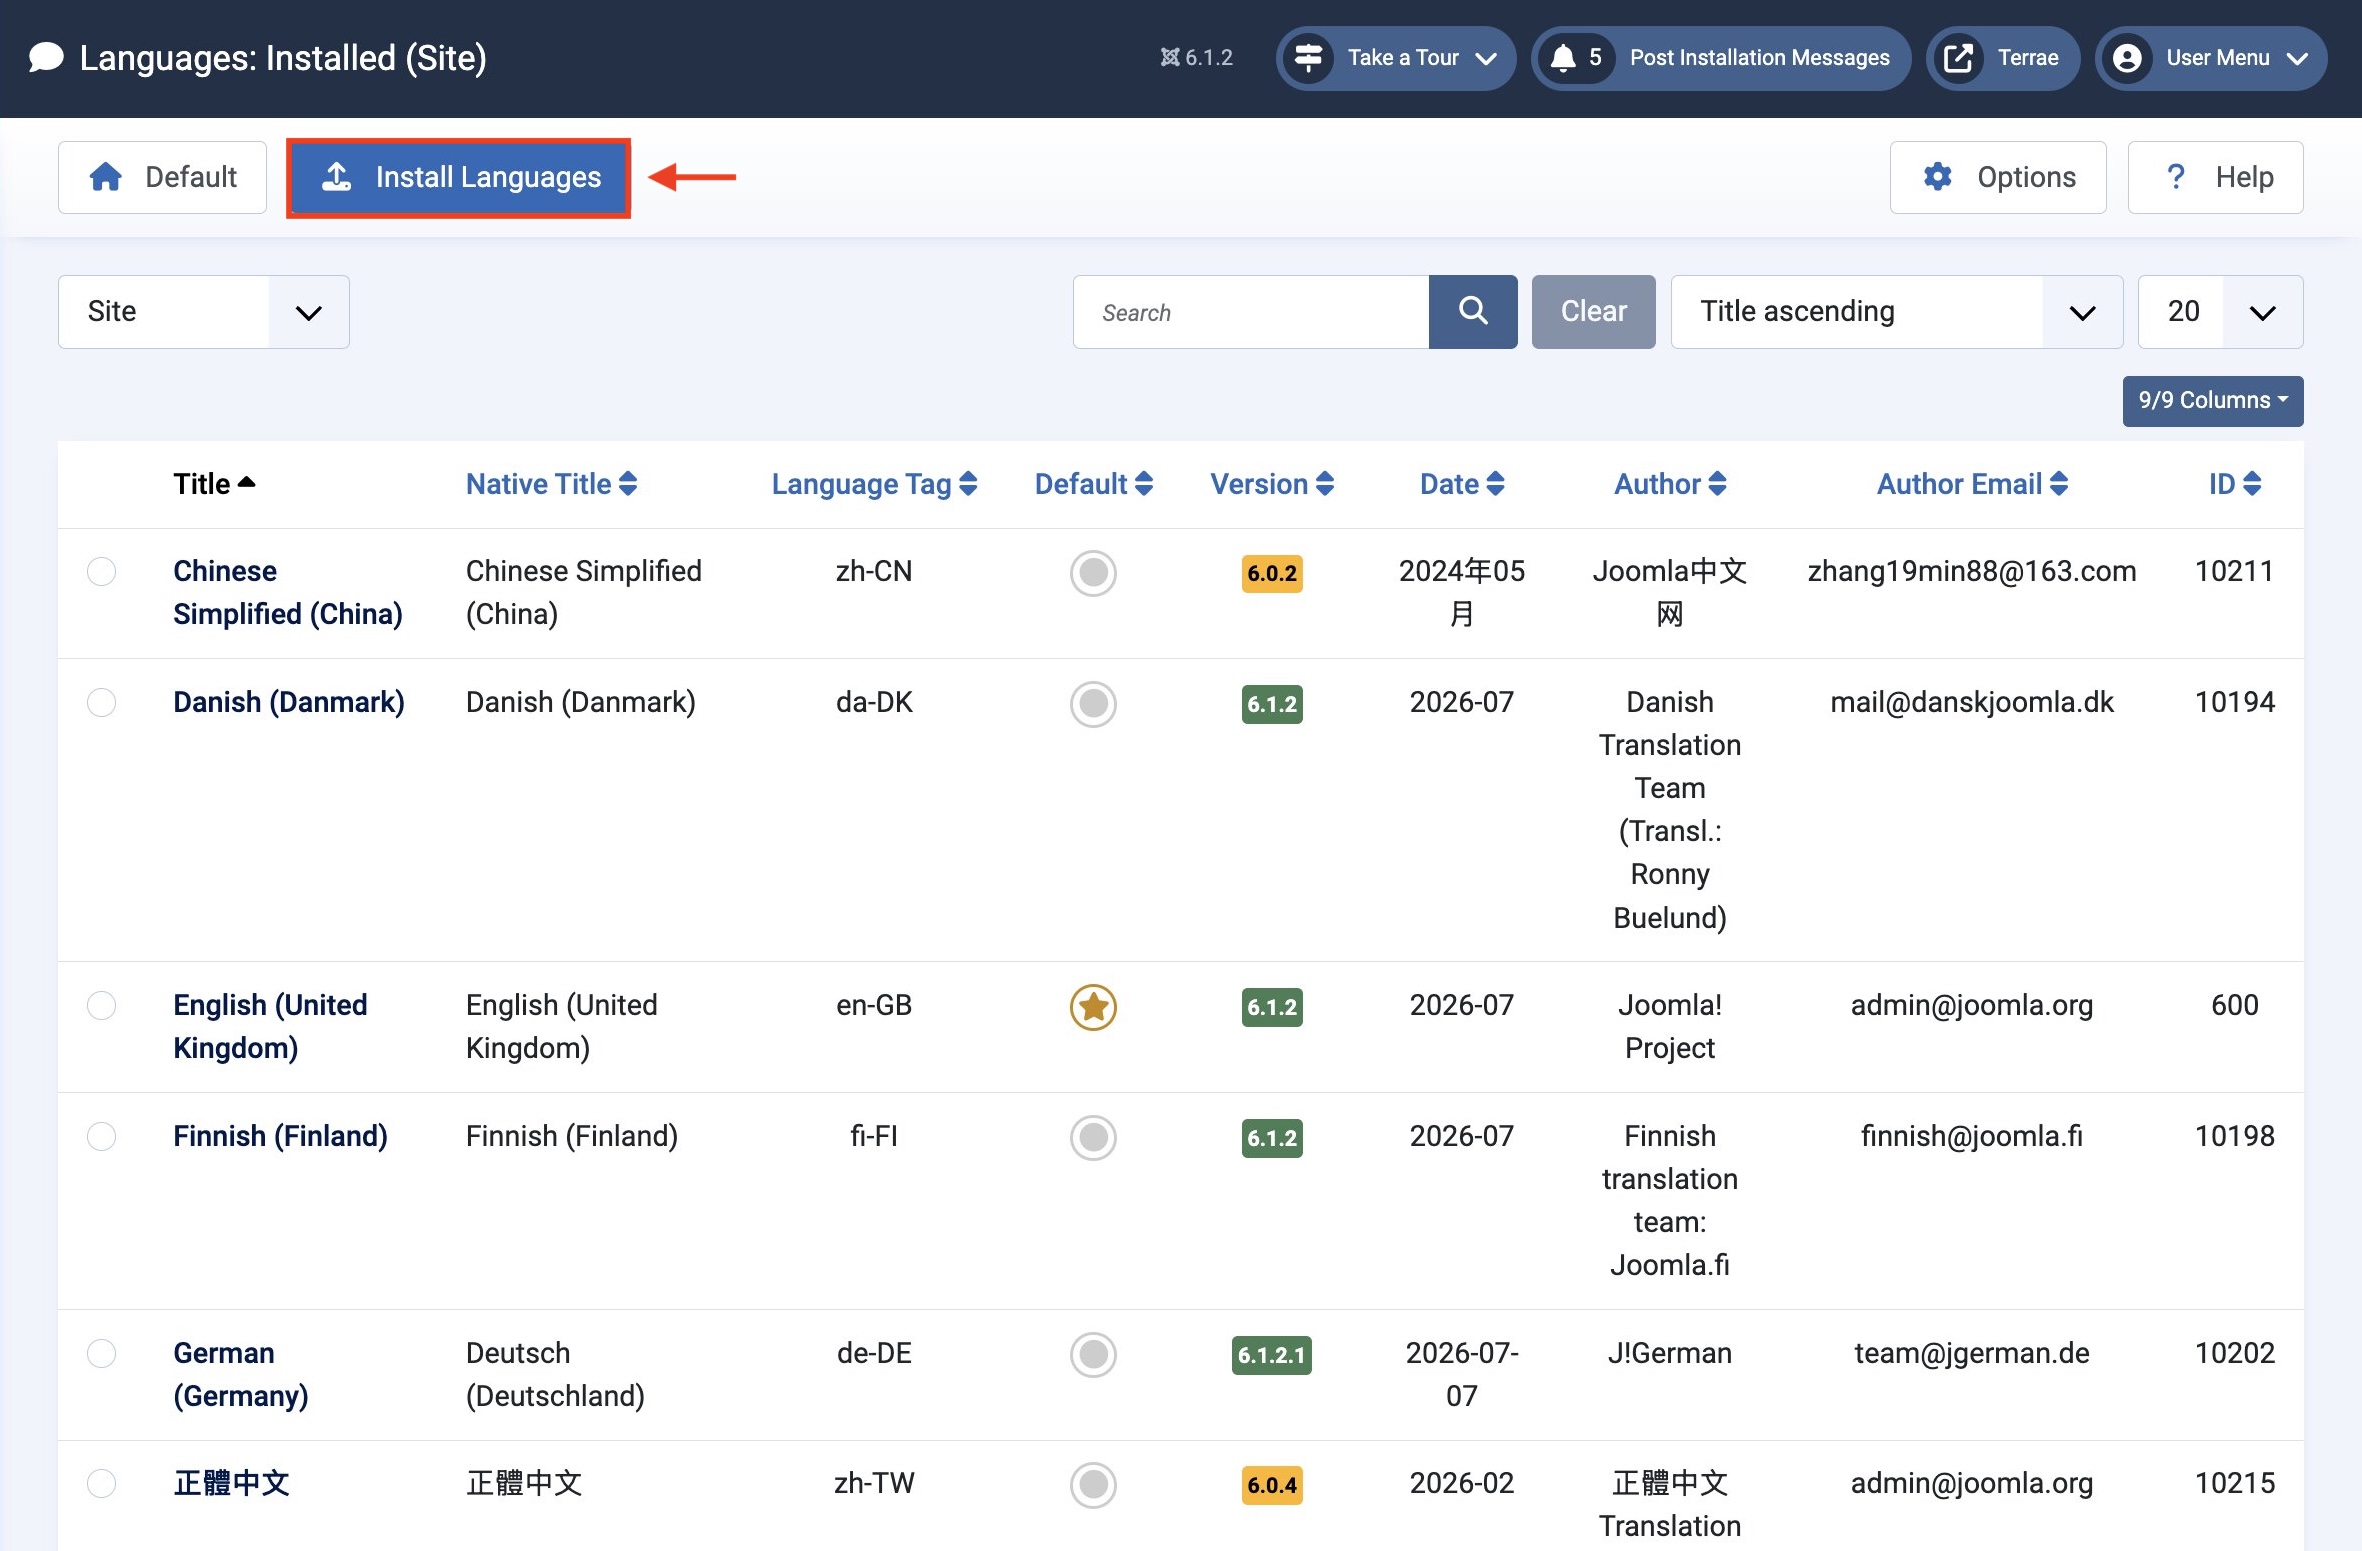
Install the language packs you want to make available on your website.
- Go to System > Manage > Languages.
- Locate the language you want to use (for example, Chinese (Simplified)).
- Click Install.
- Go to System > Manage > Content Languages.
- Ensure the installed language is Published.
A published content language is available for multilingual content and frontend language switching.
Enable Joomla's Multilingual Plugins
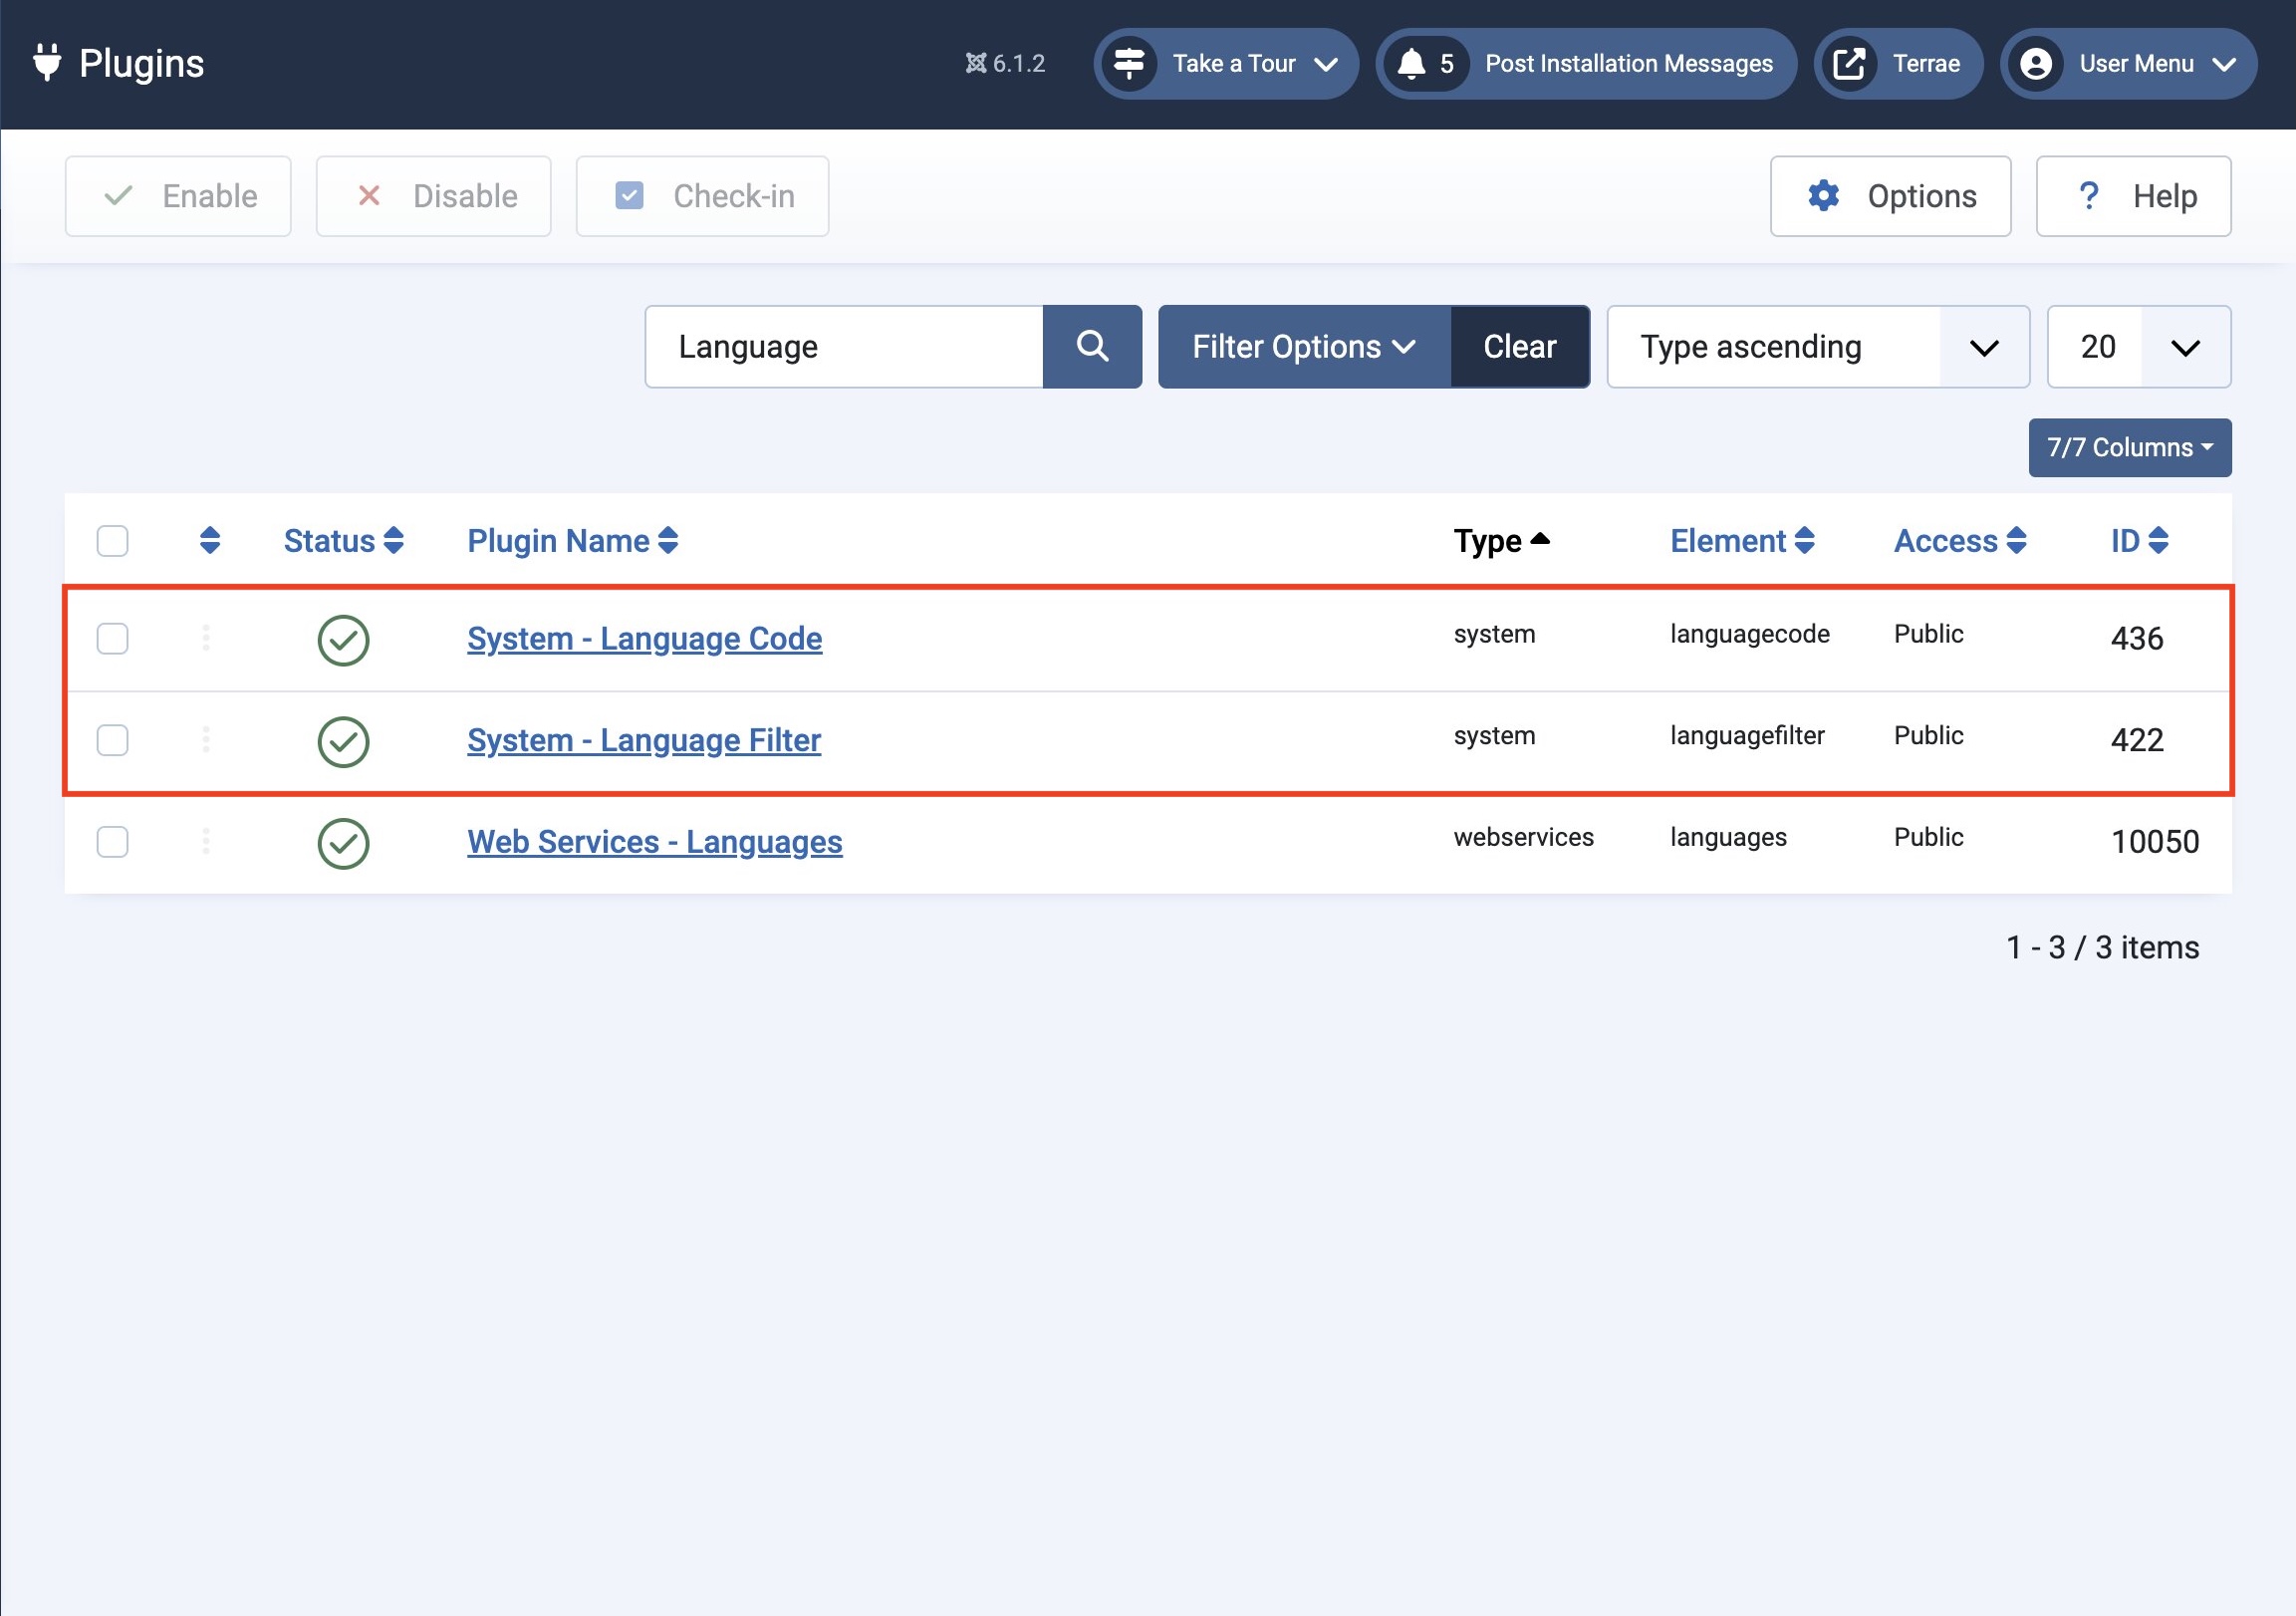
Joomla requires two system plugins to provide multilingual functionality.
1. Go to System > Manage > Plugins.
2. Search for the following plugins:
- System - Language Code
- System - Language Filter
3. Enable both plugins.
These plugins allow Joomla to detect the visitor's language and display the appropriate content.
Create Language-Specific Menus
Each language requires its own menu.
- Go to Menus > Manage.
- Click New.
- Enter a Title and a unique Menu Type.
- Click Save & Close.
- Repeat these steps for each language you plan to support.
For example, if your site supports English and Chinese, create one menu for English (en-GB) and another for Chinese (Simplified) (zh-CN).
Create Menu Items
Each language-specific menu must contain at least one published menu item.
1. Open the menu you created for a language.
2. Click New.
3. Configure the menu item.
For an EasyStore products page, use the following settings:
- Title: A title in the selected language (for example, Products).
- Menu Item Type: EasyStore > Products
- Menu: Select the corresponding language menu.
- Language: Select the matching content language.
4. Click Save & Close.
Repeat this process for each language-specific menu.
Publish the Language Switcher
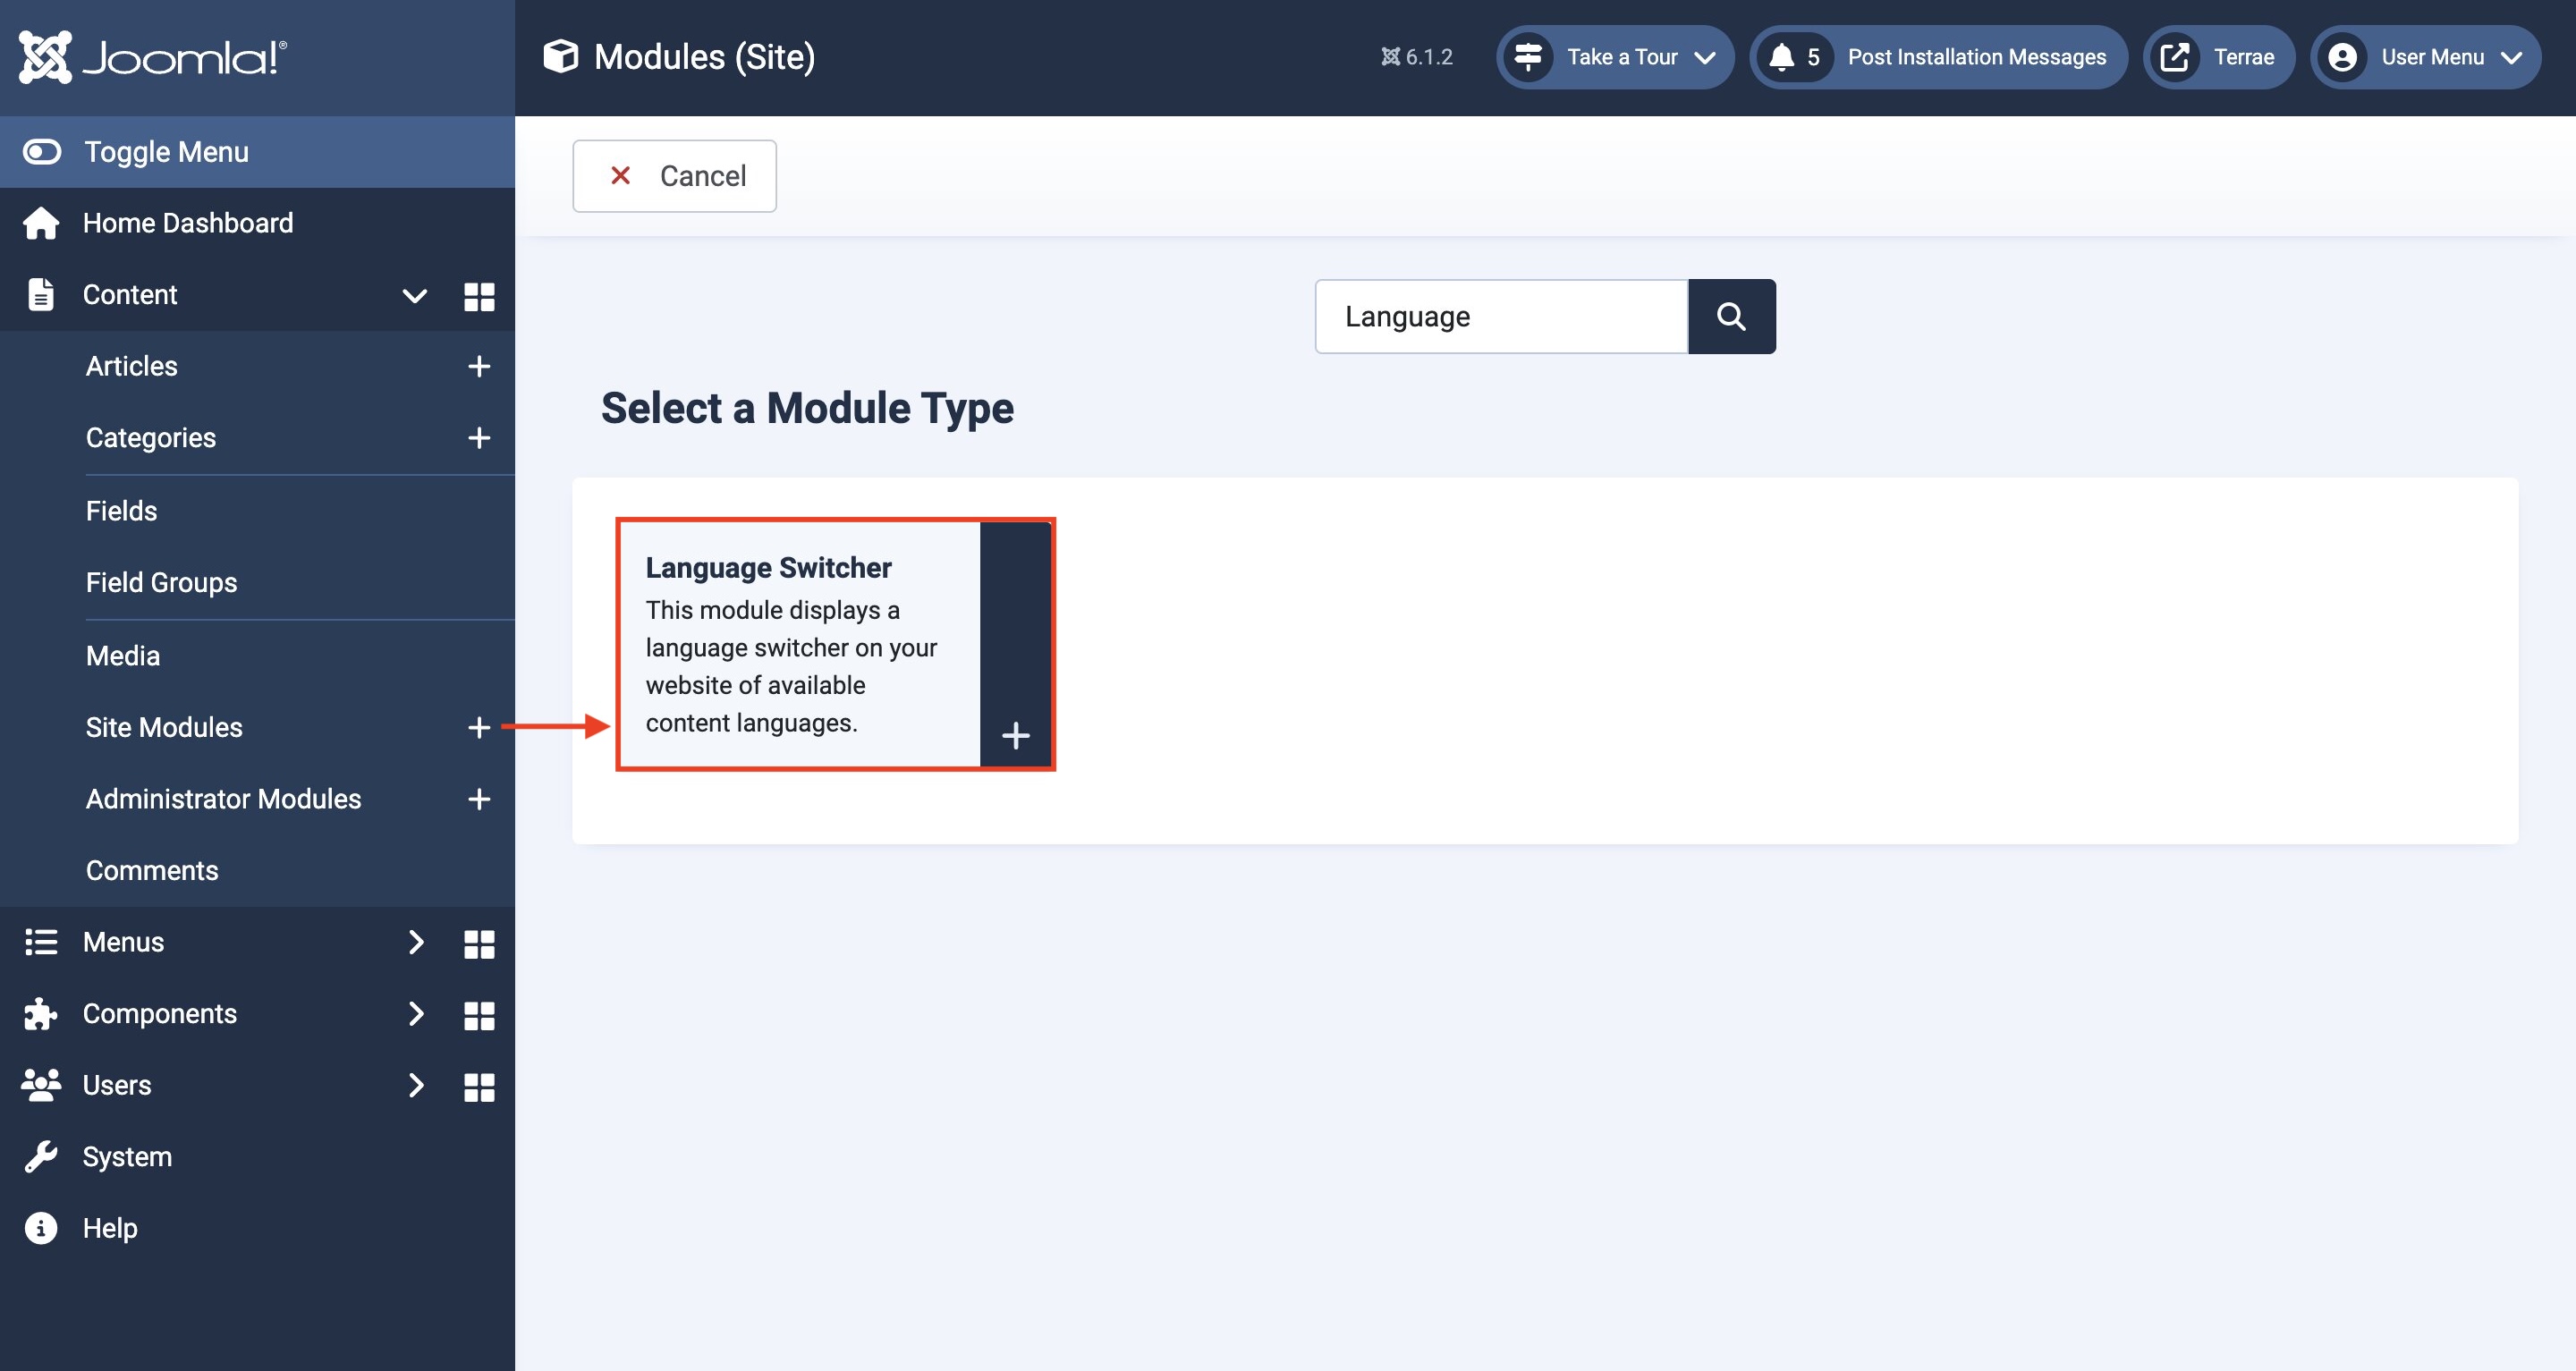
The Language Switcher allows visitors to change the website language from the frontend.
- Go to Content > Site Modules.
- Click New.
- Select the Language Switcher module.
- Enter a title if required.
- Assign the module to the desired template position.
- Publish the module.
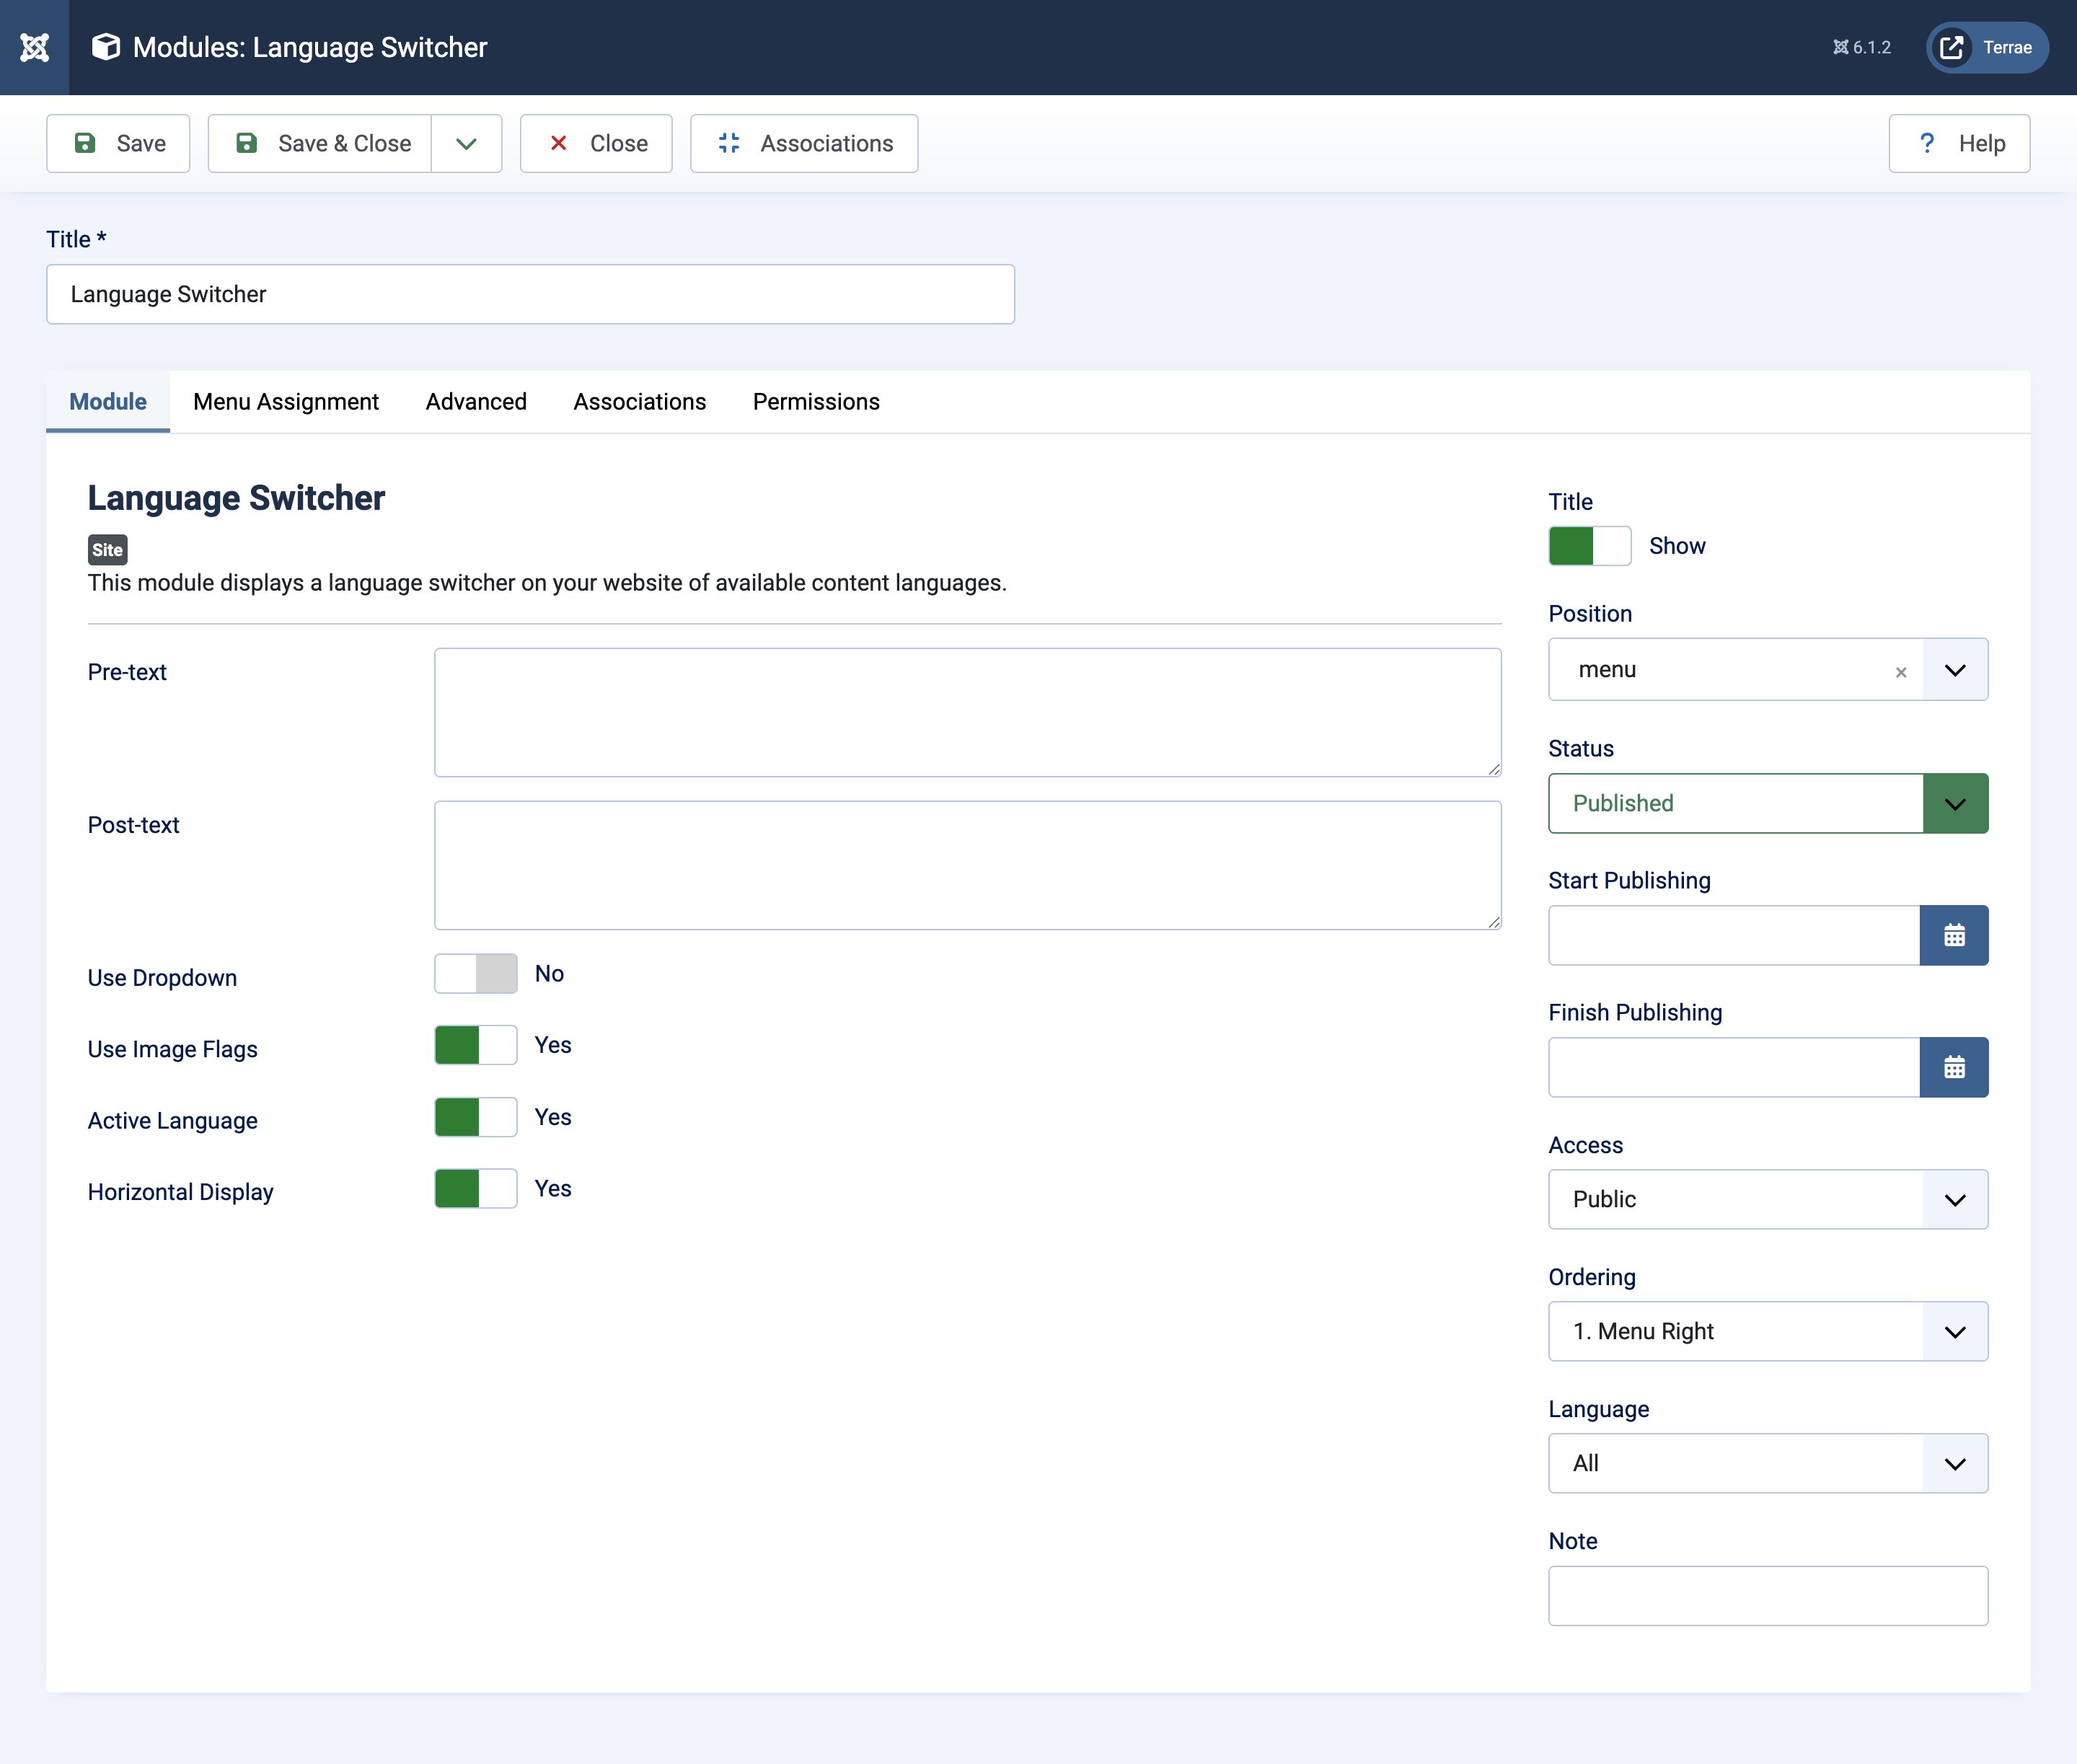
Once published, visitors can switch between the available languages from your website.
Please refer to Joomla’s official documentation for built-in multilingual systems or take a look at our tutorial on How to Set Up a Multilingual Store with EasyStore.
Note: EasyStore provides translation management for your store content only. The multilingual site configuration is handled entirely by Joomla.
Enable the EasyStore Multilingual Plugin
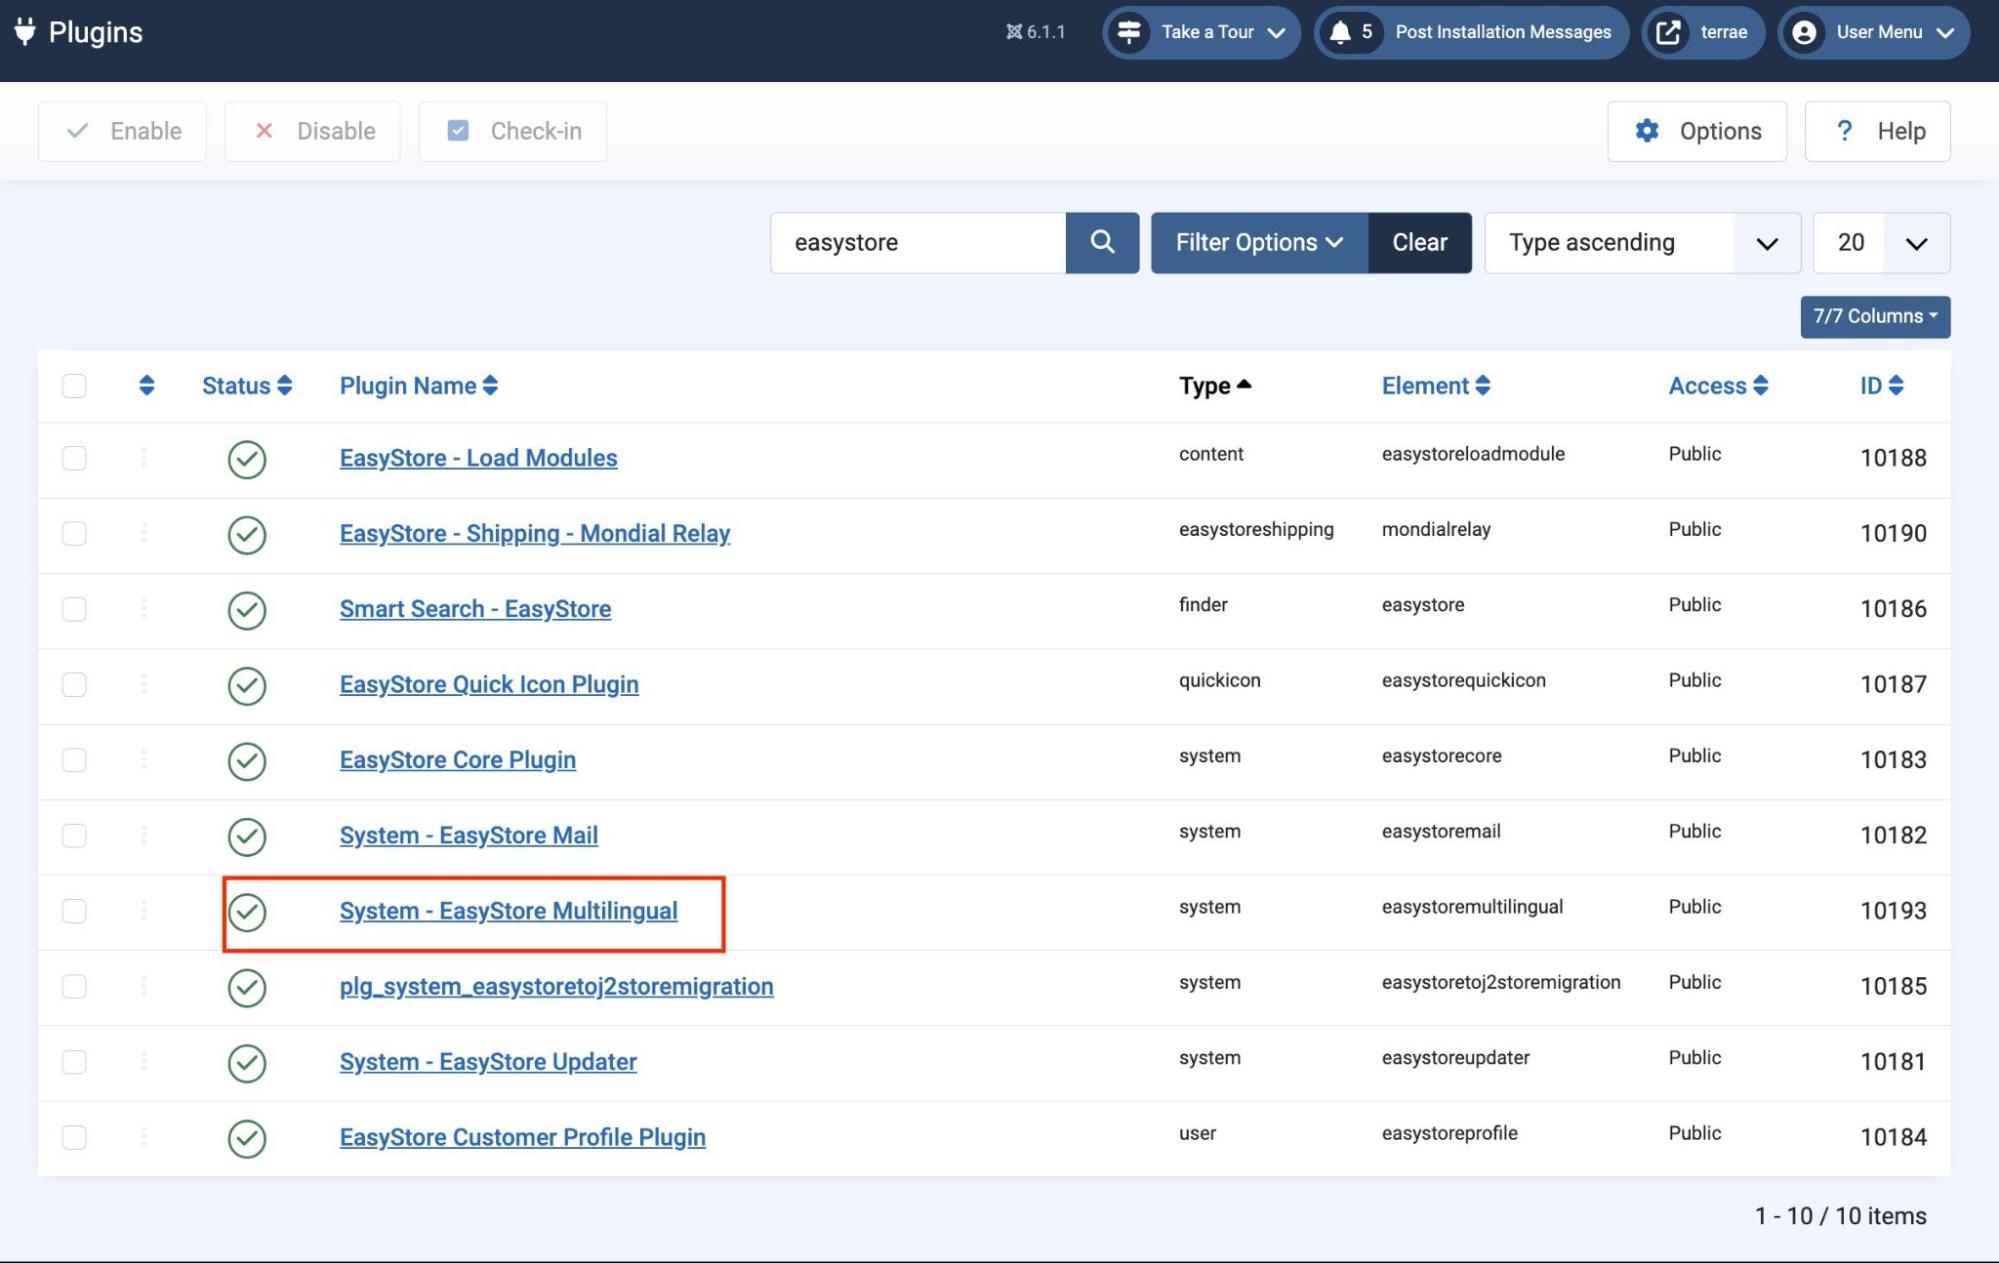
Before you can translate your store content, enable the EasyStore multilingual plugin.
- Go to System > Plugins.
- Search for System - EasyStore Multilingual.
- Enable the plugin.
Once enabled, the Translate option becomes available for supported EasyStore content, including Products, Categories, and Tags.
Note: If the Translate option is not visible, make sure the System - EasyStore Multilingual plugin is enabled.
EasyStore Translation Methods
EasyStore supports two methods for translating your store content: AI Translation and Manual Translation.
- AI Translation – Automatically generates translations using a configured AI provider.
- Manual Translation – Allows you to enter translations manually for each supported field.